A loft conversion is a great solution for any property and can add valuable and much needs extra rooms and space when the expense of moving to a larger property just isn’t an option – this is essentially the next best thing!
However, despite its obvious advantages, there can be significant costs and disruption involved, so in this guide we look at all the different elements involved in a successful loft conversion.
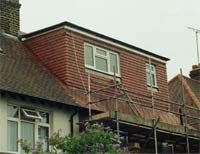
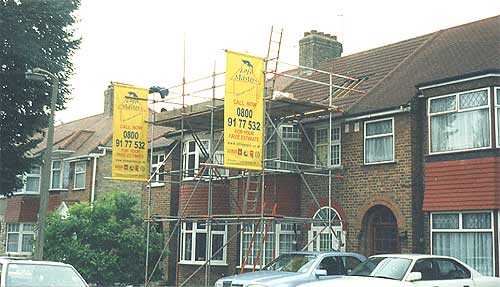
Completed loft conversion project
What is a Loft Conversion?
A loft conversion is a home improvement project that transforms an unused loft space into additional and functional living space.
Whether you need an extra bedroom, home office, or playroom or man cave, converting dead loft space can add significant extra living space and value to your property while avoiding the huge expense and hassle of moving to a larger property.
Although this may sound like the ideal solution to any space-related issues you may be having, it does come bundled with a substantial amount of expense, hassle and upheaval of it’s own so it should not in any way be regarded as a small undertaking.
Due to their complexity, there are also a huge amount of regulations and rules involved in ensuring everything is done safely and to a set standard, that your existing property is capable of supporting such work, it will retain heat and not waste energy and also that your neighbours property isn’t effected in any way.
Before going any further in terms of starting a loft conversion, consider the following points for a moment as these are the key areas when it comes to converting and loft space into a habitable area:
- Head Height: Your loft should have a minimum height of 2.2 metres for a comfortable living space.
- Structural Integrity: Additional reinforcements to rafters and joists may be required to support the new living area.
- Access and Staircase: A properly designed staircase is essential for safety and compliance with building regulations.
- Insulation and Ventilation: Good insulation ensures energy efficiency, while proper ventilation prevents condensation and damp.
- Fire and Safety: In the event that immediate escape is needed a suitable route out of the building has to be ensured.
As great as a loft conversion is, as said, it does come with a fair amount of baggage that should not be underestimated, but when done by a professional team in a professional manner, much of this can be easily managed and mitigated.
What Different Types of Loft Conversion are There?
There are numerous different types of loft conversion that can be done to a property and what type can actually be carried out will ultimately depend on the type of property, size, type of roof, type of joists, footings and numerous other factors.
The most common types of loft conversion found in the UK are as follows:
Rooflight (Velux) Loft Conversion
The simplest and most cost-effective option, a rooflight or Velux loft conversion keeps the existing roof structure intact while adding skylights (Velux windows) to bring in natural light.
This is ideal for lofts with sufficient head height and requires minimal structural work, making it a budget-friendly choice.
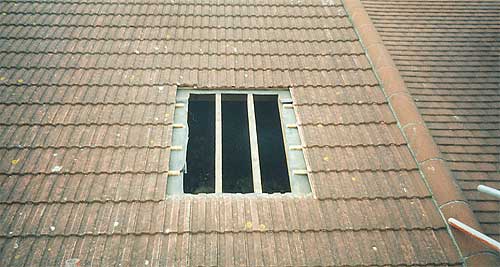
Skylight fixed into position
Dormer Loft Conversion
A dormer conversion extends the existing roof vertically up and out, effectively squaring it off, creating more headroom and floor space.
This is the most popular option in the UK as it provides a spacious, well-lit living area for a great price.
Dormers can be built at the rear, side, or front of a property and can sometimes fall under permitted development rights.
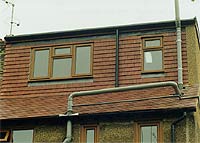
Completed loft conversion with dormer window
Hip-to-Gable Loft Conversion
Common in semi-detached or detached homes with a sloping roof, a hip-to-gable conversion extends the sloped side of the roof to create a vertical gable wall.
This increases the usable loft space and allows for a larger, more practical room.
Mansard Loft Conversion
A mansard conversion is the most extensive type, replacing one side of the roof with a near-vertical wall and a flat roof, in a similar manner to a dormer, but more extreme.
This provides maximum space and is often used for full home extensions. Due to the structural changes involved, planning permission is almost always required.
L-Shaped Loft Conversion
An L-shaped loft conversion combines two dormers to create an L-shaped extension, typically at the rear of a property.
This is ideal for Victorian and Edwardian homes and offers generous additional space, often allowing for multiple rooms.
Which Loft Conversion Is Right for Your Home?
The best choice depends on your home’s structure, budget, and any planning restrictions there may be.
If you’re looking for a simple upgrade, a rooflight/Velux conversion is cost-effective, while dormer and hip-to-gable conversions provide about the best balance of space when working to a budget.
For maximum space, a mansard or L-shaped conversion is ideal but requires more planning and often significantly more investment.
Whatever option you choose, a well-planned loft conversion can transform your home, adding both functionality and value.
What’s the Average Cost of a Loft Conversion?
As discussed, if you cannot go the whole hog and move to a new property when you need additional space in your home, a loft conversion is a fantastic way to add any extra needed space, with the added bonus of increasing your property’s value at the same time.
However, the cost can vary significantly based on the type of conversion you want, the size of your loft, and your location in the UK.
When it comes to cost, below is a breakdown of the average you can expect in the UK.
- Rooflight/Window (Velux) Loft Conversion: £20,000 – £30,000 – The most affordable option, as it requires minimal structural changes.
- Dormer Loft Conversion: £35,000 – £50,000 – Adds headroom and floor space, making it a popular choice for UK homeowners.
- Hip-to-Gable Loft Conversion: £45,000 – £60,000 – Extends a sloping roof to create more usable space.
- Mansard Loft Conversion: £50,000 – £90,000+ – The most expensive option but offers the most space and a stylish finish.
- L-Shaped Loft Conversion: £50,000 – £90,000 – Ideal for period properties, creating maximum space with an additional rear extension.
Besides the above, as with all things, there are also some less obvious, hidden costs that need to be taken into account and added on top of the main costs listed above. The most common of these are as follows:
- Architect and Structural Engineer Fees: £1,000 – £3,000
- Planning Permission (if required): £200 – £500
- Building Regulations Approval/Inspections: £500 – £1,000
- Extras/Hidden Costs: You should allow around 10% of the total cost of your build to cover any unforeseen issues and costs that may crop up. Believe it or not they always do!
Despite the significant upfront cost, a well-designed and executed loft conversion can add 15-25% to your property’s value. Coupled with the additional much-needed extra space, this makes it a very cost-effective and in many ways tempting alternative to moving house, so should definitely always be considered.
What is the Minimum Height for a Loft Conversion?
The minimum height required for a loft conversion in the UK is typically 2.2 metres from the floor to the highest point of the ceiling. This measurement ensures enough room for insulation, flooring, and a structurally sound conversion.
While 2.2m is the recommended minimum for a loft conversion, building regulations also require a minimum head height of 2 metres on staircases leading to the loft, to ensure the majority of users can gain access safely and easily.
If your loft is lower than 2.2m, there are still options, however additional works may be required to get there:
- Lowering the Ceilings Below: Reducing the ceiling height in the rooms below can create extra headroom in the loft. Although a solution, this route can be very costly and disruptive.
- Raising the Roof: Extending the roof itself can provide additional height, though this typically requires planning permission and again involves a lot of hassle and additional expense.
- Opting for a Dormer or Mansard Conversion: These conversion types involve altering the roof structure to increase usable space, making them ideal for lofts with limited headroom.
If your loft is close to the required height but not quite there, consulting a professional loft conversion specialist or architect can yield good results as in most cases they have a great many ideas and methods of finding any additional required head room that complies with UK building regulations while maximising your available space.
Are new Foundations Needed for a Loft Conversion?
Most loft conversions in the UK do not require new foundations, but in some cases, structural reinforcements may be necessary to cope with all the weight of additional materials and living space.
Before starting a loft conversion, a structural engineer will assess whether your existing foundations can support all of this added weight. This is particularly important for older homes or those with shallow foundations.
When Might New Foundations Be Required?
New or reinforced foundations may be needed if:
- Your Existing Foundations Are Weak: Older properties, especially Victorian and Edwardian homes, may have shallow or weak foundations that struggle to support the additional load.
- You Are Lowering the Floor: If your loft has insufficient headroom, lowering the floor may be necessary, which can affect the structural integrity of the existing foundation.
- You Are Extending or Raising the Roof: Mansard or dormer loft conversions that significantly alter the roof structure can add extra weight, sometimes requiring foundation strengthening.
How Are Foundations Strengthened?
If a structural survey determines that your home’s foundations need reinforcement, there are a few possible solutions for this:
- Underpinning: This process strengthens existing foundations by extending them deeper into the ground, providing greater stability.
- Steel Beams: Many loft conversions use steel beams to distribute weight more evenly, reducing the need for new foundations.
- Piling: In rare cases where ground conditions are poor, deep piles may be installed to support the structure.
How to Check If Your Foundations Are Suitable
You may be wondering how foundations are actually checked to ensure they are strong enough to cope with a potential loft conversion.
Well, before beginning your loft conversion, a structural engineer or building control officer will conduct an inspection.
They may check your home’s original building plans or dig a trial hole next to the existing foundations to assess foundation depth and strength. If your home was built after the 1960s, its foundations are likely to be strong enough for a loft conversion without additional work.
Fire Safety and Access for Loft Conversions
Ensuring fire safety and proper access is essential when planning a loft conversion.
UK building regulations set strict requirements to protect occupants and provide safe escape routes in case of fire. Understanding these regulations will help you design a loft conversion that is both safe and compliant.
Fire safety measures focus on containment, early warning, and escape routes. Key requirements include fire resistant doors, escape routes, smoke alarms and making walls and ceilings fire resistant.
Safe access is another critical factor. UK regulations require loft conversions to have a permanent staircase instead of a retractable ladder. The staircase must be at least 800mm wide with a minimum head room of 2m (some cases can be reduced to 1.9m), have a pitch no more than 42 degrees and feature a handrail.
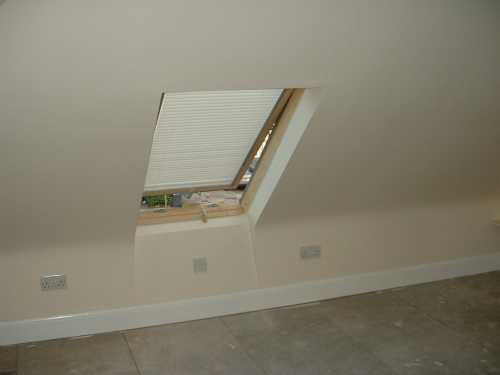
In addition to fire doors and protected staircases, at least one emergency escape window is required if the loft conversion is on the second floor. The window must open at least 0.33m² and be at least 450mm wide, be no higher than 1.1m from the floor and lead to a safe escape route, such as a flat roof.
Loft Conversions Insulation Requirements
Proper insulation is essential for a loft conversion, ensuring energy efficiency, comfort, and compliance with UK building regulations.
Without adequate insulation, heat loss can increase energy bills and make the space uncomfortable and costly to run.
UK regulations specify strict thermal performance standards that must be met to improve energy efficiency and reduce carbon emissions.
Types of Loft Insulation
There are three main areas that require insulation in a loft conversion: the roof, walls, and floor. Each has specific requirements:
- Roof Insulation: The most common methods are between and over-rafter insulation (cold roof) or full-depth warm roof insulation, which places a rigid board above the rafters. UK building regulations require a U-value of 0.18 W/m²K or lower for pitched roofs.
- Wall Insulation: If the loft includes dormer windows or gable walls, insulation must be added inside or outside the walls to achieve a U-value of 0.28 W/m²K or better.
- Floor Insulation: Insulating between the joists helps reduce heat loss and improve soundproofing. The required U-value for floors is 0.22 W/m²K.
Do you Need Planning Permission for a Loft Conversion?
There is no doubt whatever you will in almost all cases need to gain building regulation approval for your conversion.
There is also no doubt, that you will need the services of an architect. For each designed load you intend to place on an existing floor, a calculation will need to be made to prove that the floor is capable of withstanding it.
You will also have to comply with the fire regulations at every point in the construction of your loft conversion.
Most decent and reputable builders or loft conversion companies will arrange all of this for you and keep you informed at every stage as to the progress of your loft conversion project.
However, some loft conversions in the UK fall under Permitted Development Rights (PDR), meaning you won’t need planning permission. To qualify for permitted development, it must meet the following criteria:
- The extension does not exceed 40 cubic metres for a terraced house or 50 cubic metres for a detached or semi-detached house.
- The conversion does not extend beyond the existing roof slope at the front of the house.
- The materials used are in keeping with the original property.
- Side-facing windows are obscure-glazed, with any opening section positioned at least 1.7m above the floor.
- The roof height is not increased beyond the original structure.
- No verandas, balconies, or raised platforms are added.
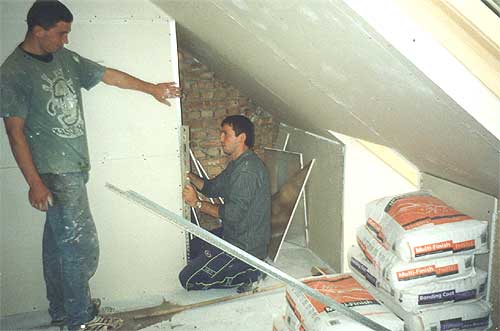
Construction of frame work
What Other Permissions are Needed?
Once the plans have been approved by you, and signed, they will then be submitted to your Local Authority Planning Deparement for determination under the Section 63 of the Town and Country Planning Act General Development 1990.
Once planning has been approved we will then prepare Building and Fire Regulation plans and submit to your Local Authority Building Control department for design appraisal and structural calculations to justify the proposed design to the Structural Engineers department for checking and approval. (approx 4 – 6 weeks for approval)
Upon approval, it’s then time to serve the necessary Statutory Commencement Notice upon the Local Authority Building Control Department in accordance with the Building Regulations
Again, most reputable companies will then obtain the following permits from your Local Authority prior to the works commencing.
- Skips and material use and storage on the highway (Local Authority Highways Section)
- Waste disposal containers (New Roads and Street Works Act 1991)
Do you Need a Party Wall Agreement for a Loft Conversion?
If you live in a terraced or semi-detached house, you’ll likely need a Party Wall Agreement before starting a loft conversion.
This legal requirement ensures that any work affecting a shared wall does not negatively impact your neighbour’s property.
A Party Wall Agreement is a formal document between you and your neighbour(s), ensuring that any work affecting a shared (party) wall is carried out safely and fairly.
It is required under the Party Wall etc. Act 1996, which applies to properties in England and Wales.
You must serve a Party Wall Notice if your loft conversion involves:
- Cutting into a shared wall to install steel beams for structural support.
- Raising or altering the party wall to accommodate a dormer extension.
- Carrying out excavation work for new foundations within three metres of a neighbouring property.
You must provide your neighbour(s) with a written Party Wall Notice at least two months before work begins. They have 14 days to agree or dispute the notice.
- If they agree, you can proceed with the work.
- If they object, a Party Wall Surveyor will be appointed to resolve the dispute and create a Party Wall Award outlining how work should proceed.
Failure to obtain an agreement could lead to legal disputes, work delays, an injunction stopping the project and a whole host of headaches. It’s always best to follow the correct process to avoid costly problems.
The Loft Conversion Process: Step by Step
When done properly, a loft conversion can increase the value of your house dramatically, but they have to be done correctly and inline with any and all regulations, seeking the proper permissions where needed and also ensuring that everything is correctly signed off by Building Control once completed.
With this in mind, I’m sure you can fully appreciate that such a project should only ever be undertaken by a professional builder or loft conversion company with all of the necessary skills and knowledge complete the job as required.
Due to this, it’s not really a DIY job, unless of course you have all the required skills, so for the purposes of this guide we are just going to run through the steps that are usually undertaken.
The construction, typically is in 10 stages, but this will obviously depend on the property involved and the type of conversion taking place. A typical example of each of these is shown below.
Step 1. Planning and Design
The very first stage is assessing whether your loft is suitable for conversion.
Key factors include ceiling height (minimum 2.2m), roof structure including truss-type, and available space.
Decide on the type of conversion you want to go for, such as a dormer, mansard, hip-to-gable, Velux etc.
At this stage, it’s advisable to get architectural drawings and structural calculations as these will form the basis of how you then proceed.
Step 2. Planning Permission and Building Regulations
Some loft conversions can fall under permitted development and in these cases you won’t need planning permission, but if you’re altering the roofline, listed buildings, or in a conservation area, planning permission will almost certainly be required.
If it is needed, in most cases, your builder or loft conversion company will do all necessary applications for you and manage the process, but you will have to cover the fee.
When it comes to timings and turn around, it will very much depend on how busy your local planning department are and how long it takes them to process your application. In most cases this will be around 1 – 2 months generally.
Regardless of planning permission, all work must comply with Building Regulations, covering structural integrity, insulation, fire safety, and stair access.
Step 3. Party Wall Agreement
If you share a wall with a neighbour (in a terraced or semi-detached house), you may need a Party Wall Agreement before work starts.
This will ensure that your neighbour(s) are fully aware of your plans and what you intend to do and how it may affect them and their property.
This is beneficial for all involved as in the event of any disagreement, everything will be there in black and white.
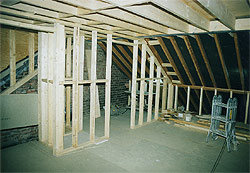
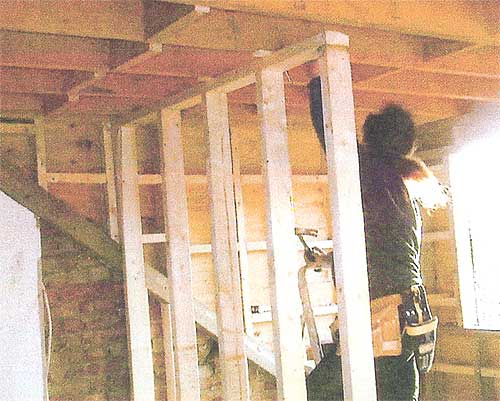
Step 4. Structural Preparation
This is where the fun starts and your home will slowly start to be dismantled and put back together again (slight exaggeration, but it will certainly feel like it).
The first stage of construction involves the erection of scaffolding and reinforcing floor joists to support the new room.
Depending on how your chosen conversion company operate, they may choose to create their access in the roof itself as opposed to having to go through the house and create more hassle for you. An access point in the roof will also be created at this stage.
If your loft requires steel beams, these will be installed at this point.
Scaffold erected
Access hole in roof
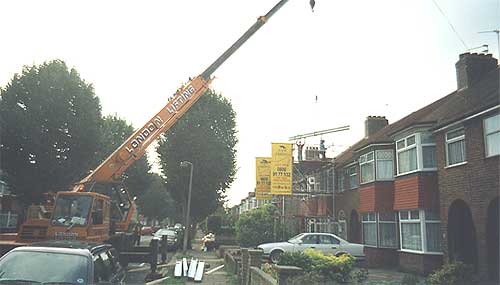
Supporting members lifted in
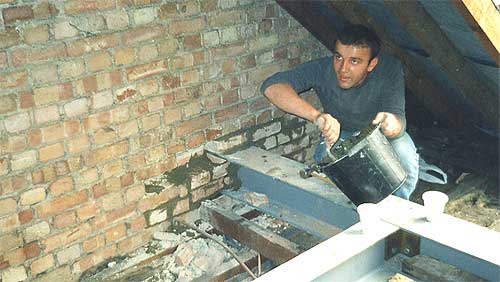
Supporting steel joists in place
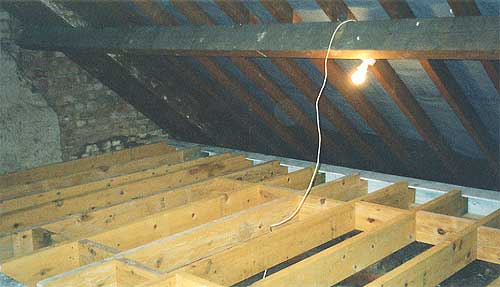
Internal floor joists laid into position
Step 5. Roof Adjustments
Once the floor has been reinforced and any main steels set in place, the next step is to start the roof adjustments.
If you are having a dormer or mansard conversions, the roof is altered and extended out to create more headroom by effectively squaring the roof off, out to a set point defined in your plans.
At this point also, new openings for windows or skylights are also cut during this phase.
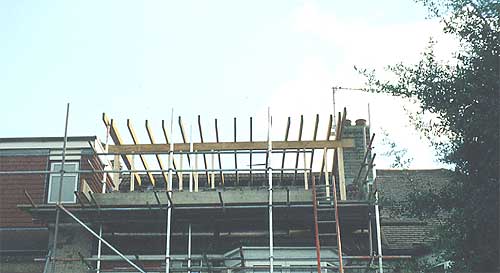
Dormer window roofing joists in position
Dormer window framework constructed and boarded
Step 6. Insulation and Ventilation
As we have stated numerous times above, proper insulation is essential to meet energy efficiency standards and keep your new space warm.
Insulation is added to the roof, walls, and floor (if the floor hasn’t already been done in the steps above).
Another essential step here is to ensure adequate ventilation is also installed to prevent any damp and condensation issues which can quickly form and cause huge amounts of damage and resulting cost.
Step 7. Staircase Installation
To meet Building Regulations, a safe and accessible staircase to your new space must be installed.
When it comes to the stairs, the design should maximise the space available while ensuring there is enough headroom and width for any inhabitants to easy come and go as they please.
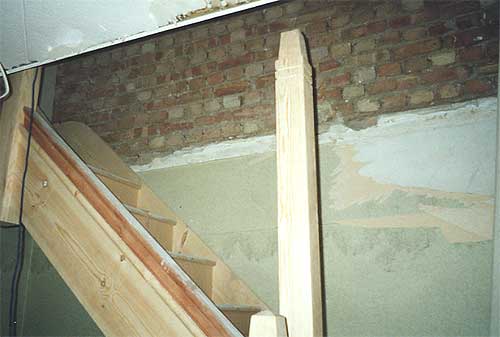
Stairs in position
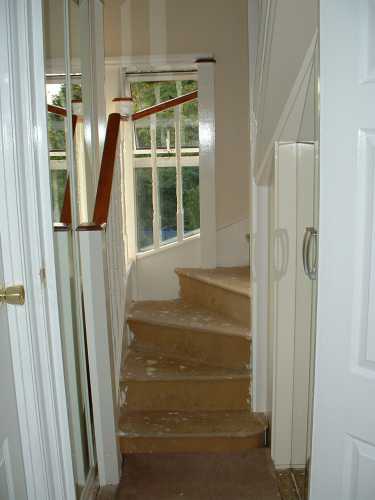
Completed stairway to new loft conversion
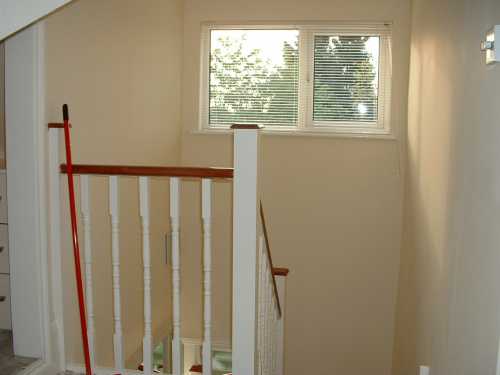
Stairway with window
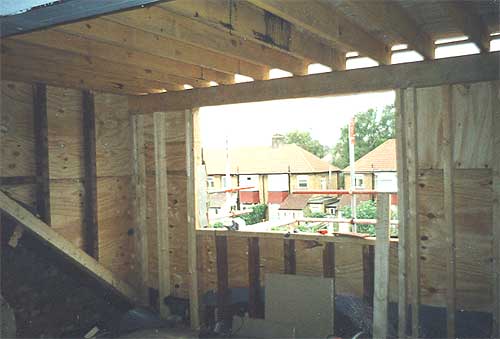
Step 8. Internal Studwork, Electrical and Plumbing Work
At this point the main shell of your conversion should now be pretty much there and weathertight so works now start to move inside.
The timber studwork to define each room is firstly erected, insulation is added to roof and floor.
Electricians and plumbers then do their first fix work e.g. laying all cables, patress boxes and pipes/plumbing for heating, sinks, showers, toilets etc. that are required.
Internal studwork erected and fixed in position
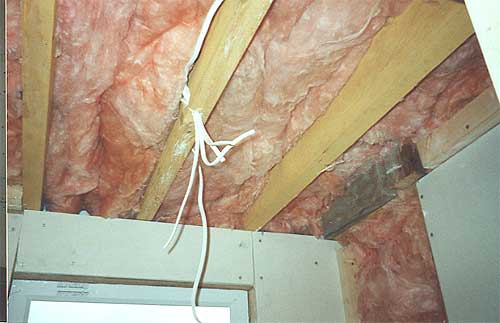
Insulation placed in between floor and ceiling joists
Step 9. Plastering and Interior Finishing
Depending on the local authority, your building inspector may choose to do an inspection at this stage just to check all the insulation is correct before it is covered with any final finishes.
The final construction work to take place now is the plaster boarding of all the studwork and then once done it is all plastered over before painting and finishing.
At some point in this stage electricians and plumbers will do all of their second or final fix work e.g. installing sinks, radiators, toilets, light switches, sockets and the likes.
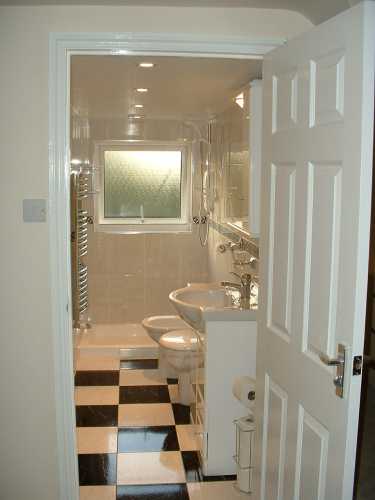
En-suite bathroom in new loft conversion
It’s all then fully tested by the installer to make sure everything is correctly working.
Finally once this is all done, any flooring such as carpets, tiles, vinyl is installed and then any other finishing is done such as adding door, cupboard handles etc.
Internal partitions boarded and plastered
Step 10. Final Inspections and Completion
After everybody’s hard work you are now almost there so the final jobs before you can call it a day are for your Building Control Officer to do his/her final inspections and sign everything off.
Once this is done you will then receive your final completion certificate.
You should also receive any other certificates such as Part P and the similar.
Once signed off, that’s it, congratulations, enjoy your new space!
Completed loft conversion – building inspector checked final items and scaffolding removed
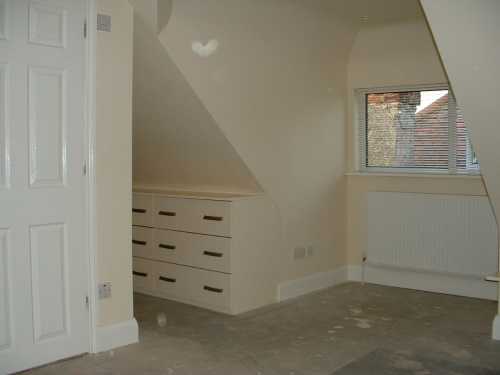
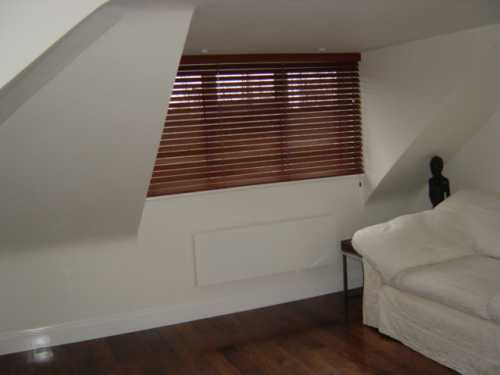
Completed loft conversion space
A loft conversion is no small undertaking and involves a lot of cost and upheaval to your normal daily routines for a good few months, however once done it can really bring a whole new lease of life to your home and family life.