In many DIY and construction jobs, the ability to drill a perfectly accurate and vertical hole in a range of different materials is essential and for this job there is no better tool than the pillar drill, or its smaller cousin, the bench drill.
In this guide we take a look at all aspects of these tools and how they are used.
What is a Pillar Drill?
A Pillar Drill is a powerful tool used for precise drilling. It features a fixed drill bit attached to a sliding column that moves up and down via a rotating handle to drill into various materials.
The key advantage of a pillar drill is its ability to drill perfectly straight and accurate holes. Unlike hand drills, it ensures the hole is exactly where you need it without worrying about angles or alignment.
Often mistaken for a Bench Drill, the main difference is that a pillar drill stands on a base plate on the floor and is generally around 6 feet tall, while a bench drill is portable and can be placed on any surface. Both serve the same purpose: precise drilling.
Pillar and Bench drills can work through pretty much any material, and the adjustable working table lets you position different sizes of materials for drilling.
Larger pillar drills may include a lubrication system and a collection hopper to make drilling smoother. You can also control drilling depth and speed based on the material you’re working with.
Always use the built-in safety guard while drilling, and wear gloves to protect your hands from sharp debris, especially metal shavings and goggles to protect your eyes.
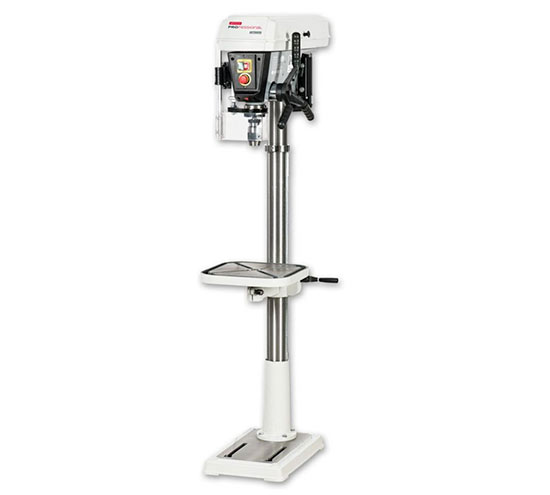
Industrial pillar drill
What is a Bench Drill?
Whereas pillar drills are used more in a large-scale industrial setting while bench drills will suit the DIY enthusiast more. Essentially, the bench drill is the younger brother of the pillar drill.
They work in pretty much the exact same way in that they feature a sliding column that moved via a lever or handle, lowering the drill bit and chuck down onto the material that’s powered by a direct drive or belt-driven motor.
The great advantage and also disadvantage of the bench drill is its size. Being much smaller it can be easily moved around from job to job and surface to surface as required, however being much smaller, it’s power and drilling capacity is quite a bit less, meaning it can struggle with bigger, tougher materials.
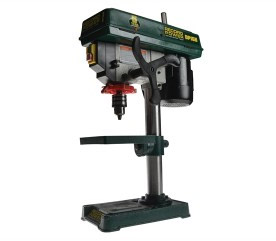
Benchtop pillar drill with cast iron handwheel
What is the Drilling Capacity of a Pillar/Bench Drill
As we have touched on above, the drilling capacity of such tools is to essentially the size of the chuck that the drill uses and the size of drill bits it can take.
As you may imagine, the larger pillar drill tends to have a larger chuck with more capacity than its smaller bench-mounted cousin and due to this is more suited to larger, more heavy duty tasks.
In terms of sizes, a bench drill chuck will generally take up to a 13mm drill bit, which will be suitable for most DIY jobs and pillar drill chuck will take much larger drill bits.
Safety Tips for Using Pillar and Bench Drills
All power tools can be dangerous if not used properly, and pillar or bench drills are no exception. Always take precautions and wear the right protective gear.
Essential safety gear includes gloves, eye protection (like goggles), sturdy clothing, and solid shoes or boots. Make sure long hair and loose clothing are secured to avoid getting caught in the machine’s rotating parts.
Always clamp your material securely to the worktable before drilling. Never hold it by hand, as the drill bit can catch and spin the material, turning it into a dangerous projectile and potentially breaking your hand.
Keep your work area clean and dry, especially if using a lubricated drill. Slippery surfaces increase the risk of accidents.
Ensure your drill is properly secured. Pillar drills should be permanently fixed to the floor or base plate, while bench drills can be clamped or temporarily secured to a work surface during use.
Selecting the Right Drilling Speed and Drill Bit
Choosing the right drilling speed for the material you are drilling is one of the key factors in determining the overall success of the job.
Depending on the material, drilling too fast can create a lot of heat and thus can seriously damage the item you’re working on.
Also, heat generated from fast drilling can very quickly blunt drill bits, making them cut less effectively, which in turn then generates more heat blunting them and damaging the working item further.
A general rule of thumb is, the softer the material the faster the drilling speed can be and the harder the material the slower the drilling speed should be.
This is also the case when it comes to selecting drill bits; The softer the drill bit the slower the drill speed, the harder the drill bit the faster the drilling speed it can be used at.
Standard HSS drill bits should be used at a standard, slower speed, whereas harder drill bits, such as cobalt and tungsten carbide can be used at faster speeds.
Comprehensive information on drilling speeds and drill bits can be found on this website here.
Keep in mind that the size of the hole also matters. Larger holes require more power and should be drilled at slower speeds. Always start with a small pilot hole and gradually increase the size to your desired hole diameter.
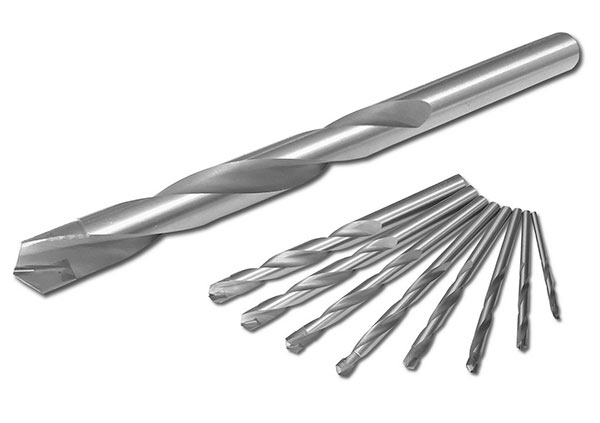
TCT – Tungsten carbide tipped drill bits
The Parts of a Pillar/Bench Drill
So that you know exactly what we are referring to in the instructions below, it’s essential that we now run through the different parts that make up a pillar or bench drill.
Although the image below is of a bench drill, as this is essentially the same as a pillar drill, all the essential parts are also the same.
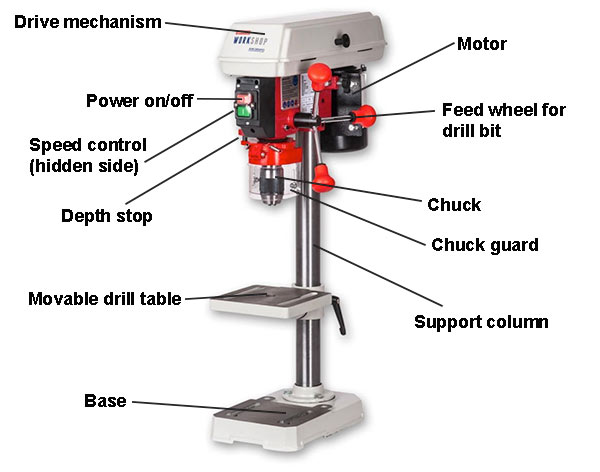
The parts of a bench drill (also pillar drill)
- Drive Mechanism: In most cases involves a belt run from the motor to a pulley that drives the chuck, or in some cases can be direct drive e.g. motor drives chuck directly
- Power on/off: Turns the drill on and off.
- Speed Control: Controls the rotational speed of the chuck.
- Depth Stop: Can be set to stop drilling at a certain depth.
- Drill Table: Supports the working item while drilling, allowing it to be clamped firmly in place.
- Base: Supports the whole machine and the column that the drill is mounted on.
- Motor: Provides the power that drives the chuck.
- Feed Wheel: Allows the user to lower and raise the chuck.
- Chuck: Holds the drill bit firmly allowing it to do the cutting.
- Chuck Guard: Protects the user from the rotating chuck – Should be used at all times!
- Support Column: Supports the drill, motor and rest of the components and also the drilling table.
Changing Drill Bits
A necessary job when drilling is to often change the drill bit in the chuck, depending on the size of hole you’re making and the material you’re drilling.
With hand held drills you often get a keyless chuck, meaning it can be opened and tightened using your hands, however, due to the levels of torque that a pillar or bench drill puts out, it requires something much tougher – a keyed chuck.
On the base of the chuck near the jaws there is a toothed gear and just below a series of 3 or so holes. The front of the chuck key is inserted into the hole and the geared section of the key, once the key is turned, turns the chuck and opens the jaws, allowing drill bits to be changed.
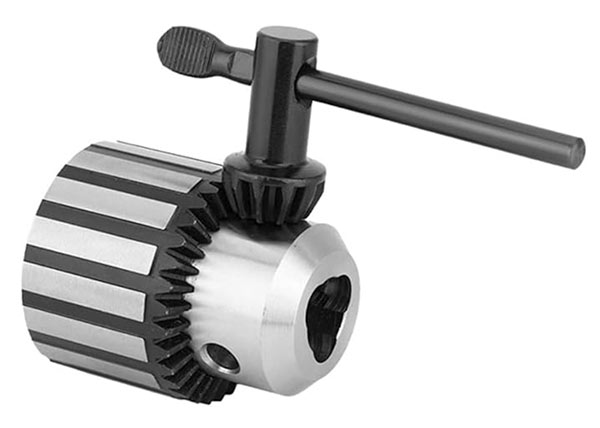
Pillar drill chuck and key
Tools and Products Needed for Using a Bench Drill
In order to successfully drill a hole using a bench or pillar drill, you will need the following tools and materials.
- Pillar or bench drill
- Selection of drill bits
- Chuck key
- Clamps (if drill table doesn’t have any inbuilt)
- Material to drill
How to Use a Pillar or Bench Drill
Now that we have looked at all the different aspects of the pillar or bench drill, what drills to use, all the different parts that make up these tools, it’s now time to look at how to use one.
Follow the guidelines below:
- Step 1 – Set Up the Drill: Firstly, ensure the drill is securely fastened to the work surface (bench drill) or floor (pillar drill) to prevent movement during operation. Next, check the drill over to ensure it is in full working condition, with no issues. Do not use a broken or damaged drill!
- Step 2 – Select Drill Bit: Next, select the right drill bit for the size of hole and material you are drilling e.g., HSS for metal, wood bits for wood. Insert it into the chuck and use the chuck key to tightest fully, ensuring it’s secure.
- Step 3 – Prepare the Material: Secure your material firmly to the drill table using clamps. Never hold the material by hand, as it can spin and cause injury. Some pillar drills feature a clamp built in to the table.
- Step 4 – Adjust the Drill Table: Move the drill table up or down to fit your material’s size and ensure enough clearance for the bit and that the chuck will comfortably reach the drill bit. Align the material directly under the drill bit, ready to adjust to the final position.
- Step 5 – Select the Right Speed: Adjust the drill speed according to the material—higher speeds for soft materials (wood, plastic), and slower speeds for harder materials (metal). Refer to the drill’s manual or speed settings chart for precise guidance.
- Step 6 – Mark the Drilling Point: Use a pencil, marker, or punch to mark the exact spot where you want to drill. This helps guide the bit to the right location and then move the table so that when the drill bit is dropped down, the centre of the drill bit hits the mark precisely.
- Step 7 – Position the Safety Guard: Always lower the safety guard over the drill bit before turning on the machine to protect against debris and potential accidents. This is absolutely essential.
- Step 8 – Set Drilling Depth (Optional): If your drill has a depth stop feature, preset it to the correct depth to avoid going too deep and damaging your material or the drill bit.
- Step 9 – Start Drilling: Now, turn on the drill and gently lower the handle to bring the bit into contact with the material. Apply steady, even pressure as the drill penetrates the surface. Let the drill bit do the work and do not force it otherwise you’ll cause heat and damage.
- Step 10 – Drill in Stages for Large Holes: For larger holes, drill a smaller pilot hole first, then increase the hole size with progressively larger bits. This ensures cleaner, more accurate drilling and prevents any damage.
- Step 11 – Keep the Area Clean: Periodically, stop and clear debris or shavings to maintain a clear work area. Always turn off the machine before doing this!! If using lubrication (must be used when drilling metal), ensure surfaces around the drill are freed from oil to prevent any slipping.
- Step 12 – Turn Off the Drill: Once you’ve finished drilling, release the handle, turn off the drill, and wait for the bit to stop spinning before removing the material.
- Step 13 – Inspect the Hole: Once the material is free, check the hole for accuracy and smoothness. If needed, clean up rough edges with sandpaper for softer materials or a file for metal and the likes.
- Step 14 – Store Safely: Once finished, unplug the drill, remove any drill bits and store them correctly. This also applies for any clamps and safety gear.
By working carefully through these steps, you can safely and efficiently use a pillar or bench drill for creating accurate and precise holes in pretty much any material.

