A wrecking bar or pry bar as they are commonly known is a very handy tool to have at your disposal especially during renovation work when you may need to dismantle walls, floors, ceilings and other structures.
There is a certain technique to using a pry bar or wrecking bar, especially when any damage needs to be kept to a minimum so read on below to find out how to use one.
What is a Wrecking Bar/Pry Bar?
Before learning how to use one, let’s first find out exactly what a wrecking bar is and what it’s used for.
Wrecking Bars have many names most are regional influenced names, but usually called crowbar, jimmy, pry bar or as listed above, wrecking bar. Whatever name is used they all essentially refer to the same tool, but wrecking bar is more of a tradesmans name hence we refer to it as so in this guide.
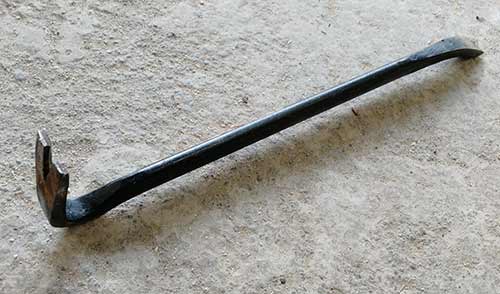
Wrecking bar or crow bar used for demolition featuring claw at one end and straight edge at the other
A Wrecking Bar is a heavy metal device with one end flattened, split to create a ‘V’ for pulling nails from objects and curved so can be used in a lever action for prying and demolishing.
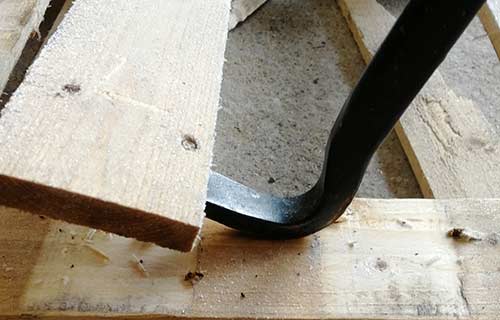
The other end is machined into a chisel shape to be used for prying items apart again with the action of levering. This end can also be driven in by using a hammer on the small flat place on the crook of the bend in the wrecking bar.
Wrecking Bars normally come in sizes that range from 12” – 48” and made out of machined hexagon shaped metal rod which increases its strength / rigidity when being used.
Bars are now being produced in bright colours so can be seen or found easily in a working situation as these tools are normally related to a demolition situation of work where there will be a lot of debris.
Typically during use, a wrecking bar may be used for a short time and then chucked on the floor while the remaining demolition work is done which in some cases can involve pulling down plasterboard, brick and even concrete walls. These can easily fall on and cover wrecking bars and they’re never seen again, so making them bright, standout colours makes them much easier to spot.
Wrecking bars come in many different shapes, lengths and sizes with some designs being more suited to a particular job than others.
Generally the hexagonal and octagonal bars are slightly stronger and offer more prying strength whereas flat prying bars are more suited for lighter work as they also tend to be shorter in length.
When looking to purchase a wrecking bar you certainly get what you pay for. The cheaper bars tend to be made of cheaper carbon/alloy steel whereas more expensive bars are commonly made of tougher forged steel so look out for this.
Likewise look for wrecking bars that have been tempered (heat treated). The act of tempering steel makes it considerably tougher.
In terms of length the general rule of thumb is the more weight or more resistance the object that you need to lever up is the longer your wrecking bar will need to be.
As always at DIY Doctor when doing any demolition work we always recommend the use of safety and protective gloves, dust masks and eye protection at all times.
Parts of a Wrecking bar
So that you know exactly what part of the wrecking bar we are referring to below, here is a summary of all the different parts of a standard wrecking bar.
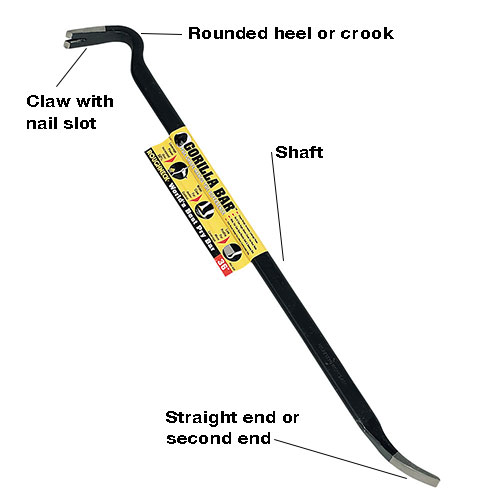
The different parts that make up a wrecking bar
- Claw – The claw end of a wrecking bar can be solid or as in the image above feature a nail slot for prying up nails. The Angle of the claw can also vary from around 90°s up to around 130°s
- Heel – The heel of a wrecking bar is often used for driving the claw in under a given object in order to pry it up. It can be struck with a hammer to force the claw inwards. The heel can either be rounded (or the shape of the shaft) or be flat to allow it to be hit much easier. It can also be used as a fulcrum or pivot point for levering when the claw is engaged the user pulls down on the second end levering the claw up
- Shaft – This is the main body of the bar and can come in a variety of different shapes including round, oval, hexagonal, octagonal and flat, each with its own benefits and drawbacks
- Straight/Second end – This is the end opposite the claw end and can feature a variety of different tips including a chisel tip, round pointed tip (for aligning objects), flat blunt tip or even just a handle
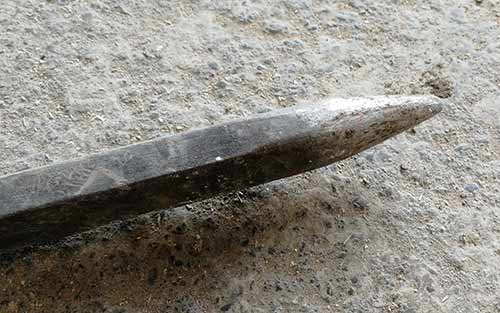
Pointed end of wrecking bar used for aligning objects and applying focused force
Pry Bars and Other Types of Wrecking Bar
Aside from the standard wrecking bar that we have shown above there are certain other slightly different types of bars, some developed for specific jobs:
- Prying bar – Although a standard wrecking bar is commonly used for prying, the prying bar is designed specifically for prying objects up, although it can also be used for levering, lifting and nail removal
- Pallet, demolition and lifting bars – These types of bars were primarily developed for demolishing pallets (which they do very well) but they are also very good at levering and demolishing structural timbers such as floor and ceiling joists and also due to its long handle lifting heavy objects
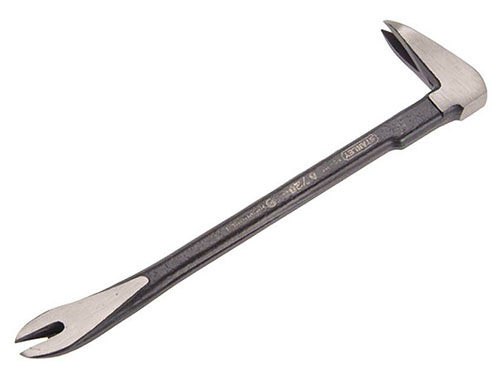
- Small prying bars – For smaller work a large bulky wrecking bar or pry bar may be totally unsuitable. In these situations a set of small pry bars are really handy to have around. As the blade ends of these tools tend to be very thin they can easily get down into very tight gaps
Prying bar
Pallet, demolishing and lifting bar
Small pry bar ideal for use in tight situations
How to use a Wrecking Bar
How you use the wrecking bar will very much depend on what you are doing. One of the most common task it will be used for is prying up floorboards. In this case you would wiggle or sometimes knock the chisel end into a gap between the boards and pull the other end down to lift a board up.
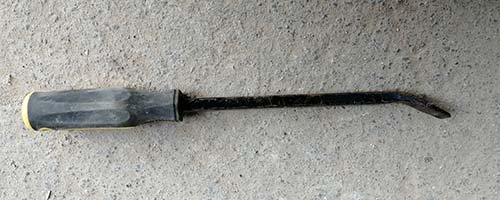
When dealing with floorboards, sometimes the boards are packed so tightly together it’s impossible to get even a slim wrecking bar into a gap to lift a board to get started. In these instances you can use a small flat blade screwdriver or small pry bar to get started.

Using a small pry bar to squeeze between floorboards
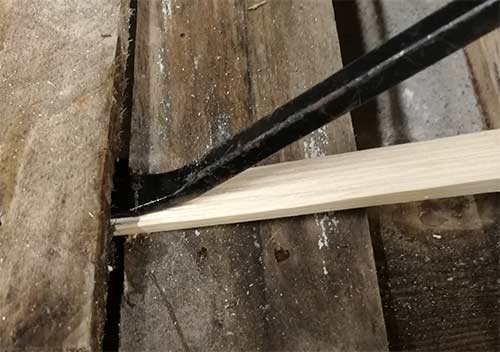
As you might guess, this requires you to lever against an adjacent floorboard in order to get the leverage to lift the other board. This can cause damage and marks which might not be a good thing, especially if you have a nice wooden floor that is permanently on show.
In this case you can use another thinner piece of timber or thin piece of metal to lever against, to pry the board up and reduce the risks of potential damage to other boards.
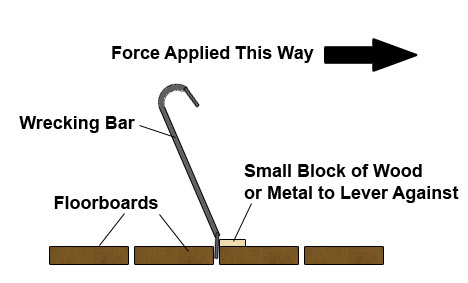
Using a wrecking bar to lever up a floorboard but levering against small block of wood to protect other floorboards
Using a Wrecking Bar to Lift Floorboards and Other Timbers
In the image below we are using an old pallet in place of a real floor as the principles are the same (we didn’t have a floor to hand that needed replacing at the time of writing this project).
Whether you are lifting floorboards, levering off plasterboard or prying up flooring timbers, the process of using a wrecking bar is exactly the same so the same steps below can be used regardless of the job:
- Step 1 – Remove first board and create space Firstly, remove one board or timber from around the centre of the area you are working on. If access is tight use a small pry bar to prise the timber up and lever against another piece of timber to prevent damage to surrounding timbers
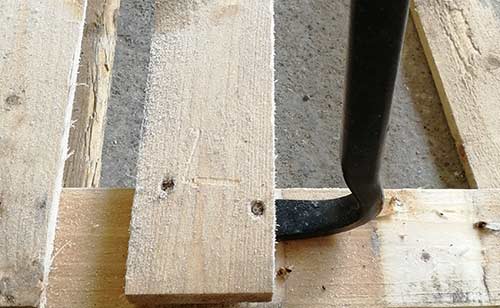
- Step 2 – Position wrecking bar Position the claw end of the bar in front of the next board. Line it up with any nails present. When levering, always do this as close to any nails or fixings as possible as tis will prevent the timber splitting
- Step 3 – Knock claw in with hammer Gently hit the heel on the reverse of the claw with a hammer ensuring the claw sits flush with the timber its resting on so it doesn’t dig in
- Step 4 – Wiggle the wrecking bar to loosen object Once the claw of the wrecking bar has been knocked in, hold the top of the bar and rock it gently backwards and forwards to loosen the board
- Step 5 – Lever board or timber away Once the board or timber you are working on is loose pull the bar all the way down to lift the timber free
Prying up first floorboard using a pry bar
Position wrecking bar claw next to board
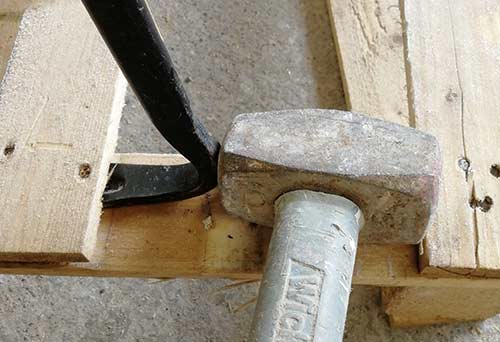
Knock the claw in under the board or timber using a hammer
Rock the wrecking bar forwards and backwards to loosen the board or timber
Pull bar all the way down to lift timber, board or other object free
Loosening Stubborn Objects
In some instances the object you are trying to lever off just wont want to budge. The best way to deal with objects is to use a combination of levering positions.
Start off with the claw on one side and then move to the other side and lever from there, gently rocking the bar each time to loosen the item a bit more.
As well as using the claw end flip the bar around and use the straight or second end. Sometimes pulling the bar up as opposed to down can provide the final bit of leverage to release the timber or object you are working on.
Turn the wrecking bar around and lever upwards using the second or straight end
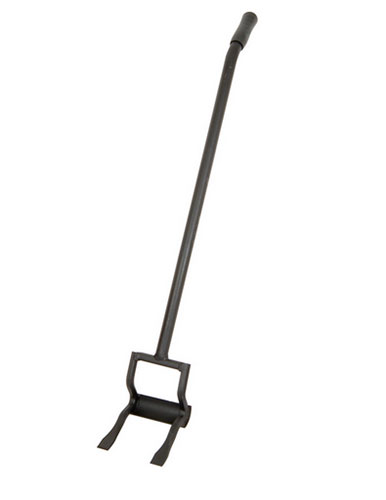
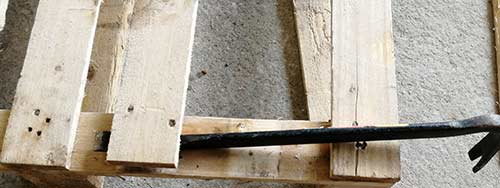
Using a Pallet Demolition and Lifting Bar
In the example above we have demonstrated how a wrecking bar can be used to lift and lever floorboards and other timbers. As good a tool as the wrecking bar is for these jobs we also need to expand slightly on another tool that we have mentioned above – the pallet wrecking and lifting bar.
For levering up flat timbers such as pallet slats and floorboards this tool is absolutely fantastic and very easy to use.
Its wide jaws will easily span 2 and even 3 inch timbers such as floor joists and other structural timbers.
As above in the below demo we have used an old pallet but the principles are the same if working on floors, ceilings and other areas.
- Step 1 – Make some space If the boards or timbers you’re working on are tightly packed together you will need to remove the first row to make enough room to get the prongs of the pallet breaker in place. See step 1 above for how to do this
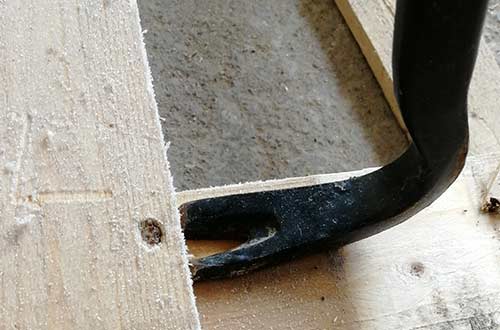
- Step 2 – Slot jaws under first board When you have made some room take the pallet wrecking bar and angle it down slightly so that ou can slip the prongs down through the gap and under the board or timber you’re working on
- Step 3 – Lever object free Slide the prongs in under the timber or object until they are as far under the object as possible. Ensure base of the tool is sat square on the timber or object you are levering off of and then gently pull down on the handle. The prongs will start to lift levering the object free. Don’t use jerky motions or pull down too hard, ease the pressure in and you will find the object comes free avoiding any damage
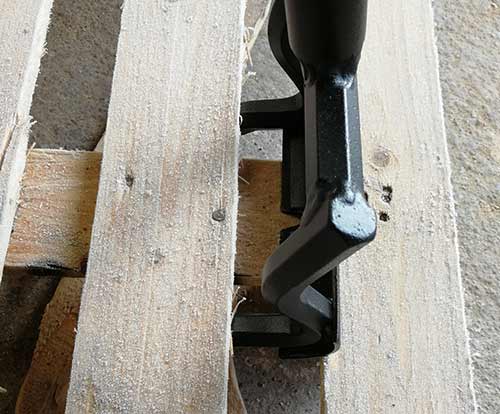
Slip the prongs of the pallet breaker under the object you are wanting to lever up
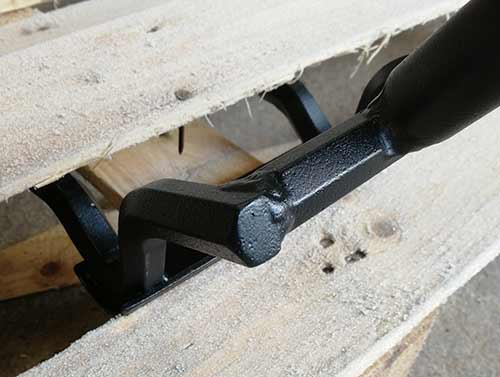
Apply gentle pressure down on the pallet wrecker handle to lever object free
As you can see from the information above, the wrecking bar is ideal for levering up floor joists, roofing timbers, floor tiles and slabs, patio slabs etc…. where smaller pry-bars, levers or claw hammers just won’t make the grade.
However a wrecking bar really comes into its own in a true demolition situation, where you just need to get on with the job and any damage caused is of no concern. In these situations there’s just no other tool that even comes close.