If performing extensive home improvement jobs such as blocking up a window or door opening or a similar job, in either case you are going to need to remove the frame that the window or door sits in.
Fortunately removing a window or door frame can be done fairly easily with little DIY experience, providing you take your time and work through the steps below.
What are the Different Types of Window and Door Frames?
There is essentially 4 different materials that a given window or door frame can be made from and these are the 2 most popular of PVCU or timber or alternatively composite or aluminium.
Depending on the type of window or door you are removing will ultimately depend on what it’s made from. In most cases, external window or door frames can be made from any of the above materials but will mostly be PVCU or timber, whereas pretty much all internal frames will always be timber.
In any case, regardless of the type of frame they are all removed in a similar manner, either unscrewed and pulled out or chopped up and levered out.
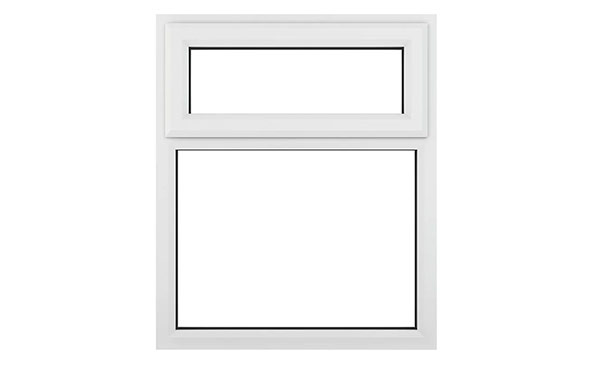
Standard modern PVCU window frame
What Types of Door Frame are There?
As with window frames, there are 4 different materials that a door frame can be made from; PVCU, aluminium, timber or composite.
Today, modern homes will either have a PVCU or composite front door and frame whereas older, more traditional properties may still feature a timber front door and frame.
Quite often with properties that do have a PVCU or composite front door, they may still have a timber rear door.
In general, PVCU and composite tend to be much longer lasting than the others and require much less maintenance (essentially maintenance free), whereas timber doors and frames often require regular (certainly annual maintenance) to keep them in tip top condition.
Aluminium is rarely seen today, unless it’s on very high-end properties or those with larger bi-folding doors or older 60’s or 70’s properties. Traditionally, older aluminium doesn’t fair well over time as they create a cold bridge and can leak a great deal of heat, but their more modern counterparts are extremely well insulated due to today’s very demanding regulations and improved construction techniques.
Again, as with windows, pretty much all internal door frames should be made of timber.
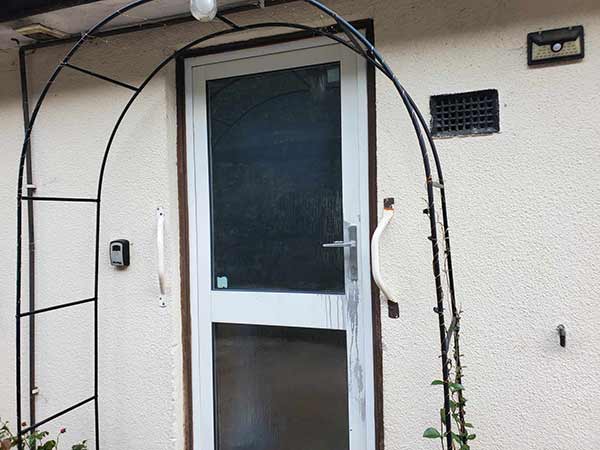
Old style aluminium front door
Do you Need Permission to Remove a Window or Door Frame
In general, if you are simply replacing an existing window(s) or door(s) with one or those of the same type and style e.g. white UPVC with white UPVC then there shouldn’t be any issues with this at all, however if you are replacing with a different type then you may need to seek planning permission.
Despite the above, if you live in a conservation area then in pretty much all cases, even if you are replacing like-for-like you will probably still need to gain planning permission or approval from your local Building Control office.
When it comes to the question of whether you are allowed to replace your own windows or doors, yes you certainly can, however once you have then the entire job will need to be checked by your local Building Control officer to ensure that it has been done in accordance with the Building Regulations (namely Approved Document L).
Additionally, if you are simply just replacing an external door and not the frame then as this is technically not affecting the current insulative state of the property then you won’t need planning permission for it.
If you are in any doubt about whether you can safely replace any of your existing windows or doors, then contact your local Building Control office – See the Planning Portal website here for contact details.
For a more detailed run down on all the rules and requirements when replacing windows and doors please see our replacement regulations project here.

Approved Document L of the Building Regulations
Measuring up for Replacement Windows and Doors
In pretty much all cases, if you have enlisted the services of a company to replace your windows or doors then, to avoid any issues with measurements they will almost certainly send out a representative to do the measuring for you.
As I’m sure you can imagine, when measuring for a new window or door, the measurements have to be absolutely spot on to ensure the new one will fit correctly. If too big then it simply won’t fit and if too small, they’ll be gaps around the frame which will obviously leak heat and allow cold air in.
To measure up for a new window or door you need to measure the size actual opening in the wall (width and height) and not just the existing frame!
In some cases it is fairly easy to spot the edge of the frame but in others it’s rather tricky as the gap between the edge of the window or door frame and the opening is cemented over, so be aware of this.
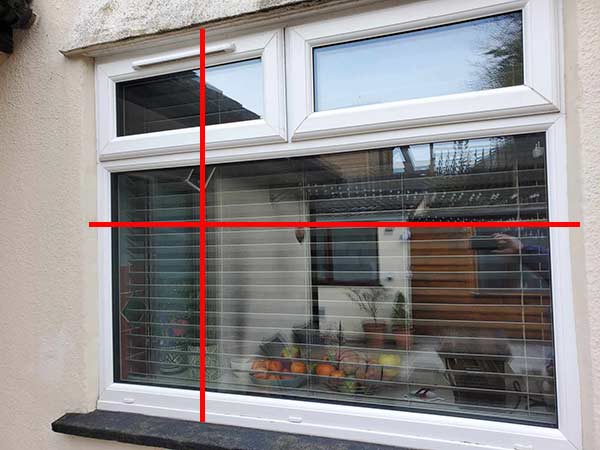
Measure the actual opening in the wall when measuring a window or door opening
Parts of a Window and Door
When removing a window or door frame, it’s important that you also know what each part of each given frame is called so that you remove the right part at the right time:
The main parts of a window frame are detailed in the image below:
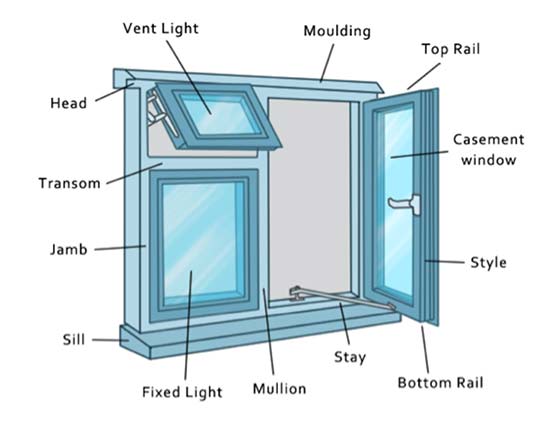
The main parts of a window and frame
If you would like to know more about the different parts of a window, see our parts of a window project here.
The main parts of a door frame are detailed in the image below:
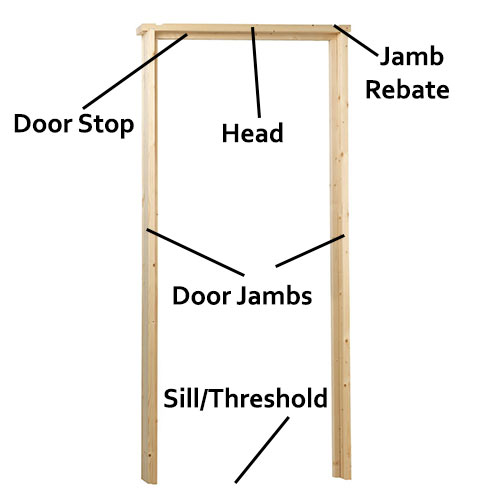
Main parts of a door frame
If you would like to know more about the parts that make up a door frame, see our fitting a door liner or frame project here.
Tools and Products Needed for Removing Windows and Door Frames
To remove a window or door frame you will need the following tools and products:
- Claw hammer
- Pry bar
- Selection of sharp chisels
- Bolster
- Cold chisel
- Power drill/driver
- Selection of screwdriver bits
- Philips and flat blade screwdrivers
- Handsaw
- Reciprocating saw (not essential but certainly helps)
- Utility knife
- Replacement window or door
How to Remove a Window in One Piece
As we have mentioned above, there are several different ways to remove a window or door frame depending on what type it is e.g. timber or UPVC, so we have detailed these below:
In pretty much all cases, if the window or door you want to remove is UPVC, composite or aluminium then it’s possible to remove the lot in one go, without the need to break it into pieces
Removing a Window Frame in one Piece
- Step 1 – Remove Cement Around Frame: If the gap between the frame and opening has been cemented, use a cold chisel and bolster to gently chip it all out to expose the edge of the frame. Make sure you don’t damage the masonry edges of the actual wall
- Step 2 – Remove Casements and Vents: Using a screwdriver and/or drill/driver, carefully remove any casements and vents to expose the inside edge of the frame. You may need an extra pair of hands to help
- Step 3 – Remove Glazed Unit: Using a sharp chisel, gently pry all of the glazing bars (the bits that hold the glass in the frame) out and away from each double-glazed unit. Leave the top until last so it doesn’t fall out. Once gone, gently remove the double-glazed unit itself and put it to one side. Repeat this for any remaining fixed pieces of glass
- Step 4 – Remove retaining screws: Using your drill/driver and suitable drill bit, unscrew all of the retaining screws from the inside of the frame
- Step 5 – Remove Frame: Make sure all the screws have been removed and then using a hammer, gently tap the frame out of the reveal. If you’re aiming to keep it don’t hit it too hard and damage it
Removing a Door Frame in one Piece
- Step 1 – Remove any Cement: First, using a hammer and bolster and cold chisel if needed, chip away any cement from around the frame, making sure you don’t damage the existing wall
- Step 2 – Open Door Fully: Next, open the door up fully to at least 90° to expose all of the fixing screws inserted through the inside of the frame
- Step 3 – Remove Retaining Screws: Using a drill/driver and suitable drill bit, remove any and all retaining screws from around the inside of the frame, when they’re all removed, make sure it doesn’t come loose and fall out
- Step 4 – Close Door and Support: Close the door up and have someone support it from the outside, or the way it’s going to fall out
- Step 5 – Knock Frame out: Using a hammer if needed or just pushing it not, gently knock the frame out of the reveal and then put to one side
Removing a Window in Sections
In this next part of the guide we will run through how you remove a window frame when it cannot be taken out in one piece and needs to be broken up to remove it.
In pretty much all cases it will be a timber frame that needs to be chopped out in sections.
Remove All The Moving Parts From Your Windows
The first step to removing a window and frame and indeed a door frame is to remove the moving parts such as any casements, vents or sashes.
This is just a simple job of unscrewing the hinges or brackets but in a few, awkward cases, a wrecking bar and some elbow grease is required to lever the item away.
Once removed, stack all frame sections out of the way, especially those containing glass.
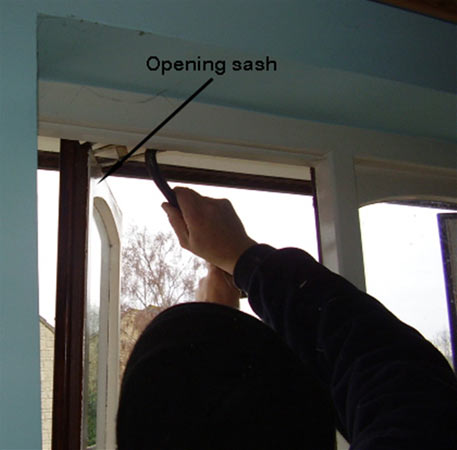
Removing awkward window sash with a wrecking bar
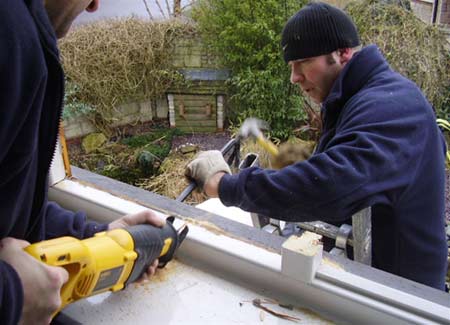
Remove The Central Uprights From The Windows
Next using a hand saw or reciprocating saw, saw through the central uprights (mullions) of the frame to remove any fixed sashes or glass panels. Be very careful here as the glass can easily break at this point
When you have made your saw cuts, bang the frame sections away from the glass using a hammer and chisel. All saw cuts should be made at an angle so the timber sections do not bind on each other when pulling apart.
Saw through window uprights to remove them
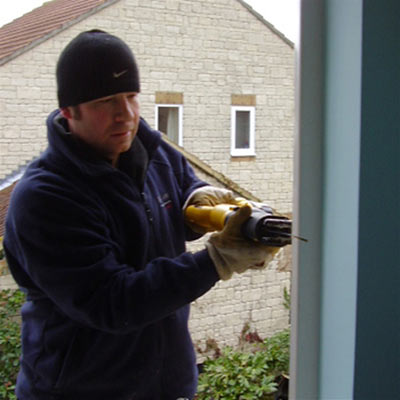
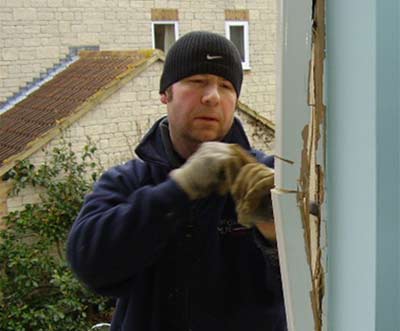
Removing The Main Frame And Side Jambs
With all central frame sections gone it’s time to cut through the main frame. The sides (jambs) are the first to go and a saw cut is made through them until the saw reaches (but doesn’t touch) the plaster inside and the masonry outside. Again you can see in the images that the saw cut is made at an angle
To help prevent too much damage to any paint or plaster finishes on the inside, use a utility knife to score around the inside of the frame where it meets the wall to break and silicone or paint seals that may tear when pulled away.
Remove window sides or jambs with a hammer and chisel – Be careful not to damage the plastered surface of the wall

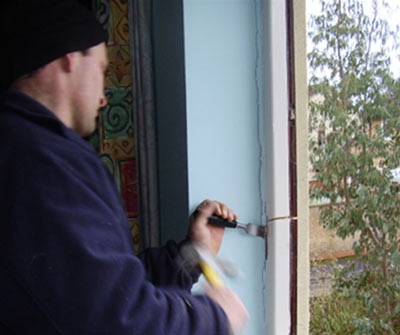
Lever off awkward jambs with a wrecking bar – Again, be careful not to damage the plastered surface of the wall
Once the saw cut is started a chisel or wrecking bar is banged in behind the jamb which is then levered inward.
As you lever in, the saw cut will open and more of the frame will be exposed.
This can be sawn and continued until you have sawn all the way through the jamb. The jamb can then be pulled inwards and wiggled around until it breaks free.
Levering off window side or jamb with a chisel
Removing The Sill and Head Timber
Next, the sill and head pieces of the frame are cut and removed.
Again, an angled cut is used and then the wrecking bar is inserted under the cill from the outside and levered upward so all of the sill can be cut.
Removing the window sill by creating an angled cut and levering up with a wrecking bar

Removing the bottom window jamb
Finally, using exactly the same process, the head timber is removed. This, if it is an upstairs window, can sometimes present difficulties.
Very often, above the window on the outside of the building, there is a soffit board which fills the gap between the inside of the facia board and the wall.
With some construction techniques, the windows are installed, and this soffit board is actually fixed to the top of the window frame. Simply ripping the head down can damage the soffit board so go carefully.
If the soffit board is fixed down onto the top of the frame, you will need to slide a hacksaw blade between the soffit board and top of frame to cut through the nails or screws holding it in place.
Once this is done you can then go ahead and remove the head timber.
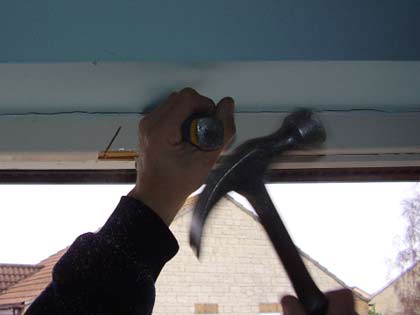
Remove the window head timber by firstly making an angled cut
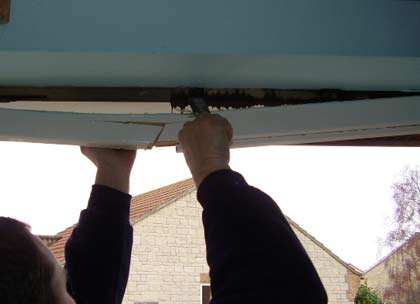
Lever the head timber down with a wrecking bar to remove
When it comes to replacing the removed window or door, there is a huge variety of windows and doors available these days and we would suggest visiting one of the many double glazing websites online for further information on all types and styles of windows, doors, composite doors and folding doors.
Composite doors are especially worth a look, combining the stunning appearance of natural wood with excellent thermal and security properties.
Removing a Door Frame in Sections
If you are unable to remove a door frame in one piece, the only option you have is t then break it up into smaller pieces. The process of doing this is pretty much the same as removing a window above, only you don’t have to worry about the internals of the frame, just the frame itself.
- Step 1 – Remove the Door: First, using a helping hand and your drill/driver, remove the screws from the hinge holding the door to the frame and put the door to one side
- Step 2 – Score Around Frame: So you don’t damage the paint, plaster or other finish that may butt up to the frame, use a utility knife to score around the edge of the frame where it meets the wall
- Step 3 – Remove Side Jambs: Using your reciprocating saw, carefully cut through each side jamb in 2 or 3 locations along its upright length. Make sure you don’t hit the wall or surface behind it. Once cut through, use a pry bar or crow bar to lever them out. Make sure that the head doesn’t fall out, it shouldn’t do but be aware that it may
- Step 4 – Remove Sill and Head: Using the reciprocating saw, cut through the head and the sill in several places, again making sure you don’t damage the surface above or below. Once cut, use a pry bar or crowbar to lever them out
- Step 5 – Tidy up: If there are any wall plugs in the wall, pull them out and also chip off any loose mortar, silicone or any other rubbish that remains, ready for any new frames
Removing a window or door frame may seem like a fairly easy job, just smash it out, however to ensure that you don’t cause any additional damage to the window or door reveal or indeed ensure the object you’re removing is kept in one piece for reuse or sale, it’s best to do it methodically, however sometimes this just isn’t the case and you have no choice but to break it into pieces.