After you have treated your damp walls and resolved the reason for them being damp in the first place the next job is to then repair them fully and and then replace any finishing coats such as plaster and then paint or wallpaper.
In this guide you will learn about plastering and repairing walls after damp treatment so that they can be repainted or wallpapered.
How to Prepare Damp Walls for Plastering
Although a little outside of the scope of this project as we are dealing with the stage after this, however it’s important to mention and run through the basic steps involved in correctly preparing your wall for replastering, as if this is not done, then any finishing work will quickly fail.
With the above in mind, ensure you cover the following steps:
Step 1: Identify the Cause of the Damp
Firstly, you must figure out why your walls are damp. Common causes in UK homes include rising damp, penetrating damp (external leaks) and condensation.
Look for signs such as tide marks, mould patches, peeling wallpaper, or a musty smell.
Step 2: Fix the Source of the Damp
The next job is to now solve the underlying cause of the damp. For rising damp, you might need a chemical damp-proof course (DPC).
If water is seeping in from the outside, check for cracks in the brickwork or blocked gutters. For condensation, improve ventilation with extractor fans or dehumidifiers.
Step 3: Allow the Wall to Dry Completely
Once the root cause in resolved, the wall needs time to dry out fully. Depending on how wet it is and the time of year, this could take several weeks to a few months.
Use a damp meter and hygrometer to monitor the drying process. The wall should read below 18% moisture content before any plastering.
Use heaters and fans to speed up the drying process if needed, but avoid trapping moisture by keeping the room well-ventilated.
Step 4: Clean and Prepare the Wall Surface
When the wall is bone dry, scrub off any mould with a good quality fungicidal wash. Remove loose or flaky paint, old plaster, and any salt deposits (white powdery marks).
Next, apply a stabilising solution or bonding agent like PVA (diluted 1:4 with water) to create a strong key for the new plaster. Allow this coat to become tacky before applying your first plaster layer.
Step 5: Apply a Damp-Resistant Base Coat (Optional)
If the wall is potentially prone to future damp issues, consider applying a waterproof render or tanking slurry before plastering.
These products create a barrier against moisture and add extra peace of mind, especially useful for cellars or ground-floor walls.
Let this cure fully as per the product instructions before moving on to standard plastering.
Is Using a Damp Proof Membrane or Liquid Better?
To expand a little further on the above, it’s also important to look at the 2 main methods of damp proofing a wall to prevent future damp issues, so that you can decide which system best suits your situation.
Below, we take a look at the pro’s and con’s of each system.
What Is a Damp Proof Membrane?
A damp proof membrane (DPM) is a thick plastic sheet or roll, usually made from high-density polyethylene, that acts as a physical barrier to moisture.
Membranes are effective at blocking ground moisture and are often used in basements, ground floors or anywhere there’s a risk of rising damp.
What Is Liquid Damp Proofing?
Liquid damp proofing products, also known as tanking slurries or damp-proof paints, are applied directly to walls or floors using a roller, brush, or spray.
Once cured, they create a waterproof seal that helps prevent water ingress.
Liquid DPCs are ideal for treating existing damp problems in older homes or where a full membrane isn’t practical. Some products also double up as primers for plastering or tiling.
Which One Is Better for Your Project?
The best choice depends on the type of damp issue you’re dealing with, the construction of your home and your budget:
- For new builds or major renovations: A damp proof membrane is often the better long-term solution. It offers physical protection, is compatible with underfloor insulation, and complies with UK Building Regulations.
- For existing properties or minor damp issues: A liquid damp proofing treatment is more flexible and easier to apply. It’s perfect for treating small problem areas, basements, or cellars where walls are already in place.
Both systems are effective when installed correctly, but they serve slightly different purposes. In many UK homes, builders use a combination of both membranes for floors and tanking slurries for walls, to ensure full protection from rising or penetrating damp.
How Long After Damp Proofing can you Plaster?
After any form of damp damage all you really want is to get your home back in order again, however it’s essential that you wait for everything to dry and any treatments to fully cure.
In general, it’s recommended to wait at least 7 to 14 days after a chemical damp proof course (DPC) has been injected before you begin plastering. However, this can vary, as if the walls were very wet to begin with, it could take longer.
For more traditional tanking systems or membrane-based solutions, the time can differ, so it’s always best to check with your installer.
As a general rule in the UK, plastering should only start once the walls have fully dried out and any signs of surface moisture have disappeared.
Applying plaster too soon can lead to problems like peeling, flaking or even mould developing behind the surface, which defeats the purpose of the damp treatment in the first place.
To know if your walls are dry enough, there are a few simple ways to check if the walls are ready for plastering:
- Visual check: Look for any signs of damp patches or condensation. The wall should appear dry all over.
- Touch test: The wall should feel dry to the touch and not cool or clammy.
- Moisture meter: For the most accurate reading, a digital moisture meter can confirm when levels are safe for plastering.
Although you can’t rush the drying process, there are a few things that you can do such as ensure there’s good ventilation and add some gentle heat.
Also, open up windows and use a dehumidifier to gently reduce the volume of moisture in the space.
Waterproofing Replastering Choices
When it comes to getting a waterproof barrier in place to prevent any future damp issues once you have replastered, there are really 2 main choices as follows:
- Traditional Render – Sand and cement to a particular specification, usually featuring additives in the mix
- Advantages: inexpensive, easy to use
- Disadvantages: slow drying, limited to breathing finishes, cold surface, prone to condensation, slow multi-layer application, not a vapour barrier
- Modern Membranes – Dimpled plastic sheet on a roll, sometimes referred to as plastic lining membrane or air gap membrane, normally secured to wall using specialist fixings
- Advantages: warm surface, no drying time, easy to fix, any finish, vapour barrier
- Disadvantages: slightly more expensive, will fail if punctured
Products and Tools Required
In order to successfully finish a wall that has been treated for damp with new plaster, you will need the following tools and products. Note that depending on what system you are using e.g render or membrane, you may not need some items:
- Breaker/hammer and chisel (for removing old plaster)
- Stiff brush
- Rubble bags
- Damp meter/hygrometer
- Damp membrane kit, fixing system and sealant
- Battens, screws, wall plugs and plasterboard (if using membrane and over-boarding)
- Silicone sealant (for sealing holes)
- Sharp sand
- Portland cement
- Skim plaster/multifinish plaster
- Building sand and cement (for initial wall repairs)
- Paddle mixer
- Clean water
- Mixing buckets
- Trowels
- SBR
- Renderproof or other quality additives
- Nail board/scratch float
- Plasterers float
How to Replaster Damp Walls Using Traditional Renders or Membranes
Plastering or rendering walls after damp proofing isn’t the same as standard plastering. Treated walls need a special method to make sure the damp doesn’t come back and the finish stays sound for many years to come.
To get lasting results, regardless of what system you are using, plastering after damp treatment must follow a specific process:.
Replastering Using Traditional Render
The first method we will look at is how to replaster when using a traditional plaster/render mix.
It is essential that this is done a particular way to ensure a long lasting and successful job.
Step 1: Remove old Plaster
The first job is to chisel off and remove any and all old plaster off at least 450mm above any signs of damp or salts.
The best way to do this is to use a damp meter to check how high the moisture goes and strip the plaster at least 450mm above the highest reading.
If the ground floor is affected, remove plaster up to 1 metre above floor level.
By doing this, you will reduce any chances of any salt that’s present from contaminating your new plaster.
Next, brush down the exposed walls to get rid of all leftover plaster, especially around corners and metal angle beads. Any remaining bits can let salt show through and create future damp patches in your fresh plaster.
Step 2: Make Repairs
Next on the list is sorting any repairs. Fix any gaps or weak joints in teh existing mortar using a 4:1 mix of sharp plastering sand and cement. Use only washed, coarse sand, also known as screeding or rendering sand.
Avoid fine or unwashed sand, as it often contains salts and doesn’t bond well, leading to weak patches where moisture and salts can pass through.
Add Renderproof or an equivalent good quality additive (see below) to your mix water for added protection.
Note for Non-Porous Walls: If your wall is made of smooth, hard materials like granite or blue brick, standard plaster won’t stick well due to lack of suction.
Use SBR (Styrene-Butadiene Rubber) concentrate as a bonding agent. Suction helps plaster grip the surface, without it, your render may crack or come loose as it dries.
Step 3: Dampen, Mix, and Apply First Coat
Due to the fact that plaster is so pours e.g. it sucks the moisture out of anything it touches, before applying, it’s essential to lightly dampen the wall before applying the render/plaster. This slows down drying and prevents cracking.
Next, mix up a batch of render. Use a mix of 3 parts dry, washed sharp sand (also called rendering or screeding sand) and 1 part fresh, lump-free Portland cement.
Apply a thin first coat, no more than 12.5mm (½ inch). Avoid thick coats, they can sag and crack.
Mix with water containing Renderproof waterproofer/plasticiser (1 part Renderproof to 40 parts water) or any other good quality additive. This helps the render stick better, blocks moisture, and strengthens the bond.
Do not use fine, unwashed, or wet sand, as it weakens the mix and lets salts through. Also, never add plaster, ‘browning’, or washing-up liquid to the render, it can ruin the finish and reduce durability.

Renderproof waterproof plasticiser for mixing with render
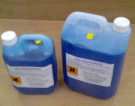
Renderproof – add to sand and cement render as a ‘salts’ barrier
Step 4: Scratch the Surface
The very next job to do is to now create what’s known as a scratch coat.
Before the first coat dries, scratch the newly applied render surface evenly using a nail board, trowel, or metal float.
This may sound totally counter-productive to the fact that you have just laid it on a smoothed it out, however, these scratches help the next coat grip properly. Without them, further render coats may crack, become hollow, or even detach as it dries due to natural shrinkage.
Step 5: Apply the Second Coat
Once the first coat is firm, but not fully dry, apply a second coat using the same consistency of mix. If more layers are needed, scratch each coat before the next to ensure proper bonding.
In warm weather, lightly mist the surface with water to slow drying. If render dries too fast, it can crack or fail to stick properly due to high suction and shrinkage.
Step 6: Apply the Skim Coat
While the surface is still damp, or lightly re-wet it if needed and then apply a skim coat using Multi-Finish or Board Finish.
To mix, always use clean, fresh water and always add the skim plaster powder to the water and never the other way around. Mix using a paddle mixer ideally until you have a smooth, thick, creamy consistency, with no lumps that’s self-supporting.
Do not polish the finish or add extra water. A shiny finish may look smooth but traps moisture, encouraging condensation, black mould, and slow drying.
For a full and detailed run down on how to mix and apply skim plater, see our skim plastering project.
Step 7: Decoration and Finishing
Wait at least one month before painting, and only use a light, breathable emulsion, never heavy vinyl. Avoid repainting for at least three months, and don’t wallpaper if possible. New plaster needs to breathe. Trapped moisture can cause paint to peel or lead to mould under wallpaper, which absorbs moisture and encourages growth.
Need help spotting signs of damp? Use our guide to diagnose damp and find the cause here.
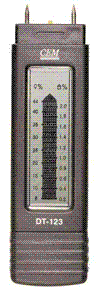
Damp Meter for testing damp levels in materials

Hygrometer for checking humidity levels
Installing Modern Damp-Proof Membranes for Cold and Damp Walls
Plastic damp-proof membranes, also called air gap or cavity membranes, create a protective barrier between damp walls and interior finishes. They stop moisture and cold from reaching the surface you decorate.
These membranes have a dimpled design that forms a small air gap, allowing the wall behind to breathe while keeping your interior dry.
You can fix them directly to the wall and cover with battens, or use a mesh-faced version that lets you plaster straight over the top.
For a full step-by-step guide, visit our lining damp walls project.
Below is a quick overview of the key steps to install a damp membrane system effectively:
- Assess the Wall: Check for signs of rising damp, condensation, or penetrating damp. Use a moisture meter if available. The wall should be structurally sound before installation, so make any necessary repairs if needed.
- Choose the Right Membrane:
- Use a plain membrane if you plan to batten and board over it.
- Choose a mesh-faced membrane if you want to plaster directly onto it.
- Prepare the Surface: Brush off any loose material, dust or old plaster. The surface doesn’t need to be dry, but it must be stable and free of flaking paint or debris.
- Cut the Membrane to Size: Measure your wall and cut the membrane using heavy-duty scissors or a utility knife, allowing extra for overlaps at joints and edges.
- Fix the Membrane to the Wall: Use special plastic fixing plugs with rubber grommets to secure the membrane. Drill through the membrane into the wall and hammer in the plugs at regular intervals (usually every 250–300mm).
- Seal Joints and Edges: Overlap the sheets by at least 100mm and seal with damp-proof tape or sealing strip to prevent moisture from escaping through the joins.
- Install Corners and Around Openings: Use pre-formed corners or fold the membrane carefully. Seal around windows, doors, and floor junctions thoroughly to avoid weak points.
- Apply Finishing Surface:
- For mesh membranes: Apply bonding plaster directly once the membrane is fully fixed.
- For plain membranes: Fix timber battens or metal framing, then attach plasterboard and finish with skim plaster or paint.
- Allow Time to Settle: Once the finish is applied, allow everything to dry naturally. Avoid decorating too soon, wait at least a few weeks before painting with breathable emulsion.
- Maintain Ventilation: Keep rooms well-ventilated during and after installation to help moisture escape and support long-term damp prevention.
Damp plaster is a common but serious issue. In most cases, the best solution is to remove the affected plaster entirely. Once this is done and the root cause of the damp is fixed, you’ll have dry, healthy walls that last for years.