One of the most rewarding DIY jobs in the home is sanding an old floor and transforming it into a lovely new surface. This application is generally not suitable for parquet floors which are best done using a special sander for parquet.
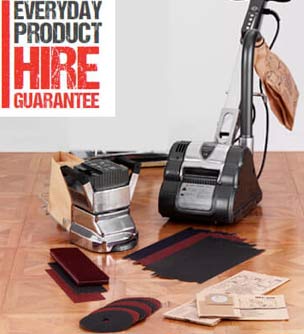
Floor Sanders and Edge sanders can be hired
Curling, Cupping, Crowning and Warping Floorboards
When timber of any kind is to be fixed in a room, it should be laid in that room for up to three weeks to acclimatise to the moisture/humidity in that room.
This very very rarely happens on new build houses on building sites as when the floor is laid the heating is not even installed.
This means of course that the timber will expand and contract many times as the moisture content and humidity levels rise and fall in the building and the timber expands and contracts.
It is as well to remember when sanding wood floorboards that pine floors, however flat they look, will probably have a slight dip (curling) or a bow (crowning) in the middle of each board. This is because all timber has a moisture content because it absorbs humidity moisture from the room.
The centre of the board dries out more slowly than the edges of the board and it warps (warping) one way or the other. It’s easy, without the correct equipment, to get an uneven finish, so take care.
Sanding and Restoring Parquet or Engineered Hardwood Flooring
The parquet floor sander is the ultimate floor finishing sander, ideal for veneered floors, parquet and all hardwood strip floors and wooden flooring, or engineered hardwood floors. They are a real pleasure to use.
Parquet Flooring Sanders leave floor absolutely perfect with hardly any effort.
Normal floor sanders can be used for sanding parquet or engineed hardwood flooring but real care must be taken and our advice is to practice first so you feel fully in control of the machine.

Professional floor sander
When sanding Parquet Flooring it is essential that you check that all the blocks are stuck down tight. A loose block can easily break the sander.
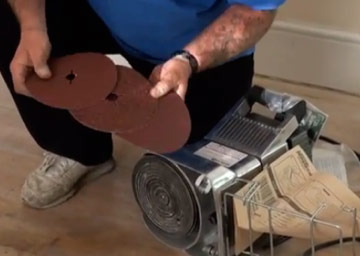
Different Sandpaper Grit Sizes
Sandpaper is a generic term used to describe either paper or cloth that has had a coarse material glued to it.
Many years ago, the course material used to be sand of a sort but these days this is not the case. Aluminium Oxide and Silicon Carbide are now the most common forms of "sandpaper".
The number of pieces of grit stuck on the backing paper determines the coarseness or smoothness of the sandpaper but the title of the paper also refers to the size of the pieces of grit.
It is widely believed that (for example) a 120 grit paper has 120 pieces of grit stuck to it for every square inch, but it is not quite as simple as that.
A piece of 120 grit paper has approximately 120 pieces of grit stuck to it but each piece of grit has a size of between 115 and 125 micrometers (µm). The size or the particle of grit is every bit as important as the number of particles.
Using Different Grit Papers to Sand Floors
If the floor is very rough, you might need to start with a 40 grit paper, moving up to a 60 grit, then 80 grit to 100 grit and finishing off with a 120 grit paper for a really smooth finish.
Parquet flooring should be sanded at 45 degrees to the grain using sandpaper with a grit value equal to the quality of the surface of the floor.
Hoover the floor regularly as you sand.
Trying to get to a smooth finish too quickly will be counter-productive as a fine grit paper, used on a rough floor, will very quickly wear the grit down and cost you a fortune in paper.
Moving through the grits will balance the floor out and be much more cost effective. If you sand in the direction of the grain with parquet flooring you stand a good chance of cupping the blocks.
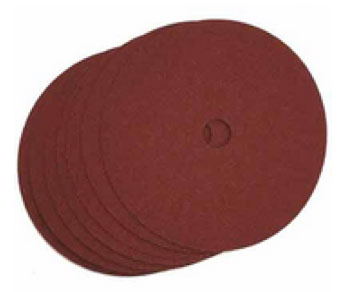
Sanding discs for floor sanding have different grit ratings
How to Sand Down a wooden Floor or Floorboards
First use a nail punch and punch down all the nail heads to about 1 eighth of an inch below the surface. If you do not do this the nails will rip your sandpaper to pieces as it spins around.
In order to sand your floors evenly and to a top quality finish you will need to make sure that you hire a decent machine, preferably a fairly new one. Most reputable hire centres will only stock and hire out decent machines.
The cheaper and older sanders tend to miss sections of flooring and also create a huge amount of dust!

Nail punches take floorboard nails below the surface
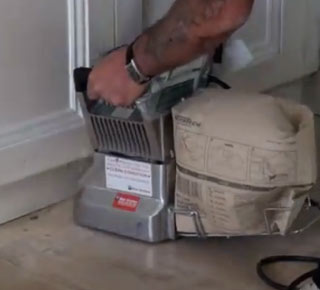
Belt sanders are used for the edges. These sanders are virtually dust free because of a huge dust bag, or collection unit, incorporated into the design. You will get a drum/roller sander which has the sandpaper attached to a big roller.
To apply the roller sander to the floor, its necessary to tilt the sander up and down to make contact. This can, in inexperienced hands, lead very easily, to huge gouges in the floor.
Most belt type sanders use sandpaper on a belt which is operated so simply by a clutch type lever.
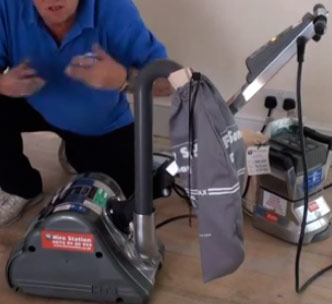
Hire a drum sander from DIY Doctor
Health and Safety When Sanding Timber Floors
You will need a large sander for the main area, and one for the edges. For stairs you will just need the edge sander.
These machines may be 110 volt and require a transformer, which you should be given at the hire shop, if not, please request one.
You will also need to buy some “throw away facemasks” because, despite great dustbags, the fine sawdust can get quite thick.
If you hire your machine from the DIY Doctor hire centre you will get face masks and disposable gloves sent with the machine.
The machines are very powerful, they have to be to give you the kind of surface you need. You must remember when using them, not to leave them in one place for one second too long, they will eat the floor. Keep them moving for a nice, even finish.

Wear face masks to sand timber floors
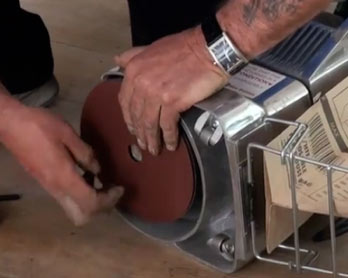
Changing Sanding Sheets on Floor Sanders and Drum Sanders
You need now to fit the 40 grit papers to both machines. Tilt the roller back so the paper is off the floor and press the trigger to get the feel of the machine. You can see how this is done in the video at the foot of the page.
How to change the paper on a floor drum sander
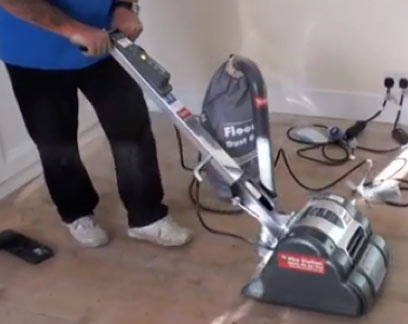
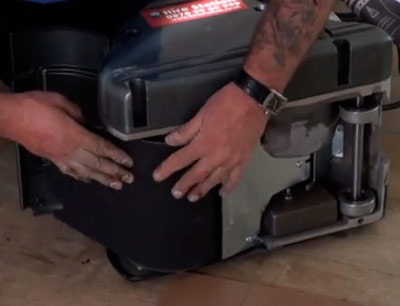
Drum sander positioned on floor, ready for sanding
Lower the floor sander gently and let it pull you along at a steady rate. You can stop it any time you like so don’t get into a panic when you get to the end of the room, just turn it round and come back. It is always better to sand with the grain than across it.
For floorboards heavy with varnish or paint the sander should be applied to the floor going diagonally across the grain until all of the paint or varnish has been removed. When this has been achieved, start sanding with the grain. Under no circumstances should you use a sanding machine at right angles to the wood grain in the floorboards
Filling Gaps in Floorboards
If you have gaps in the floorboards that you do not want, see our filling gaps in floorboards project. Please remember though, when you varnish or stain the boards afterwards, the joint will come up a slightly different colour than the rest of the floor because its composition is different.
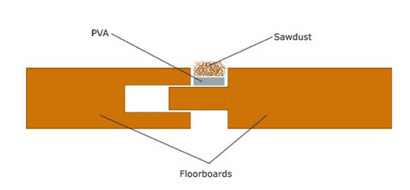
Gaps between floorboards can be filled in a variety of different ways
Using an Edge Sander up to the Skirting Boards
Keep at it with the large drum sander until you have the main area sanded down to the new wood, there will probably be a few undulations in the boards, which will prevent you getting the big sander into some of the marks, but you can get them with the edge sander later.
Now use the edge sander to get close to the skirting boards and to remove and dips, crowns, warps, marks or scratches mentioned above.
Getting to the skirting boards with an edge sander
Change the paper to 80 grit and repeat the process and finally with the 120 grit.
These final passes are really to erase the scratch marks made by the first pass with the 40-grit paper. When you are happy that the floor is as smooth as you can get it, you are ready to apply the finish coat.
Hoover the floor completely, then leave for a couple of hours and repeat to ensure that you have removed as much dust as you possibly can.
Changing the sand paper on a flooring edge sander
The Edge sander is a disc sander which will take the sandpaper disc right up to the very edge of the floor. An edge sander will have a couple of small wheels on the back of the machine which allows you to tilt it back to lift the disc from contact with the floor.
care must be taken with the edge sander as the discs are very powerful and they can gouge lumps out of the floor in no time at all.
Edge sander taken right up to the end of a room
For those of you who are in any doubt about how dusty this job can be if you do not use the modern up-to-date sanders take a look at the photo below. This is a real job done by real people in a real house!!
Apparently the dust got into every room in the house and took weeks to get clean. Thanks to Katie for the photo! Apologies for the poor quality of the image but the camera man could not see a thing!

Older sanding machines may be very dusty
When you are sure the place is dust free, give the floor a wipe over with a rag soaked in white spirit. Wear gloves for this. This will clean up any surplus resin that has come out of the timber and generally de-grease the floor. Allow the spirits to evaporate for at least a couple of hours.
As you wipe over the floor you will also be able to feel just how smooth and flat it is. If you notice any high or low points these can be rectified easily now. If this is the case, you can hand sand these.