What is a Strimmer or Brushcutter?
A Strimmer is a power tools that uses a nylon line which rotates very fast to cut and trim grass. The term “Strimmer” is actually a brand name created by Black & Decker to describe Grass or Line Trimmers. In Australia they are commonly known as “Wipper Snippers”.
A Brushcutter is a very similar power tool to a strimmer but it has a metal cutting blade instead of nylon line to cut with. This means that it can cut through more than just grass, as their name suggests. They also have to have a more powerful motor to drive them.
It is possible to purchase dual purpose trimmers and brushcutters which can be operated with either a nylon grass cutting line or a brush cutting blade.
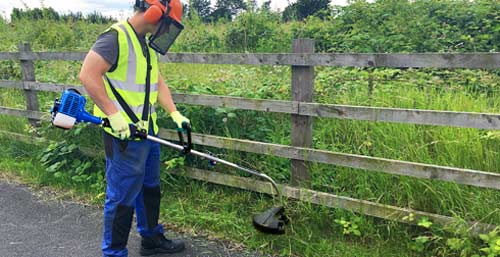
A grass strimmer in use – Image coutesy of SGS Engineering
Types of Strimmer and Brushcutter
There are only three types of Strimmer or Brushcutter available:
- Petrol – these are the most powerful type. They generally have a two stroke engine to power the head which can have a nylon grass trimming spool or a brushcutting blade attached. These are for heavier duty clearing work where there will be no electrical power available. The power of the motor will be determined by its capacity (cc); this will typically be between 25cc and 60cc
- Corded Electric – These use mains electricity to power them. They have the obvious constraint that they need to be used near a power socket and you have the inconvenience of working around the cable. They will be lighter and cheaper, but will not be as powerful, although some models will be capable of working a brush cutting blade
- Battery Powered Electric – These Strimmers are the least powerful and are very unlikely to be able to support the use of a brush cutting blade. The battery means that they can be used away from a power source, reducing the inconvenience of working around the flex. Charging can be a problem so you either have to have sufficient batteries or charging facilities for extended use
There are some hybrid electric trimmers that can use both mains power and batteries. This offers the benefits of both forms of electrical power.
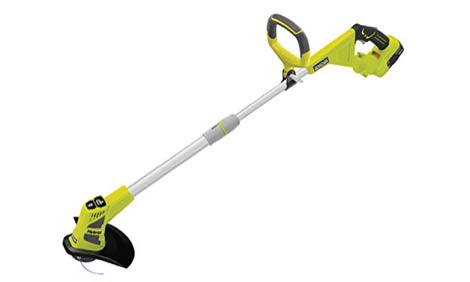
Ryobi ONE+ Cordless Hybrid Grass Trimmer with 1.3 Ah Battery, Charger and Cable – Available on Amazon here
The other main options for your choice of strimmer or brushcutter are:
- Head – Brush cutter head or line spool? If you are only using the tool for trimming grass and edging work you will not need a brush cutting blade, so you do not need a larger, heavier and more expensive tool that can accommodate a brush cutting blade. The brush cutting blade can be metal or plastic, which is sometimes referred to as a Polycut
- Handles – There are “Handle Bar” or “Cow Horn” handles and there are Looped handles. Looped handles are generally found on lighter less powerful tools and they allow finer more accurate work. The larger cow horn handles are used for line trimmers and brush cutters which will allow an easier scything action and you to be able to work on larger areas more efficiently
- Shaft – The shaft between the motor and the head can be bent or straight. A Bent shaft is only possible on lighter less powerful strimmers and very unlikely on a brush cutting head. The bent shaft allows the head to be manoeuvred with more precision for finer jobs
Parts of a Strimmer and Brushcutter
The parts found on most types are detailed below. Although the example is a petrol power type, most parts will also feature on their electrical counterparts:
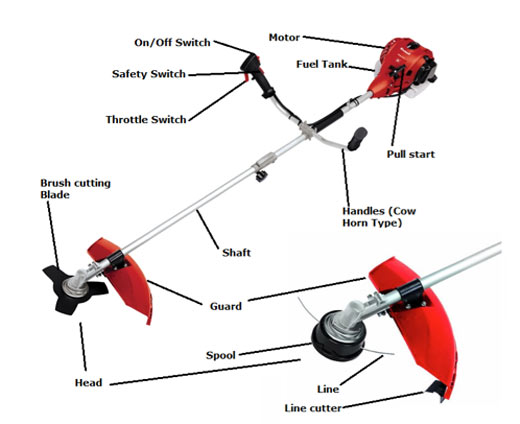
Diagram of the common parts of Strimmers and Brushcutters
Here are the parts of the strimmer explained in a little more detail:
Motors and Engines
This can either be electric or petrol, as we explained earlier (a petrol motor is show in the diagram above). This will be the heaviest part of the tool, so ensure that it is not too heavy for you.
Petrol motors are typically between 25cc – 60cc and are 2 Stroke, which means that they take normal unleaded petrol mixed with 2 stroke engine oil. This helps the engine to work, without cutting out, when it is moved around at almost any angle.
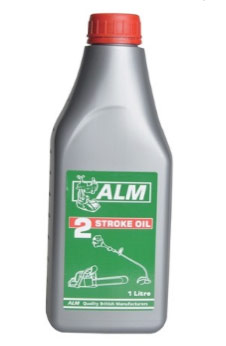
2 Stroke Oil – suitable for Strimmers and other Garden tools
Pull Start and Fuel Tank
For a petrol motor you will need a pull start and a fuel tank. There will also be a choke to enrich the fuel mixture for starting when cold. You may need to use the priming bulb to pump through some fuel if the motor ran out of fuel.
It is normal to take several pulls to get of the pull start to get the motor going. The fuel tank should not be left full when the stimmer is not being used for long periods. (See below for maintenance and storage information).
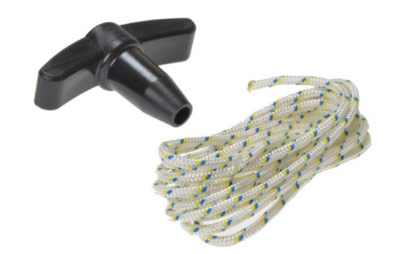
Replacement Pull start with handle and cord
Start, Stop and Other Controls
There will be a start switch on all types. For electric models you simply need to flick this on to use the tool, but for petrol models this needs to be switched on before you use the pull start cord, or the motor will never start. This is the switch to stop the motor.
Most strimmers will have a throttle switch which will control the speed of the motor and therefore the speed of the head, whether it has a nylon trimming line or it has a brush cutting blade. This allows you to increase the speed that the head is turning when cutting and slow it when idle or cutting very light vegetation.
Most grass cutters of this type will have a safety switch which needs to be pressed to reach the throttle. Typically this engages the head while the motor is running to turn the head, and if not pressed stops the head turning. This means that should you fall over or lose control of the handles then the head will no longer be lethal.
Handle
As we have described previously, there are different types of handle designed for different purposes depending on the type of strimmer of brush cutter you need. Normally, this is where the controls will be found, hopefully in an ergonomic position (e.g. easy to reach), or it will be less comfortable to use the tool if you have to strain to operate the controls. The handle should reduce vibration and be positioned so that you can easily work with the tool without being strained or overbalanced.
Shaft
This is the “pole” that connects the motor at one end to the head as the other. They can be straight or bent depending on the type of trimmer, but most can be separated into 2 (or possibly more) parts to make storage easier.
Strimmer Head
This is the “business end” of the strimmer. It is fitted with the cutting option of choice if that choice is available; either a spool with nylon/plastic line or a brush cutting blade.
Cutting Guard
This is designed to protect the user from flying debris what will inevitably be thrown up buy the head when it is in use, regardless of what cutting option is fitted. This should face you and come between you and the head.
Spool
This is attached to the head of the grass trimmer to store that trimming line. If more line is needed it can be taken from the spool.
Generally this uses a “bump system” where the spool can be bumped gently on the ground while the strimmer is in use to release a little more line.
Trimming Line
When this spins around it cuts through the grass or vegetation, hence their alternative name; Grass Trimmer or Line Trimmer.
The line should be at the correct length; if it is too long it may strain the motor and too short it will not cut effectively.
The line will wear away so more line will need to be extended from the spool from time to time. On most modern strimmers there is a bump system that allows this where you simply tap the base of teh head on teh ground to allow more line to extend.
Eventually you will need to get new line; these come in different sizes and thicknesses so it is important to check your instructions that you purchase a compatible line.
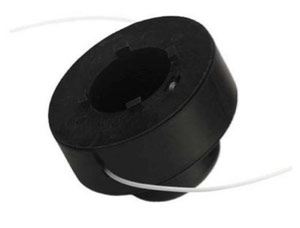
Trimming Line and Spool
Line Cutter
This is a little blade that is attached to the guard which actually cuts your trimming line. This is to stop too much line being released when the spool is bumped as if the line gets too long the motor will not be able to efficiently turn the head, or worse the line get tangled or cuts something it shouldn’t.
Brush Cutter (Blade)
If your Trimmer allows the use of a brush cutting blade or you have a dedicated brush cutter, then you will use this type of blade to cut through tougher vegetation such as brambles and bracken.
The blades can be plastic or more typically metal and as I’m sure you can imagine, the metal blades tend to be tougher and more sturdy.
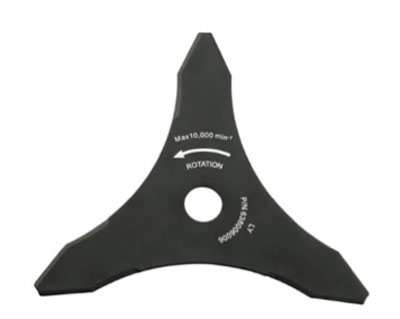
Brush cutting blade – 26 cm (made by Ryobi)
Harness
Larger strimmers and brush cutters will always come with a harness. This is worn by the operator from which the tool is clipped and hangs. This takes the weight of the strimmer so that you only need to guide the cutting head to where it is needed.
The harness should be fully adjustable so that you can make sure that it fits and the tool “hangs” at the correct height. It should be balanced when clipped so that it does not need any effort to put the head in a good cutting position.
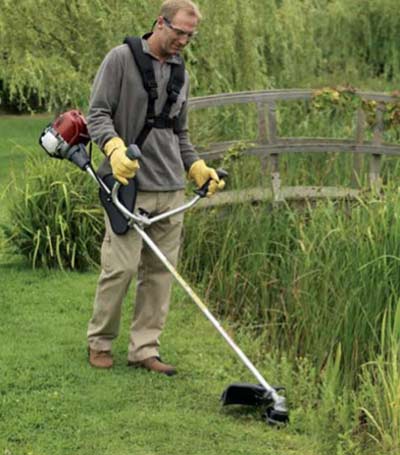
Stimmer with harness – Image courtesy of Honda
How Does a Brushcutter or Strimmer Work?
Basically, the blade or nylon line spins and cuts through the grass, weeds and brush. The faster it spins the more effective that it will be, and remember that the tips of the blades or the end of the line will be spinning fastest so these will be the most effective cutting points.
The other thing to remember about these machines is that the line is held taught by the spinning motion of the spool, and centrifugal force. Therefore the faster the spool turns, the more taught the line will be and the more effective it will be at cutting.
Some turn their cutting head clockwise which means that the grass and debris will be mainly thrown out to the right. This makes it more effective to cut using the left hand side of the blade so a left to right cutting stroke will be more effective as you will not be cutting through the cuttings as they are ejected.
If yours turns anti-clockwise then the opposite will be true.
How to Use a Trimmer or Brush Cutter Safely and Efficiently
Like most power tools, practice is what is needed to get really good at using them, and a Strimmer is no different. The more you practice the more confident you will be also.
Despite their ease of use and the fact that they are a great tool to have in the arsenal, they can be a dangers tools, so ensure that you read the safety information below, and also the manufacturers manual that should have come with the tool.
There are no hard and fast rules about how you have to use your trimmer but there are four recognised techniques that are used. They may be called different things by different people, but the principle is the same.
The 4 strimming techniques are:
- Mowing or Edging: This is where you use the strimmer to create a nice tidy looking mown area, particularly when edging a grassed area or you need to trim small odd patches of grass. Keep the spool parallel to the ground and then walk the head over the grass to be cut at the right height. It will take practice to get a really neat job, and stones and debris will be thrown up. It’s probably best to start at a longer height and then as you get more confident and practised lower your cutting height until you’re happy
- Trimming or Tapering: This technique allows you to trim around objects so that they do not become overgrown while leaving a neat blended edge to the grass around. This time, the spool should be held at an angle, around 30° is about right, but this depends on what you want and are comfortable strimming. The end of the cutting lines should be tilted into the object or tree that you are trimming around. This should give you a nice tapered edge
- Weeding or Screeding: This is where you use the trimming line to quickly cut off weeds growing through a patio or paving. The aim is to cut the weeds as tight to the patio surface as possible without wearing out your line too quickly. This technique requires a light touch; angle the line so that it is just glancing off the paved surface and then bring the head to speed and swing it over the weeds.
- Scything: This technique is ideal for brush cutting and grass trimming when you have longer grass or vegetation to deal with. A powerful, ideally petrol, machine is required. Ensure a sure footing and swing the head in a gentle dipping motion from left to right in front of you (or right to left for an anti-clockwise turning head). This means that the trimmings will fall on the cut area. If the grass and vegetation is very long and thick, then it might take two passes. Use the first one to take the top off and the second to cut it down to the height you need
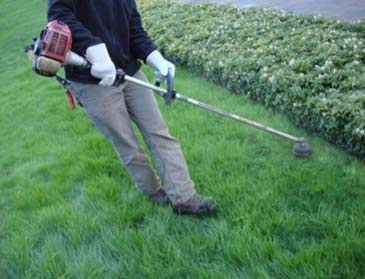
Trimming the edge of a lawn with a Strimmer
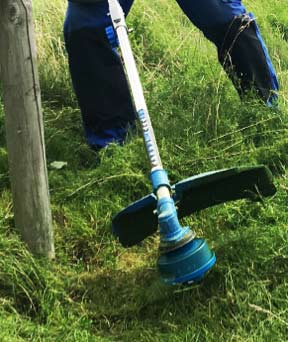
Tapering or Trimming Cuts with Grass Trimmer – Image courtesy of SGS Engineeing
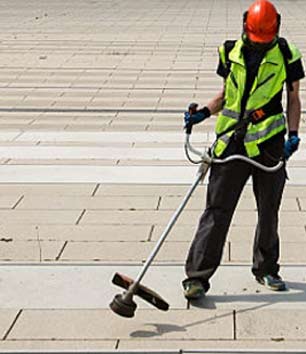
Weeding paving cracks with a strimmer
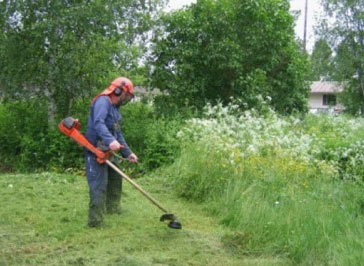
Scything long grass with a Trimme – Image courtesy of Essex Gardener
When trimming large areas it is recommended to work in squares and work around the edges of the square trimming a line as you go, until you reach the centre. Swing the head of the grass cutter in a scything motion as you go.
If you are working on a slope then it is most effective to work is straight lines across the face of the slope. It is better to to cut in the optimum direction (depending on the way that your head turns) and then walk back and start again on the next cutting line in the same direction.
When trimming around trees and delicate objects, use the guard to protect the object from the line if possible.
Common Hazards of Working with Strimmers and Strimmer Safety Information
There are a number of possible hazards that you should be aware of when working with a Strimmer or Brushcutter. Knowing about them will help you avoid them.
Here are some of the most common potential dangers that occur and tips on how you can avoid them:
- Flying Debris: The head turns very fast and will flick our debris and stones. Ensure that you have suitable protective equipment and clothing to as you do not get injured. (See our list of recommended kit below)
- Other People: When you are working with ear protection and the noise of the motor going you may not notice other people or children approaching. Keep an eye out at all times, and stop regularly to ensure no one is near your danger area
- Noise and Vibration: Petrol machines are noisy and will affect your hearing if you do not protect it. The motor will vibrate so you should consider wearing gloves to dampen the vibrations and take regular breaks
- Trips and Falls: Try to ensure that you have a sure footing at all times. There should be a safety switch, but it better to take a little extra care and not fall. Also ensure you are wearing suitable clothing to protect you in case you do fall or trip
- Poisonous sap and Poo: Irritating chemicals in plants and animal dropping will be flicked up. It’s not pleasant so watch out and try and avoid them, and wear suitable cloths.
- Power Cable: Watch out for the cable if you have one. Keep the flex over your shoulder so you can’t trip over it, or cut it. You should always ensure that you are protected by a RCD plug which will break the circuit if you do accidently cut the cable.
- Wildlife: Not only will it give you a jump when something suddenly appears, you probably don’t want to hurt any wildlife in your garden. You should walk the area before you start to scare any lingering animals away, and keep an eye out when you are strimming
- Fumes: Petrol fumes are not pleasant and are highly flammable. Make sure you are working in a ventilated area particularly when assembling, refuelling and starting your strimmer. Wipe down spillages and don’t start the tool in the same area that you refuelled it in. Allow the engine to cool before refuelling
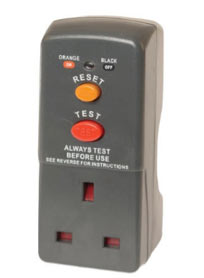
RCD Safety Plug
Using a stimmer takes concentration and physical effort. You need to take regular breaks and any time you feel tired you should stop rather than take a risk and operate it when you are not fully focused.
Make sure that you are familiar with the operating instructions for the particular machine you are using. Check that the machine is well maintained and serviceable before you start to operate it.
Before you start using the strimmer, make sure that the area you are working in has been prepared. Move all garden furniture, shut away any pets and quickly check the undergrowth for anything that shouldn’t be there or might be damaged.
Safety Equipment
There are some pieces of equipment that we would recommend that you wear when operating a Brushcutter or Strimmer:
- Ear Protection
- Goggles, Safety Glasses or Visor
- Long trousers
- Sturdy foot wear, ideally with a steel toe cap
- Gardening style gloves
Essential Maintenance and How to Put Your Petrol Strimmer into Winter Storage
There are two areas that you will really need to look at; the motor and the head.
At the end of the season there are a few things you should do to ensure that your strimmer will work the following spring. You should obviously give the whole thing a good clean and make sure that it is not damp.
Drain the fuel tank and then start and idle the motor until it stops; this will ensure that there is no fuel left in the motor.
Before starting the motor the following year it is worth checking the spark plug; the electrodes should be a light reddish or brown. If they are not they should be cleaned or replaced.
If you have a metal blade, you should check it and sharpen it before oiling it to protect it from rust over the winter.
Nylon lines should be removed and stored in a cup or small bowl of water. This will keep it subtle for the next season.

