A varnish is a finish and protecting film that is typically associated with wood, but can be used on other substrates also. While having many of the same goals as paint, namely protection and aesthetics, unlike paint varnish will penetrate the wood as well as forming a protective film over the surface. Varnishes are not coloured like a paint.
In this project we focus on varnishes, and if a colour is needed, stains. We will explain when and how to use your stain with your varnish to get the best finish.
Varnish Ingredients – What Makes Up Varnishes?
In essence, varnish is basically a paint without the pigment applied to it. The majority of these are polyurethane based resins and are solvent based (similar to oil paints). Acrylic varnishes, although water based, are becoming more popular for their environmental and health benefits.
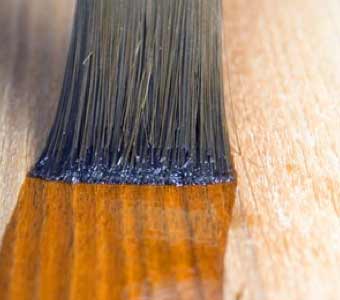
Varnishes protect and provide a beautiful finish – Image courtesy of Boat Wood Finishing
Like paints, there are three main constituents to varnish:
- Varnish Oils: This is the ingredient that will cure and/or harden on exposure to the air to form the protective coating that a varnish provides. Varying the proportion of (and types of) oils to resin affects the properties of the varnish, from high gloss, hard but brittle varnishes used on furniture to softer, flexible and weather resistant types that are better for outdoor use. The choice of oil will have an effect on the eventual “look” of the varnish. Some oils can have some colour which will tint the varnish. The gloss of the varnish will be determined by the oil, although additives known as flatting agents can be added to reduce the sheen
- Resin: This is the component that adds the strength and body to the finished varnish. There is a huge range of compounds from natural products such as tree resins and even insect secretions to organic chemicals such as polymers and plastics that are used as varnish resins. Like the oil the choice of resin can affect the varnish so resins that do not colour the varnish are favoured. The way that they react or act with the oil will have a bearing on the properties of the varnish
- Thinner (or Solvent): This is the ingredient that thins the oils and resins to allow the varnish to be applied easily. Having done its job it should evaporate and allow the resin and oils to cure and harden. The thinner can be a range of solvents, such as turps or white spirit. Water can be used in some varnishes
The more thinners there are the more liquid the varnish will be, which is not necessarily a good thing, unless the varnish is to be applied by spraying which will need a thinner mixture. A thicker varnish will be more viscous and allow a thicker more durable coat.
Similar to paints, varnishes are also available with a satin/silk or high gloss finishes, either clear or with the addition of a very small amount of colour. This will be determined by the choice and amounts of oils to resin used in the mix, but flatting agents are often needed too to take off the gloss. Generally varnishes are clear, and a stain is used before applying the varnish, if colour is needed. Varnishes with added colour are often intended to enhance the appearance of wood, or even give it some extra colour, which is easier and quicker that staining and then varnishing in t two step process.
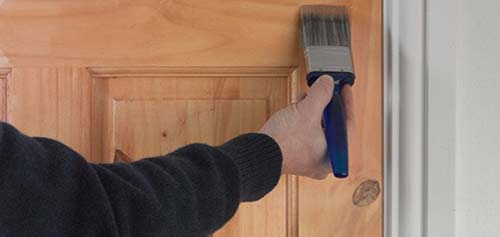
Varnishes can come is gloss, satin and matt finishes – Image courtesy of Wickes
How a Varnish Hardens or Cures
There are essentially two ways that varnishes harden, and it is very helpful to understand them:
- Immediate Hardening: Some varnishes harden immediately that the solvent evaporates. In the absence of the solvent or thinner the resins and oils become dry and solid. When we say immediate hardening, the solvents will take several hours at least to dry, but when they are dry then at that point, immediately, the varnish is hard (as it will ever be) and ready for use
- Gradual Hardening: These are varnishes where there is a ongoing reaction between the oils and resins after the solvent has evaporated, which make continue for several days in some cases, before the varnish is hard and fully cured. In this case the exposure to the air causes oxidation and polymerization which may occur over a series of processes and take a few days
As we have already discussed the different ingredients or component parts of the varnish will have the biggest influence over these hardening processes and the time it takes. Also there are a range of additives that are used to affect these properties and others favourable properties such as colour, flexibility, UV protection and many more.
The biggest factor under our control (to a degree) is the temperature and humidity, so this is worth considering. Read the instructions on the specific varnish you’re using for further guidance, however as a general rule of thumb higher temperatures and lower humidity will speed up curing times. This might not be as good a thing as you think, because if a varnish hardens too quickly it might become brittle, which is why we refer you to the instructions.
How to Apply Varnish – Tips for a Great Finish
Before you start to apply any varnish, ensure that the surface is well prepared; varnish accentuates rather than hides marks, unwanted stains and bumps. Sand the surface down with a medium or course grit sandpaper before filling any cracks. Then sand down again with a medium grit paper. If you are sanding and varnishing a floor then have a look at our project and videos on sanding floors here.
Varnish is also its own primer and undercoat, although in some cases it is better to thin the first coat with roughly 10% white spirit (for solvent varnishes) and water for water-based varnishes. This is particularly true if you are using a polyurethane varnish. In most cases it is also better to apply this with a lint free cloth and you are able to rub the varnish into the wood grain better than you could do with a brush.
Once the first coat has been applied and it has dried, it then has to be keyed (rubbed down lightly) and a second coat is then applied (without dilution).
Dust and varnish don’t mix, which is a shame because all the sanding before applying the varnish will inevitably create a lot of dust. Give it time to settle and get rid of as much as possible; if you apply your varnish in a dusty environment it will stick in the drying varnish potentially ruining the finish. If this happens you will have to sand it down gently with a fine grit paper and then apply another coat.
Unlike paint, varnishes and stains are designed to soak into the wood. You can even apply a clear varnish to the stain to improve the finish and also make it more durable. These are also available in solvent and water based variations and also in a variety of colours and shades.
Varnish can be applied with a brush, which is more typical, or a roller. If you are planning to use a roller use one with a short pile. See here for help on choosing a roller. Apply with the grain to get a smooth and even finish.
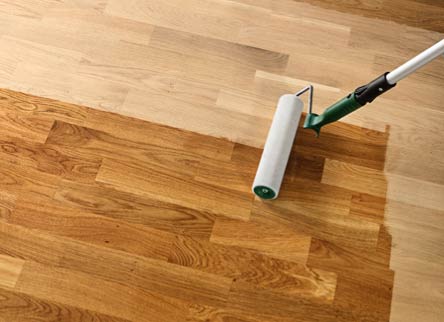
Applying varnish with a roller – Image courtesy of Bona)
Different Types of Varnish Explained
There is a huge range of different varnishes out there and different manufactures will call them slightly different things to make it even more confusing.
Here are the most common types of varnish we think that you’ll find and when you might use them:
- Acrylic Varnish – These are quick drying and non-toxic water based varnishes which generally have good UV resistance meaning that they can be used outside as well as inside. They can be used on other materials other than wood, so are more versatile than many varnishes. They are clear, highly transparent and do not tend to yellow, but they do not tend to penetrate into the wood as well as oil based varnishes. Being water based you can clean up with water, which makes then very user friendly, but they sometimes do not spread as uniformly as other varnishes. They are generally available in gloss, satin and matt finishes
- Exterior Varnish – As the name indicates these are varnishes which have been specially formulated for use outside. They have added UV protection so that the wood beneath the layer of varnish is protected. They are often microporous which allows the wood to ‘breathe’ and have an added fungicide to prevent mould growth. They are likely to be very similar in formulation and performance to a yacht varnish, being relatively flexible, but slow to cure, even if they are touch dry relatively quickly
- Polyurethane Varnish – These varnishes give a really hard surface and are often used for floors and areas which are going to get a lot of wear and tear. They are also heat resistant too and will give a clear, tough finish, which is available in gloss, satin and matt finishes. Polyurethane varnishes do not tend to penetrate into the wood so are often primed with a oil based varnish or a thin shellac solution. Do not try and put an oil based varnish on top of a Polyurethane varnish as it will not bond. In addition to the excellent hardness and durability, they are resistant to spills of mild acids, solvents and other chemicals. The do not yellow much but they are not resistant to UV (sun) light, so if used outside try to find one with added UV protection or it will deteriorate quickly
- Yacht Varnish – Also called marine (or spar) varnish, this is a varnish that was originally designed for use on boats where the primary purpose was to ensure that water did not penetrate to the wood. To achieve this the varnish had to be highly flexible; a rigid, inflexible varnish might crack as the wood bent and flexed under the strain of the sea and these cracks could allow water to penetrate. Originally these did not have much gloss, as appearance was a secondary feature, and little UV protection, but now most yacht varnishes have a high gloss finish based on tung oil and phenolic resins. They are ideal for use on outside timber, but not for surfaces that are going to be walked on
- Alkyd Varnishes – This is a terms that you will sometimes hear, and most varnishes will contain an alkyd of some kind. They are modified natural or vegetable oils.
- Shellac – This is not strictly a varnish, and is the main ingredient for French Polish for furniture. It is secreted by a beetle in South East Asia and usually bought in flakes which are diluted with alcohol before use. The ‘de-waxed’ version of shellac, which has under gone a process to have most of the waxy substances removed, can be used as a primer for other varnishes, such as Polyurethane and Acrylic which do not penetrate well into the wood. Shellac can be clear, or there are a range of shades
- Lacquer – Again this is not really a varnish and is often used to describe the process of applying a finish by spraying. It is a quick-drying, solvent based (rather than alcohol as in the case of Shellac) finish applied by spraying. Acetone is the usual solvent base, or “Lacquer Thinner”. Once applied, lacquer can be removed using lacquer thinner. It does not cure or polymerize like a true varnish will
- Drying Oils – Again not varnishes, but simply the oils ingredient of the varnish without the resin and solvent. Because it is only the oils they take a long time to dry – often weeks for raw oils. This can be speeded up by boiling or treating to part polymerise the oil, or adding additives. The most commonly used are Tung oil and Linseed oil
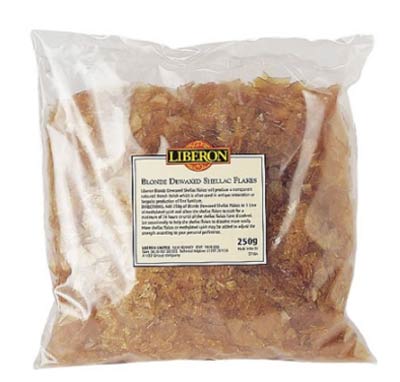
Some dewaxed shellac flakes as they are typically sold
Much like paint, varnishes have finishes that vary from “Gloss” through “Satin” to “Matt”. This describes the sheen of the finish and how reflective it will be. Gloss is the shiniest and smoothest, while Matt describes a dull and un-shiny finish.
Choosing the Right Varnish
Thankfully nowadays all commercially produced varnishes are of exceptional quality and will perform very well in the right setting.
Follow the description on the tin; interior varnish should not be used outside because they will not have suitable UV resistance and characteristics to withstand the elements. Floor varnishes might be too hard and prone to cracking if use on exterior wood that is likely to need some flexibility, and it is likely to degrade in the increased UV light. A yacht varnish will not be hard enough for use on a high traffic floor and wear out faster than it should.
Remember that varnish is a mixture of Oils, Resins and Thinners, with a range of additives that has been developing over hundreds if not thousands of years. A quick search of the internet and you will be able to find recipes for making your own varnish!
Hopefully with a good understanding of what the various elements do, you will understand how the various characteristics that the manufacturers’ have developed in their varnishes can be best used.
Wood Stains and Using Stains
A (wood) stain is very similar to a paint; it is designed to colour the substrate, although it does not leave a protective film as it is designed to be absorbed. Because it is absorbed, it means that the grain will be seen through the colour and the extent of this is largely dependent on how opaque the pigment in the stain is.
Like paints, a typical stain is made up of three parts:
- Pigment: This is the part that provides the colour. Some people differentiate between pigments which are held in suspension and dyes which are dissolved in the ‘vehicle’ or solvent. Essentially it makes little difference to the user, except that pigments held in suspension will be large molecules and will not penetrate the structure of the wood as much which will make them more opaque. The colours are generally browns and wood effects, but you can get highly colourful stains which will colour wood in all manner of colours
- Solvent or Vehicle: This is the ingredient of the stain that carries the pigment or dye into substrate. It makes the stain workable in exactly the same way as it does in paint. When this evaporates it leaves the pigment or dye in the grain accentuating it and leaving the colour
- Binder: Unlike paint this is a very small part of a stain, but is it still present. It helps to hold the pigment in the wood once the vehicle has carried it there
Make sure that the stain is thoroughly mixed before you start to apply it so that you get an even colour throughout.
Applying a Stain
Just as the process for preparing to varnish we described above, the surface needs to be prepared thoroughly. Fill all the cracks and sand down with a medium grit. Ensure that you use a filler that will accept the stain or it will show as an unstained patch in the stained surface.
As mentioned before, stains are often applied with a lint free cloth. This aids in the blending and coverage of the finish, but you will have to work quickly to blend the wet and dry edges together to avoid any hard lines and overlaps. A water based stain will also raise the fibres on the surface of the wood which in many cases also spoils the evenness of the colour.
Work with the gain rather than across it, and ensure that you do not overload your brush or cloth as this might cause drips. You want to try and get as even a spread as possible so that you get an even colour across the surface; drips will ruin this if you do not catch them in time.
Sand down lightly after the first application and if necessary apply another coat. This will make the colour bolder and darker. We would strongly recommend practicing on an off cut to get the measure of the stain before you start on the real thing, especially if you’re not familiar with using stains. Even if you are, it is important to see how the stain will work with your particular wood you are using.
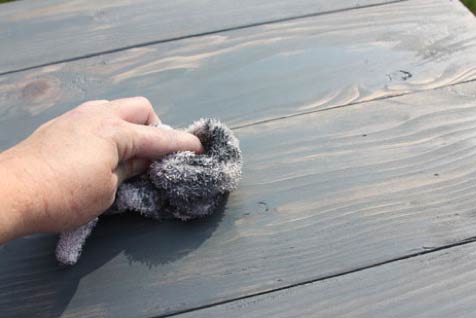
Applying a coloured wood stain with a cloth – Image courtesy of Ana White
It is possible to mix stains to make your own unique colour. Make sure that don’t mix oil and water stains; they will not mix. If you try this you will absolutely need to test in on an off cut first! That said there are a huge variety of stains available, so you can probably find what you are looking for without going to the hassle of making it.
You will always apply the stain before applying the varnish, unless the varnish already has the stain mixed into it. Allow sufficient time for the solvent to fully evaporate before applying the finishing coat of say, varnish. If it is wet or cold we suggest that you leave another 24 hours over the manufacturers’ recommended drying time to be 100% safe.
Remember any product designed to permanently stain wood will have no trouble doing the same to your skin and fingers. The solvent will not be pleasant on your skin either so we recommend that you take care using stains, and definitely use rubber gloves and overalls.
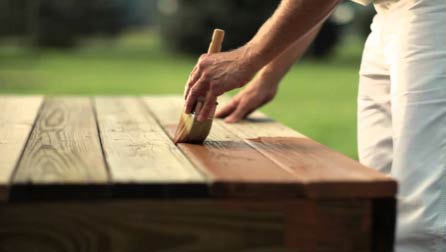
A brave man applying wood stain while wearing white trousers (and no gloves)!
In summary, the stain provides the colour and a varnish provides the hard coating to protect the surface. These two functions are achieve in a single product with paint, however paint sits on the surface, where are both varnish and particularly stains are absorbed by the surface. This means that stains in particular are a more permanent form of colouring as it will be next to impossible to remove them.

