You may have arrived at this project page thinking; Why do I need to know how to paint a panel door? Don’t I just clean it up, sand the door down and then slap some paint on? Obviously you could paint a panel door like this but it won’t necessarily result in a paint job you’re happy with.
To guarantee a beautifully painted panel door, it’s important to work through the following steps that involve the correct preparation for wooden doors, painting each door panel and vertical rail in the right order, ensuring that you paint in the direction of the wood grain and also using the correct brush for the area of the door you’re painting.
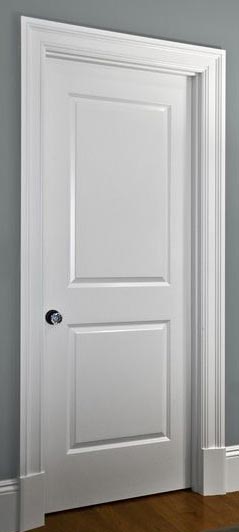
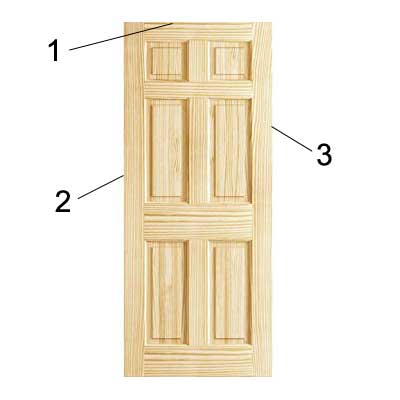
Gloss painted wooden 2 panel door
For the purposes of this project we are going to prepare and paint the door where it is, but if you are able to and have the space to do so, you can also remove it and paint your door in the garage, shed or where ever you have the space.
On the whole, as long as you take your time and follow the below instruction, then where ever you do it you should end up with a great result.
What is a Panel Door and How is it Made?
Before we start, it’s a good idea to understand what a panel door actually is and also how they are made as this will give you a little extra insight into why it’s has to be painted in a particular way.
A properly constructed wooden panel door is made up of three different sections:
- Panels – The raised panel sections in the middle of the door
- Rails – The horizontal and vertical sections that hold each panel in place
- Stiles – The 2 long vertical sides that hold the rails in place
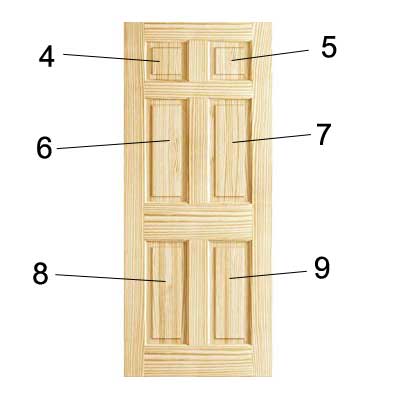
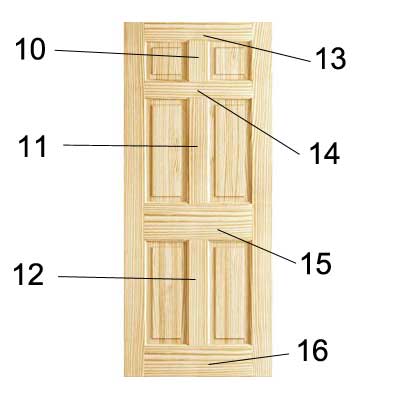
Each of the raised panel sections are separated by rails that either run vertically through the middle of each of the panels or horizontally through the middle and also at both the top and bottom.
The long vertical sections or stiles that run the full height of the door at either side hold each rail in place and in turn, also hold the door in one piece.
In a traditionally constructed panel door, the raised panel sections in the door are not glued or fixed in position and are allowed to float in position. This is to allow for their expansion and contraction.
Wooden panel door themselves are available in a huge range of different types of wood ranging from pine to oak and even pVCU and wood composite.
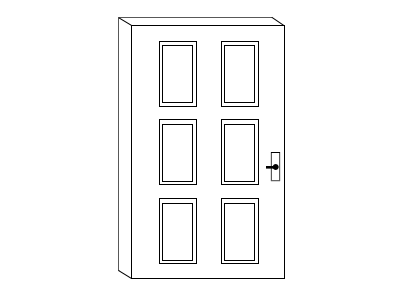
In terms of different styles and designs, traditionally a panel door is constructed with 6 panels, but it is possible to get them with 2, 4 and 8 panels.
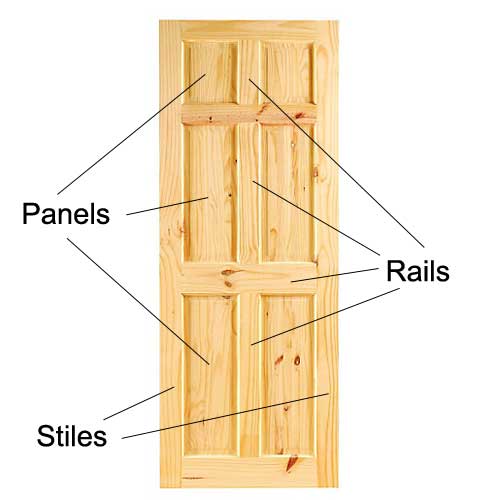
Parts of a pine wooden 6 panel door
Preparing Wooden Panel Doors for Painting
Before we actually start painting our panel door we need to get it prepped.
To make the job as easy as possible, firstly, we are going to remove each handle and also (in most cases) the lock barrel or tubular latch. In some cases you may have a roller catch or similar. If so, this will need to also come off.
Using a screwdriver or drill/driver, remove each screw from the handles, latch etc…. and put them to one side in a safe place. You’re going to need to put them back on later so don’t loose anything.
With all of the door furniture removed from your panel door, the next job is to give it a good rub down with some sand paper. This will provide a good “key” for the paint to stick to and also help to remove any surface grease and grime.
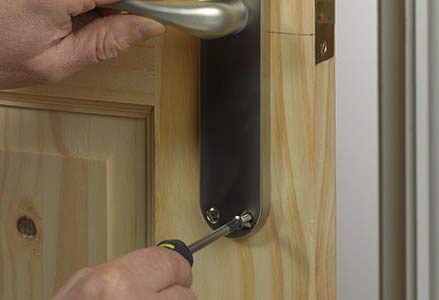
Removing the lock barrel from the door – Image courtesy of wickes.co.uk
Rubbing down is a dusty job so make sure you cover any carpets, furniture or other items with dust sheets and also close any doors to other rooms.
It’s also a good idea to have a vacuum on hand. As you rub down with one hand, follow on behind with the vacuum in the other hand. This will suck up the majority of any dust that’s created, but unfortunately not all of it.
Using a medium grade sandpaper such as a 240 grit, rub over the entire door, taking off any rough edges. Pay particular attention to the panel areas of your door and make sure you get well in to any nooks and corners.
If your panel door already has paint on it, when you’re rubbing down, make sure you smooth off any imperfections in the existing paint and also that the surface is “roughed up” enough to give a good key for your new paint.
Once you’ve finished the rubbing down, give the door a final hoover over to remove any surface dust that’s gathered and then give it a good wipe over with white spirit to get rid of any final remaining dust, debris or grease.
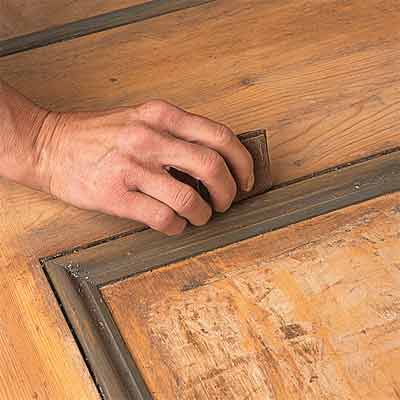
Rubbing down wooden panel door – Image courtesy of yourhomemagazine.co.uk
If there are any items that you’re not going to be painting e.g. architrave, skirting etc…. .then these areas will need to be masked up to prevent any paint getting on them. To find out how to mask up for painting correctly, see our project here.
Pro Tip: One little trick the pro’s use to prevent excess paint getting on to the hinges of a panel door when you’re painting it is to rub a little Vaseline over the hinges and any areas of each hinge you don’t want paint to get on to. Once you have painted around these areas you can then rub the Vaseline off, taking with it any “over paint”.
To protect your carpets or floor coverings, simply slide a dust sheet or piece of cardboard under the bottom edge of the door and tape it in place so it doesn’t move.
Should you Undercoat or Prime Your Panel Door?
The answer to this question really depends on the type of doors you have and what type of top coat you are using.
If your doors are brand new and unpainted and constructed of timber e.g. pine then what you are really going to need to do to get the best finish is to apply one coat of primer, one coat of undercoat (or indeed one coat of a combined primer and undercoat) and then your top coat.
If you do opt to go for the above solution then make sure that you rub down both the primer and undercoat coats (or the combined coat) before applying any top coats.
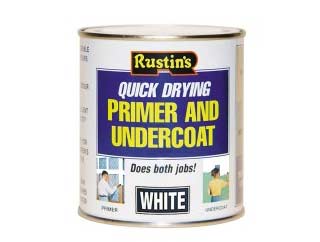
Rustins quick drying primer and undercoat
It’s inevitable that some dust and debris will find its way on to each coat and a quick rub down will help to remove it.
In terms of your topcoat, again, you have several options to go for with generally the most popular (and what some would say is the best paint for doors) being either a gloss or emulsion, the choice is really down to you and your own particular tastes, however if you are undecided on what paint type you should go for, you can find some further info here.
Essentially, the best paint for interior doors is going to be something that’s hardwearing as interior doors do tend to take a bit of a hammering, especially if you have kids, so you are going to need a finish that can take a few knocks.
One thing to note is that if you are going with a gloss topcoat then to get the best end finish you really do need to apply an undercoat.
Sealing Knots and Resinous Timber
One final point to cover here is the pesky knot! If you are using pine panel doors or have worked with pine timber in any way in the past then you should be all too familiar with knots and also resin.
As pine is a “resinous” timber, the resin in the wood itself can seep out especially from knots and other imperfections and can ruin a final finish and indeed any carpets it gets on to.
Due to the fact that the actual “knot” area itself is so dense, any paint that is applied to it does not, in most cases, soak in at the same rate as the paint applied to an un-knotted area, resulting in an almost permanent mark
In order to stop this from happening you will need to seal any knots. For help with this see this article here.
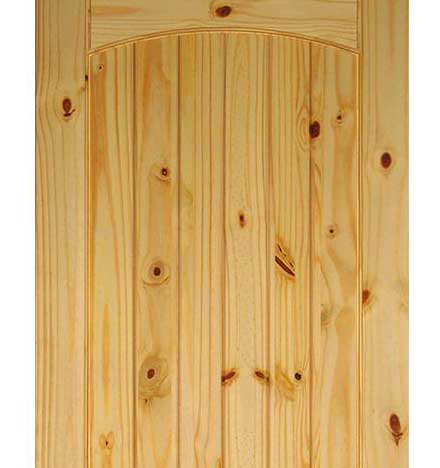
Knots present in pine panel door
How to Paint a Panel Door
How that we have prepared our door, removed any and all door furniture, sealed up any knots and resin, masked up any areas that we don’t want painted and established whether we need to apply any primers or undercoat, it’s now time to get painting!
If you are applying primer, undercoat and topcoat then you will need to work through the painting steps below for each coat.
As an initial outline of how we are going to paint our panel door, see the animated image below. It runs through each painting step from start to finish.
Stages of painting a panelled door
Brush Selection
Just one final thing before we do start, have you thought about what paint brushes you’ll be using? If the answer is no, I was just going to grab one out the she; hang on 2 seconds!
To get the best finish possible, you’re going to need a selection of brushes for different parts of the door:
- 15 – 25mm Brush: This will be used for painting around the perimeter of each panel and also the slim side edges of the door
- 50 – 60mm Brush: This will be used for painting the larger areas of the door such as the panels, stiles and rails
Instead of using the 50 – 60mm brush you can instead use a mini roller, but just be aware of any areas that will overlap where you’ve previously used a brush.
The difference between a roller and brush finish is slightly different e.g. with a brush you have brush strokes and with a roller you will have slight stipples and if you are not careful this will give a very slight “edge”.
To help in minimizing this, go for a good quality fine brush as the brush strokes themselves will be much finer and will blend in a much smoother manner.
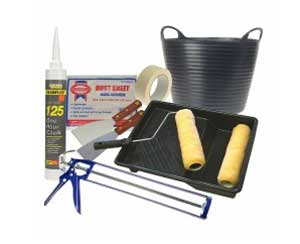
The DIY Doctor’s decorators kit including selection of paint brushes
Just to emphemphasize asise on brush quality a little more, as mentioned, a good quality fine brush will produce a better finish and will also hold it’s bristles much better than a cheap brush, resulting in a lot less coming loose and ending up stuck in your nice smooth painted surface!
Steps 1-3 – Paint Top, Hinge and Lock Edges
We are going to start our painting with the side edges of our door. Using our small brush and a step ladder, paint the top edge of the panel door ensuring your brush strokes run in the direction of the wood grain.
Take your time when painting as you don’t really want to get any paint on any surfaces we haven’t yet dealt with. If you do get any paint on these area, scrape as much excess paint of your brush as you can and swipe the paint off of the affected area in the direction of the wood grain.
With the top sorted now move on to the hinge edge and then finally the lock edge of the door, again, taking your time making sure that you cover all areas fully.
Start with the top, hinge and lock edges of your panel door
Steps 4-9 – Painting the Door Panels
Next we are going to paint our panels. Sticking with your small brush and starting with the top panel nearest to the hinge edge of the door and moving left to right as you move down the door, paint around the inside edge of the panel making sure you don’t miss anything.
Depending on the type and style of panel door you have, the panel itself may be flat or raised with a bevel edge. Make sure you get the your bush into all corners and tight spaces fully.
With the panel edges sorted now you can move on to the panel itself. Take your large brush or roller and give it a good coating, again, brushing or rolling “with” the grain of the wood until all is covered.
With your first panel finished, you can now move on to any subsequent panels until all have been given a good and complete coating.
Paint the panels of your paneled door
Steps 10-16 – Paint Middle Horizontal and Vertical Rails
Next, we move on to the horizontal and vertical rails that hold each panel in place.
The one thing here that you need to be aware of, again, are the grains of the timber. In pretty much all cases, any vertical rail timbers will have the grains running vertically and any horizontal rails will have the grains running horizontally. This is almost always the case, but check before you start.
Starting at the rail running between the top 2 panels, using your large brush or roller, give this a good coating of paint, taking care not to overrun too much on to the vertical rails.
If you do, take your small brush (wiping off any excess paint first) and then brush over the excess in the same direction as the timber grain.
With the top rail done, repeat for the remaining vertical rails. Once this is done, move back to the top and repeat for the horizontal rails, working your way down to the base of the panel door.
In the event of any overruns, use the above technique to get rid of them
Paint the horizontal and vertical rails of the panel door
Steps 17-18 – Paint Side Vertical Stiles
With all of our panels and rails now covered with a nice layer of paint, we now progress onto the final steps; the vertical stiles at the sides of the door.
Using your large brush or roller, start with the stile on the hinge edge of the door. Start at the top and work your way down to the bottom.
As with the rails, take your time around the areas where each rail joins to the stile and try to avoid getting any paint on to the already painted rail as you will be brushing against the grain and the will cause a visible edge.
With the hinge-edge done, move on to the lock edge, repeating the process outlined above.
Once this is done, you have now learnt how to paint a panel door and if you have followed each step above fully, you should now be looking at it thinking; That’s a great job!
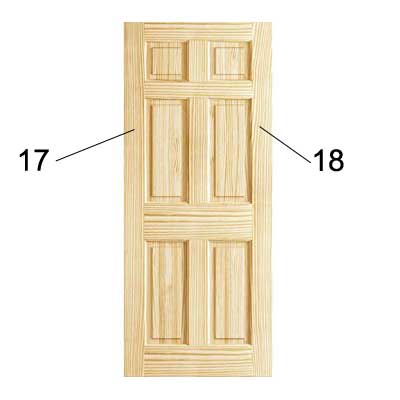
The final job is to paint the 2 vertical stiles of your panel door
One final point to note when it comes to painting a panel door is that for the purposes of this project, we have worked on the principles of painting an interior panel door but if your are painting an exterior panel door then you will also need to paint the bottom edge of the door.
This is to prevent damp and moisture from getting into the door from what would be an unprotected bottom edge and, over time, rotting it out.
To do this, the best method is to remove the door itself so that you can easily access the bottom edge and ensure that you give it a good coating of paint so that it is fully protected and able to expel any water or moisture.