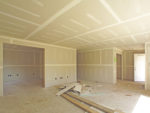
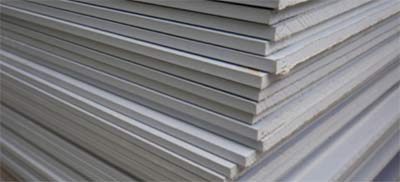
This section is all about internal walls and finishing them with plasterboard. We explain all about the different types of plasterboard that are available and when they can be used. There are also a number of options for getting your plasterboards fixed to the wall, which we outline in more detail below. We have projects which explain how you can go about each of these options to fix them yourself.
When you are fitting plasterboard to your wall, it is a good time to think about whether you need some internal wall insulation as this can be fixed behind the boards relatively easily and without too much incremental cost.
In many instances you will want to skim over the plasterboards that you have fixed. We have a section that explains everything that you need to know about plastering. This is worth bookmarking so that you can return to it once all your plasterboard is ready for skimming.
There are some differences when it comes to finishing exterior walls, so we have created a section on Render and External Finishes. Have a look at this for information on finishing the outside of your home.
On occasion you might choose to use Architectural Mouldings, Textured Coatings or Atrex. This might be for aesthetical reasons or simply to hide a very uneven wall. Or you might be looking for ways to get rid of the dreaded Artex. We have a section that covers all these topics – see here.
Before you use the projects about to find out how to work with plasterboard, it is worth finding out what are the options for internal walls, and of course what are the pros and cons of using plasterboard.
Options for Finishing Internal Walls at Home
Before plasterboard was invented back in the middle of the 20th Century, there were only really two options for finishing internal walls; Wet Plaster and Lath and Plaster. No one now works with Lath and Plaster except to make repairs (or in specific heritage buildings), so this is an option that we can largely ignore.
Nowadays there are several options that can be used:
- Wet Plaster
- Plaster boards with a skim coat
- Tape and Jointing or Drylining (US term)
The two “dry” options can be further divided by the way that the boards can be fixed, either dot and dab or on to studwork.
While this section is all about working with plasterboard it is helpful to understand the alternative, wet plastering, as this will help to show why using plasterboards has become so popular.
Wet Plastering
This give a very traditional look and feel and if often preferred in restoration projects where there is a desire or a planning requirement to match the existing building materials.
A cement or gypsum based render is towelled on to the internal masonry directly. First a key or scratch coat is applied, which is scratched to provide a key for the next coat which is called the skim coat. This is applied in a very similar way as you would an external render.
Traditional lime or clay plasters are often used particularly in older buildings due to their breathability and flexibility. These are skilled jobs so probably not for a DIY enthusiast, If you are going to do it yourself, make sure you get as much practice as you can before starting on the real thing.
Pros:
- Ideal for period properties
- Good sound proofing qualities
- Relatively quick to apply, particularly around tricky areas such as doors and windows
- Hard, durable finish
- Airtight so improved heat retention
Cons:
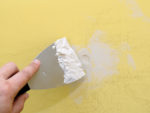
Boards and Skim
When using the board and skim approach, the plaster boast is fixed to the wall, either using dot and dab or fixing to studwork. Then a layer of skim plaster is used to cover the boards.
Dot and Dab fixing is where dots of adhesive are applied directly to the wall and these are used to fix the boards. This creates a small cavity between the wall and the plasterboards which is useful for insulation but does cause problems when it comes to fixing things to the wall, particularly heavy objects like a TV bracket.

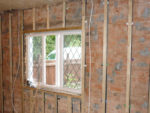
The alternative is to fix battens to the wall which can then be used to anchor the plasterboards to using drywall screws. This allows insulation to be built into the wall; we explain the options for securing the battens, insulation and boards in our project on internal wall insulation.
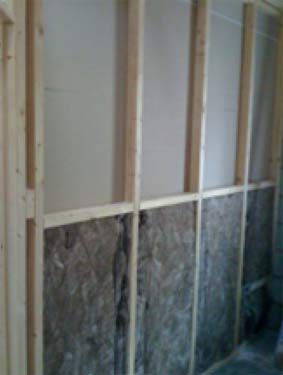
Find out how to fix the battens to your wall ready for your plasterboard in our battening project here.
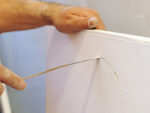
Once the plasterboards have been fixed by whichever method that you prefer, then the joints should be covered with a scrim tape, which prevents the skim plaster cracking due to movement at the joints.
Pros:
- Quick to fit
- Much shorter drying time
- Easy to add insulation
- Limited cracking
Cons:
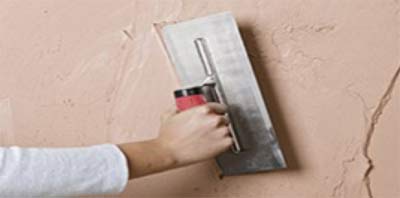
Tape and Jointing or Drylining:
This is a technique that is very common in North America, where it is called “Drylining”, a term that is coming into more frequent use over here. In fact it is a technique that is become more popular due to its ease.
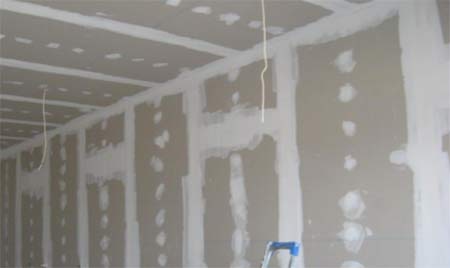
The boards are fixed as we have described above, either with the dot and dab technique or fixed to battens or studwork. The difference here is that there is no skim coat and the plaster boards is the finished wall, ready for whichever decoration you prefer.
Typically a tapered edge board is used. Once fixed the joints are taped. Then the joints and holes for any screws or nails are filled, before sanding down to a smooth uniform surface.
Pros:
- Quick – really quick
- Easy to do even if unskilled
- Cheap (as plaster is not required)
- Not messy as no ‘wet’ materials are used
- No drying time at all before decoration
Cons:
- Hollow wall feel
- Very poor soundproofing
- A painted finish is rougher and duller than a skimmed wall
- Plasterboard is more easily damaged
There are disadvantages to using plasterboard, but these are mainly outweighed by the speed and ease of use and it’s price to fit. That said the manufacturers are always looking for way to improve the boards to reduce negative aspects of using them. For example it is possible to buy sound proofing boards to improve sound insulation.