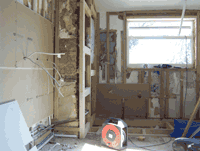
Battening a wall for plasterboard or dry lining is a great way of providing a little warmth and fighting condensation in a cold building. However, without adequate ventilation behind the board, condensation can still form on the cold wall as warm air passes through the plasterboard.
This is one of the reasons for providing a vapour barrier behind the board, or better still, using plasterboard called vapour check plasterboard which has one side coated with a tin foil to stop Vapour passing through.
For the complete insulation job we recommend using 25mm battens with 25mm of polystyrene insulation slabs (called Batts) packed in between the battens. There should be nowhere for air to settle on a colder surface, even in between the batts as Interstitial condensation (condensation forming in small gaps) can occur. Joints should be taped up and vapour check board used. See our project on types of plasterboards.
Battening for plasterboard
The battening itself is a pretty straight forward operation but for novices we do not recommend using full size sheets of plasterboard. Plasterboard can be bought in smaller, more manageable sheets of 1.220m long by 600mm wide. These are called plasterboard laths. See our project on fixing to masonry to see how to hold the battens and drill for plugging and screwing. There is a section in the project specifically for fixing timber battens.
The battens must be placed at sensible distances apart. Plasterboard comes in two thicknesses and we recommend you use the 12.5mm thickness for this job.
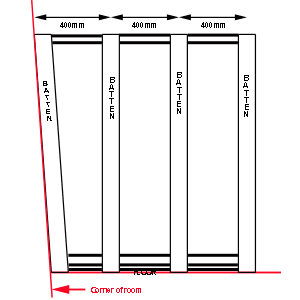
The battens need to be as close to 400mm apart as possible allowing for the fact that you need the end of a plaster lath to fall on the centre of a batten so the next board can share the same batten.
You can see more about this on our partition walls project. If the plasterboard lath is 1.22 metres from edge to edge and your first batten is in a corner, the measurement to the last batten needs to be made from the left hand edge of the first batten to the centre of the last batten.
To fix the next batten, the measurement needs to be from the centre of the last batten, to the centre of the next until you cut the last board into the opposite wall where the batten, once again sits in the corner of the walls.
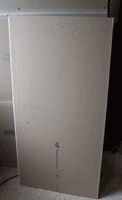
Plasterboard lath
Battens on wall
Battens in the corners of the room must follow the wall. If the wall is out of plumb, then the batten must go up out of plumb. It is important the very edge of the plasterboard is fixed and this can only be achieved if the battening goes right into the corner.
It is also important that battens not in corners are fixed absolutely upright. So the first batten to be fixed is not the batten in the corner, but a batten about 1.1m away from the corner.
This batten can be fixed plumb and then the next batten 400mm in towards the corner can be fixed plumb, and the next one 400mm from that, towards the corner can be fixed plumb too. The plasterboard can then be cut to the shape of the wall where it is not plumb but you will be able to carry on round the room knowing the other boards will be square.
Battens against windows, doorways etc should be fixed right on the edge as you can see from the image of the battens on a concrete lintel. There should never be any part of the edge of a piece of plasterboard without a batten underneath it. If edges are left loose and "flapping" about in the breeze they will quickly become damaged and the plaster will soon vibrate off them.

Battens on lintel
In the corner of a room two battens will need to butt up against each other to take the boards from either side and if you think that any part of your battening may not be strong enough then put more screws in now.
If a batten is not fixed absolutely 100% against the wall it will spring when it is hit by a hammer trying to drive in a plasterboard nail. It will even spring when the screwdriver tries to drive in the drywall screw.
Every time it springs it will loosen more and every time it gets loose, as it is now connected via laths of plaster, to other boards, they will loosen too. Do not take chances, get it right the first time.
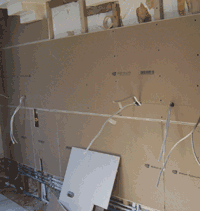
Wall battening nearly done
In the building trade we only get paid for doing a job once. If it isn’t right the first time, we have to do it again the second time….For nothing ! You soon get used to the idea that its much better to spend a little longer on it and to get it right at the beginning.
You will also need to run a batten along the top of the room to stop the edges up there being loose and the same at the bottom. We suggest two, or even three battens at the bottom as this will make it much easier to put the skirting on.
As you can see from the image, we have staggered the plasterboard joints. This is the same as laying bricks. It is not good to have one joint directly above another as it can easily lead to cracking when the plaster goes on.
See all of our related projects on the right hand side of the page to learn about skim plastering and putting electrical sockets in your new plasterboard wall.