Lets face it, wheelie bins and recycling boxes are ugly things and create a complete eye-sore when left laying around, especially out the front of your house.
In order to save yourself and your neighbours from having to look at these waste receptacles for any longer than just bin day a great solution is to construct a wheelie bin store, read on below to find out how.
How to Build a Basic Wheelie Bin Store
There are quite a few different designs and varying complexities of wheelie bin store dotted around the internet, each with its own unique features but for the purposes of this guide we are going to keep things simple and to a budget so we are going to show you how to to construct a basic wheelie bin store.
Where is Your Bin Store Going to go?
This is a key consideration! Your bin store should be placed in a location that is both easy to access and close to your property so that any rubbish can be quickly disposed of in the appropriate container with the minimum of fuss.
However if you have sorting bins in your home e.g. one bin for recycling, one for non-recyclable etc. then you may prefer to store your wheellie bin and recycling boxes a little closer to the road or area that they are emptied as in most cases you will probably only empty the bins in your home every few days negating the need for them to be close to your home.
Wheelie bins and recycling boxes, once full, can be very heavy and due to this tricky to move, especially if you have to drag them over gravel or shingle driveways or paths so in this case storing them close to their collection point is a great idea.
Ultimately it’s up to you where you store them the only real requirement is that they are easy for you to access and move.
Dig and Set First Post
Once you have a location for your bin store you can now start to dig an set your posts. For the posts we are going to use 3x 6ft 75mm x 75mm fence posts. As a standard wheelie bin is 1080mm in height (which is just over 3 1/2 feet) we will need to sink each post around 1 1/2 feet into the ground.
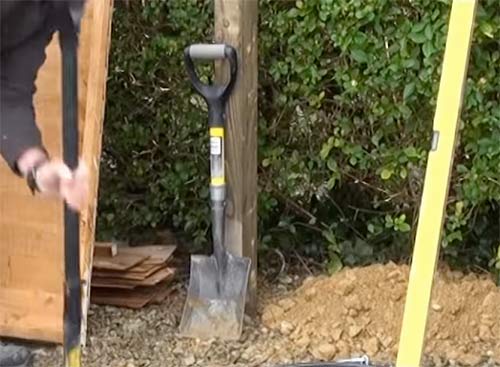
As we are building our bin store on a shingle driveway that’s been compacted we are going to use a handy tool from Roughneck Tools called a “mut”. Although it’s technically a scraper its sturdy solid construction also lends it well for breaking up compacted surfaces so that you can then get a shovel in much easier.
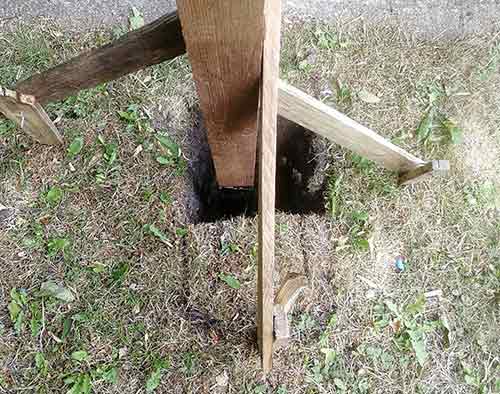
The first post hole was dug to 1 1/2 feet in depth and roughly 9 inches in width (see our project here on fence post hole sizes for more information)
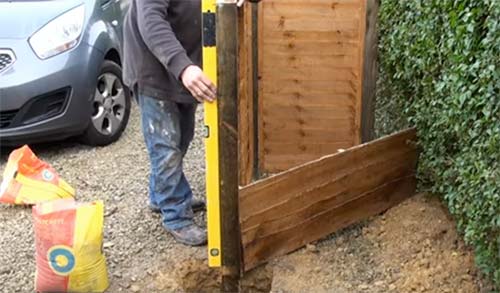
Before the post was placed in the hole the top was mitred to a 45° angle to allow water to run off so that it doesn’t sit on top of the post and rot it out. Once done it was set it the hole and leveled and then held in place by some braces. The post should sit 4 feet 6 inches above ground level.
Fence post braced and leveled upright while cement/Postcrete cures
Once the post was positioned and leveled in the hole, Postcrete was then used to cement the post firmly in place – See our project here on using Postcrete for more help.
First fence post set in place for wheelie bin store
Set Second Fence Post
With the first post now set the next task is to set our second post. This next hole is going to be half a fence panels width out from our first post so measure the width of a fence panel, this should be roughly 6 feet so half will be roughly 3 feet or just over (measuring from centre batten out to edge of side batten).
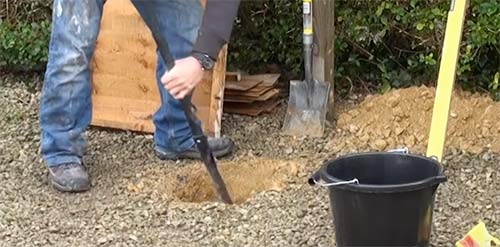
Measure 3 feet directly out from your first fence post, ensuring you are square to it and then mark this point and then start digging down our required 1 1/2 feet. Once you have hit this depth mitre the top of the fence post to 45° and pop it to one side for the moment
Second wheelie bin post hole dug
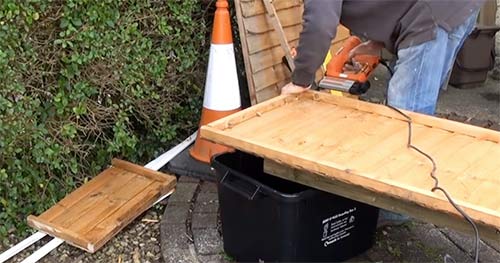
With the second hole dug the next job is to cut a fence panel down to size. Lay a fence panel down on a suitable solid surface with the battens facing upwards. Using a decent handsaw or jigsaw if you have one cut down the side of the batten from top to bottom.
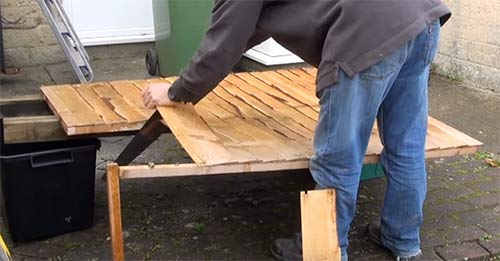
Cutting down fence panel in width for wheelie bin store
Once you have cut the fence panel to the correct width now cut it to the correct height, in this case that will be 4 feet in height.
Measure and mark this height on your panel and cut using your handsaw or jigsaw. This time you will also be removing the top section of batten that provides the panel with strength across it’s top edge.
Once the panel is cut to height find the section of top batten and prise it away from the fence panel slat it’s secured to. If this section of batten cannot be used salvage another piece and cut it to length.
Once free fix it across the top edge and down the sides of your shortened panel using preferably screws through either side and then nails across the top of the slat. This will then add some much needed strength to the weakened panel.
Batten fixed to fence post to provide strength
With your panel cut to the correct width and height fix it in place to the first post using 4x 2 1/2 inch decking screws, using a spirit level while you fix to ensure it’s totally level across horizontal and vertical.
Next do the same for your second fence post, securely fix the panel to the floating post in the hole again ensuring all is totally level and true. Once fixed the panel will hold the post level while the Postcrete cures.
Add the required water to your hole steadily as not to disturb the post and then gently add the Postcrete and then check the level once more and then leave to fully cure.
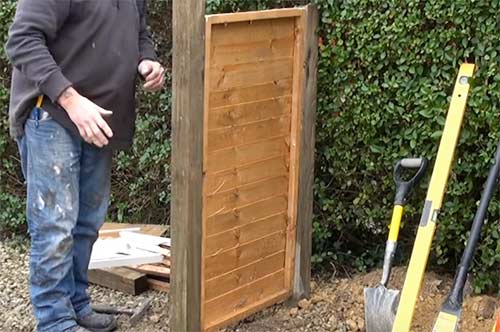
Second post for wheelie bin store fixed in place
Set Final Fence Post and Panel
One of the final jobs now is to dig and set the final fence post. For this we are going to use a full size 6ft fence panel, keeping the panel its full width but just trimming it height-wise this time.
Take your fence panel and lay it down on a sturdy, solid surface and then measure and mark 4ft up form the bottom at either side and then draw a line between them. Using a handsaw or jigsaw cut the panel down to the correct height. As with the above, next replace the top section of batten to strengthen the panel once again.
Cut the second fence panel to the correct height for your wheelie bin store
Next, using a tape measure, measure out from your second fence post at 90° to your first panel the 6ft width of the panel (or however wide your particular fence panel is) and mark this. Now dig out your hole to the correct depth, in this case 1 1/2 feet.
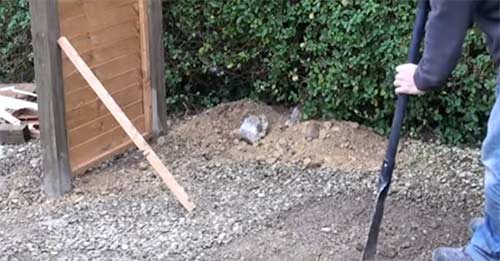
Setting second fence post hole
Once your hole has been dug, cut the fence post to the correct height and then take your fence panel and screw it in place to the second post as you did with the first and then screw the third post in place at the other end and then level the post with a spirit level.
Level third fence post before concreting
Once fully leveled concrete the fence post firmly in pace. Once the cement or Postcrete has fully cured your new wheelie bin store is now pretty much complete!
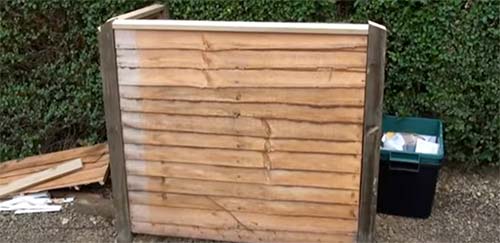
Finished wheelie bin store
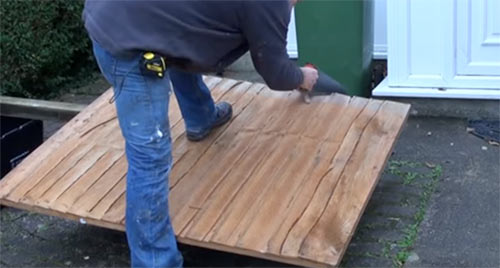
Treat Posts and Panels
With all the construction work now complete the final job now is to treat your new wheelie bin store with a suitable timber or shed and fence treatment.
Pretty much all fence posts and panels should be treated in the factory to prevent rot and insect attack but adding an additional layer of treatment is always a good idea.
It’s entirely up to you which treatment and colour you decide to use, just ensure it’s a good quality product and preferably a single coat product as this will cut down your workload.
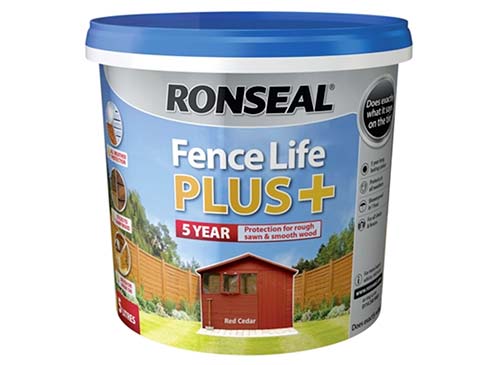
Ronseal one coat fence treatment
Making a basic wheelie bin store is a fairly easy and straightforward job and as long as you take your time and measure everything accurately you are almost certain to get a great finish.