Happy chickens lay eggs, and it’s crucial to provide them with a comfortable and clean nesting area to encourage egg laying. If their environment is dirty and unpleasant, it can deter them from laying eggs.
In this DIY guide, we’ll demonstrate how to construct a nest box attachment that can be added to any chicken coop, ensuring your hens have the perfect spot to lay their eggs undisturbed.
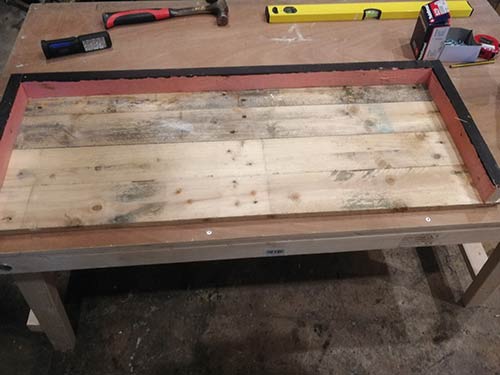
This project complements our guide on building a chicken coop from old pallets.
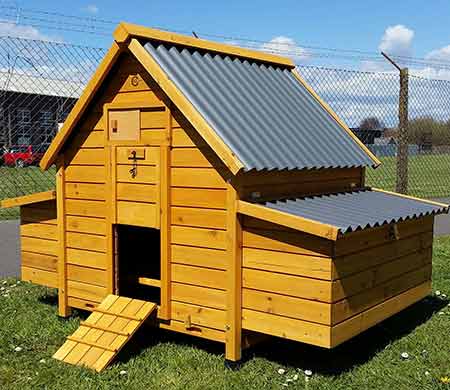
Chicken coop with nesting box
Benefits of Adding an External Nest Box
There are several compelling reasons to opt for an external nesting box instead of simply installing stalls inside your existing chicken coop. Two of the most common reasons are to maximise the space available inside the coop and to provide easier access for egg collection by mounting the nest box externally.
Furthermore, some prefer the traditional look of a coop with external nest boxes. However, the primary motivation is usually the convenience offered by the first two options.
If your coop is relatively small and already fits the number of chickens you have, reducing its interior space would be unfair to your birds. In such cases, adding additional nesting space externally is a significant advantage.
Similarly, if accessing the interior of the coop for egg collection is challenging, having the nest boxes fixed externally, typically with a hinged roof, provides very convenient access to collect eggs.
Tools and Materials Needed to Construct a Nest Box Attachment
Here follows a list of tools and materials you will need to build your nesting box:
- 3x sturdy, medium sized pallets
- Crow bar or pallet wrecking bar (for dismantling pallets)
- Drill/driver
- Box of 1 1/4 inch wood screws
- Box of 1 1/2 inch wood screws
- Mitre saw or hand saw
- Pencil
- Tape measure
- Roll of roofing felt
- 10mm felt nails
- Small T-hinges
- Gate latch
- 250mm x 1100mm piece of roofing rubber or similar
- Timber treatment and paint brush
- 6m of 2×4 roofing batten or similar
- 300x500mm cut off of 18mm plywood or similar
How to Build a Nest Box Attachment for a Chicken Coop
To create your nest box attachment, you can utilise almost any type of sturdy timber that can withstand moisture and exposure to the elements.
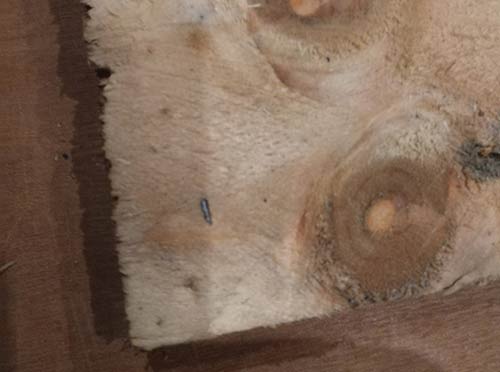
In this project, we’ll repurpose old pallets, which provide suitable timber that matches the type and size needed to complement our existing chicken coop, also constructed from pallets. Moreover, they come at no cost.
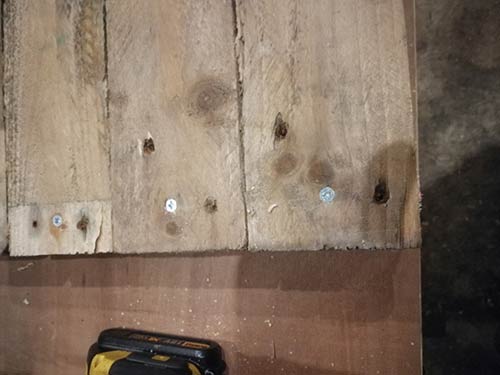
Prior to commencing construction, you’ll need to disassemble the pallets. Refer to our guide on how to break down a pallet here.
For this specific project, we’ve opted for three sturdy half pallets, ensuring we have ample timber to build our nest box with some extras left for contingencies.
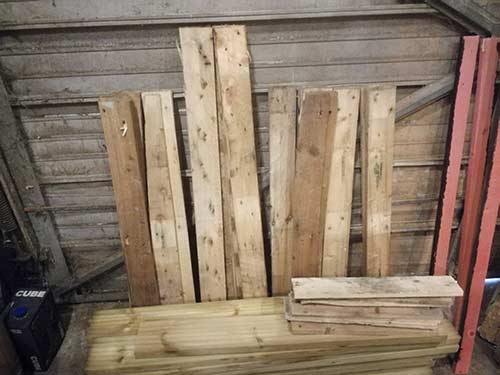
Old pallets to be used to construct our chicken coop
Step 1 – Building the Nest Box Base
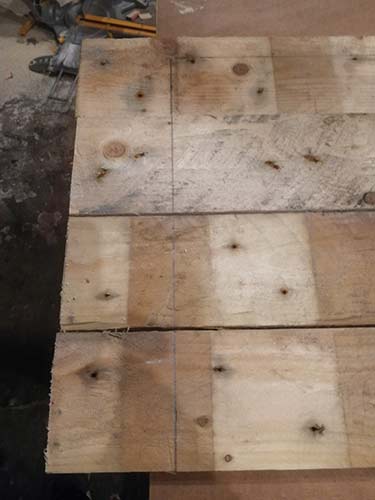
Begin by assembling the base. Lay out four pallet slats of the same size on a workbench or the floor.
Ensure all pallet slats are squared up so that their edges are level and aligned.
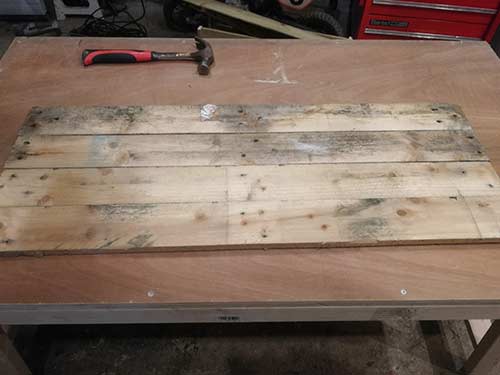
Pallet slats arranged and squared to create chicken nesting box base
Using a tape measure, determine the thickness of one pallet slat. In this case the slats are 18mm thick.
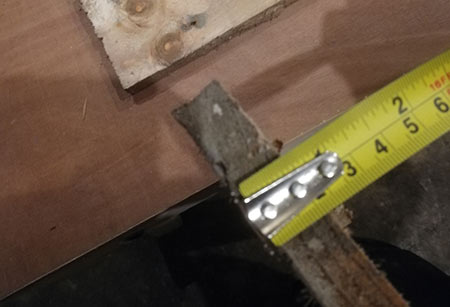
Measuring thickness of pallet slats
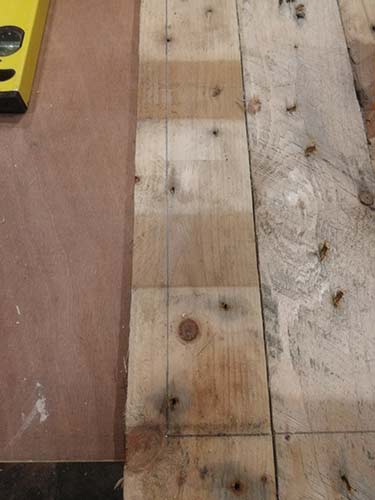
With the tape measure, mark 18 mm in from each side of the pallet slats’ top and bottom, then draw a line between these marks. This will indicate where to attach the battens so that the slats on the sides will be flush with the outer edge of the base.
Marking 18mm gap on base for flush side cladding
Measure the height of the four slats together, in this case it’s 360mm, subtracting 18 mm to get the length of the battens needed for the sides.
Cut two battens to this length, for this example, 342 mm.
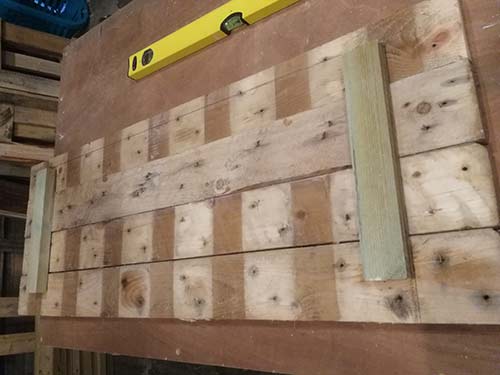
Flip the base over, ensuring it remains squared up. Slide a batten under the slats, aligning it with the front edge and the marks on the sides of the base.
Using a 3 mm drill bit, create pilot holes in each slat, then screw 1 1/4-inch wood screws to attach the base to the battens.
Base secured to battens with screws
Repeat this process for the other side, using a large clamp to close any gaps if necessary. Then, flip the base back over.
Measure the width between the two side battens and cut another batten to fit, making it slightly wider so it fits snugly.
Place the batten and drill pilot holes at each end and two in the centre, then screw it into place.
Rear framework batten attached to nesting box base
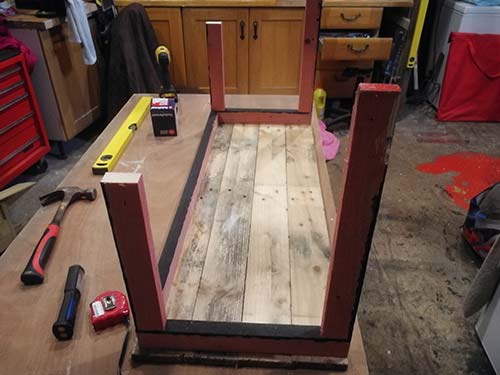
Step 2 – Building the Remaining Nest Box Framework
Now that we have the base constructed and the battens screwed into place, the next step is to create the remaining framework to shape the nest box. This framework will allow us to attach the remaining pallet slats on the outside, resulting in a sturdy and weatherproof box to keep our chickens warm and dry.
The height of your nest boxes is up to you, but for this project, we’re making ours 500mm high at the front and 400mm high at the back. This slope ensures efficient runoff of water or moisture from the roof.
Begin by measuring the depth of the timber being used. In this case the batten is 50 mm deep.
For the front framework, deduct 50mm from the total height of 500mm to get 450mm. Cut two pieces of batten to this length.
Front framework timbers cut to size
Cut two further battens for the rear framework, deducting 50mm from the total height of 400mm to get 350mm.
Since the roof will slope, it’s necessary to miter the tops of each side of the framework to allow the roof to sit flush.
Place one front and one rear upright timber along a straight edge, ensuring they span the total depth of the nest box, for this example, 360mm. Ensure they are perfectly squared horizontally and vertically.
Front and rear upright timbers squared up
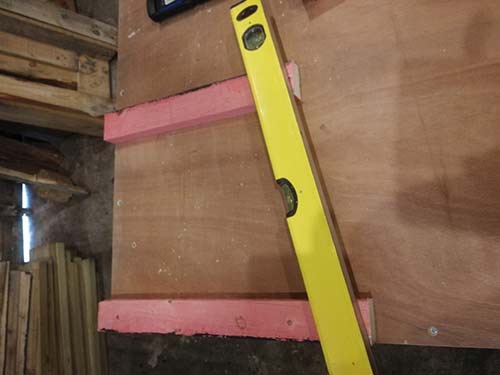
Using a spirit level, place the level between the front and rear timbers at the top, ensuring it aligns with the top front edges of each timber. Mark lines across each batten to define the angle for the mitres, creating the roof slope.
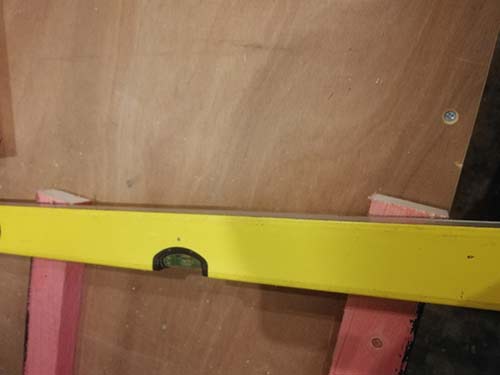
Using a spirit level to mark the mitre angle for the roof
Once marked, cut the mitres using a hand saw or miter saw. Repeat for the other side.
Using a 3mm wood bit, drill pilot holes on either side of each batten for screwing them down into the existing base battens. Use 1 1/4-inch wood screws to secure each of the upright battens into place, using longer lengths for the front and shorter lengths for the rear.
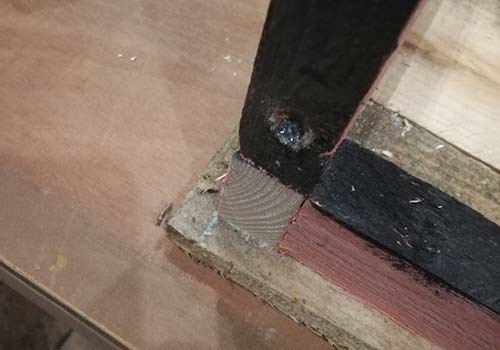
Side timbers secured in place
Now, measure the width between the front and rear battens at the base. Cut two battens to this length, drill pilot holes at the top of each side, and use 1 1/2-inch wood screws to secure the top battens into place, forming the top edges of the nest box framework.
Front and rear side framework timbers secured in place
The final step is to cut battens for the top side edges, also needing to be mitred. Cut two pieces to 400mm in length and hold one piece between the front and rear timbers on one side, ensuring it’s level with the top edges of both timbers. Mark where it meets the uprights, defining the mitre angle for cutting.
Once marked, cut the timber to size and repeat for the other side. Drill pilot holes through the front and rear uprights, then insert the timbers. Use 2 1/2-inch wood screws to secure them in place. Repeat for the other side.
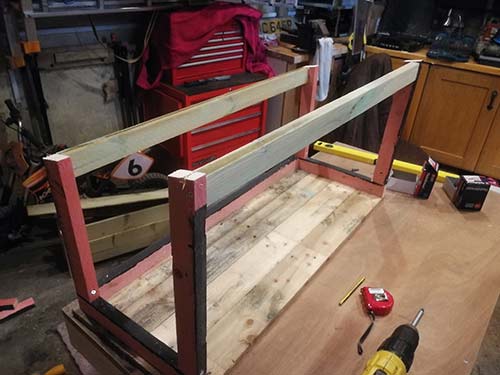
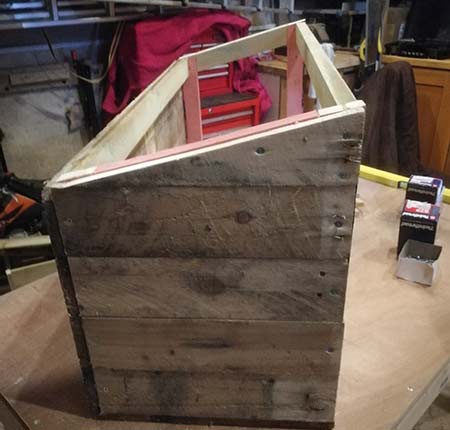
With this, the main framework for the nest box is complete.
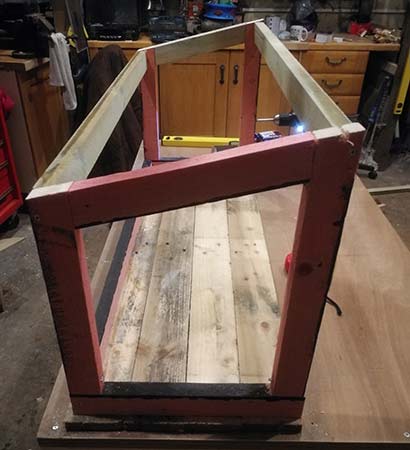
Completed main framework for the nesting box
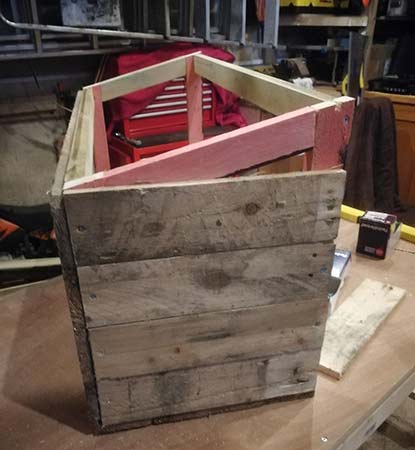
Step 3 – Covering the Outside of the Nesting Box
With the framework finished, the next step is to cover the outside and complete our nesting box.
Search through your stack of pallet timbers and pick out four sturdy slats of the same length and size. Since our nesting box will be 1000mm wide, choose slats of this length.
Once you’ve selected the slats, use a 3mm pilot drill bit to create pilot holes about 8 to 10mm from the edge and roughly in the centre of each slat.
Turn the framework onto its front side and lay the four pallet slats over the back. Use 1 1/4 inch wood screws to attach them securely.
Pallet slats screwed onto the rear of the nesting box
Next, cut five pallet slats to a length of 360mm. Again, use the 3mm pilot drill bit to make pilot holes about 10mm from the edge at the centre of each slat.
Attach these slats to the sides of the nesting box using 1 1/4 inch wood screws, just like before.
Side cladding slats attached to the nesting box
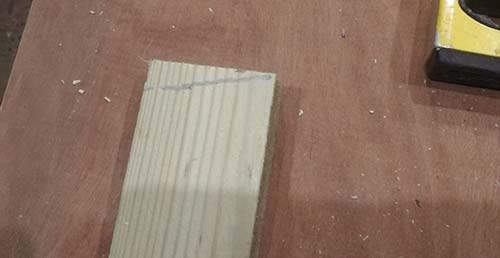
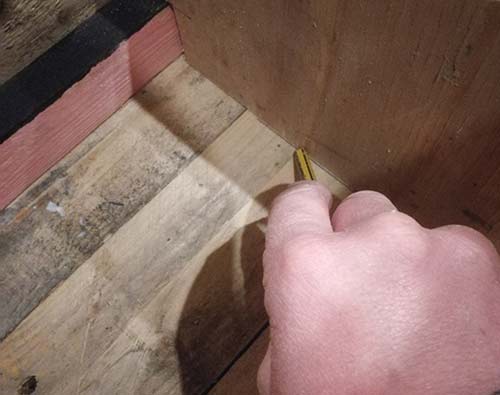
Lastly, to complete the side cladding, take the fifth slat and align it on top of the top slat you’ve just attached. Use a pencil to mark the angle it needs to be cut to.
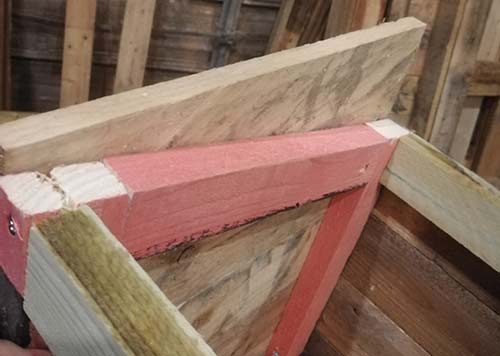
Angle marked on side cladding slat for cutting
Once marked, cut the slat to the correct angle. Drill two pilot holes on the front edge and then one each along the base and down the sloped section, then screw it in place.
Mitred cladding slat attached to the side of the nesting box
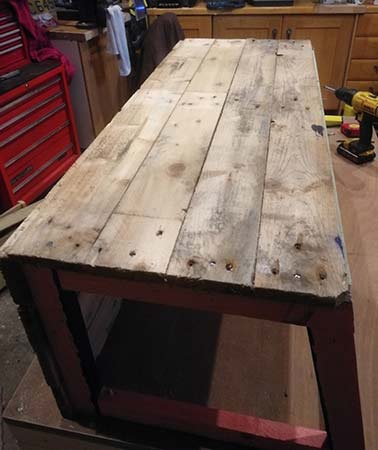
Repeat these steps for the other side, and once completed, our nesting box should be fully covered.
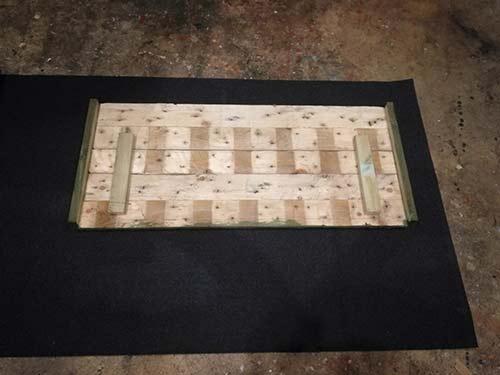
Step 4 – Building the Nesting Box Roof
Now that we’ve finished the main body of our nesting box, it’s time to focus on crafting the roof.
Sort through your stack of timber slats and pick out five pallet slats, reserving one for later. Ensure they are each 1200mm in length to provide an overhang on either side, and 90mm wide. Lay them out on your workbench or the floor and align their edges.
Using a pencil and tape measure, mark points 150mm from the top and bottom on both sides of each slat, then connect these marks with lines.
Roof slats marked out for fixing
On the rearmost pallet slat, measure and mark points 30mm down this line on both sides, then draw a line between these marks.
These markings define the interior area of the nesting box, indicating where we can attach timbers to join all our roofing slats without interfering with the framework when closed.
Interior area marked on underside of roof
Next, cut two lengths of batten to 320mm each. Flip the assembly over, slide the battens underneath, drill pilot holes, and use 1 1/4 inch wood screws to attach the slats to the battens. Repeat this process for the other side.
Roof slats fixed together using batten
To provide an overhang at the rear and prevent water from running down the back wall, we’ll add a fifth slat. To do this, we need to attach battens on either side of the roof.
Cut two pieces of batten to 490mm in length. Then, using an angled or sliding bevel, set it to the angle of the roof’s slope and mark this angle on the end of each batten.
Angle marked on batten for cutting
Once marked, use a hand saw or mitre saw to cut the ends of the battens to the correct angle. This ensures the roof fits snugly against the back of the chicken coop.
With the correct mitre angles cut, place one batten on its side and measure down from what will be the top edge. Mark points roughly 8 to 10mm from either end of the batten and draw a line between them.
Drill five pilot holes along this line, ensuring two of them are close together at the opposite end from the mitred end. This provides a secure fixing for the fifth slat, which will overhang the end.
Once drilled, use 1 3/4 inch wood screws to attach the batten to the sides of the slats. Repeat this process for the other side.

Battens screwed to side of roof to support fifth slat
With the roof fully assembled, place it on top of your nesting box and check the fit, ensuring the internal battens do not interfere with the framework.
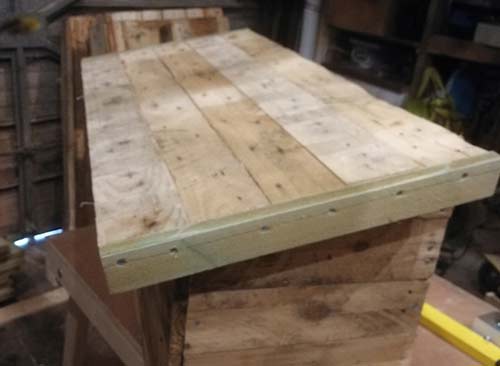
Testing the fit of the nesting box roof
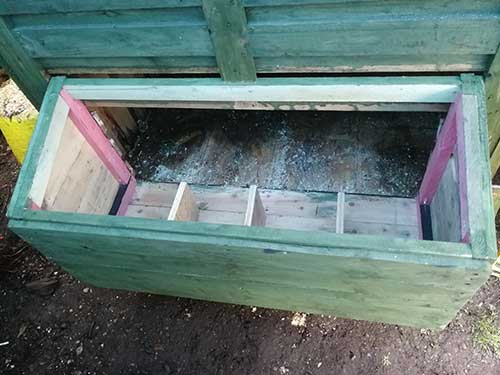
Step 5 – Creating Nesting Stalls
Our next task is to divide the inside of the nesting box into individual stalls, providing each chicken with its own space to nestle down and lay eggs.
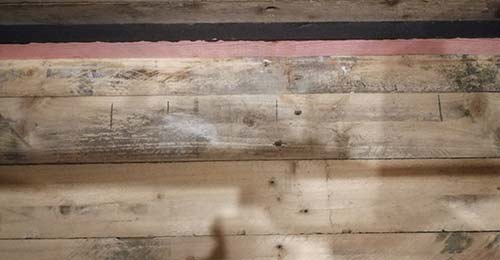
First, let’s determine how many stalls we want. Considering the size of the nesting box (880mm), we want to avoid overcrowding, so four stalls should be ideal.
Divide 880mm by 4, which gives us 220mm. We marked points every 220mm along the back of the nesting box, totalling 3 points.
Marking out nesting stalls on the base of the nesting box
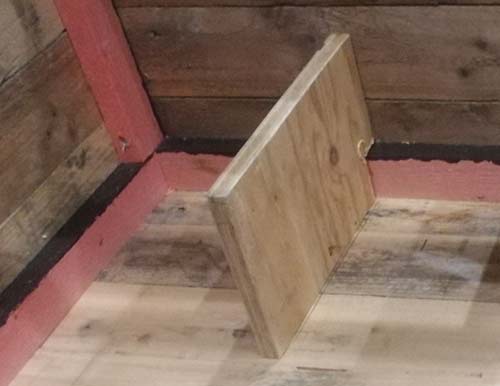
For the dividers, you can use various materials; here, we’ll use 18mm plywood. Cut each divider to around 280mm in length and 150mm to 200mm in height.
After cutting, mark a notch 50mm high and 30mm deep on the back edge of each divider to fit around the framework fixed to the base.
Marking a notch on the divider to fit over the framework
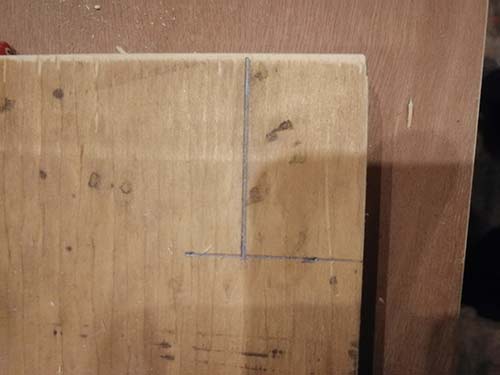
Place one divider over a marked point on the base, then mark along both sides and up both back edges with a pencil. Remove the divider.
Marking the position to fix the nesting stall divider
Using a 3mm drill bit, drill 2 pilot holes between the lines along the base and up the rear edge. Flip the nesting box over, position the divider back into place, and screw through the base and the back edge to secure the divider. Repeat this for the other two dividers.
Divider firmly screwed in place in the nesting box
Step 6 – Thoroughly Treat the Entire Nesting Box and Roof
Now that the construction is nearly complete, it’s crucial to treat the nesting box with a suitable timber treatment. Here, we’ll use Cuprinol fence and shed treatment.
Before applying any treatment, carefully read the manufacturer’s instructions to ensure it’s safe for use around animals and won’t cause harm.
Using a paintbrush, apply the treatment, ensuring complete coverage of the entire exterior of the box, including the top edge of the frame.
Once the nesting box is fully covered, repeat the process for the roof. Allow both the nesting box and the roof to dry, preferably overnight, and then apply a second coat the following day.
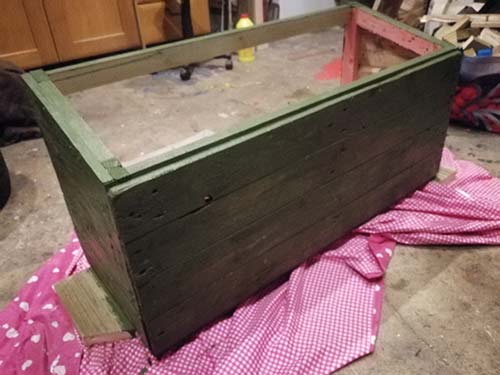
Nesting box treated with suitable timber treatment
Step 7 – Apply Roofing Felt to the Nesting Box Roof
Once everything is dry, the next step is to apply roofing felt to the roof of the nesting box to prevent water and moisture from seeping through to the inside.
For this task, we’ll use a standard roll of roofing felt.
Begin by rolling out the felt on a flat and level surface, such as the floor. Position the roof so that there is a roughly 50 to 60mm overlap along the top and side edges.
Roof laid out on roofing felt
Using a Stanley knife and a straight edge, like a spirit level, cut the felt to size so that there is a 50 or 60mm overhang all the way around.
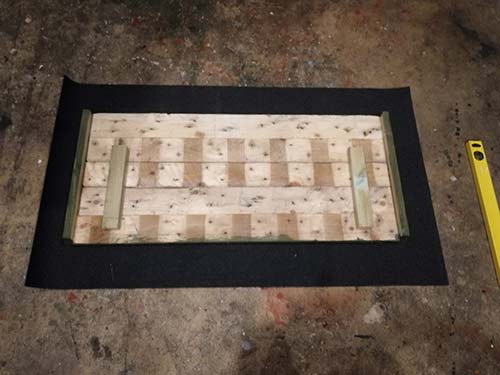
Roofing felt cut to size
Start with the sides, folding them over and securing them in place with 10mm felt nails.
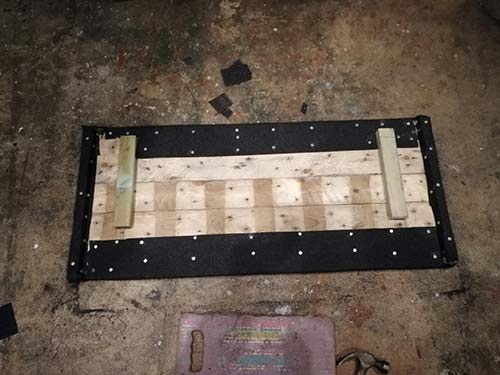
Roofing felt nailed to nest box roof
If any sections overlap and become bulky or difficult to fold, trim away the excess with a knife so that the top piece of felt covers the trimmed section.
Once the underside is fully secured, flip the roof over and nail down the top side as well.
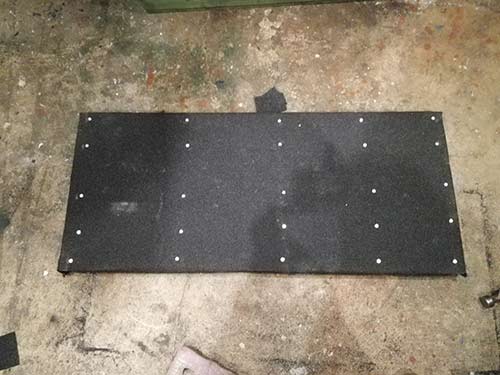
Roofing felt nailed down to top of roof
Step 8 – Prepare the Chicken Coop and Install the Nesting Box
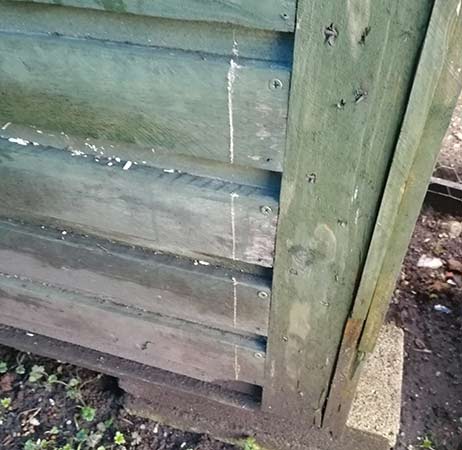
Now that the nesting box construction is complete, it’s time to attach it to the chicken coop. This involves cutting out a section at the back of the coop to fit the nesting box properly.
Start by measuring the internal width and height of the opening on the nesting box. In our case, it’s 880mm wide by 430mm high.
Using these measurements, mark out the area to be cut on the back of the chicken coop, ensuring that the cut hole is centred.
Cutting area marked out on rear of chicken coop
Since our chicken coop is already made of pallets and we’ve used pallets of the same size for the nesting box, cutting the hole is relatively straightforward.
Begin by unscrewing any slats up to the marked area that defines the size of the hole we need.
Next, use a jigsaw to cut away any remaining pallet slats or pieces of timber to create the correct-sized opening.
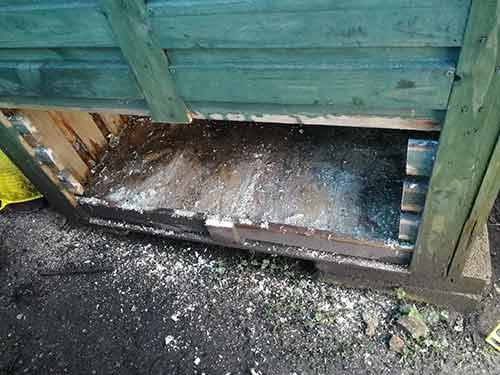
Remaining pallet slats cut away using a jigsaw
To provide support for the nesting box while installing it and to ensure both floors are level, screw a piece of batten to the base of the chicken coop.
It’s advisable to have assistance at this stage to hold the nesting box in place while fixing it.
With the help of your assistant, position the nesting box and, from inside the coop, use 1 1/2 inch wood screws to secure it to the batten, driving screws through the floor, up both sides, and along the top at four or five points on each side.
Once securely screwed in place, the nesting box should be fully supported.
Nest box screwed in place through floor, up each side, and along the top
Step 9 – Attach the Roof to the Nesting Box
The final step is to secure the roof in place. Begin by placing the roof on top of the nesting box, ensuring it is centred so that the overhang on each side is even.
Roof fitted in place on top of nesting box
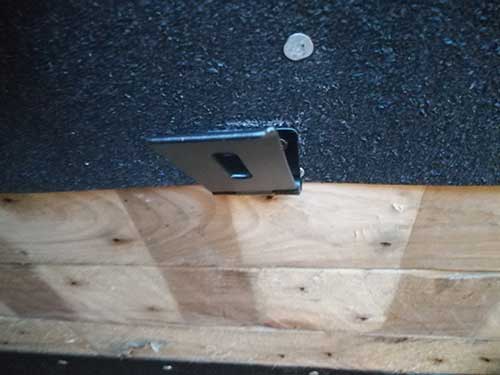
Install small T-hinges over the top of the batten used to secure the roof slats together. Screw the hinges into place on the batten and the roof.
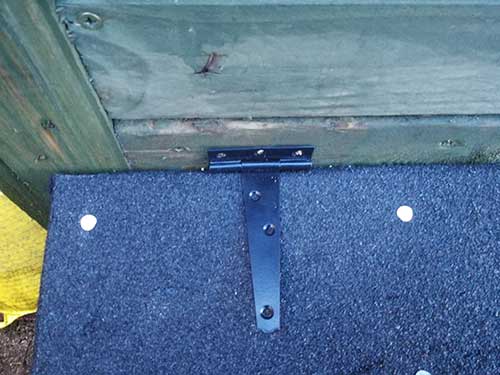
T-hinge fixed in place on roof
Push the roof up snugly against the back of the chicken coop and screw the hinge into the coop.
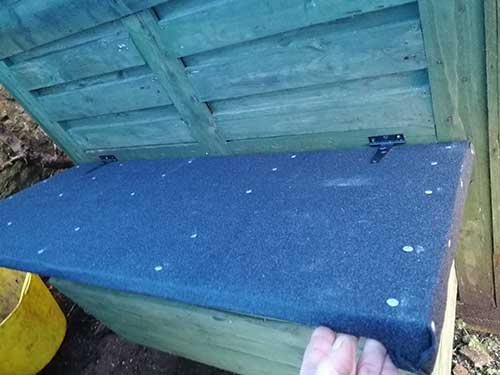
T-hinge screwed to rear of chicken coop and roof opened to test
Test the opening and closing of the roof to ensure smooth operation and check for any binding in the hinges.
Step 10 – Install a Latch to Secure the Roof
One of the final tasks is to install a latch to ensure the roof stays securely closed, preventing it from blowing open or allowing unwanted visitors inside.
For this, a standard gate latch will suffice. Position the latch underneath the roof overhang and mark the screw holes. Then, open the roof fully, locate the marked holes, and screw the latch in place.
Gate latch screwed to underside of roof
Next, close the roof and insert the keep into its slot in the latch. Push it up against the back of the nesting box, hold it in place, then open the latch and screw the keep firmly into position.
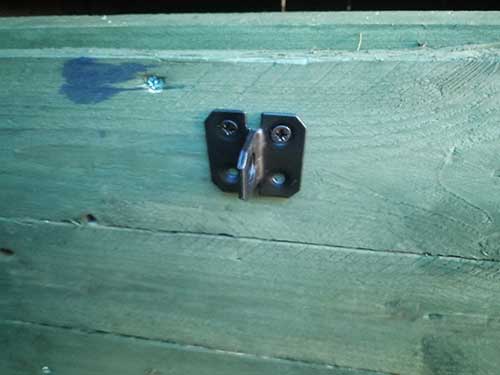
Gate latch keep screwed to back of nesting box
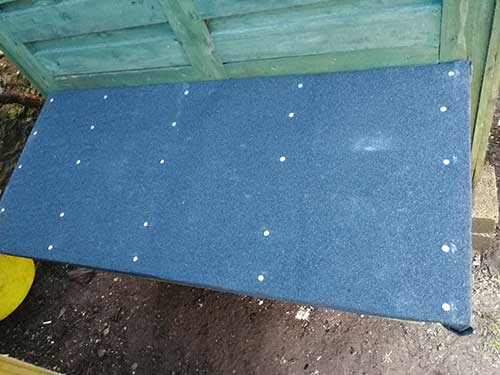
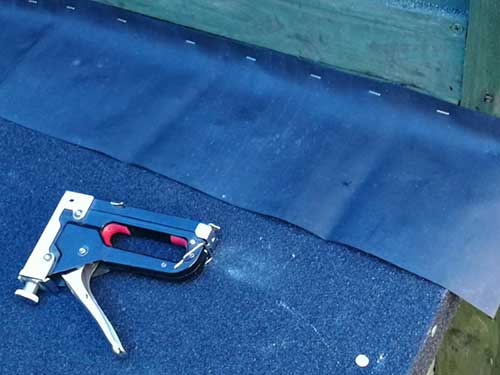
Step 11 – Seal the Gap Between the Roof and the Rear of the Chicken Coop
The last task is to seal the gap between the roof and the back of the chicken coop. This prevents water and moisture from seeping down into the nesting box.
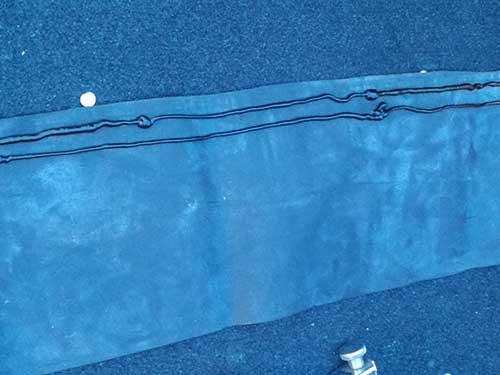
Grab an old piece of roofing rubber or similar material, a felt offset will do, and cut it to size, ensuring a 50mm overhang on each side. Lay the rubber flat and apply two beads of sealant along the top edge.
Beads of Weather Mate sealant applied to rubber
Place the rubber against the back of the chicken coop, making sure the sealant beads are pressed flat. Centre the rubber with equal overhang on both sides, then staple it in place.
Rubber strip stapled to rear of chicken coop
Use felt nails to secure the rubber to the roof and along the sides to prevent water from seeping underneath.
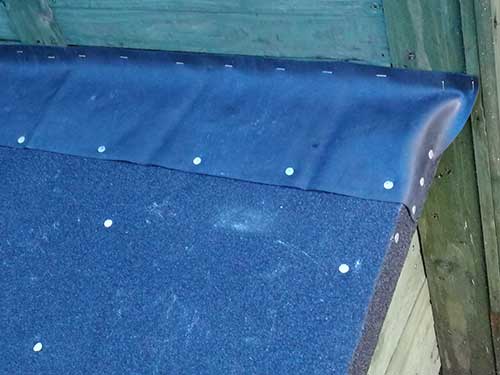
Rubber strip nailed to top of nesting box roof
Lastly, screw a length of pallet slat over the rubber to completely seal the joint.
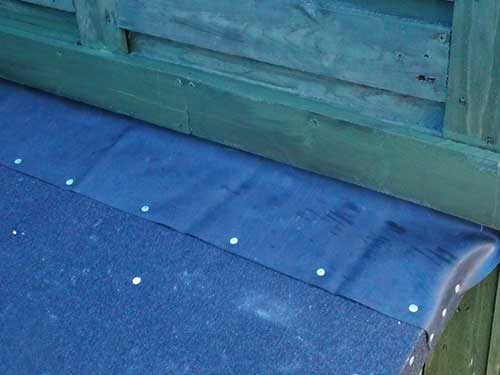
Pallet slat fixed over rubber to seal join
With this done, your project is nearly complete. Great job!
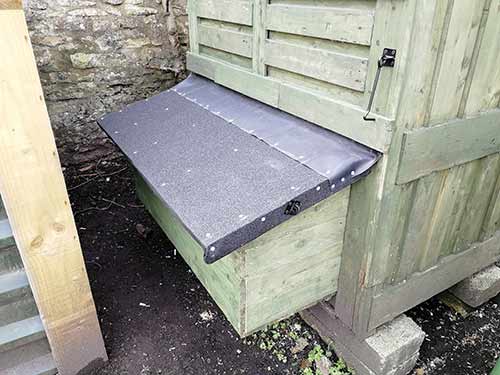
Nesting box fully fixed to rear of chicken coop
Constructing and building a nesting box to fit to a chicken coop is a fairly straightforward job and certainly one that’s well worthwhile as if you have happy and comfortable chickens you are certain to enjoy bountiful supply of eggs.