Adding a dimmer switch to the lighting in a room can have a dramatic effect on the overall ambience of a room, allowing you to lower the lighting levels to create a much more relaxed environment.
In this DIY guide we look at how to fit a dimmer switch in place of a standard light switch.
Regulations for Fitting Dimmer Switches
In accordance to the Building Regulations and the BS 7671 wiring regulations, if you are simply exchanging an existing standard 1 or 2 gang light switch for a dimmer switch then this is entirely possible to do on a DIY basis, as long as you have the knowledge to do so.
However, if it is to be a newly installed switch where all wires and cabling needs to be run from scratch then this is not possible to do as a DIY’er and can only be done by a Part P registered electrician with the knowledge and skill to do the work correctly, test it fully and then issue a minor works certificate.
Failure to do this correctly can cause issues when trying to sell your home and can even invalidate your home insurance!
One thing to be aware of is that back quite a few years ago the wire colours that were traditionally used were changed to harmonise with those used in Europe so you may find you have different coloured wires in your home. For more information on this see our wire colours project here.
For more information on staying safe when working around electricity, see our electrical safety project here.
What is a Dimmer Switch?
A dimmer switch is a type of light switch that allows you to control the amount of electricity that flows to the lights it controls, which, when turned down dims them or when turned up brightens them, manually enabling you to set the light level in a room.
Traditionally, dimmer switches used a variable resistor that essentially restricts the flow of electricity by converting it to heat. This not only caused the resistor to get hot but also, this was a massive waste of electricity.
Today, modern dimmer switches are much more efficient and instead of using a resistor, essentially turns the light on and off very rapidly every second. As both UK and US electricity is AC (alternating current) it turns from positive to negative every cycle.
Modern dimmer switches use this cycle to determine when to turn the light off. At the point that the switch from positive to negative happens there will be zero voltage and this is when the switch cuts the power.
When it turns it back on depends on the position of the dimmer. If it’s set to a bright setting it turns the power back on very quickly, but if set to a dim setting, it will wait a little before turning it back on again. These are known as phase cutting dimmer switches.
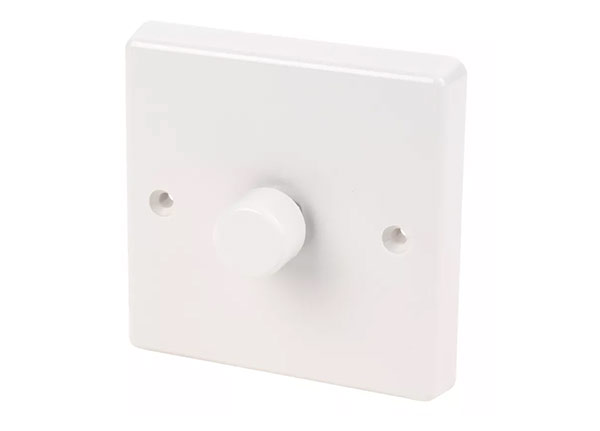
Standard single gang dimmer switch
Types of Dimmer Switch
There are numerous different types of modern dimmer switch, but essentially they can be broken down into 2 main types:
- Leading Edge
- Training Edge
The names refer to the way in which they control light levels. As mentioned above, modern dimmer switches work by rapidly cutting the supply of electricity to the light half way through it’s cycle when the current hits zero.
A leading edge dimmer cuts the front off of the second part of the wave cycle, where as a trailing edge dimmer cuts the second part of a waves cycle.
Both of these types of dimmer have their own distinct characteristics, but on the whole, trailing edge dimmers are seen as slightly better as they have a smoother operation and tend to make much less noise.
Aside from the main differences in how they operate, dimmer switches are also available in several different operation:
- Single-pole: Controls 1 set of lights from a single switch in a single location
- 3-way dimmer: Allows for the control of 1 or a series of lights from 2 different switches
- 4-way dimmer: Allows for the control of 1 or a series of lights from 3 different switches
- Smart dimmers: Use smart automation technology and wifi to enable you to control a single or set of lights using an app
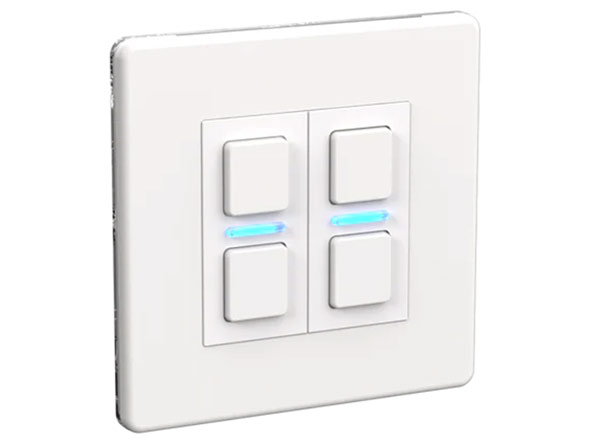
Smart dimmer switch
Can you put a Dimmer Switch on any Light Switch?
Today, pretty much all light fixtures are compatible with a dimmer switch and can be swapped like-for-like. However, the main issues come with the type of light bulb they will be controlling.
Most incandescent and halogen bulbs are compatible with dimmers, but generally CFL’s (or compact fluorescent lights) or those that are controlled by a transformer generally don’t, unless they are made specifically for use with dimmer switches.
When it comes to LED’s there are 2 types, those that are compatible with dimmer switches and those that aren’t. This should be stated on the bulbs packaging.
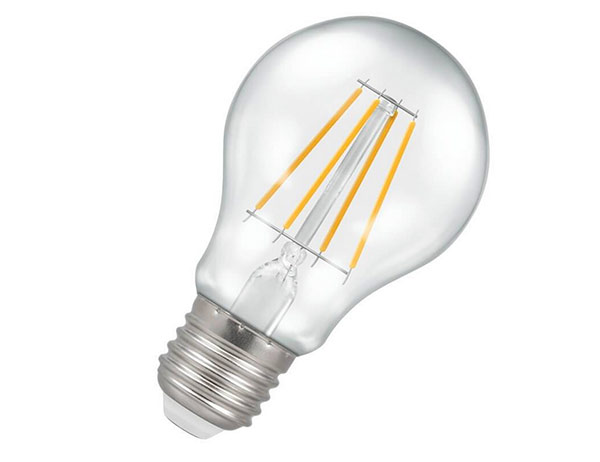
Dimmable LED bulb
Tools and Materials for Fitting a Dimmer Switch
To fit a dimmer switch in place of a standard light switch you will need the following tools and materials:
- Small plat blade screwdriver
- Philips screwdriver
- Dimmer switch of your choice
- Brown/red tape – to mark switched live if not already marked
How to Fit a Dimmer Switch
As we have now looked at what a dimmer switch is and how it works, it’s now time to see how they are fitted.
For the purpose of this project we will be swapping and existing 1 gang 1 way switch for a similar 1 gang 1 way dimmer switch.
Step 1 – Isolate Circuit
The very first job to do before doing anything else is to isolate the circuit you will be working on by turning off the MCB/RCD in your consumer unit or pulling out the fuse if you have a fuse box.
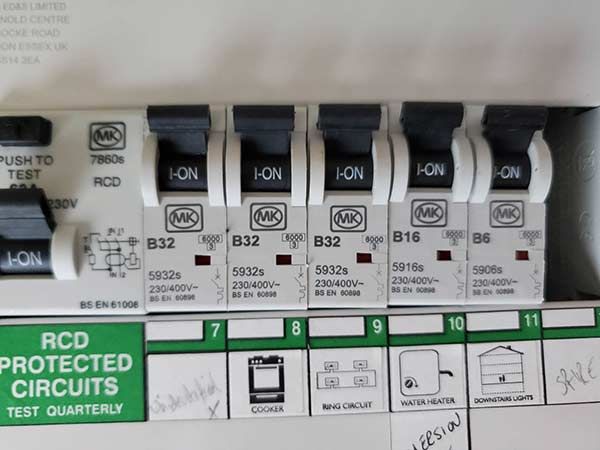
Isolating circuit in consumer unit
Step 2 – Unscrew Switch Faceplate
Once the power to the circuit and switch are isolated, the next job is to use a flat blade screwdriver to unscrew the 2 screws on the front of the faceplate.
Once done, put the 2 screws to one side and pull the faceplate away and turn it to reveal the internals on the rear of the face.
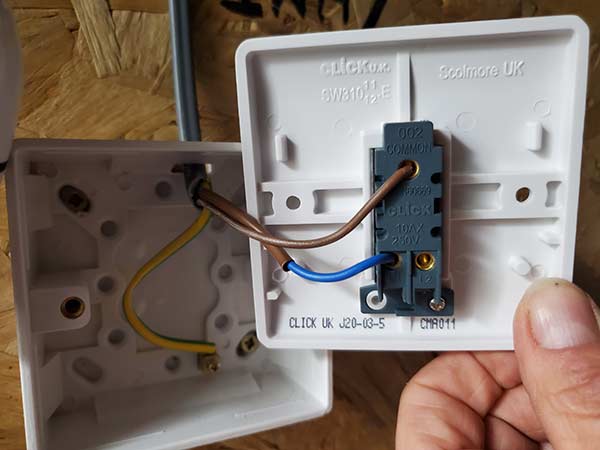
Rear of 1 way switch with wiring
Step 3 – Disconnect Wiring From Switch
On the rear you will most likely find a brown and blue or red and black wire connected to the switch. Red (live) and black (neutral) are old wire colours and brown (live) and blue (neutral) are new colours. The blue/black neutral should also have a brown/red sleeve or piece of tape wrapped around it to indicate that it’s the switched live.
If you have a metal face plate for your switch there should also be a green and yellow earth wire to a small terminal on this. If not then it should be connected to the metal box in the wall called a pattress box. If the pattress box is plastic then it should be screwed into the earth terminal somewhere inside.
Before removing anything, first take a picture of the back of the switch so you know where all the wires go. The brown live should be in COM and the blue neutral/switched live should be in L1.
To release each wire on the switch, use your flat blade screwdriver to loosen the small screw in each terminal and then pull the wires free. If the earth is also fixed to the faceplate, unscrew this, if attached to the pattress box leave it where it is.
For more detail on how light switches are wired, see our lights and switches project here.
If you have more than a brown/red and blue/black wire in your switch, then you are involved in two or three way lighting. This can get quite complicated in terms of what goes where so refer to our lights and switches project linked to above for more help with this.
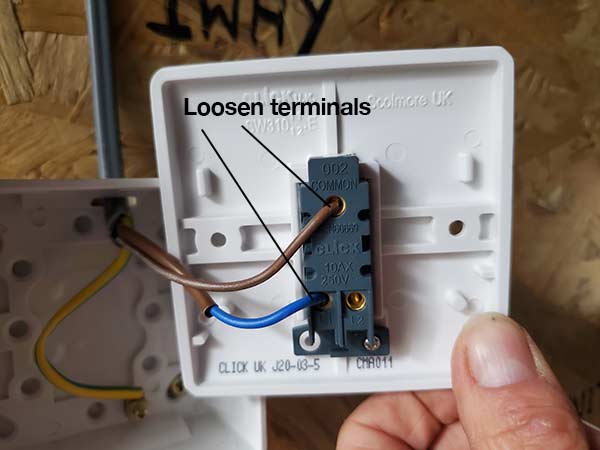
Loosen wires in rear of switch faceplate
Step 4 – Connect new Dimmer Switch
With the old switch out of the way, take your new dimmer switch and connect the wires in the same place as the old one; brown live to COM and blue switched live to L1
If the new dimmer switch has a metal faceplate then you will also need to connect the earth to the earth terminal on the faceplate.
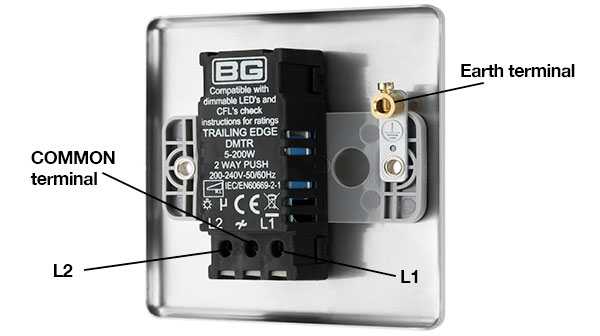
Terminals on rear of dimmer switch faceplate
Step 5 – Screw Faceplate Back on
Once all of the wires are connected to the correct terminals, turn the faceplate back around and position it back over the pattress box.
To get it to sit flat, you may need to give it a little wiggle so that the wires find their own natural resting place.
Once correctly positioned, pop each screw through each hole and then screw it up tight, ensuring that it’s level.
Step 6 – Test Switch
Once all is back in place and screwed in to position, go back to the consumer unit and turn the circuit back on.
Go back to the switch and turn the dimmer dial until you hear a click, this means it’s turned on. Turn the dial slowly around and you should see the light slowly get brighter.
Your job is now done, good work!
Fitting a dimmer switch in place of an existing standard light switch is a fairly easy and straight forward job as long as you know what you are doing.
If you are in the slightest bit unsure on what to do you should get a professional electrician in.