When decorating your walls, you have many options to enhance your décor, whether it’s for every wall or a single feature wall. Choices include paint, wallpaper, photo walls, and murals. However, here’s another idea:
Fabric Walls!
Yes, you read that right — fabric on your walls! Exciting, isn’t it?
While using fabric as wall décor isn’t new and has been done for centuries across various cultures, it’s recently gained a surge in popularity.
There are two main methods to create a fabric wall:
1. Hang fabric like a tapestry by pinning each corner to the wall or draping it from the top like a curtain, depending on your style.
2. Apply fabric directly onto the wall using liquid starch, a simple and less permanent alternative to traditional wallpaper.
Before diving into these methods, let’s define what a fabric wall covering actually is.
What is a Fabric Wall Covering?
A fabric wall covering is exactly what it sounds like – using fabric instead of paint or wallpaper to decorate your walls.
This method is ideal for renters or anyone who frequently changes their décor, as it’s easy to remove and doesn’t require permanent changes.
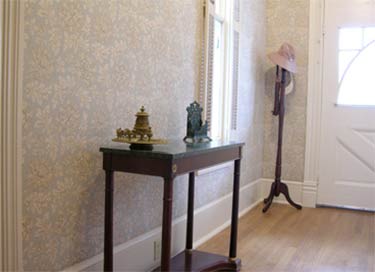
Fabric used as wall decoration – Image courtesy of hotelpicodaurze.com
Choosing the right fabric is key. Heavy fabrics like velvet can be too cumbersome, while very thin fabrics like silk may not withstand wear and tear.
The advantage of fabric walls is their reusability. If you tire of a pattern, simply remove and wash the fabric for a fresh look. Additionally, fabric walls offer some sound absorption, though not as much as specialised acoustic panels.
Generally, fabric wall coverings fall into two main methods: hanging fabric like a tapestry or applying it similar to wallpaper.
Tapestry-like Walls
The first and in some ways the most obvious place to start is with the tapestry:
What are Tapestry-Like Wall Coverings?
Tapestries have been used for centuries across various cultures, often associated with medieval castles and intricate scenes of battles, religious events, or mythical tales.
In the Western world, our view of tapestries is shaped by history lessons and media portrayals, which often feature elaborate, historical designs.
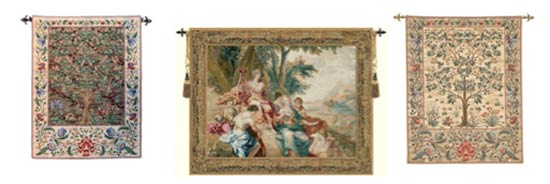
Examples of classic tapestries
Today, many tapestries are displayed in museums or art galleries, but tapestry-like wall coverings remain popular for home décor.
You can get creative with tapestry wall art, from medieval-style pieces hung like scrolls to modern interpretations. While traditional tapestries often have religious or nature themes, they might not provide full wall coverage unless they are quite large.
Full Wall Coverage
For near-complete wall coverage, draping a large fabric, typically square or rectangular, from near the ceiling or under the coving is a popular choice in bohemian décor.
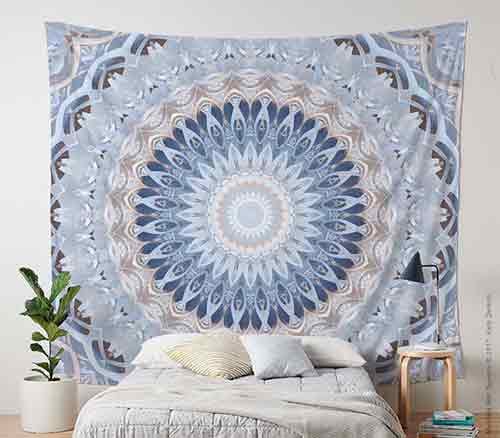
Example of a large fabric wall covering – Image courtesy of kellydietrich.com
Pin the fabric at the top corners (or more if needed) and let it drape naturally for a loose, curtain-like effect. For a smoother look, pull the fabric taut and pin all corners.
Methods of Pinning Fabrics
Here follows generally the best methods that can be used to pin your fabric wall coverings.
The method of pinning the fabric to the wall is entirely up to you and really is based on the type of look and finish you are going for.
Nails and Staples
For hanging fabric, you can use nails or staples. Ensure you use heavy-duty staples rather than standard desk staples, as they won’t hold the fabric securely and it will ultimately fail. Alternatively, consider using eyelet screws, grommets, or a rod for a more polished look.
If nails or staples are visible, you can cover them with a fabric border. Use fabric tape or a strip of matching or complementary fabric to hide the fixings. Double-sided tape, fabric glue, or a curved needle can help attach the border.
For a unique touch, embrace the nails or staples as a design element. Arrange them in patterns like zigzags or criss-crosses for a stylish effect. This approach requires more precision but can be visually striking. Keep in mind, though, that removing the fabric later will involve taking out more nails or staples.
Eyelets, Grommets, Dowels, and Rods
Using eyelets/grommets or a dowel/rod involves some sewing and drilling. For a rod, you can hang the fabric like a curtain or stretch it between two rods. Measure your wall and cut the fabric to size.
Leave enough fabric on the sides for looping around the rod and stitching. Lay the fabric flat, place the rod near the edge, fold the fabric over, and stitch to create a pocket for the rod.
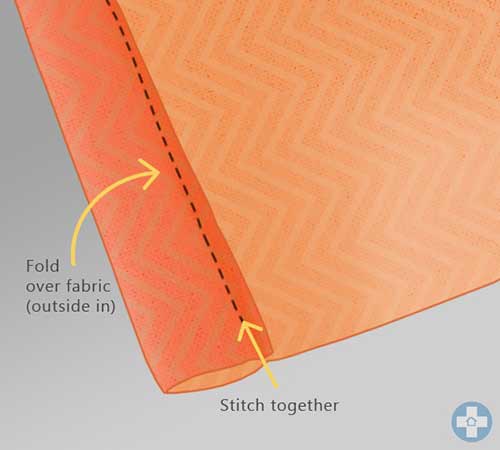
Stitching a pocket in the fabric for the dowel
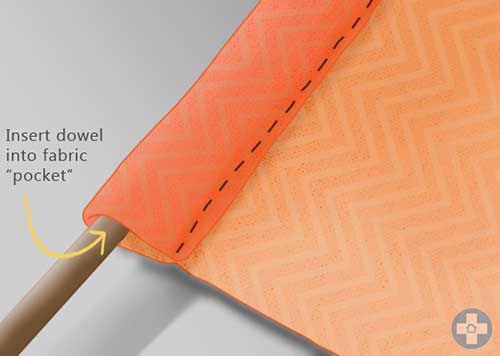
Inserting the dowel into the fabric pocket
Measure the rod length carefully. Attach it to the wall with brackets or as a curtain pole.
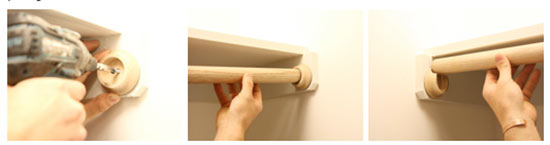
Fixing the hanging rail to the wall
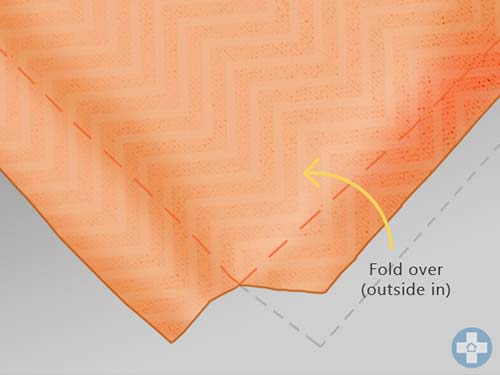
For grommets, measure and hem the fabric before attaching them. The hem should be at least 0.5 cm wide. For thick fabrics, cut away a small corner section to reduce bulk.
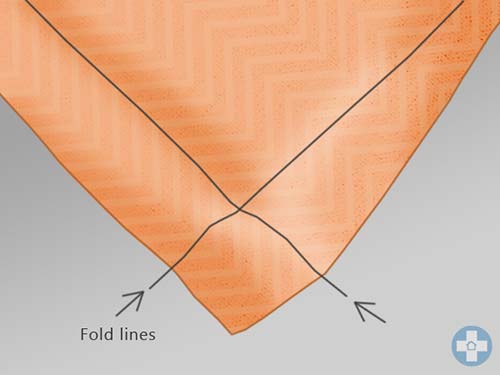
Marking the folds on the fabric
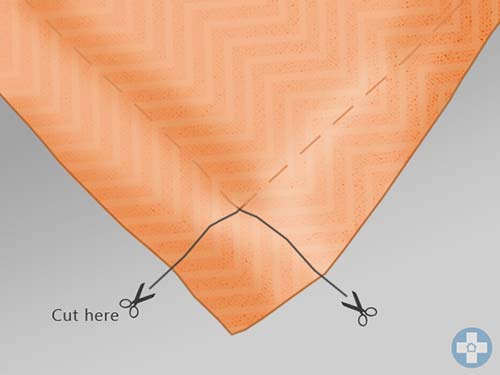
Cutting away a corner of the fabric

Corner of fabric cut away
Fold and pin the fabric edges, then sew to create a hem. Use a bright thread for a guideline and a matching thread for the final stitch.
Folding the bottom edge of the fabric
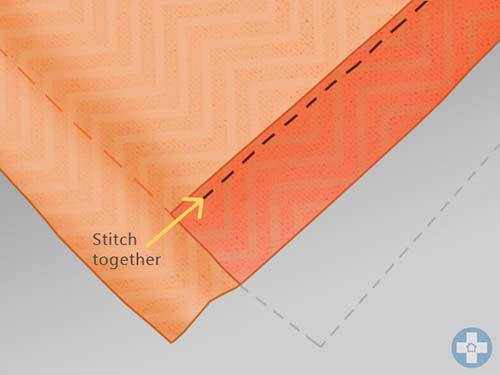
Stitching the folded bottom edge
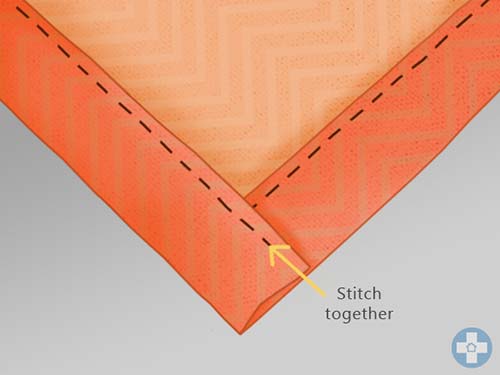
Stitching the remaining edge
Cut small X-shaped holes for the grommets and use the right-sized pliers to attach them. This usually involves pushing them together and then using the pliers to finally squeeze them fully together.
Attach corresponding eyelet screws to the wall and use twine or another material to connect the grommets.

Rear view of the eyelet in the fabric
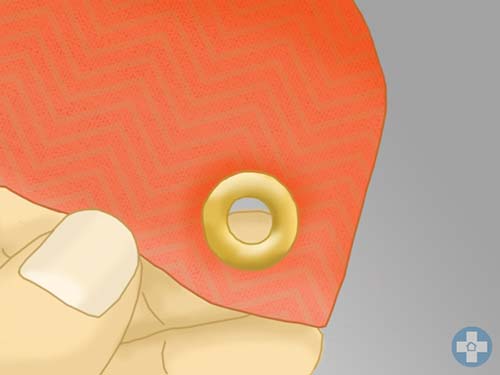
Front view of the eyelet
Ensure the fabric fits snugly against the wall. Note that both rods and eyelet screws may hold the fabric slightly away from the wall, so account for this when positioning furniture.
Wallpaper-like Walls
Moving on, the next option to look are is the wallpaper-esqué wall, find out all you need to know below:
What Are Wallpaper-Like Fabric Walls?
Fabric walls are often easier to manage than traditional wallpaper. Unlike wallpaper, which requires precise alignment of multiple strips, fabric can cover your wall with a single panel for a seamless look.
If your wall isn’t perfectly even, you might need more than one fabric panel. Measuring for fabric is similar to wallpapering, but remember that fabric can shrink as it dries. To accommodate this, add a few extra inches to your measurements.
How to Apply Wallpaper-like Walls
Before you start make sure the wall is clean and dry otherwise the fabric will have a hard time adhering to the wall.
Step 1 – Clean Your Walls
Start by using a sugar soap solution to remove grime and grease from your walls. Let the walls dry completely.
Next, wipe the walls with a cloth or brush to get rid of any dust. Protect your floor with a plastic sheet or drop cloth, especially if you have carpet.
Step 2 – Measuring and Pattern Alignment
Measure your wall before purchasing fabric and allow an extra 2 to 5 inches for adjustments. Have someone assist you in holding the fabric as you pin it to the wall, especially for large pieces.
Check periodically to ensure that patterned fabric remains straight and aligned.
Step 3 – Remove Fixtures and Prepare Edges
Before you start, turn off the electricity and remove fixtures like light switches if needed. For a neater finish, consider removing skirting boards or coving. This will hide any ragged edges.
Mark the positions of the skirting and coving as a guide to keep your fabric straight. If you can’t remove them, use a sharp knife and a straight ruler for precise cuts.
Step 4 – Adhering Fabric to the Wall
To keep fabric securely on the wall, use liquid starch, available in the laundry aisle of major retailers.
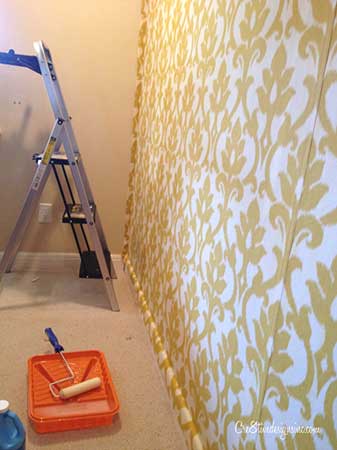
Apply the starch with a paint roller for large areas and a spray bottle for edges and corners. Start by rolling a generous layer of starch on the wall, then use a wide paintbrush to reach the edges. Ensure the wall is thoroughly damp before applying the fabric.
Step 5 – Applying the Fabric
Begin in a top corner near the ceiling. Pin the fabric to the wall with wall tacks, placing one tack about every 10 inches. Add more tacks if needed.
Leave a few inches of excess fabric. Smooth out wrinkles using a plastic smoothing tool or wallpaper brush. If the starch dries, reapply with a spray bottle.
Once pinned at the top, move to a bottom corner. Gently pull the fabric taut without over-stretching to avoid damaging it or pulling out the tacks. If possible, have a helper pull the opposite corner while you pin.
Check that the fabric is straight and even. Once pinned at all four corners, continue pinning along the bottom and sides while keeping the fabric taut. Use a dry paint roller to press the fabric into the wall.
Fabric adhered to the wall – Image courtesy of cre8tivedesignsinc.com
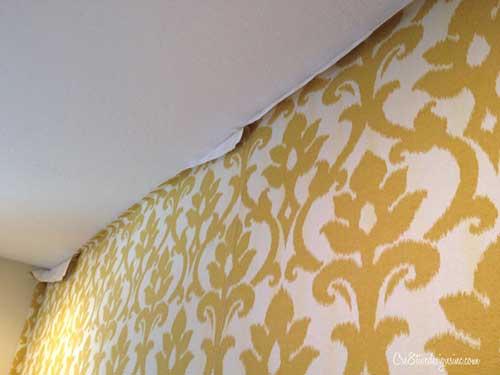
Edges of fabric ready for trimming – Image courtesy of cre8tivedesignsinc.com
Using the spray bottle and smoothing tool, start in the centre of the wall and work outward to smooth the fabric. After smoothing, spray another layer of starch over the entire wall and let it dry completely. The tacks will hold the fabric in place as it dries.
Step 6 – Remove Tacks and Reattach Fixtures
After the fabric is completely dry, remove the wall tacks. Use a straight-edge ruler to press the fabric into the corners and edges. Trim any excess fabric with a retractable knife or scalpel.
Reattach any skirting, coving, or fixtures you removed earlier. Your new fabric wall is now complete!
Removing Wallpaper-like Coverings
Taking down fabric wall coverings is simple. Start by dampening the corners with a wet cloth, then peel off the fabric.
If you encounter stubborn areas, moisten them further to ease removal.
After removing the fabric, clean the wall with hot, soapy water and a few drops of dish soap. Follow up with sugar soap to restore the wall’s original condition.
You can wash the fabric in a washing machine or by hand for reuse in other projects.
Other Fabric Wall Covering Ideas
Fabric wall coverings offer more options beyond the methods we’ve discussed.
Explore various techniques like draping fabric for a decorative effect similar to wedding or prom settings, using upholstery for furniture-like finishes, or applying fabric panels similar to carpet tiles.
There’s always a creative approach to suit your style and space!
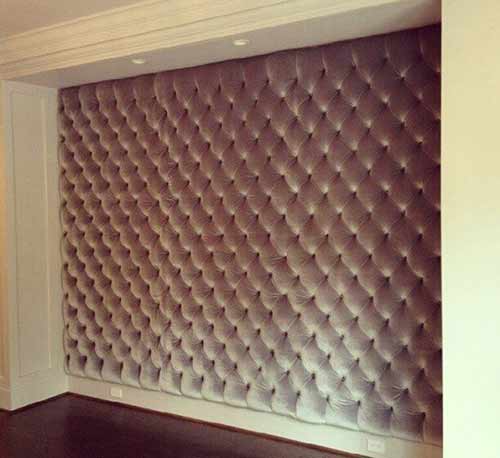
Headboard style wall covering – Image courtesy of pinterest.com
If you decide to create a fabric wall or fabric wall covering, please don’t hesitate to share your project with us. We love to see what our readers can come up with.