Installing a new kitchen can completely transform any property and may even increase its value.
Refitting the kitchen is often one of the first jobs for new homeowners, so in this guide, we’ll walk you through the entire process, step by step, so you know exactly what to expect.
Key Things to Think About Before Fitting a Kitchen
If you’re hiring a professional, this guide is still valuable for designing your kitchen layout and style to suit how you use the space.
Kitchen design is personal, but we’ll cover the key components to consider during the planning phase.
Cabinet style is another important choice. Sleek, modern designs suit new homes and apartments, while traditional or cottage-style kitchens work best in older properties.
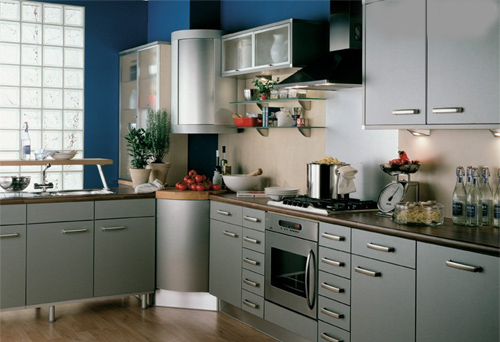
Modern kitchen designs suit contemporary homes.
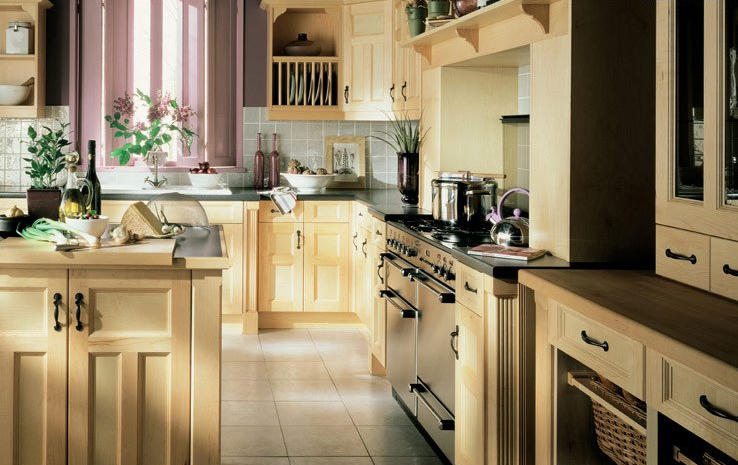
Traditional kitchen units are ideal for period homes.
Choose wall tiles and paint that complement or contrast with your cabinets, and opt for flooring that ties in with your worktop colours for a unified look.
When selecting a kitchen sink, consider whether you need a single or double option, and explore different materials like ceramic, stainless steel, or moulded designs.
Small details, like unit handles and taps, can significantly impact the overall design, so choose these carefully.
Lighting is crucial in a kitchen. Ensure bright lighting for work areas and consider adjustable lighting if you’ll be dining or entertaining in the space. Check out our kitchen lighting guide for more ideas.
Skills Needed to Fit a Kitchen
Installing a kitchen yourself requires advanced skills to ensure it looks great and lasts. Kitchens endure heat, moisture, and heavy use, so precision is key for a long-lasting finish.
A professional-quality installation enhances both the appearance and durability of your kitchen, making it a job best suited for experienced DIYers.
You’ll need skills in multiple trades, including carpentry, plumbing, electrical work, and tiling, to complete the project successfully.
Safety First
Fitting a kitchen involves several safety risks. Kitchens combine electricity, water, and often a gas supply, making it essential to take proper precautions.
Drilling Holes
Before drilling into walls or floors, always check for electrical cables and water pipes using a pipe and cable detector. You can find these tools in pretty much any DIY store.
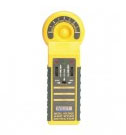
Find Pipe, Cable, and Stud Detectors in our DIY Superstore
The detector shown also identifies wall studs. This is crucial when attaching kitchen units, especially heavy wall units, to ensure a solid anchor point. Without a secure fixing, units can loosen or fall under weight.
Consider how much weight a wall unit holding dishes or mugs carries. A fixing into a stud or solid wall is far stronger than one in plasterboard.
If you must fix to plasterboard, use the appropriate plasterboard fixings for extra support.
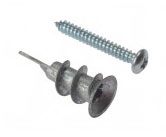
Specialist Plasterboard Fixings will make Wall Units more secure
Using Power Tools to Fit a Kitchen
Power tools can speed up and simplify kitchen fitting. You can use tools you already have or buy/hire them specifically for the job. However, always use a Safety RCD (Residual Current Device) when working in kitchens or bathrooms. An RCD automatically cuts off power if the tool’s cable is damaged or if it gets wet, protecting you from electric shock.
Learn more about RCDs and electrical safety in our Cables and Fuses Project.
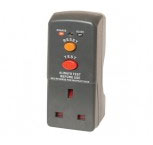
Use an RCD to protect against Electric Shock when using power tools in damp conditions
Check Your Tools
Before using any power tools, inspect them and their cables for damage. If you find any issues, avoid using the tools until they are professionally repaired or replaced.
Safety Equipment
Always wear the right safety gear for the job. If you’re unsure what protection you need, check the instructions for your tools and materials.
Gas
By law, only a Gas Safe Registered engineer can disconnect or connect gas appliances. Refer to the contact details below for more information.
Electricity
Be cautious when working with electricity. If you’re unsure, hire a qualified electrician. For more details, refer to our guide on Part P building regulations, as most kitchen electrical work must meet these standards.
As with gas, it’s illegal for any unqualified person to do a great range of electrical jobs, so any electrical work should only be done by a Part P registered electrician.
Measuring Your Kitchen
Accurately measure your kitchen in millimetres and create a detailed scaled plan using graph paper or a kitchen planning software.
Start measuring from the main entrance door and work clockwise. Note the direction of door swings.
Include permanent features like windows, chimney breasts, steps, or beams that might impact your layout.
Identify existing plumbing, waste fittings, boiler flues, and extractor fans. While you can relocate these, keeping them in place is often more cost-effective.
Record the sizes of appliances you plan to include and the units needed for them.
List any existing or essential kitchen appliances and furniture. Take precise measurements to ensure they fit well into your new design.
Consider the cabinet sizes needed to accommodate your current or desired equipment and utensils.
Points to Note When Measuring
When measuring your kitchen, pay attention to the following:
- Measure ceiling height at multiple points to check for variations. Account for any discrepancies in your plan.
- Verify the kitchen is square by measuring diagonally or comparing opposing walls. Adjust worktops and units if needed.
- Mark the locations of power points, plumbing, gas supplies, air vents, and permanent features like windows, sills, radiators, and boilers.
- Double-check all dimensions; remeasure if uncertain.
- Consider the space needed for your kitchen appliances.
- Identify the wall material to choose the correct fixings for your units.
Planning Your Kitchen
Design your kitchen to fit your needs by creating an efficient ‘work triangle’ between the cooker, sink, and fridge. This setup optimises your kitchen workflow. Also, consider the bin and recycling area, as these are frequently used, despite their lack of glamour.
Ensure you have ample workspace around these key areas for placing hot items, stacking dirty dishes, draining clean dishes, and preparing food. In smaller kitchens, you may need to make these areas multi-functional. Plan for both single and multiple users to avoid congestion, such as when one person is washing dishes while another is making tea.
Effective kitchen planning keeps your workspace uncluttered and functional. Your layout will depend on the room’s size, shape, and the placement of windows and doors. Remember, plumbing and electrical points can often be relocated, so don’t let these factors limit your design.
Design Layouts
Kitchens generally come in four basic layouts:
- Single line of units
- Double line of units (galley kitchen)
- L-shaped kitchen
- U-shaped kitchen
Larger kitchens can also include an island, breakfast bar, or eating area. Creative use of cabinets within these layouts can transform your kitchen to fit your lifestyle.
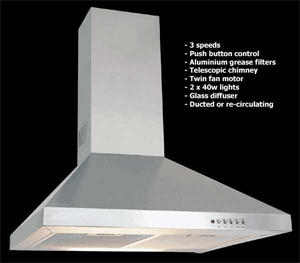
Cooker hoods for disbursing steam and smells
Working Out the Details for Your Kitchen
Designing a kitchen can be overwhelming, so here are some dos and don’ts to help you avoid common mistakes.
Follow these dos to minimize effort, control costs, and ensure safety when installing and using your kitchen units:
Definitely Do
- Place electrical sockets at least 150mm above worktops.
- Install extractors or cupboards at least 750mm above hobs.
- Use heat-resistant or fireproof cables for cookers and hobs.
Suggest You Do
- For paper plans, cut out unit shapes and move them on an outline plan to find the best layout.
- Place kitchen sinks near windows for a view.
- Position dishwashers and washing machines close to the sink to reduce plumbing work.
- Align wall and floor units in width for a cohesive look.
- Place tall units at the ends of worktop runs to maximise workspace.
- Position the hob and oven to minimise the distance for carrying hot pans.
- Leave at least 300mm of clear space on each side of the hob for pan handles.
- Install extractor fans on or near outside walls for optimal performance.
- Ensure enough space around free-standing appliances for easy access, following manufacturer instructions.
Definitely Don’t
- Place a cooker or hob under a window where curtains could catch fire, gas flames might blow out, or access is difficult.
- Install a wall unit above a hob without an extractor fan.
- Position a hob next to a tall unit, corner wall, or at the end of a worktop run.
- Place a cooker near opening doors.
- Encase boilers or gas appliances as they need proper airflow to function safely.
- Install a hob under or near electrical sockets.
- Block air vents if gas appliances are present in the kitchen.
Suggest You Don’t
- Place appliances in a corner.
- Install an inset sink near worktop joints.
- Position sinks near opening doors.
- Put cookers next to fridges or freezers.
If unsure about sink or dishwasher placement, consult a plumber. Proper positioning is crucial for waste pipes and drains.
For gas appliances like hobs and boilers, consult a Gas Safe registered fitter. They will also advise on fitting or relocating air vents.
Always consult a qualified, Part P registered electrician for electrical work, as kitchens are high-risk areas.
After choosing your units and worktops, consider adding finishing touches like plinths, pelmets, cornices, handles, decorative legs, and wirework.
Useful Contact Details
Gas Safe Register
- enquiries@gassaferegister.co.uk
- PO Box 6804
- Basingstoke RG24 4NB
- 0800 408 5500
- www.gassaferegister.co.uk
CIPHE – The Chartered Institute of Plumbing and Heating Engineering
- info@ciphe.org.uk
- 64 Station Lane
- Hornchurch
- Essex RM12 6NB
- 01708 472791
- www.ciphe.org.uk
NICEIC – National Inspection Council for Electrical Installation Contracting
- enquiries@niceic.com
- Warwick House, Houghton Hall Park
- Houghton Regis
- Dunstable LU5 5ZX
- 0870 013 0382
- www.niceic.com
Removing Your Old Kitchen
Wait until you’re fully prepared before removing your old kitchen. Ensure you have all the necessary tools, new kitchen units, appliances, and sufficient time to complete the installation.
Confirm receipt and accuracy of your new kitchen units and appliances before dismantling the old ones.
Only start removing your old kitchen after purchasing your new units and appliances, to avoid any last-minute shortages.
Getting the Kitchen Ready
Consider using another room as a temporary kitchen. An electric kettle and microwave will be handy while your kitchen is out of use.
Start by clearing everything from your kitchen—empty cupboards and clear worktops. Turn off the electricity at the main fuse board.
Turn off the water supply at the mains (remember to fill the kettle first!). Then disconnect sink and drain lines, followed by any appliances.
Removing Old Cabinets
Always wear safety gloves and goggles when removing cabinets. You’ll need two people to handle wall cabinets.
Start by removing all drawers and doors from the cabinets.
Remove the worktops by locating and unscrewing the attachments underneath the base cabinets. If the worktop is glued down, use a crowbar to lift it, placing a piece of waste wood between the wall and crowbar to protect the wall.
Finally, unscrew and detach the cabinets, then clear the kitchen.
Making Good
Now is the perfect time to repair your walls. Fill any holes, or if the walls are in poor condition, consider skimming them with plaster. For guidance, check out our plastering and screeding projects.
If your walls are in good shape, apply a first coat of paint.
It’s also time to lay new flooring, box in pipes, and arrange for any professional help you might need, such as from an electrician or plumber.
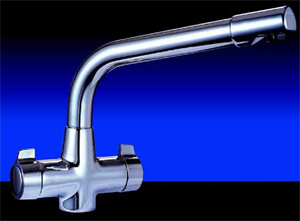
Contemporary kitchen tap
Tools and Products Needed for Installing a Kitchen
To fit your own kitchen, you’ll need a range of specialised tools. Using the right tools is crucial to avoid frustration and achieve a professional finish.
Here’s a list of essential tools for a successful kitchen installation:
- Basin Spanner
- Bolster Chisel
- Cabinet Accessories
- Cabinets
- Claw Hammer
- Crow Bar
- Doors
- Drill
- Drill Bits
- Electrical Screwdrivers
- Gloves
- Hammer
- Handles
- Kitchen Sink
- Kitchen Taps
- Masking Tape
- Measuring Tape
- Phillips Screwdriver
- Pliers
- Pump Pliers
- PVA Wood Glue
- Safety Goggles
- Saw
- Silicone Sealant
- Slotted Screwdriver
- Spanners
- Spirit Level
- Wire, Pipe, and Power Detector
- Worktops
Investing in the right tools can save time and reduce material waste by preventing mistakes and damage. Though there’s an initial cost, the efficiency and quality benefits are worth it.
How to Install a New Kitchen
Begin in the corner where you’ll start the installation. Use a spirit level to check if the floor is level.
If the floor isn’t level, mark the highest point on ‘wall 1’. From this mark, measure 870mm up from the floor for the top of your base cabinets, including 150mm for plinths and legs.
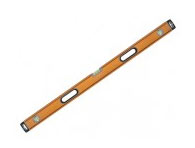
Use a spirit level or laser level to draw a level line for the top of the base cabinets. A longer spirit level (at least a meter) will provide more accuracy.
Ensure your kitchen units are level using a spirit level.
Decide the placement of your wall units and mark level lines for their top and bottom at the desired height.
Verify your level lines to ensure they are straight. This will ensure your cabinets are aligned correctly, even if your walls aren’t perfectly straight.
Step 1 – Cabinet Assembly
Assembling cabinets is straightforward, but read the instructions carefully to ensure you understand the process before starting and don’t cause any damage.
Hints and Tips
- Clear a spacious area for assembly and storage.
- Never lift or carry heavy boxes alone.
- Open and assemble one box at a time.
- Protect surfaces by assembling on a carpet or cardboard.
- Label each cabinet and door with masking tape and numbers.
- Wall units are installed before base units, so start with these first.
Step 2 – Installing Wall Cabinets
Install wall cabinets methodically, starting with the corner unit and working outward. Ensure you have assistance to hold the cabinets while you check levels and secure them.
Hints and Tips
- Align the wall unit with your layout plans and template lines, starting from the corner.
- For plasterboard walls, use cavity wall anchors if the fixings don’t align with studs. Alternatively, attach battens to the studs and mount the cabinets on these.
- Ensure each wall cabinet is level and straight before installing the next. Secure the bracket, hang the cabinet, and adjust screws to ensure it is level. A spirit level is crucial for accuracy!
Step 3 – Installing Base Cabinets
Start in the same corner as your wall units. Ensure the base cabinet aligns with your plan and is correctly positioned relative to the wall cabinet above.
Check that the base cabinet is level, even if the floor isn’t. Use your marking lines as a guide.
Install doors and shelves last for easier adjustments. Adjust the cabinet legs to match the height mark and ensure the unit is level before securing it to the wall.
Hints and Tips
- Don’t secure the cabinets to the wall until you’ve checked the levels of adjoining cabinets.
- Drill holes for pipes before installing the sink cabinet.
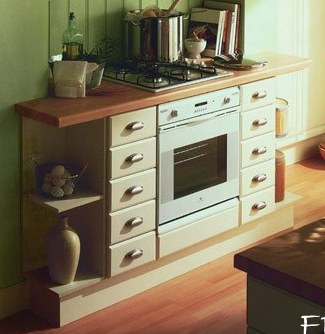
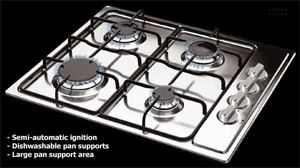
Kitchen base units with fitted cooker
Step 4 – Fitting Kitchen Worktops
Start by installing the end worktop first if your kitchen has a ‘U’ shape with three worktops. Measure the cabinet length and cut the worktop to fit. Decide whether to have a flush cut or slight overlap based on space.
For worktops butting against walls, account for wall imperfections or angles. Create a template for complex shapes if needed.
If using Formica, seal edges with PVA glue. Apply joining strips with silicone sealant to secure worktop edges and ends.
Once cut, position the worktops on base units and check for fit. Adjust as needed to ensure tight, flush joints.
Secure the worktops with appropriately sized screws and verify that all joints are level and square.

Fitting Kitchen Worktops is easy once they are cut to size and shape
Step 5 – Installing an Inset Sink and Taps
The installation process and tools depend on your sink and tap type. Start by measuring and marking the sink outline; use the provided template if available. Cut the hole carefully with a jigsaw.
Place the sink face down, seal the rim, and attach it to the worktop with securing clips.
Install the taps according to the instructions provided. Mixer taps are ideal for ease of use with wet hands. Consider taps with additional features like a hose or filtered water. Explore our guide on boiling water taps for more options.
Mixer Tap Installation Tips
- Ensure the hot pipe is on the left side when facing the sink.
- Use spring-clip clothes pegs to hold pipe nuts and olives in place while connecting.
- Read the installation instructions thoroughly before starting.
- Consider taps with hose options for easy rinsing and cleaning.
- Explore options like filtered or boiling water taps for added convenience.
Installing a kitchen may seem like a totally massive job and in all honesty, it is, however, if you have a little DIY experience and some common sense, then it’s certainly possible to do it yourself and get a finish like the pro’s!