
A lush lawn enhances any garden, offering more than just beauty. It boosts biodiversity, providing habitats for insects and supporting bird species.
Moreover, a lawn absorbs excess water, reducing flood risks, and absorbs CO2 and air impurities, promoting a healthier environment and well-being.
This guide will walk you through the crucial steps to establish your new lawn.
Quick Tips for a Stunning Lawn
The fastest route to a beautiful lawn is turfing. Alternatively, seeding a lawn from scratch is cheaper but slower; find the process in ourseeding a lawn project.
Turfing is a straightforward DIY project, though it can be heavy, especially for larger areas, so we would suggest assistance. The process of turfing involves 3 essential steps
Key steps include:
- Preparation: Ensure the ground is ready for laying turf to ensure optimal growth.
- Laying Turf: Roll out the turf for quick and robust new growth.
- Ongoing Maintenance: Care for the new turf until it’s fully established.
If you’re repairing an existing lawn, check out our repairing a damaged lawn project.
Best Times for Turfing Your Lawn
Choosing the right time to lay new turf is crucial for quick and easy lawn establishment.
Turfing can be done year-round, but spring and autumn are optimal, with less risk of turf drying out.
In summer, watch for dryness that can stunt growth or kill the grass. In winter, avoid freezing spells or frost.
Grasses, like other plants, have specific needs for water, nutrients, air, and light. Optimal conditions are typically found in spring and autumn.
We’ll cover ensuring your grass gets enough nutrients in the following sections.
Soil Preparation for Turf
Properly preparing the ground is crucial for successful turf laying. A well-prepared soil bed promotes easier root growth and enhances drought resistance.
Ensure the soil is 4-6 inches (100-150mm) deep, loose, and free of stones, weeds, and large lumps. The goal is to create an optimal surface for the turf to establish roots into.
Prepare the soil before ordering turf to lay it promptly upon arrival. Specialist topsoil isn’t necessary if the ground is well-prepared and fertilised correctly.
Choose a balanced NPK fertiliser for even nutrient distribution, avoiding high nitrogen fertilisers that may overstimulate growth and make the lawn more susceptible to disease.
Work on dry soil to prevent clumping and achieve a smooth, level surface. Mix new topsoil with existing soil and fertiliser to improve overall soil quality.
After turning over the soil, lightly compact it by treading over the entire area and then rake it to ensure levelness.
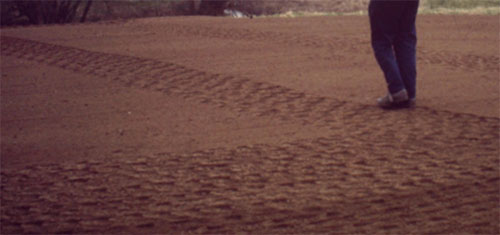
Treading the soil before new turf can be laid – Image courtesy of Lawns for You
Water the soil to a depth of at least 3 inches (75mm) a few days before laying the turf and again just before laying to help settle the soil and provide moisture for the turf roots.
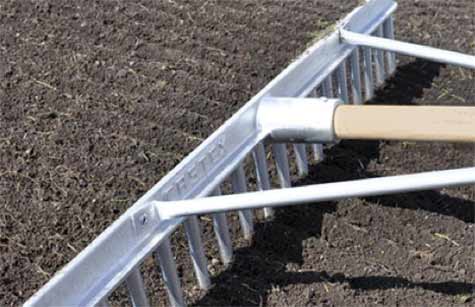
Finish preparing the soil for turf by raking over – Image courtesy of Turf Online
Monitor the weather forecast to order turf when rain is expected, facilitating better establishment without excessive watering.
Calculate Turf Quantity Needed
To start, measure the width and length of the area for turfing, then multiply these figures to find the area in square meters or square feet (depending on your chosen scale).
Add an extra 5% to account for shaping, avoiding stretching the turf, which can damage it and hinder rooting.
Order turf from reputable suppliers, preferably members of the Turfgrass Growers Association (TGA)), ensuring it’s less than 12 months old and around 9mm thick.
Consider the lawn’s purpose, maintenance needs, and grass type preferences when choosing turf varieties as there are many.
Most turfs blend grasses like dwarf rye grass, meadow grass, or common bent, each suited to different uses, climates, and maintenance levels.
Provide 4-5 days’ notice for delivery to your supplier.
Tools and Products Needed for Laying Turf
In order to lay your turf successfully you will need the following tools and products:
- Enough turf to complete the job
- A clear patch of land, ready for turf
- Watering can or hose with fine sprayer
- Suitable PPE gear
- Plank(s) of wood
- Garden fork
- Rake
- Brush or broom
- Long knife or cutting spade
- Wheelbarrow to carry the turf
- Supply of fine topsoil or compost
How to Lay Turf
Your turf should be laid as soon as physically possible upon delivery or collection to prevent weakening from lack of sunlight.
In hot, dry weather, lay and water the turf promptly; in cooler, more humid conditions, you have up to 24 hours before laying.
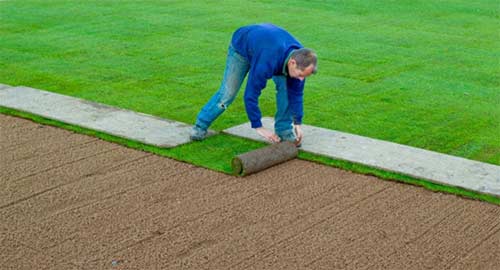
Laying turf from a board – Image courtesy of The Lawn Store
Step 1 – Prepare Ground
The first job is to clear and prepare the area in which you want to lay your turf.
Clear the area of any weeds, stones or similar and ensure you have around 100-150mm of decent quality soil for the turf to root into.
If not, you will need to line with good quality top soil or some NPK fertiliser and mix this with the existing soil.
Rake the area over until you have a clear, flat and level surface, free from any dips, bumps, stones or other similar objects.
Step 2 – Lay First Row of Turf
Begin by laying the first row of turf against a straight edge to ensure a square lawn, reducing gaps between turves.
As you lay each turf, create a slight hump at the edge against the previous one. Then, press down the hump to ensure a flat surface and press each piece of turf together firmly to eliminate gaps.
Press down on each turf to ensure proper contact between the roots and the soil beneath.
Step 3 – Continue Laying Turf
After completing the first row, lay down a wooden plank on top of it to use as a walkway to spread body weight when working open subsequent rows.
When laying, offset each subsequent row like brickwork to stagger the joints.
Lay each piece of turf with a slight hump, nudging it firmly against the previous one with a garden fork to eliminate gaps. Press down on the turf to ensure root contact with the soil below.
When working on sloping areas, lay the turf across the slope to reduce water runoff and maintain moisture.
Step 4 – Trim Turf to Fit
To cut in and fit turf around edges, paths, or features, use a long knife, cutting spade, or hand-saw.
Lay the turf as before, then trim away the excess. You can reuse cut-off pieces if large enough, but ensure thorough coverage without skimping.
Continue laying turf, staggering joints and filling any gaps.
Step 5 – Protect Edges and Joints
To prevent drying, cover exposed turf edges with soil or compost along their length.
Sprinkle fine soil over all joints and brush the entire lawn with a broom. Once laid, walking on the lawn as you work ensures good turf-soil contact.
Step 6 – Water and Finalize
Thoroughly water the new turf once you’ve finished, ensuring water seeps through to the ground below.
Regular watering is crucial for thriving and rooting. Avoid letting it dry out, as this can harm the turf.
Tip: If your soil is heavy with clay or the conditions are wet, lay down boards on the turf before walking on it. This distributes your weight, preventing turf compaction, which hinders root growth and water penetration.
New Turf Lawn Care
For the first 3-4 weeks after laying turf, it’s crucial to care for it diligently to ensure proper establishment.
If the lawn or patches begin to die, your investment of time and money will be lost. However, there are solutions if issues arise; refer to our guide on lawn repair.
Follow these tips to give your new lawn the best chance of thriving:
- Continue watering your new turf daily until it’s well-established, preferably when rain is expected.
- Avoid watering during midday when the sun is strong to prevent grass scorching. Early morning or evening watering is best, as less water evaporates.
- Avoid walking on the turf for about a week after laying and watering. Afterward, minimise unnecessary foot traffic until it’s fully established.
- Your lawn should handle light traffic within six months or by the next season. While it’s resilient, limit foot traffic initially for optimal growth.
- Don’t delay mowing, as it promotes new growth. Give the grass a light trim on the highest setting 2-3 days after laying to encourage root growth over upward growth.
- Check for lifted or disturbed areas, which can be damaged by mower blades. Firmly push these areas back down and water generously.
- When mowing, avoid cutting more than one-third of the grass’s length, or a maximum of one-quarter for the first few cuts.
- If grass clippings are light, they can be left on the lawn. Remove them if they start blocking sunlight from reaching the grass.
- Vary mowing directions each time to promote vigorous and healthy lawn growth.
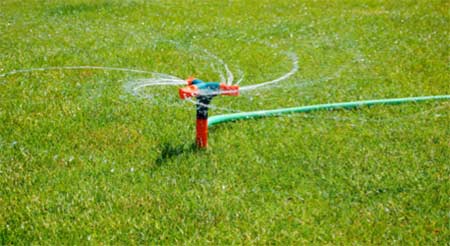
Watering your new lawn – Image courtesy of The Lawn Store
Feeding Your New Lawn
Once laid, feeding your lawn is of utmost importance to ensure it can grow and thrive. to make sure it’s fed at the optimal time, take note of the following guidelines:
- Once your lawn establishes, it needs nourishment since the initial fertiliser will deplete.
- If laid in spring with pre-turf fertiliser, start feeding in week six; without, start in week four.
- Autumn-laid lawns don’t need feeding until spring, and use winter feed if necessary in weeks four to six.
- Summer-laid lawns require feeding in weeks five or six due to frequent watering.
- Winter-laid lawns wait until March or April for feeding.
- As temperatures rise above 5 or 6 degrees Celsius, feed every 4-6 weeks until autumn.
- Spring allows for a nitrogen-rich fertiliser to stimulate growth and improve appearance.
- Use granular lawn feed, avoiding weed and feed products for at least a year.
- Promote biodiversity by embracing some uninvited species, aiding drought tolerance.
- Water the lawn regularly, especially in the first year, and remember that established lawns withstand droughts better.
- Consider environmental impact when watering, using harvested rainwater if needed.
- Continue feeding March to September, adjusting frequency based on soil and grass type.
- Ensure uniform spread of lawn feed, using dispensers for even application.
Explore our lawn maintenance projects for more information and alternatives like artificial turf.
We have a lots of projects about maintaining your lawn in our section on Lawns and Hedges where you can find more information. If you find the whole idea of laying and maintaining a real grass lawn too much we also have a project about how you can lay artificial grass.
Using turf to get an instant lawn is a hugely satisfying project and with a little preparation and planning it is relatively easy, as I hope that we have shown. Hopefully you have the confidence to lay your own turf lawn now.

 DIY Doctor Ltd,
  0845 6342 179


