Do you have uneven floors? Don’t worry many concrete floors and floor screeds are not 100% level, and there is a solution.
Laying a concrete floor slab or floor screed over a fairly large area lends itself to a little inaccuracy simply because of the difficulty in moving and laying an extremely wet and heavy material like concrete.
When to Use Self Levelling Compound
Using Self levelling compound to get a concrete floor slab level depends on how much it is out of level in the first place. It can only be used if the floor is out of level by 5mm or less. This can be checked in the following way.
- Strip off all existing carpets, tiles or other flooring
- Brush the floor thoroughly removing any carpet tape, carpet gripper, tile adhesive or nails
- Drop a marble or golf ball in many places on the floor and see which way it rolls to get a picture of where the floor is at its lowest
- Use a long spirit level to measure exactly how much out of level it is. This should be a 6 foot (1800mm) level to get a proper level because it is such a big area. Hold the up the low end of the level until the bubble is in the middle, then measure the gap between the floor and the raised end of the level
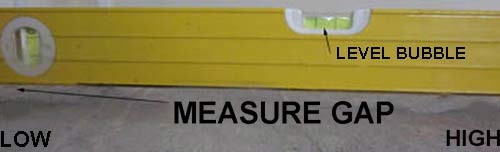
Using a spirit level to check the level of a floor and measure thickness of screed required
If the floor slab or screed is less than 5mm out of level you can use a self-levelling flooring compound, or self levelling screed.
Self levelling floors screed compound from the DIY Doctor store
Essentially, there are two types of self-levelling compound. The first is a powder which comes with a latex liquid in a separate container. To prepare it for use the two are mixed together to form the compound.
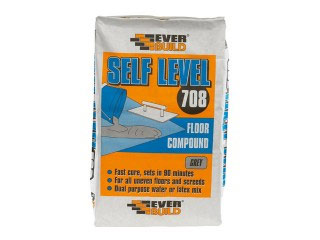
The second type of compound is a bag of powder, with the latex compound already included. This just needs to be mixed with water to use.
This second type is the type we sell in our DIY Store as it is so much easier to mix and work with. It can also be used to level floors which are more than 5mm out of level (up to 10mm) by adding some sharp sand, to the mix. This stiffens the mix up a little and allows it to be used in greater thicknesses.
What is Self levelling floor Screed?
A self levelling floor screeding compound usually contains latex because the compound is laid in a very thin layer and the latex gives it the flexibility it needs to move without cracking.
Once it is prepared, mixed and poured it will flatten out across the uneven floor and "self-level" due to gravity (with a little help – see below).
There are a number of types of compound but they all usually require mixing in a bucket using a mixing paddle. This involves attaching a special paddle to an electric drill and mixing it thoroughly to make sure the components are evenly distributed through the mixture. This can be seen in the video below.
Can I use screed if I have Under-floor heating?
Latex compounds are now very advanced and most can be used with under-floor heating but please check on the instructions that came with your under-floor heating kit.
Concrete floors, slabs or screeds often need priming before laying a self levelling screed or compound in order to take some of the porosity away from the surface.
Using Self Levelling Compound to Level a Floor
Mixing Flooring Compound with Sharp Sand to get a Thicker, Stronger Mix for Screeds Over 5mm
For the purposes of this project we are going to imagine that we are levelling a large sized room with some quite substantial dips (over 5mm) so, as we mentioned above, we will be using some sharp sand in with the mix to give it some additional rigidity.
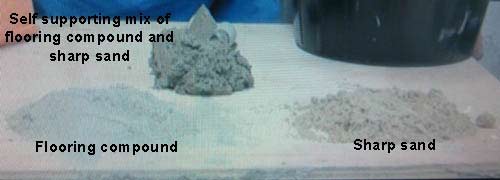
Mix self levelling compound with sharp sand to lay floor screed
To lay a self levelling floor screed or compound you should:
- Ensure surface is dust free by giving it a good sweeping and then run over it with a vacuum. Once dust free (or as much as it can be), prime the surface according to the manufacturer’s instructions
- Using a suitable bucket, mix the compound with a mixer paddle until the required consistency is obtained (again, check the manufacturer’s instructions). At this stage, mix only enough quantity to make the required number of screed lines as shown below. You can work out the volume using the length of the number of lines you need, their width (2 inches) and the depth
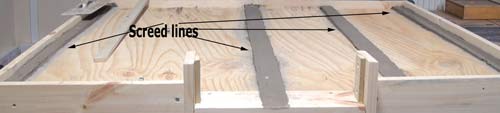
- Next, start forming your screed lines. These will need to be about 1 meter apart (or proportionately spaced accoring to the size of the room – basically you should have an even number of lines across the space of the room), start at one side of the room and work towards the opposite side (as can be seen in the image below). You can mark out where your screed lines are going to go on the floor using a pencil
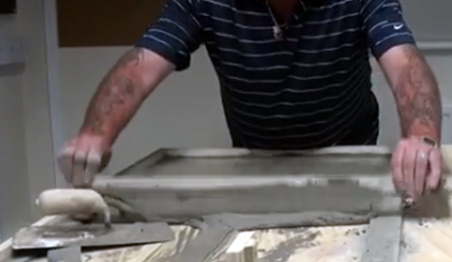
- Once the screed mixture is prepared, spread some of the flooring compound out into a strip about 2 inches wide as you can see from the image below. Use your trowel to level it off on the top and use a spirit level to ensure that the top of the screed lines are level in all places
- Repeat the above for the rest of your screed lines. As you go, ensure that they are level in all directions e.g. along the screed line itself and also level with any other screed lines next to it
- If you find that a line is not level you can add some more screed mixture and use your trowel to level it off. Again, check along the length of the line to make sure it is level and also against any adjacent lines
- Getting a dead flat level down the length of a line and across other lines is a tricky task so take your time and get it right. The level of your screed lines will ultimately determine the overall level of the floor
- Also remember, if you add more mixture to one line then this may make other lines out of level
- Once all your screed lines are down and level, trim off the sides of each line to get a nice, crisp edge (see image above)
- Leave the screed lines to dry for about an hour until they are firm enough to push down on lightly without causing a depression
- With your lines set it’s now time to start filling the spaces between the lines. Mix up some more screed and starting at one side of the room, pour it between the first set of lines and spread it out using a float or trowel. Using a straight edge, make sure there are no voids by tamping down gently on the surface using your screed lines as a level
- Once you have completed the first run, repeat until all gaps have been filled. Again check levels as you go
- One important fact to note is make sure that you work around your room towards the door. You don’t want to work across your room and then when you get to the end find that you are trapped in the corner of the room and have to walk over your nice levelled floor to get out.
- Once all laid and levelled leave the floor for at least 24 hours to dry out. Before walking on it use your finger to check that it is solid
Level screed lines to make a screeded floor level and then trim edges
Fill between screed lines with more screed mixture and tamping down to get level
Mixing and Laying Flooring Compound for Small Spaces and Screeds Less Than 5mm
If you only need to level a room or section of flooring that requires less than 5mm in depth of screed then you can use a straight self-levelling compound, without the need to add sharp sand to the mix. One that we have use in the past and found quite good is the Everbuild Flexiplus compound below.
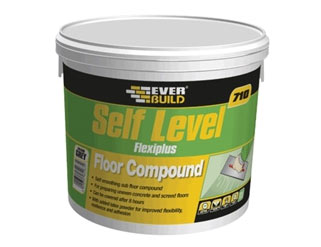
Self level Flexiplus compound
To level a floor using just compound follow the steps below:
- As with the above, remove all existing floor coverings such as carpets, tiles, adhesive etc…. and remove any dust and debris by giving it a good sweep and a vacuum
- Work out the volume of compound you will need by multiplying the width and length of the room by the depth of screed required and then mix up the required amount of compound is a bucket using a paddle mixer to the manufacturers specified consistency
- Once mixed, pour the mixture out on to the floor, starting ideally in the areas you have identified to be the low spots
- Using a steel float, trowel the mixture over the area to be levelled watching to see where it runs down any slopes to form its own level in the hollows. Despite its name the compound will not self-level automatically as there is surface tension to be overcome. The mixture should be pushed around the floor with the trowel to break this tension and gradually the compound will find a level
- Depending on who manufactured your chosen screed will depend on how long you need to leave it to cure. The above Flexiplus compound will set in 90 minutes but it will need to be left for at least 8 hours before anything can be laid on top. This will also depend on temperature – if it’s warm then it may take less time but if it’s cold it will take longer