Today, due to the rules stated in the Building Regulations, pretty much any floor slab that is laid is insulated as part of the job and even if it’s not a requirement set out in the plans or by building control, most reputable builders and architects will insists on it being done.
One of the ways of saving energy and retaining heat in the home is to allow less heat to be transmitted out of the floor and, at the same time, to allow less of the external cold in the ground to be transmitted into the house via a cold concrete floor slab.
In this DIY guide we will look at the various methods of insulating a concrete floor slab, both during construction and also methods for retrofitting insulation if you have an un-insulated floor slab.
Why do Floor Slabs Need Insulating?
Insulation under ground floor slabs is a good way of meeting the increased requirements of Building Regulations part L and also Building Regulations part F.
These sections deal with, in one way or another, the values (called U values) which a home should be insulated to and the energy which is saved by implementing this insulation. Every new build property including extensions should be insulated to the stated level in order to satisfy the regulations stated in both documents.
This effectively means that if your home is insulated to a high level it has to work less hard to provide the energy to maintain the heat you need to live comfortably. This also means that your heating system will be under less pressure to maintain your desired temperature and thus will also save you money.
Laying a new Floor Slab – How Should it be Insulated and What Should be Used?
The target U value for a concrete ground floor slab is 0.22 and these days the insulation must be provided around the edge of the floor slab as well. This stops any thermal bridging across the walls leading to cold spots.
A 50mm thick layer of proprietary floor slab insulation (e.g. 50mm Kingspan, Celotex or similar) is usually enough to reach and maintain the target U value but this should be checked with an architect first.
Insulation sheets should be laid tightly together with the joints staggered to avoid movement. The DPM (Damp Proof Membrane) is laid under the insulation on top of a soft blinding to ensure it is not punctured.
In terms of where the insulation should be placed, it can either be placed under the slab or between the slab and the floor screed. There are arguments for and against both, but if you are to use an under floor heating method of some kind the insulation is often placed on top of the floor slab, under the screed.
Take a look at our project on ground floor slabs to see the complete picture of ground floor slab construction and where to place the under slab insulation if the opinion of your architect, or your choice, is to place it below the concrete slab.
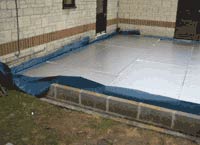
Slab insulation
The under floor insulation boards must be fully supported over their entire area with no voids and no projections. The silver foil covering of the insulation itself acts as a vapour barrier or vapour control layer and also stops moisture from the freshly poured concrete slab penetrating the insulation.
Despite this, it may be the case that your local Building Control may insist that a polyethene DPM sheet is also installed (usually between the insulation and concrete) so that this also provides an extra layer of protection in the form of both a vapour barrier and to prevent the concrete from damaging the foil coating of the insulation. Check with your Building Control Officer to confirm whether this is the case.
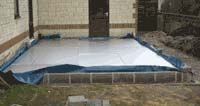
Insulated under floor slab
Insulating an Existing Concrete Floor
As we have looked at above, if laying a new slab then insulation can easily be incorporated into its construction. However if you have an existing slab that’s un-insulated that’s contributing to lower temperatures in your property then ideally it will need insulating. There are several ways to do this:
Insulating Under and Existing Concrete Floor Slab
This is arguably the trickiest, most costly and time consuming route to take but the one advantage that it does have is that it doesn’t have to raise the existing floor height.
Essentially what needs to be done is that the existing concrete floor slab needs to be broken up using a suitable breaker and then all the waste hardcore needs to be removed.
Once cleared and leveled a new slab then needs to be laid in its place that now features a layer of required insulation.
As you are adjusting the current thermal performance of the property you will probably need to gain planning approval before you start anything, so first call your local authority planning office.
Once you have discussed and gained the appropriate planning approval your allotted planning office will also be able to advise on the slab construction in terms of its overall depth including consolidated hardcore, insulation, dpc, binding layer, concrete slab etc. The slab construction itself will look something like the below:
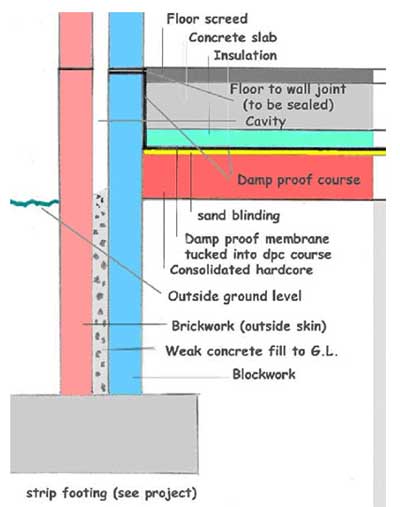
Cross section of a concrete slab showing different layers
Once the slab and screed have both fully cured you can then lay your chosen floor covering on top to finish.
Insulating on top of an Existing Concrete Slab With Solid and Aluminium Insulation
If the above solution of removing the existing slab and laying a new one is totally out of the question due to cost and inconvenience then the next solution is to insulate over the top of the existing concrete slab.
There are several ways that this can be done:
Insulated Timber Frame
The first is to construct a timber frame and insulate within the frame, only in this case you would need to lay a damp proof membrane between the concrete slab and the timber to prevent damp damage. The membrane also needs to be sealed to the wall behind the skirting.
Timber frame constructed over concrete slab and insulated
Laying Aluminium Foil Insulation
The second solution and cheapest and quickest of all is to insulate the slab using double sided aluminium foil. As most products of this nature are around the 5 – 7mm thick you aren’t going to need to raise the existing floor level too much so no fixtures and fittings will need to be messed with and if any doors need trimming up this will only be by a few millimetres.
To insulate the floor using foil insulation you first remove the existing floor covering, sweep and vacuum the slab fully to remove as much dust and debris as possible and then cover the floor entirely with the foil insulation ensuring that it’s butted up to all walls and also any joints are butted with no gaps.
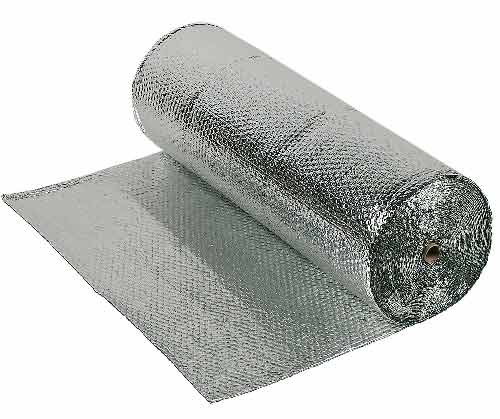
Foil insulation that can be laid over existing concrete floor slab
As you lay the insulation dab on a little EPDM adhesive every 300mm or so along each side as this will help to keep it in place on the concrete and prevent any movement.
Once all laid out and the adhesive has cured, use a utility knife to trim around the edges and then tape up all joints using aluminium foil tape.
With all the joints taped up you can then lay your chosen floor finish over the top e.g. carpet, lino etc.
Solid Insulation and Floating Floor
The third and often preferred solution due to its ease and relatively low cost is to construct what’s known as a “floating floor”. However there is one drawback to this method in that you will be raising the existing floor level by at least 70mm or so and this will ultimately mean radiators, sockets and other fixings may first need to be raised up by at least the increase in floor height, which in itself can be costly!
Here follows a basic run down on how To insulate an existing floor slab by laying a floating floor:
- The first job is to get any radiators, sockets or other fixings raised up from their existing locations by at least the increase in height of the new floor. Essentially this will be a sum total of the depth of insulation plus the depth of floor covering (either 18 or 22mm chipboard, 25mm ply or 40 – 50mm screed) plus the dpc membrane. To do this you will need to get in the appropriate plumbing and electrical trades. Our Find a Tradesman service can help you with this
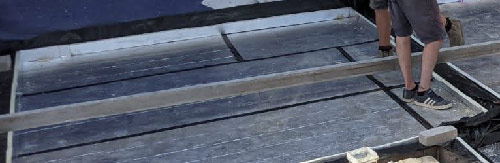
- Once any fixtures and fittings that need raising have been raised the room that you are working in will need to be fully cleared of any obstructions, this also includes the skirting boards, doors that open into the room etc.
- With the room fully cleared the next job is to use a spirit level to check the level of the floor. If you find that the existing slab is a fair bit out of level then the best solution at this stage is to level it up as this will mean that your new floating floor will in turn be level. See our project here on levelling floors for more information
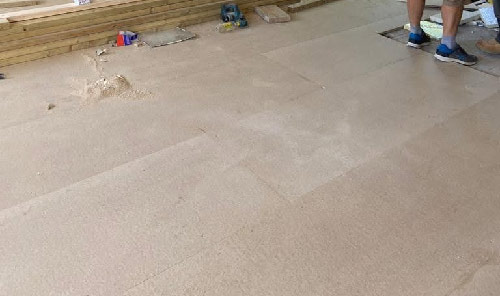
- Once fully cleared and levelled the solid insulation sheets are then laid across the floor area, but before you do fully sweep and vacuum the floor area to prevent any particles puncturing the foil covering of the insulation as this helps to act as a damp control barrier. In most cases these will be 50mm solid insulation sheets such as Celotex, Kingspan or a similar brand. All sheets should be butted up right next to each other and any cuts should be cut accurately to fill the area in question with absolutely no gaps. Once the entire floor area is covered use gaffer tape or a similar strong tape to tape over all joints
- Once the insulation sheets have been laid the next task is to lay the final floor finish over the top. As mentioned above this can either be a timber floor such as chipboard or indeed you can lay a screed straight over the solid insulation sheets. In the majority of cases a timber floor is probably preferable as it’s cheaper and easier to lay from a DIY perspective, however if you do choose a screed then see our project linked to above on how to lay this. For timber flooring use at least 18mm tongue and groove chipboard (preferably 22mm if possible) and ensure all tongues and grooves are glued using epoxy timber glue. Also a 10mm expansion gap needs to be left around the perimeter of the floor
- Once your chosen floor finish has been laid with the required expansion gap, the gap itself then needs filling with cork expansion strips. The strips should be pushed down into the gap so that it’s fully filled all the way around the room.
- With the expansion gap filled one of the final jobs is then to refit the skirting boards as these will then hide the expansion gap. Also when fitting the skirting try top leave a 5mm gap at the base as when your final floor covering e.g. carpet, lino etc. is laid it can then be tucked under the skirting for a neat finish
- The penultimate job is to now fit your chosen floor finish, carpet, lino, laminate, parquet etc.
- The final job is then to refit any doors or the like that had to be removed. Remember these will need to be trimmed up by the amount that the floor level has now increased so that they will open over the new floating floor
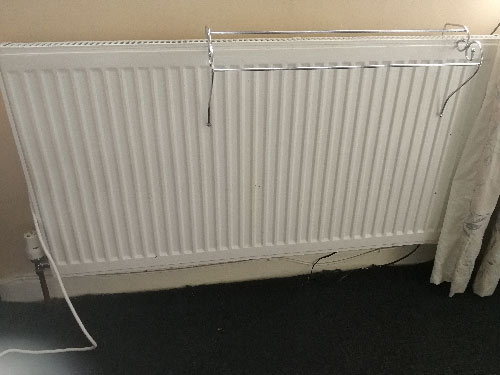
Radiator that needs to be raised up before laying floating floor

Room fully cleared of obstructions

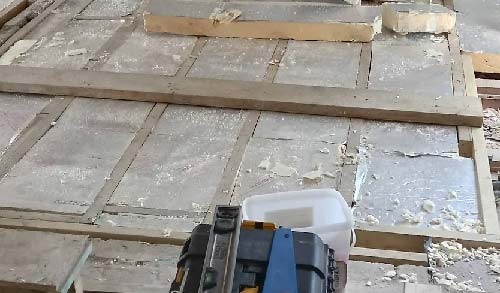
Levelling concrete floor before laying insulation
Insulation sheets laid across floor and all joints taped up
Timber floating floor laid over solid insulation
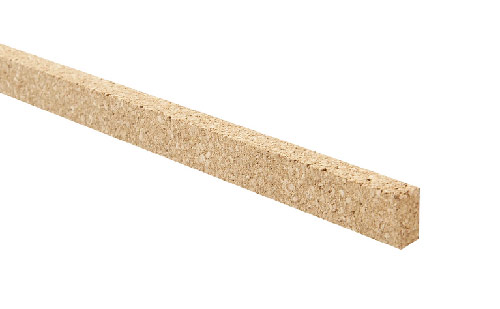
Cork expansion strips for filling expansion gap
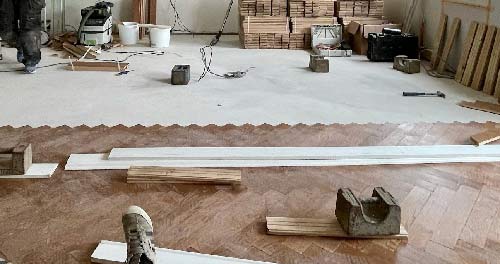
Fitting parquet flooring over finished floating floor
Insulating a concrete floor slab is always best done during its initial construction and indeed today should be to comply with building regulations. However if you live in an older property that was constructed when insulation wasn’t necessarily a requirement the quickest and in most cases cheapest solution is to lay an insulated floating floor over the existing slab