The flooring you choose to go in a given room really needs to reflect its main use and due to the levels of water and moisture in bathrooms and kitchens, carpet just isn’t suitable.
So, in light of this and spaces like these, vinyl flooring offers a waterproof, hardwearing and lasting solution. In this guide we run through the process of installing vinyl flooring and all that it entails.
Stone Wood Flooring
What is Vinyl Flooring?
Vinyl flooring is a popular and durable choice for both residential and commercial spaces. It’s made from synthetic materials, primarily polyvinyl chloride (PVC), which makes it highly resistant to moisture, stains, and wear. Available in sheets, tiles, and planks, vinyl flooring offers versatile options that can mimic the look of wood, stone, or tile, making it a cost-effective solution for many types of rooms.
One of the main reasons vinyl flooring is so popular in the UK is its ability to withstand water and moisture. Unlike wood or laminate, vinyl doesn’t warp or swell when exposed to water, making it ideal for bathrooms, kitchens, and even basements. It’s also relatively low-maintenance, requiring only occasional cleaning with a damp mop to keep it looking fresh.
Vinyl flooring is available in a huge range of styles and finishes, including realistic wood stone-look designs. These options allow you to get the appearance of expensive materials without the hefty price tag or upkeep.
Many vinyl floors also come with an added protective layer, ensuring they resist scratches, dents, and fading over time, making them perfect for high-traffic areas like hallways and living rooms.
Another key benefit of vinyl flooring is its comfort underfoot. Unlike hard materials like tile or stone, vinyl is soft and cushioned, which can make it more comfortable to stand or walk on for long periods. It’s also quieter than hard floors, reducing noise levels in busy households or offices.
Vinyl flooring is generally supplied in either individual planks or tiles or in large sheets, both suitable for DIY install with a little common sense and knowledge.
In respect to tiles and planks, there are 2 differing types of these, dry back and self-adhesive. Self-adhesive tiles are perfect for DIY projects. They come with a pre-applied adhesive, so no extra glue is needed. All you need is a sharp knife to cut the tiles or planks to fit your space—making them easy to install with minimal tools.
As you may guess from the name, dry back doesn’t have a built-in adhesive. You’ll need to buy and apply a separate adhesive to the back of each tile or plank before laying them down. Installing dry back tiles can be trickier and requires extra tools, making them less ideal for beginners.
Additionally, when installing tiles and planks, it’s essential that you unpack and leave them in the space you’re installing them in for at least 24 hours as this will allow them to acclimatise. You should also ensure that the ambient space remains at around 15-18°C, both during acclimatisation and also installation.

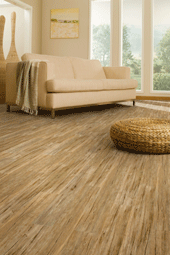
Vinyl plank flooring
Where Can You Lay Vinyl Flooring?
You can install vinyl tiles and planks on under-heated floors (max 28°C), as long as the heating is turned off 48 hours before, during, and 48 hours after installation. Keep the room temperature between 15-18deg;C. Vinyl is suitable for most rooms, including bathrooms, but not recommended for conservatories.
Before starting, plan your layout if you’re using multiple colours or styles. Like with ceramic or quarry tiles, measure your floor area to ensure you have enough tiles or planks.
If you’re laying tiles, start from the centre of the room and work outwards for an even finish. This approach ensures any edge cuts are neatly placed around the room.
For more tips, check out our ceramic tiling guide and floor tiles tutorial.
Do You Have to Put Down Underlay Under Vinyl Flooring?
When installing vinyl flooring, whether you need an underlay depends on the type of vinyl you’re using and the condition of your subfloor.
In most cases, vinyl flooring can be installed directly onto a clean, dry, and smooth subfloor without the need for underlay. However, in certain situations, using an underlay can improve comfort, soundproofing, and the overall performance of your floor.
For example, if you’re laying vinyl over a concrete or uneven subfloor, an underlay can help to smooth out imperfections. This is especially important for ensuring a long-lasting, professional-looking finish. If you’re installing vinyl over wooden floors, an underlay can also help to reduce noise and prevent creaking.
Another key benefit of using an underlay with vinyl is that it can add a layer of insulation, helping to keep your home warmer in the winter and cooler in the summer. Some underlays are specifically designed to provide extra cushioning, which can make your vinyl flooring more comfortable underfoot. This can be particularly useful in high-traffic areas or if you plan to stand on the floor for long periods.
In some cases, vinyl flooring comes with a pre-attached backing that acts as an underlay. If this is the case, you don’t need to add a separate underlay, as the built-in backing will provide the necessary support and insulation. Always check the manufacturer’s guidelines to ensure you’re following the correct installation instructions for your specific type of vinyl flooring.
Joining Vinyl Sheets in Large Rooms
When installing vinyl sheeting in a large room, you may find that you need to join two sheets together in order to cover the entire area. This can be a tricky job and needs to be done accurately and correctly to ensure a seamless and professional finish, especially if you are laying a patterned floor.
The first point to note is that you should always use a sharp utility knife and have a supply of spare blades as they blunt quickly and not using a sharp blade can cause rips and tears.
Next, decide on where to create your join. Try to avoid high-traffic areas such as doorways and the likes and pick and area away from places such as these, if possible. Under rugs, sofas or other large pieces of furniture is a good spot if you can.
When it comes to creating your join, once you have correctly fitted the first section of flooring, roll it out and lay the second section over it. If it’s patterned, slide the second section along until it matches.
Now, using a straight edge of some type, lay this out over the section of overlapping flooring and then use your sharp utility knife to cut through both sections of flooring. This will leave you with a perfectly cut joint.
Finally, gently without moving either section, peel the join back and apply adhesive to the floor and stick the joint down, allowing it to fully cure for the stated time.
Tools Needed for Installing Vinyl Flooring
In order to correctly lay vinyl flooring you will need the following tools and products:
- Enough vinyl flooring/tiles etc. to cover floor
- floor levelling compound (if needed)
- Utility knife
- Spare utility knife blades
- Straight edge (spirit level or similar)
- Tape measure
- Suitable pen for marking vinyl
- Bolster chisel
- Suitable vinyl adhesive/glue
- Suitable underlay (if needed)
- Primer for priming subfloor (if laying planks or tiles)
- Paint brush for primer
- Scraper for removing old flooring (if any)
- Hammer
- Punch (for knocking down nail heads)
- Decent sander (for smoothing timber surfaces, if needed)
- 6mm plywood (if needed for covering uneven timber floor)
- Nails for above plywood (if needed)
- Brush
- Dustpan and brush
- Vacuum
- Metal ruler
How to Prepare a Subfloor for Vinyl Flooring
As with pretty much all construction work, the overall outcome of the job and its success always comes down to the preparation work that’s done beforehand and this is no different when it comes to vinyl flooring.
Whether you’re laying sheet or plank vinyl flooring, it’s essential that the subfloor you’re laying on is absolutely flat and level to avoid any bumps, dips and lumps spoiling the final finish.
Additionally, where dips and lumps are present, extra stress and strain can be placed on the flooring causing holes and splits in sheet floors and separation in vinyl plank floors, so the very first job is to correctly prepare the subfloor.
Your subfloor must have a damp proof membrane and be smooth, dry (at least 75% RH for new floors), and free of debris. This applies whether you’re working with concrete, stone, timber, or old vinyl floors.
If you’re installing vinyl tiles or planks, make sure to prime the subfloor to isolate contaminants like paint, plaster, or grease. This helps the flooring adhere better.
Start by cleaning your subfloor. This is done by sweeping, vacuuming, and wiping it down. For existing ceramic or quarry tiles, ensure they’re in good condition and well-bonded.
These will also need a smoothing compound to be applied to their surface to level out dips around grout lines etc. Use as directed by the manufacturer.
If removing and replacing an old vinyl floor, make absolutely sure to strip off any and all old vinyl and any remaining adhesive before smoothing the surface.
For wooden subfloors, secure loose boards, hammer down any proud nails, and sand uneven spots. Apply a smoothing compound if necessary, then cover with 6mm plywood, fixing it with 25mm lost head nails spaced 100mm apart.
After levelling your subfloor, apply a coat of floor primer using a brush or roller. Most primers will dry in 15-20 minutes, turning from white to clear as they cure.
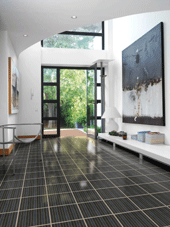
Professionally finished flat and level vinyl floor
How to Lay Vinyl Flooring
Now that we have explored the various types of vinyl flooring, what underlay needs to be used and various other aspects, it’s now time to see how to actually fit it.
Step 1: Prepare the Subfloor
As we have said, the very first job before any laying of any vinyl flooring takes place, you must ensure the subfloor is clean, dry, and level. Use the information above and below to ensure it is.
- Clean the Floor: Sweep and mop the floor to remove any dust or debris. A clean surface will help the adhesive bond better and prevent imperfections in the finish.
- Check for Moisture: Vinyl is sensitive to moisture, so ensure the subfloor is completely dry. Use a moisture meter if necessary. If damp, use a dehumidifier until bone dry.
- Level the Floor: If your subfloor is uneven, use a floor-levelling compound to create a smooth surface. This is especially important for concrete or wood subfloors. See our levelling concrete floors project for help and the info above for timber floors.
- Ensure the Subfloor Is Firm: If you’re installing over plywood, check that it’s secured and not creaky. Reinforce if necessary.
Step 2: Measure and Plan the Layout
To ensue that you have enough tiles, planks or vinyl sheeting to cover the floor you’re working on, accurately measuring the whole area is essential.
- Measure the Room: Measure the length and width of the room to calculate how much vinyl you need. Add 10% to your measurements to account for waste, mistakes and a bit of movement room.
- Decide on the Direction: Lay vinyl planks or tiles in the same direction as the longest wall for a more visually appealing look. This helps create a natural flow in the room and helps to make the room space feel bigger.
- Dry Fit the Vinyl: Lay a few pieces of vinyl (without adhesive) to see how they fit. This will help you plan cuts and figure out where seams will fall.
- Buy Flooring: Once you know exactly how much vinyl you need, get your chosen flooring purchased ready for installing.
Step 3: Install the Vinyl Flooring
Now, once all of the above has been taken care of, let’s get into the actual installation process. This varies slightly depending on the type of vinyl flooring you’re laying.
For Click-Lock Vinyl Planks:
- 1. Start in the Centre: Begin installing planks and tiles from the centre of the room and work out to the edge. Measure and mark the room centre of the room for your start location.
- 2. Click and Lock: For click and lock planks, simply click the edges of each plank into place, working row by row. Use a rubber mallet to tap planks tightly together.
- 3. Trim Edges: When you reach the wall, cut the last row of planks or tiles to fit.
- 4. Use Spacers: Place spacers between the wall and the vinyl to maintain a 5mm or so gap for expansion as the floor will spread slightly as it’s walked on.
For Glue-Down Vinyl Tiles, Planks or Sheets:
- 1. Apply Adhesive/Peel Backing: Spread a thin layer of vinyl flooring adhesive with a trowel, following the manufacturer’s instructions for coverage and drying time, on to the floor or peel the adhesive cover backing from the plank/tile.
- 2. Laying Tiles: Again, as above, start in the room centre, press down the first tile or sheet, and continue laying the tiles, working out to the rooms edge. Apply light pressure to ensure good adhesion. Ensure each plank/tile is laid level and square.
- 3. Align the Seams: Make sure the edges of each tile are aligned neatly to avoid gaps or uneven seams.
- 4. Roll the Floor: After all tiles are laid, roll the entire area with a heavy roller to press the vinyl into the adhesive and remove air bubbles.
- 5. Laying Sheet Vinyl: Due to the size of sheet vinyl, it’s certainly trickier to lay. Firstly, roll vinyl up and move to the centre of then room and unroll it, position it so it’s square and then, using a bolster, push the vinyl into the angle between skirting board and floor and lay down a metal ruler in the crease and use a utility knife to cut along the crease. Repeat around room and gently around any obstacles.
- 6. Gluing Vinyl Sheet: Once all cut to size, depending on the type of sheet flooring you have it may have been to be stuck down. Stay flat, heavy duty flooring shouldn’t need gluing, cushioned it just needs gluing at edges and joints, but non-cushioned, thinner vinyl needs gluing over its whole area.
Step 4: Finish Edges and Seal
After the flooring has been installed, the next task is to finish the edges and seal it.
- Install Moulding/Trim: If you removed any baseboards, expansion mouldings or skirting around the perimeter of the room, it can now be refitted or installed if you’re installing it now. This will cover the edges or the vinyl and create a polished look.
- Apply Sealant: If necessary, especially for kitchens and bathrooms, apply silicone sealer along any edges of the flooring to prevent water from getting underneath.
Step 5: Clean Up and Final Touches
Once all fitted and installed, it’s time to tidy everything up.
- Clean the Floor: Sweep up any dust or debris from cutting. Use a damp mop to clean the floor, making sure there’s no adhesive residue.
- Allow the Adhesive to Cure: If you’ve used glue-down vinyl or silicone sealant, allow both to cure for 24–48 hours before moving furniture back in.
Tips for Cutting Around Obstacles
When laying any type of flooring, it’s inevitable that you will need to cut in around certain obstacles such as door frames, architrave, pipes, toilets etc. Here follows some tips of how to do so. The principles of both techniques can be applied to pretty much all types of obstructions.
- Architrave – The easiest way to fit tiles/planks/sheets around architrave is by trimming the base of the architrave so the vinyl can slide underneath. Place the vinyl flat on the floor against the architrave. Lay a hand saw flat on the tile and saw into the architrave, keeping the cut level for a smooth fit. Use sandpaper or a chisel to tidy the cut if needed. If cutting the architrave isn’t an option, create a template using a profile gauge or cardboard, transfer it onto the vinyl, and cut it to fit.
- Pipework – To tile around pipes, punch a hole slightly larger than the pipe’s diameter in the vinyl. Use a sharpened piece of pipe (e.g., copper) as a cutting tool: align it over the vinyl where the pipe will go and tap the top with a hammer to create a clean hole. Then, cut a straight line from the vinyl’s edge to the hole using scissors. This allows it to fit neatly around the pipe.
Lifting Tiles and Planks
Over time, tiles or planks may start to lift. If this happens, you can often fix it depending on the brand and adhesive used.
To re-stick a lifted tile or plank, use a hair dryer to gently heat the area. This softens both the material and adhesive. Once heated, press it down with a cloth, smoothing from the centre to the edges. Apply firm pressure to secure it in place.
If this method doesn’t work, you may need to remove the tile or plank and replace it.
Replacing Damaged Tiles and Planks
Keep a few spare tiles or planks on hand for easy replacement if any get damaged.
To replace one, use a sharp knife to cut the damaged tile or plank into strips. Heat the area with a hair dryer to soften the material and adhesive. Carefully lift the strips, starting at the centre, to avoid damaging nearby tiles or planks. Once removed, install a new tile or plank using the steps outlined earlier in this guide.
Greystrip Flooring
Maintenance
Modern vinyl flooring often features a durable PU (Polyurethane) coating, helping it stay fresh and new with regular care. Simply sweep and mop using a general floor cleaner for routine maintenance.
Avoid using solvents, as they can cause damage. For stubborn marks or stains, white spirit can be used sparingly—test it first on a hidden area to ensure it won’t harm the surface.
If you’ve never laid a vinyl floor before, be it tiles, planks or sheet flooring, the thought of tackling such a job may seem extremely daunting, however if you take your time and follow the instructions above, you can be sure of a great finish.