Insulating your loft is probably the most cost effective way to save energy in your home as it is cheap to do and it is where the majority of the heat can be lost. See below where we discuss the benefits of loft insulation in more detail, however before going into going into that we are going to explain the different types of roof and what insulation should be used in each.
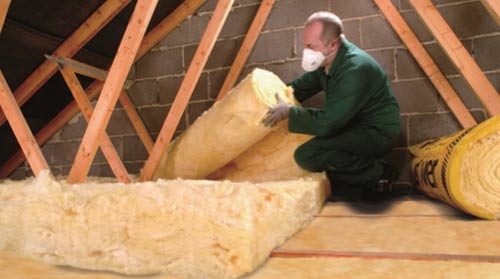
Laying insulation in a loft is an excellent DIY job
We describe how to you go about insulating your loft here if you want to jump straight there, but in this project we help you to choose the right type of insulation for your needs and work out how much of it you need.
The Different Types of Roof Insulation Options
There are a range of different options for insulating different roofs depending on their construction. We will cover these briefly so that you can understand where and when they should be used, before we focus on explaining how you calculate the amount of insulation needed to insulate a cold roof or cold loft, which is by far and away the most common type.
Here are the most typical options for roof insulation:
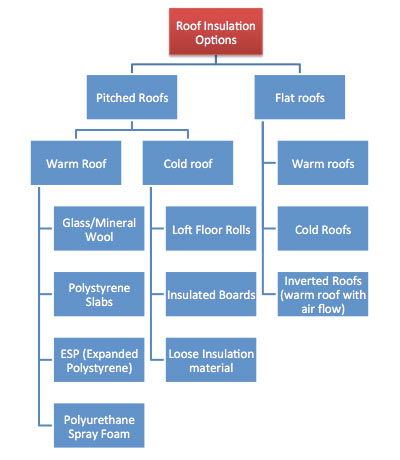
Options for Roof Insulation depending on Roof Construction and Insulation Type
Flat Roof Insulation
We cover this in detail in our project about the construction of a flat roof, including the three types:
- Cold Roofs; includes an air space in the roof construction
- Warm Roofs; the air space in the construction is fill completely with insulation
- Inverted roofs (Warm roof with airflow); the air space it part filled with insulation but allows for air flow under the insulation
Pitched Roof Insulation
This is a traditional roof as we know it with a loft space that can be accessed usually through a hatch. There are two way that these can be insulated:
- Cold Roof; this is the most common type where the insulation is laid over the top of the ceiling to keep the rooms below warm, but the loft space will therefore not be heated and as a result is called a “Cold Roof”. See here for how to lay insulation yourself in a cold roof
- Warm Roof; this is where the insulation is applied to the underside of the roof rather than the top of the ceilings. This has the effect of trapping the warm air in the loft space, rather than stopping it get into the loft space, hence ‘warm roof’
Pros and Cons of Warm versus Cold Roofs
There are a range of materials and methods for insulating a warm roof, but with the exception of spray foam there needs to be an air gap between the roof tiles to reduce condensation. This means that warm roof insulation solutions are more specialist as you need to know what and why you are using them which does make them more expensive generally.
Another disadvantage is that you have more space to heat as you are heating the whole loft space, as well as all the habitable rooms, however typically the insulation performs better so will generally offset this disadvantage.
Spray foam insulation can also provide structural strength to the roof, but you need to ensure that there are no slipped or broken tiles as the foam is generally applied to the underside of them without felt. This means that they are effectively stuck in place once it has been applied.
By far and away the most common type of roof is the cold roof and as this does not need specialist advice to fit this is where we will focus.
Different Types of Insulation for a Cold Roof
A cold roof is the most common type there is, where the insulation is laid on top of the ceiling between the joists. There are a few types of loft insulation available for the DIY enthusiast to place in the loft or attic.
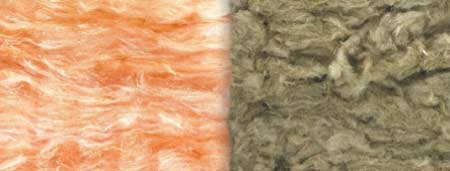
Glass Fibre versus Rock or Mineral Fibre Insulation
These are the main insulation options you have:
Rolled Batt or Blanket Insulation
This type is dealt with in detail in our project about laying loft insulation. It is the most commonly used and it is recommended for a DIY fit.
Glass Fibre Matting
Glass fibre was invented by accident in the 1930’s and has been used as an excellent insulator ever since.
It is made from thin strands of liquid glass that is cooled quickly to create a fibre.
It is slightly more insulating than Rock wool insulation for its weight but not enough to worry about. Otherwise it has very similar performance and can be used in the exactly same way.
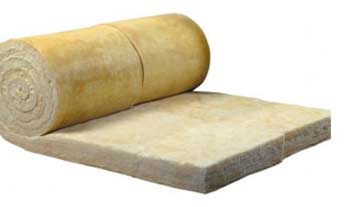
Glass fibre insulation
Rock or Mineral Fibre
Like glass fibre insulation Rockwool is made by heating rock, generally dolomite, until it melts and then forcing it into strands which are cooled to create “wool” fibres.
It is also referred to as Rockwool, Stone wool or Slag wool reflecting the original material that made it. Slag wool is made from the waste created in blast furnaces called slag
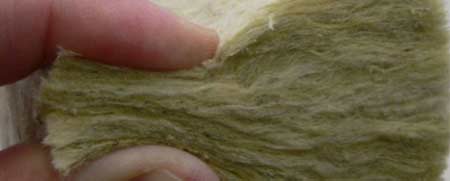
Rock wool insulation
Sheep’s Wool
This is insulation made from sheep’s wool which is a very eco-friendly option but it does come at a price. It is more pleasant to work with as it is not an irritant.
Ensure that it is treated as it will attract all manner of creatures to make their homes in it if it is not
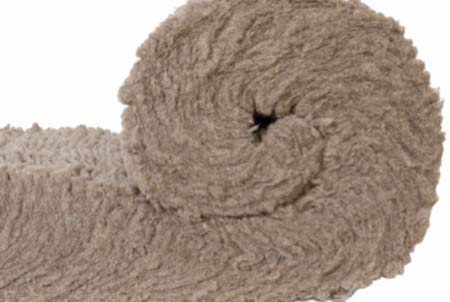
Sheeps wool insulation
Plastic or Polyester Fibre
It is possible to make an insulating fibre from recycled plastic which has some eco-friendly qualities but does not come at quite the price tag as sheep’s wool insulation, although is it slightly more expensive than a mineral wool.
Like sheep’s wool it is not an irritant and is generally recyclable too.
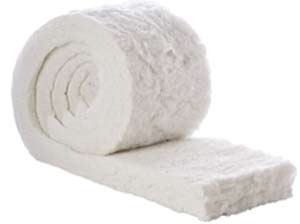
Plastic fibre insulation
Foil-Backed Felt
It is possible to get glass fibre and Rockwool insulation in foil back mats which improves the insulating qualities. Always lay the insulation with the foil facing up on the top of the insulation layer.
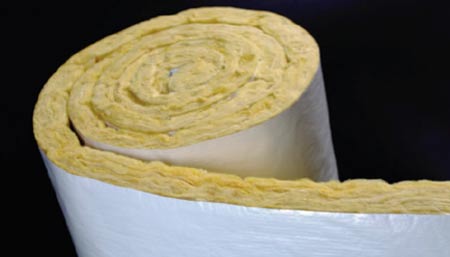
Foil backed insulation
Pros and Cons:
This type of insulation is easy to install, and you can get it at almost any builders merchant, although the more specialist types which are more eco-friendly will be harder to get and you might need to use specialist suppliers.
On the downside they are irritants, or the non-irritating varieties are more expensive. They can be bulky and awkward to get into tight spaces and might need to be cut to size making them slower to lay.
Loose Fill Materials
Broadly speaking there are two types:
- Spread Loose Fill – This is a loose insulating material that is spread across the loft space rather than being rolled out. It can be any of the fibres described above, but not formed into rolled mats. Commonly it will be glass or mineral wool, but there are ‘green’ alternatives such as cork granules and recycled newspaper
- Blown Insulation – This is loose insulation material that is mechanically blown into the loft, usually by a professional firm
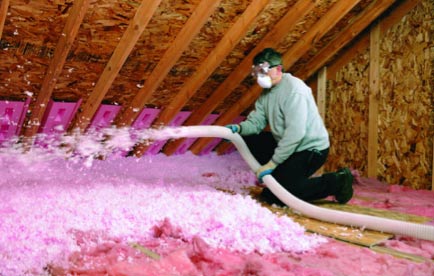
Blown insulation – Image courtesy of M&M Insulation
Pros and Cons:
The great benefit of this type of material is that it is easy to lay, particularly in tricky to reach areas and tight nooks and crannies.
There is no cutting to size and so it is quick to spread out, especially if blown by a professional outfit.
On the downside it is expensive and cannot be used in a draughty loft where it might be blown about. While this can be ideal between joists, it becomes more problematic above them.
If you are blowing mineral fibres you will need to ensure you have personal protective equipment.
Insulated Boards
This are sometimes know as sheet loft insulation, and are either sheets of insulation or boards with insulation applied to the directly.
This “category” would include the sheet insulation that is ideal for insulating on sloping and vertical surfaces where loose or rolled insulation would not work so well.
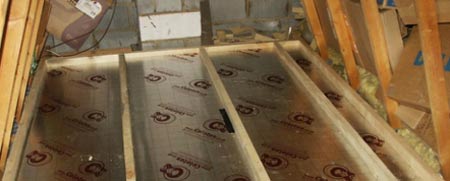
Insulation boards between joists
There are specialist insulated loft boards that are designed to be laid across the joists and allow you to keep your storage space.
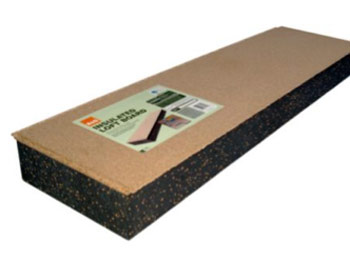
Insulated Loft Boards – Image courtesy of B&Q
Pros and Cons:
These are usually much more efficient insulators so the thickness can be less than other types of loft insulation.
The big problem with this form of insulation for lofts floors is that they are fragile, even the ones designed to be used as loft boards. They are much more expensive to purchase and they are not eco-friendly. Because of cost mainly, they would seldom be used in a loft.
How Much Loft Insulation Do You Need?
Using less than the recommended amount of insulation will cost you money. As much of 25% of your heating can be lost through the roof with no insulation in place. This represents about £155.00 per year wasted according to the Energy Saving Trust not to mention the tonnes of CO2.
Currently the government recommendation is that you should have 270mm thickness of insulation in your loft. This is based on the standard mineral wool, but the requirement is really about the amount of thermal insulation you have – the thicker the layer of insulation the more insulating it is.
As we discussed above the insulating properties of all the rolled insulation options are broadly similar so it is adequate to use thickness are a crude measure of the insulating capacity. No need to go into R-values and thermal conductivity values – phew!
For interest thought, the greater the R-value or lower the thermal conductivity value the better the material is at insulating. If you have multiple layers you simple add the R-values of each layer to get the total R-Value for the complete thickness of insulation materials you are using.
Back in the 70’s the recommendations was to have 25mm and then more recently it was increased to 100mm, and by 2013 it had increased again. The full thickness of insulation in the United Kingdom (from August 2013) should be a minimum of 270mm.
You can have more if you want! The insulation works by trapping air in the mineral wool or similar.
Air is an excellent insulator so the more air (the thicker the layer of air) that you can trap the more insulating it will be.
Where air is poor at trapping heat is where it is allowed to move; it warms up and then moves taking the heat with it. This is known as convection, and if this is stopped, by trapping the air in the “wool” then air becomes an excellent insulator.
There are diminishing returns for adding more and more insulation so the guidelines therefore don’t suggest adding greater depths as the returns (or savings) don’t justify it.
While it is not going to hurt to have more insulation the cost savings you will get for every extra layer of insulation get less, so eventually it not worth adding any more.
How to Calculate How Much Insulation You Need in Your Loft
There are two things that you need to know before you start:
- The “floor” area of your loft (Length x Width)
- The depth of insulation that you already have
It is also helpful to know the height of the joists, but this is likely to be close enough to 100mm not to matter – the nice thing about working with insulation is that the measurements do not need to be very precise as it is a squashy substance anyway.
You want to know the joist height so you can decide it the first layer of insulation is going to be laid in between the joists. Or you can just as easily do this by looking at it.
Thicknesses range from:
- 100mm (4 in)
- 170mm (7 in)
- 200mm (8 in)
This way you can add the right amount to get the desired thickness overall (270mm or 11 in).
There is no need to lift old insulation – just lay the new stuff directly on top, without squashing it down.
The rolls are usually 600mm (24in) or 400mm (16in) wide. This is because it’s the same distance specified between ceiling joists in most modern homes.
Most of the wider rolls come perforated so that it is easy to cut them to size of the more common joist widths.
Here’s how to calculate how much you need:
Laying a Base Layer
If you have no insulation or only 25mm of insulation the insulation will need to be laid between the joists. You will need to lay a Top Layer of insulation over this (see below).
Use 100mm thick rolls which has a coverage of 8.3 m2.
However, there will be joists that will take up some of the area so deduct 10%.
The calculation is as follows:
Area (in sq m) x (1 – 0.1) ÷ 8.3 sq m = No rolls of 100mm mineral wool required.
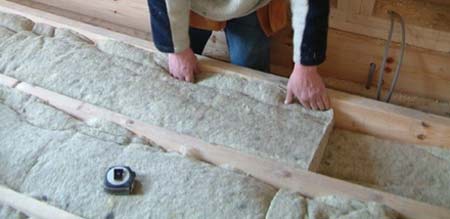
Insulation between joists – Image courtesy of OVO Energy
Laying the Top Layer
If you have already got 100mm of insulation you can then lay a top layer:
Use 170mm thick rolls which have a coverage of 6.47 m2
There will be no joists so there is no need to deduct anything.
The calculation is as follows:
Area (in sq m) ÷ 6.47 sq m = No rolls of 170mm mineral wool required.
Laying a Super Top Layer
If you have between 30mm and 100mm you can lay a super thick top layer.
Use 200mm thick rolls which have a coverage of 5.61 m2
There will be no joists so there is no need to deduct anything.
The calculation is:
Area (in sq m) ÷ 5.61 sq m = No rolls of 200mm mineral wool required.
Laying a Thin Top Layer
If you have over 170mm you can lay a thin top layer.
Use 100mm thick rolls which have a coverage of 8.3 m2.
There will be no joists so there is no need to deduct anything.
The calculation is as follows:
Area (in sq m) ÷ 8.3 sq m = No rolls of 100mm mineral wool required.
Loft roll, given time, will settle and become thinner. This will have the effect of collapsing the tiny gaps between the fibres which trap the heat and it soon becomes useless as the heat can pass straight through it. This is why you might need to add more insulation in time.
The guidelines make a minimum recommendation for the thickness, so if you are in any doubt we suggest that you to exceed it rather than have less than this depth (270mm).
Final Preparations before Laying Insulation
Before you head off to buy your insulation there are a few things that you should quickly check:
- Ventilation: It is very important that there is enough ventilation so that condensation doesn’t build up in the loft space and potentially cause rot. There should be a 50mm (2 in) gap under the eaves between the insulation and the roof, or ventilators elsewhere in the roof structure. If not, then you need to ensure that you have ventilation – you might need to call in a roofing specialist
- Pipes: There might be pipes in the loft which need lagging. Check for these and then purchase suitable lagging while you are buying your insulation
- Water Tank Jacket: Check that if there is a tank in the loft that it has a jacket. If not you can get one of these too. You will need to measure the size of the tank to get one the right size
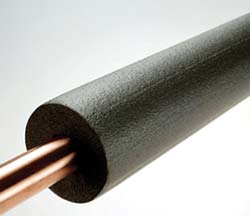
Pipe lagged with insulation
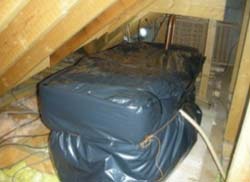
Water tank in a jacket – Image courtesy of insulate-store.co.uk
Now you are ready to go and get your insulation and anything else you need. Then you can get started with laying the insulation.
The benefits of Adding Insulation toy your Loft
This is a very worthwhile job on a number of counts.
Firstly, because you will save money as your heating will become more efficient as you are not loosing so much heat through the loft.
As a result of this you will be using less energy, so doing your bit to save the planet.
You will also find that your home is more comfortable; warmer in winter and cooler in summer, maintaining a stable temperature for longer.
The heat will not be lost so quickly when the heating goes off so the temperature will not fluctuate so fast or far.
The table below shows the savings that can be made with proper loft insulation. The data in the table was provided by The Energy Saving Trust:
| Loft insulation (0 – 270mm) | Loft insulation (50 – 270mm) | |
| Annual saving per year (£) | Around £155 | Around £45 |
| Installed cost (£) | Around £500 | Around £500 |
| Installed payback | Around 3 years | Around 11 years |
| DIY cost | From £250 | Around £180 |
| DIY payback | From 2 years | Around 4 years |
| CO2 saving per year | Around 1 tonne | Around 300kg |
As you can see, insulating the loft is a no-brainer on every level so why not find out how by looking at our project all about how to lay insulation in your loft.

