Fitting a door number or door numbers to a front door can be one of the easier DIY jobs, but as with many things, if the prep work is not done properly e.g. measured out and levelled up, then the over finish will look sloppy and poor.
Although all you’re doing is sticking some numbers on a door, to get the best possible look, any and all numbers should be straight and level and in the centre of the door.
What Different Types of Door Number are There?
Door numbers today come in a vast array of different sizes, colours, materials and styles to accomodate every possible different door type and taste, for example there are traditional wrought iron door numbers and also more modern brushed chrome for that more contemporary look.
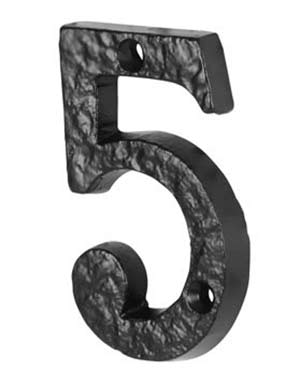
Traditional style wrought iron door number
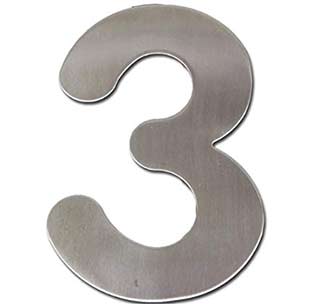
Contemporary brushed aluminium door number
Aside from the different styles and materials used to make door numbers that differentiate one from another, the other main difference comes in the way that they are attached to the door itself:
- Screws: Arguably the most common – small screws are used to screw each number in several locations to the door, holding it in place
- Adhesive: In place of screws, each number features a sticky adhesive pad on it’s rear. A protective adhesive backing layer is peeled off and the number is then stuck to the door
- Bolts: These are mainly used in busy city areas sometimes to stop theft but are very uncommon in a domestic situation. A bolt on the rear of the number goes throught the door and is bolted up from the rear of the door
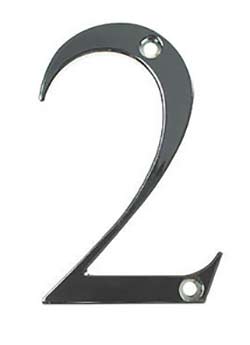
Screw on door number

Adhesive fixed door number
Where on the Door Should Door Numbers be Fixed to?
In answer to this question, it’s really up to you where you decide to put the numbers on your door, after all it’s your door and your house!
As a general rule of thumb, door numbers tend to be fixed in the centre of the door towards the top normally halfway between the top of the door and the handle and lock.
As door numbers are generally used to identify a given property, having them in this position measn that they are somewhere around eye level for most people meaning that they can easily been seen.
With the above in mind if it’s important that others can spot your house quickly and easily then it’s a great idea to have your numbers somewhere around this area, but as we have said, where you choose to put them is totaly up to you.
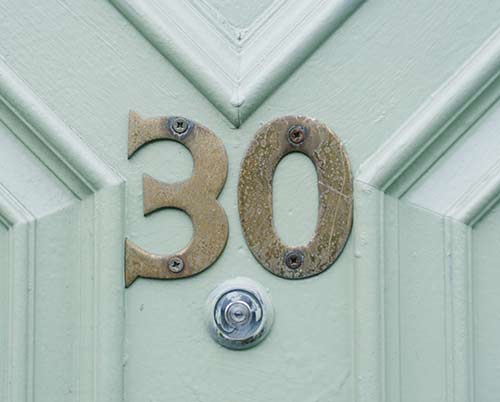
Door numbers fixed to front door – Image courtesy of housebeautiful.com
How to Fix a Door Numbers to a Front Door
Before you start fixing your door numbers to the door, you will need to purchase some.
At the end of the day, the type and sytle of numbers that you go for is really down to you, there is no real right and wrong choice, it’s simply a matter of taste.
One thing to be aware of though is choosing screw on numbers to be fixed to a upvc door. It is possible to drill and screw to a door fo this type but generally stick on adhesive door numbers are easier to apply to a upvc door.
Likewise, adhesive door numbers may not stick very well to timber doors depending on what they have been treated with e.g. they may not stick very well to some types of stain or varnish. In these instances it’s better to go with screw on door numbers.
For the purposes of this project we are going to be using two screw on door numbers (2 and a 5) and we are going to be fixing them to a hardwood timber front door.
Step 1 – Measure and Mark Vertical Centre of Door
Before we can start fixing our door numbers to the door, the first job is to measure and mark on our door, where our numbers are going to go so that they are fixed centrally and horizontally level.
Using a tape measure, measure teh width of your door at the top, divide this number by 2 and then measure and mark this measurement on the door.
For example, if your door is 800mm wide, half this width would be 400mm, so measure and mark this point near the top of your door.
Next, repeat this process further down the door, just above the handle and lock.
Once you have two marks, use a straight edge such as a spirit level to draw a vertical line between the two using a pencil (always use a pencil for this as once we’re done, we can rub out the lines easily).
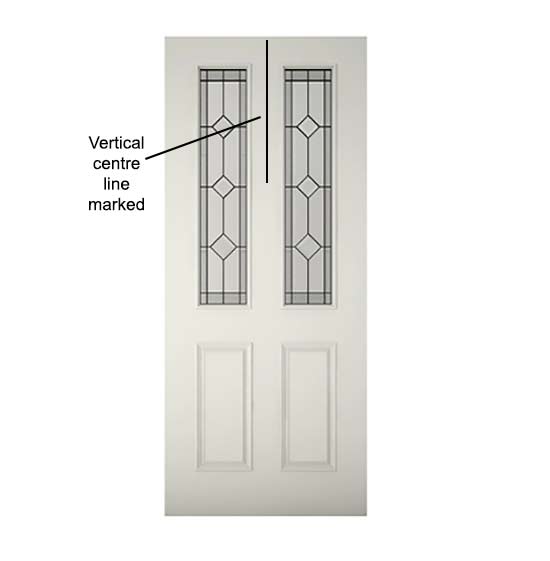
Vertical line marked on door to indicate centre of door
Step 2 – Mark Horizontal Line for Numbers
Now that we have measured and marked our vertical centre line, it’s time to mark another horizontal line.
This new line will ensure that the numbers sit horizontally level on the door as you will have a perfectly level line to align them against.
To mark this level, use a tape measure to measure down your vertical line to the desired height you want your numbers. Again, there are no rules on where this should be, it’s up to you.
For the purposes of this explanation we are going to measure down and mark at 300mm.
Once you have measured down and made your mark, next take a spirit level and place it directly on the horizontal mark and then level it up so the bubble in the vile is precisely between the two level points signifying the level is actually level.
Once positioned draw a line roughly 250-300mm long across the vertical line to allow you to level your numbers against.
Again, ensure you use a pencil so that you can rub it off afterwards.
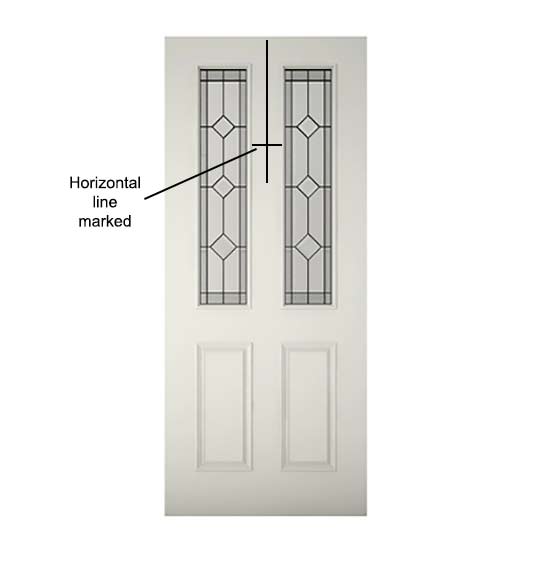
Measured and marked horizontal line to level door numbers against
Step 3 – Position Numbers and Mark Screw Holes
With all of the required levelling lines drawn it’s now time to position the numbers in place and mark any screw holes.
Before marking any screw holes, the final job is just to mark the exact position each number is going to go so that there is a nice even gap between them.
The best way to do this is to measure and mark either side of the horizontal line an equal distance using the point that the vertical line crosses it as the centre point.
For this example we are going to space the numbers 20mm apart so with this in mind we ned to mark 10mm either side of the centre vertical line.
The point that we make each of these marks will signify where the corner of each number will go.
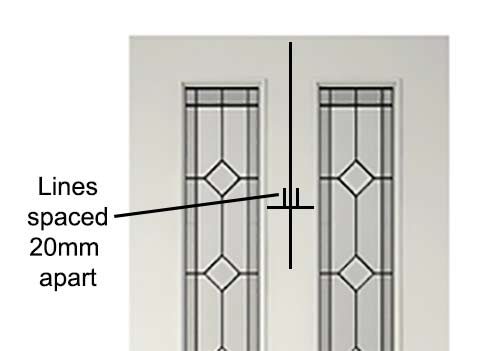
Additional vertical marks used equally space and level numbers
Take your first number, in this case the number “2” and place it so that the bottom right corner is perfectly aligned with the horizontal line and also the small vertical line that was added to ensure the numbers are equally spaced.
Once in position hold it flat against the face of the door and use a pencil to mark out each screw fixing hole.
Repeat this process for the second number also, only this time you will need to use the bottom left corner of the number to level it by.
With the above in mind, you may be thinking; what if I’m only fixing one door number or three door numbers? How do I ensure they are fixed centrally?
This is indeed a good question – in the case that you’re only fixing one number, simply measure the width of the number at it’s widest point and divide by two. This will give you the centre of the number.
Simply use this measurement to measure and mark a small point on the number itself to signify the centre and when you place it on the door, align the mark on the number with the point on the door that the horizontal and vertical lines cross. This will ensure that it’s levelled centrally on the door.
In the case of three numbers, again use the principles above for just one number, get this in place and then just measure and mark equal distances on either side for teh other two numbers.
Step 4 – Drill out Pilot Holes
Once you have positioned and marked all the screw holes on the door you will then need to drill some pilot holes for the screws.
Make sure the drill bit is smaller than the diameter of any screws to ensure that each screw has a decent amount of timber to “bite” into. The need for a pilot hole is that most door number and indeed, most door furniture of all types, uses small brass screws. This can also be the case even for hinges.
Because brass is not the strongest of metals, if the timber is particularly solid, as with Oak front doors for example, it is easy for the brass screw to snap off leaving the threaded section in the door.
This is next to possible to remove without damaging the door so 2 minutes spent making a pilot hole can save you a whole day.
Additionally, drilling a small pilot hole will make the job of screwing up your screws much easier as the pre-drilled holes will provide a channel for the screw to follow meaning that it won’t have to cut it’s own.
This will also help to make sure that any screws actually screw in straight and true and not at an angle.
Step 5 – Screw up Door Numbers to Door
With everything perfectly levelled up and all the pilot holes drilled, the final task is to actually screw the numbers in place.
To actually screw them in place you can use a standard drill/driver but in this case we would recommend using a suitable screwdriver e.g. philips/pozi or flat head, depending on the type of screws.
The reason we recommend screwing them up by hand is that some power drivers can be a little too powerful for small screws and can easily snap them off or round off the heads. Screwing them up by hand is a little gentler and should prevent any damage.
Screw each number up into place, but don’t fully tighten them as yet. Just before you do, use a spirit level to check they are perfectly horizontally level and adjust if needed. Once fully levelled, tighten them up fully.
Once finished stand back and admire your handy work.
Step 6 – Tidying up
With the numbers now firmly fixed in place on the door, the only thing left to do is have a quick tidy up. By this we mean remove any and all of the marks and lines on the door.
To do this use a standard rubber to rub all of the lines out, leaving you with a perfectly numbered front door.
Fixing Stick on Door Numbers to a Front Door
Sticking numbers on doors as opposed to screwing them on is a very easy job but because of the effectiveness and strength or modern adhesives you only get one chance to get it right!
In respect to getting it right the only thing that you really have to worry about is making sure that they are fixed in place straight and level.
To ensure that they are, work through step 2 and step 3 (without marking screw holes as there won’t be any) above so that you mark out the precise position that each number needs to be placed.
Peel off the backing strip and apply the numbers carefully from the base with the bottom edge placed onto your horizontal line first, with only the very edge of the adhesive touching the doors surface. This will allow a little wiggle room to get the number absolutley level.
Once levelled, gradually push the adhesive backing and number against the doors surface until it’s fully stuck.
When they are stuck, they are truely stuck but if you do get into difficulties and have placed a number on incorrectly it can be removed by sliding (some force is necessary) a wide bladed paint scraper up behind the number.
This may leave some adhesive on the door and this needs to be wiped off using a rag dipped in solvent thinners or white spirit.

Brass effect stick on door numbers
The number can then be re-stuck using a strong adhesive or replacement adhesive pad.
Fixing Bolt on Door Numbers to a Front Door
As we mentioned above, bolt on door numbers aren’t that common and are mainly only used in industrial situations or in areas where the chances of them being stolen are quite high.
In the event that you do feel the need to bolt fix your door numbers on, the installation process is pretty much the same as for the screw on and stick on types that we have mentioned above, only this time you will need to drill several holes through your door so that you can insert your bolts or threaded bar through to bolt it up form the rear.
In most cases, bolt on door numbers will be slightly more raised than their screw on or stick on counterparts. This is due to the fact that they need to feature some sort of threaded recess on the rear so that a threaded bar can be screwed in.
The threaded bar is then inserted through the door and nuts are then screwed down to hold it firmly in place.
In order to fix a bolt on number in place, first, work through step 2 and step 3 above to mark out the position of your numbers and ensure they are level and evenly placed.
Once all marked out and you know exactly where they are to be placed, turn your first number over and measure up from the base to the centre of the first threaded bolt recess.
Next, measure up this exact amount on your horizontal level line on the door and put a mark. This is where your first hole is to be drilled.
Measure from the first hole on the rear of your number up to the centre of the second hole and make a note of this measurement.
With the centre of your first hole marked, place a spirit level on the door on this first mark and ensure the level is vertically level and then measure from the first mark upwards using the side of the spirit level as a straight edge and then make another mark. This is where your second hole needs to be drilled.
In pretty much all cases a bolt on number will have only 2 fixings, but if there are more, use the above tips to mark out any additional holes.
On the packaging of your bolt on number it should state the size of drill needed to drill out the holes, if not compare a selection of drill bits against each threaded bar until you find the correct size.
Using a suitable drill, drill out each hole, ensuring that you hold the drill straight and level as you drill to give you a nice straight hole.
Screw in each section of threaded bar to your number(s) and pinch them up finger tight. With the threaded sections in place, push them through each hole in your door and then screw on each nut, again until finger tight.
Finally, use a suitable size spanner to pinch each nut up. Take care not to tighten them too much as you could strip out the threads in the number or the nut will start to bite down into the surface of the door.
Fitting door numbers to your door is not a hugly difficult job and as long as you take your time and get everything straight and level you should finish up with your door numbers sitting on your door perfectly aligned and level.

