Storage space in modern properties is sadly lacking and any storage solutions, be it simply for clothes, or for the many things we seem to collect, are very much sought after.
Off the shelf wardrobes offer a great storage solution for clothes but as they are a “one-size-fits-all” solution they are not suited to every home and can in fact be more of a hinderance than a help.
In light of this a great solution is to build your wardrobes specific to the size and shape of the space available in your home, this way you can make the absolute best of the space available.
One further space optimising solution is to then fit sliding wardrobe doors as this allows you to fully maximise your storage space.
With this in mind, read on below to find out how you can build you very own wardrobe with sliding doors.
What are Sliding Wardrobe Doors?
Sliding wardrobe doors are exactly what they sound – they are the doors to a wardrobe that slide from left to right to access the innner storage area as opposed to open outwards into the room.
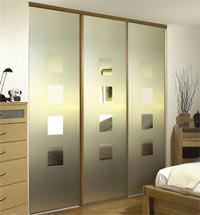
Frosted glass style sliding doors
This opening format has several advantages, the first and arguably the most important is the fact that they save on a huge amount of space. When a door or set of doors open outwards into a room you have to allow enough space in front of them for them to open fully so that you can access the inside.
As sliding doors open by sliding to the left or right to allow access to the inside area you don’t have to allow for any space in front, a win-win situation!
As you don’t have to allow for space in front another advantage is that you can make your space or in this case wardrobe deeper, giving you more usable storage space, again, another win!
What to Think About Before Installing Sliding Wardrobe Doors
Before you get started building your wardrobe and installing your sliding doors there are a few things to think about first.
When looking for a suitable area for your wardrobe and sliding doors, look for somewhere that has ideally a wall to the back and to one side, the corner of a room is normally the perfect spot. In most cases this will be where an existing wardrobe is currently and if this is the case you will first need to remove this.
When it comes to size, as you are building one from scratch the best route is to generally go as large as possible without affecting the use of the room e.g. going too big.
Ideally if you can the best solution is to use the entire width of one wall e.g. wall to wall as this will allow for a huge amount of storage space, however if this is not possible go as large as you can.
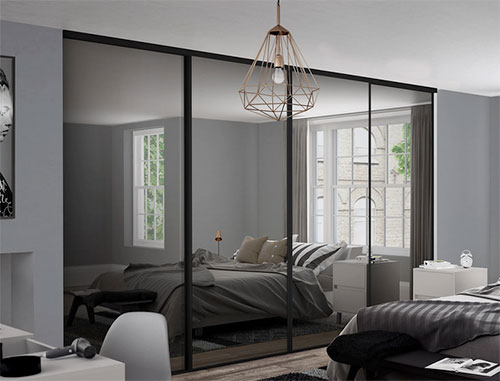
Full width wardrobe with sliding doors
Often it’s hard to visualise how big your wardrobe will be and how much storage space you will gain before it is built but if you have an existing flat pack wardrobe this will give you an idea of the amount of storage you will get and the space that will be occupied
In terms of what wall to go for, many rooms, especially bedrooms, have a window and radiator on one wall, bed on another, chests of drawers, entrance door etc. essentially objects that can’t be moved.
In these instances it’s best to use the wall with the door on and run up as close to the door as possible as often this is the wall that no large objects are placed against due to the door.
Also think about the objects that you could potentially loose by building your own wardrobe with sliding doors. If you can build your wardrobe large enough to accommodate drawers within it then you can potentially get rid of any free standing drawers you have in the room, creating yet more space.
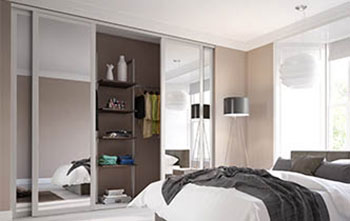
Bespoke built wardrobe with sliding doors and in-built shelves – Image courtesy of spaceslide.co.uk
One final thing to think about is what finish you want for both the wardrobe and doors. The most popular choice is generally white and this matches the majority of bedroom furniture, but other options include natural wood, different colour paints other than white and also mirrored.
Fixing large mirrors to your sliding doors will not only allow you to get rid of any fixed mirrors they also give any room the illusion of more space and depth and also create a great deal of extra light.
What Size Should a Wardrobe With Sliding Doors be?
In terms of how big your wardrobe and sliding doors should be, as we have mentioned above, as you are building them yourself this can be any size you like in terms of the amount of space you have available e.g. go as big as you can.
One thing to bear in mind though is the size of the doors that will be needed to cover your wardrobe and their weight. As they will be effectively hanging form the ceiling, depending on the material you use and it’s thickness this can be a lot.
If you are going to use a sheet timber such as MDF or Plywood, full size 12 or even 18mm thick 1.2 x 2.4m sheets can weigh a huge amount and if you are using 2 or even 3 or 4 sheets of this size on a ceiling with only small joists then there is the potential this could pull the ceiling down!
It is also possible to buy pre-made sliding wardrobe doors from any of the large DIY chains, this way all you have to do yourself is build the wardrobe for them to cover.
If this is something you plan to do then you will need to take into account the standard sizes of typical off-the-shelf sliding wardrobe doors which is generally two heights of 2260 and 2220mm and three widths of 914, 762 and 610mm.
If you are using these pre-made options then you will need to make sure you construct your wardrobe to a suitable size so that they fit correctly.
Additionally the height of the room will also be a factor here. Although off-the-shelf doors will be fine for pretty much all standard size rooms, some rooms have particularly high or low ceilings so make sure you measure accurately first!
A few further points to think of is that of door overlap and depth. By door overlap we mean the fact that the middle doors will need to overlap any doors to the side by around 10 or 15mm to ensure that the interior of the wardrobe is kept covered (using a 3 or more door setup). Likewise as with all doors, any that meet in the middle should meet with no gaps.
One further point we have mentioned already above is the depth of your wardrobe. As stated this will be dictated to you by the space in front but if you can you should aim for a depth of around 610 – 650mm.
At this depth you can not only comfortably hang your clothes so they hang feely but you can also easily fit most flat-pack or pre-made furniture such as pre-made walk in wardrobe modules, chests of drawers etc. You can obviously make these yourself but to save some time and hassle you can let someone else do the work for you!
A few final point in respect to size is the track that the doors will run and slide in.
In most cases the best solution is to use a specific sliding door track and hanging set that can be purchased from pretty much all DIY stores. As with all pre-made items they are made to specific sizes and due to this if using such a kit you will obviously have to construct your wardrobe to suit so be aware of this.
Is it possible to join some rails together in length to extend their width but you have to ensure that they run exactly in line as if they are kinked even slightly this can affect how the doors slide.
When using an off-the-shelf sliding door kit such as this again as it’s been mass produced it will have been made to a specific size or range of sizes and in resect to this most sliding door rails are made to the following lengths:
- 1067mm
- 1200mm
- 1449mm
- 1473mm
- 1500mm
- 1601mm
- 1803mm
- 2692mm
- 3607mm
Types of Wardrobes and Sliding Wardrobe Doors
In terms of the different types of sliding doors and in deed sliding wardrobe doors there are a few – The standard off-the-shelf sliding wardrobe doors that we have mentioned above and the made to measure type that are made specifically to your specifications (essentially what we are making below).
As mentioned, standard sliding doors come in the following widths and heights in most cases:
- 610mm wide
- 762mm wide
- 914mm wide
- 2220mm high
- 2250mm high
In terms of made to measure, these are obviously constructed to your own specifications.
As we are looking at the type of sliding wardrobe doors we also have to mention the different styles, these are generally as follows:
- Glass: Sliding doors are constructed using reinforced glass panels, quite often frosted as to hide the contents they are covering but can also be lined with solid colours or images that create a unique style, however they can be very heavy and expensive
- Steel/Aluminium: Similar to the above, sliding doors are constructed using steel or aluminium, normally in the form of a steel/aluminium frame and a sheet steel or ally covering over the front. Although they can work amazingly well in the right setting, they don’t suit every room and can be expensive and also noisy!
- Modern/Minimalist: Normally constructed using aluminium for the external frame and then filled with a variety of sheet materials of your choice including wood, perspex, composite, glass etc. They come in a huge range of finishes to suit any existing style
- Shaker: Modern or traditional, the shaker style is all about clean lines and minimal design. Often white is the colour of choice but they can come in any colour required
As you can see, buying off the shelf can be a great choice and if you have a fairly standard room space you are sure to find a size and finish to suit all your needs.
Internal Storage
As we have touched on above, how you kit out your wardrobe will be entirely up to your storage needs. You may just choose to feature a hanging rail to hang your clothes or you may want to go the whole hog and feature shelving, drawers and any other storage device, it’s up to you and the space you have available.
As we have touched on above, if you are wanting to add such storage items, ensure you construct your wardrobe deep enough for them to fit and ensure you plan everything out before you build it, including measuring everything accurately, especially if you are wanting to use pre-made and flat pack items.
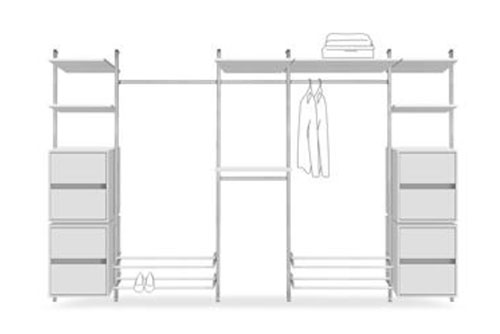
Pre-made walk in wardrobe module ideal for a bespoke wardrobe with sliding doors – Image courtesy of spaceslide.co.uk
Types of Sliding Door Hanging Rails
One of the most important elements of a wardrobe build with sliding doors is the sliding gear (e.g. the hanging wheels and rails they run in) that enable the doors to slide back and forth.
There are a huge amount of different kits available on the market today, a quick search online will reveal at least 20 different types (styles, lengths and opening design such as bi-fold etc.) on Screwfix alone and the one you opt for is very much up to you and your requirements.
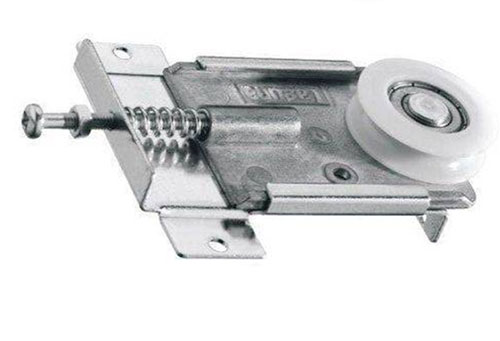
In the guide below we have used a simple setup that includes a rail and a screw in hanging wheel. Screwing the hanging wheel in and out adjusts the drop of the door allowing it to run in the rails without binding.
One of the downsides to this design is that if the floor or ceiling that the rails are attached to isn’t level then the hanging wheels will bind and the door will stick.
In our example below, luckily the room we were installing in featured both a level floor and ceiling so this kit was fine, however this is certainly not always the case and rooms with un-level ceilings and floors you will either have to level them out before construction or if the level discrepancy is very slight then you can use spring loaded hanging wheels that compensate for this.
Spring loaded sliding door hanging wheels that can compensate for out of level floors and ceilings
Before you start any form of construction of your wardrobe, use a spirit level to check both the ceiling and floor and make sure they are level!
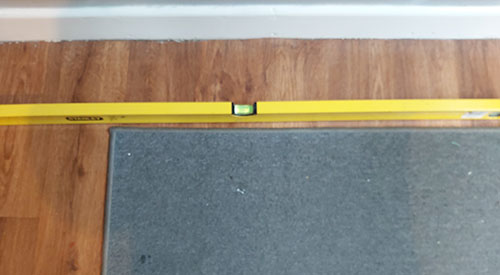
Check floor and ceiling levels using a spirit level
How to Build a Wardrobe With Sliding Doors
As we have now looked at all the different options for building a bespoke wardrobe with sliding doors, considered all the different size options of the objects that are being bought and those that have to be made and have chosen the ideal location for your wardrobe it’s time to start building.
For our wardrobe in this example we are constructing in the right corner of a room on the wall opposite the door opening so the door opens in at the end of the wardrobe and making the wardrobe floor to ceiling in height as the room is a standard height.
Measure and Mark Position of Wardrobe
The first job is to measure and mark the position of the top rail and fix it in place. Measure out from the wall to your chosen wardrobe depth and make a mark, in this case 610mm. Do this several times across your proposed installation area and then use a straight edge such as a spirit level to draw a line through the marks.
Next do the same on the floor out form the wall taking into account the depth of the skirting if there is any, make some marks and then joint them using a straight edge.
As the room is roughly 4m square we are going to make our wardrobe 1803mm in width (internal width) so we then also measured and marked the floor and ceiling at 1803mm from the side wall in several places, again taking into account skirting on the floor and joined up the lines.
We then also measured and marked 610mm out from the wardrobe back wall on the side wall and joined the line that ran from what would be the front top right corner down to the front bottom right corner. We then used a spirit level to check this vertical line and make sure it was perfectly plumb to ensure the top and bottom rails would be directly over each other.
As the house was fairly new the walls were all fairly square (or as square as they can be) so the line was vertically square. This will not always be the case, especially with older properties so if your line is out you will need to come in or out with your marks on the ceiling to ensure the rails are perfectly aligned over one another.
After joining all the lines we had two cube shapes marking out the exact size and shape of the wardrobe.
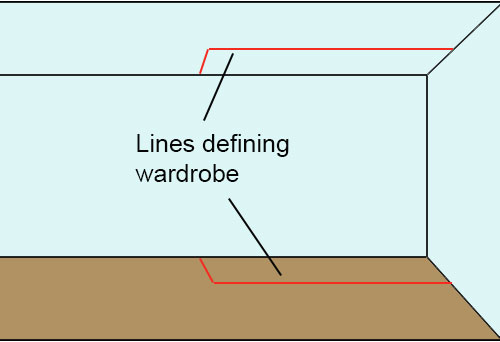
Marks on ceiling and floor marking out size and position of wardrobe
Fix Top Rails and bracing in Place
The next job is to fix the top rails in place. Position the first rail in place so that it butts up to the line you drew on the ceiling to define the wardrobe width and then mark through all of the fixing holes (you may need a second pair of hands to help with this).
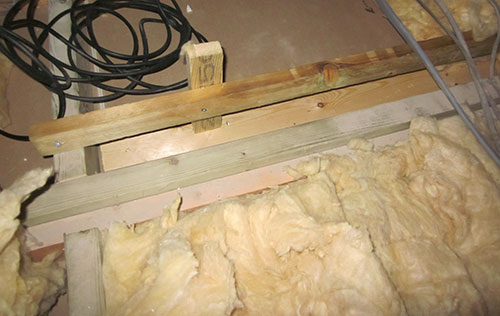
Next, access the loft area and check the area above your wardrobe install for pipes and cables. If any present measure their position so you know where they are and climb back down to your work area.
Using a ladder, take a drill/driver and a couple of screws and screw them up through all the rail fixing points.
Climb back into the loft and find all of your screws and then measure the gaps between each pair of joists that features any screws protruding up and cu 3×2 inch or 4×2 inch timbers to length.
Once cut to length, climb back up into the loft and screw them in place over the top of the run of screws, flat to the ceiling. Ensure that the rear 1/3rd of the timber is over the screws so there is enough at the front to also screw up the front sliding door rail.
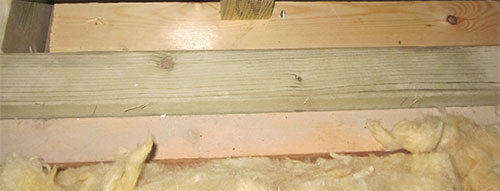
Sliding door rail brace screwed between joists to help support the rail
Next, cut and fix a suitable timber over the top of the joists so that the back face is level with the brace timber fixed between the joists and then cut and fix in place short timbers to act as additional bracing to help further support the bracing.
All of this structure will help to support the weight of the doors hanging in the top ceiling rail. As stated above the doors can be very heavy and to ensure the top rail remains fixed in place it needs to be fully screwed and supported along its full length.
Further bracing screwed over top of ceiling joists to help supprt weight of sliding doors
Once the bracing is fully fixed take your sliding door rail, position it so the back edge is butted to the line on the ceiling and then screw it securely in place using 8x40mm timber screws or a similar suitable screw.
Once the first rail is fixed, position the second rail up to it, ensuring they’re fully butted together and screw this one in place also.
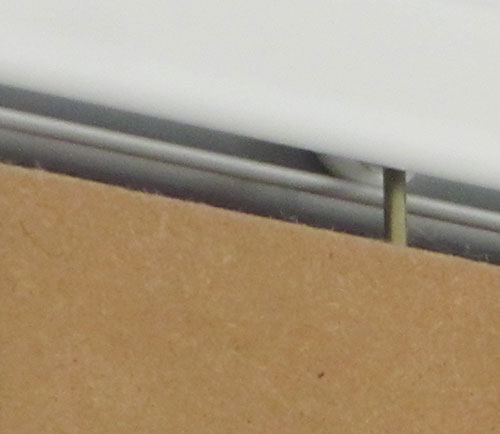
Both sliding door hanging rails fixed in place on ceiling
Fix Bottom Rails in Place
With the top rails fixed, the next task was to fix the bottom rails in place. Position the first rail so that the back edge is flush with the line on the floor and screw it in place fully through all available fixing holes.
Just before fixing, use a stud, pipe and cable detector (find out how to use stud, pipe and cable detectors in our project here) to check over the installation area to make sure there are no pipes or cables hidden in the ground.
If you are fixing to a timber floor, again use 8x40mm timber screws, however if you are fixing to a solid concrete floor see our project here on fixing to masonry
One the first rail is fixed in place, butt the second rail up and fix this in place also.
Bottom rail for sliding doors fixed firmly in place to floor
Fix Door Stop in Place
With the sliding door rails fixed top and bottom ready for the doors, the next task is to fix a door stop vertically to the side wall.
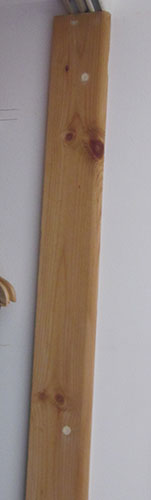
Measure the height between the top and bottom rails vertically down the wall and cut a suitable piece of timber to size. In this case we used a piece of 4×1 inch planed timber. We then ran a router and rounding off bit down the outer edge to remove any sharp angles but if you don’t have one, a piece of 120 grit sandpaper can be used to the same effect.
Drill 4-5 fixing pilot holes down the centre of the timber, evenly spaced, and counter sink them (see our project on pilot holes and countersinking here) and then fix the door stop in place so that the very front of the rounded edge protrudes just past the front sliding door rail.
Use the fixing to masonry and hard surfaces project linked to above for help with this if you need it.
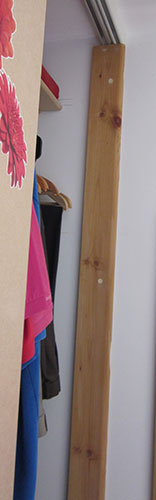
Sliding door stop fixed vertically to side wall
Measure and Cut Sliding Doors
With the rails all fixed in place the next job is to cut the sliding doors ready to be fixed. As our wardrobe is 1803mm in width we are going to cut our doors to 610mm in width as we are using 3 doors. This will allow the two side doors to butt up to the side wall and the end panel and the centre door to over lap each side door by 15mm.
We then measured from the top of the base rail to the bottom edge of the top rail which was 2250mm. We then deducted 15mm from this so that we would have 10mm top and bottom wiggle room which gave us a total height of 2230mm.
Armed with the above measurements we used two 18mm sheets of 1.2 x 2.4m MDF, cut one in half to give us two 610mm wide sheets and then did the same for the second sheet. The three pieces were then cut to 1230mm in height and a router was then run around the edges to remove any sharp angles
We also then used a router and 6mm cutting bit to cut a 8mm deep circular recess at the centre of each door and then fixed a circular brass door pull ring in place
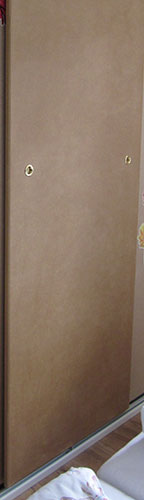
Sliding wardrobe door cut to size
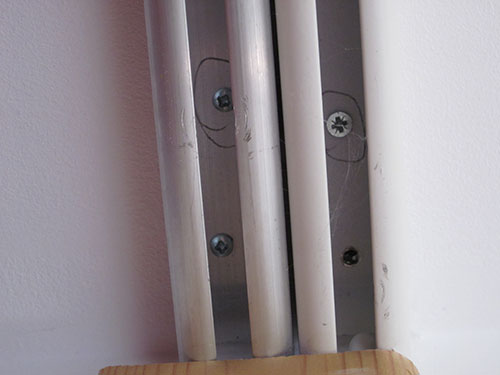
Fix Sliding Rollers/Wheels to Sliding Doors
The next job is to then screw our sliding door roller hangers in place at the top and bottom of the. The way that your particular door rollers/hangers are fixed will depend on the type of kit you have so refer to your manufacturers instructions for exactly how this should be done, but in our case the rollers are screwed down into the top of each door, two at the top, two at the bottom.
Measure and mark the centre of the top edge of the door in several places and run a line between them, then measure the width of the door (610mm in our case) and divide this by 3 to give 203mm. Measure and mark a point at 203mm and 406mm along the top edge of door and drill a small pilot hole using a 2mm drill bit.
Screw in two sliding door roller hangers into each point so that there is roughly 11mm between the base of the wheel and top of the door. Also ensure both wheels are facing away from the rounded edge of the door.
Repeat this process for the base and for the other two doors
Sliding door rollers fixed top and bottom on each door
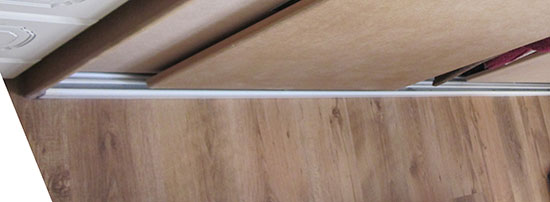
Fit Doors in Place
Once the doors have the rollers fixed securely to them the next job is to hang them in place in the hanging rails. As this type of hanging wheel is screwed in or out to raise and lower each door, setting each to 11mm distance from wheel to top of door as we have above should be fine providing the floor and ceiling are level.
However, if either are out of level the door will most likely bind so you will need to adjust both top and bottom sets of wheels to ensure they don’t
Start by test fitting one door first. If this slides left and right across the full width of the hanging rails fine with no binding then you are good to go, however if not remove it and adjust until to get a perfect fit and then adjust the other doors accordingly and then hang them in place.
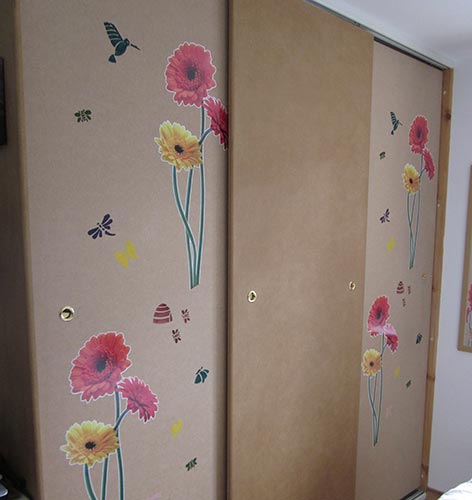
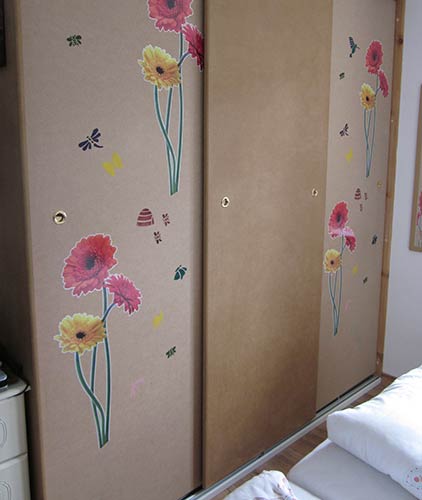
Sliding wardrobe doors hung successfully at the front of a bespoke built wardrobe
Measure, Cut and Fix Side Panel in Place
One of the final jobs to do now is to cut and fix the side panel in place. For this, measure, cut and fix two 3 x 2 inch timbers between the open ends of both the top and bottom rails between the back edge of the back rail and rear wall.
Once the side timbers are fixed, next measure, cut and fix a 3 x 2 inch timber vertically down the back wall between back edges of the top and bottom timbers we just fixed in place.
Now measure the height from floor to ceiling, in this case it was 2350mm and then measure from the back wall out to the front edge of the front rail and add 10mm to allow the edge to be rounded off with a router
With these measurements we cut a piece of 18mm MDF to 2350mm in height and 720mm in width and then used the router to round off both outside edges.
Drill and countersink 4 fixing holes across the top and bottom of the MDF side panel and then 8 down the back edge, ensuring they are evenly spaced and then use 8x32mm wood screws to screw the side panel in place.
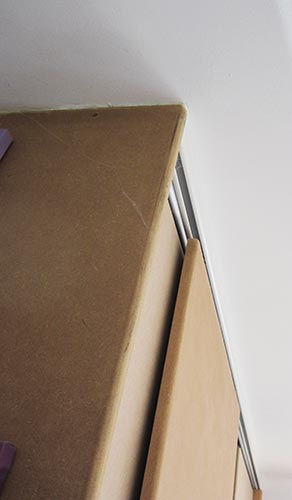
Side panel fixed in place to wardrobe
Fill Screw Heads and Finish up
With everything pretty much constructed the only jobs left to do are finishing so use a decent quality wood filler to fill all visible screw heads and then a decent decorators caulk to caulk around the edges of the side panel (find out how to apply caulk in our project here).
Once the filler has fully dried rub it off flat using a medium grit sand paper such as 240 grit.
Screw heads of sliding wardrobe filled for painting
Depending on how you want to finish your wardrobe and sliding doors will depend on what you do next. In most cases you will want to paint them to match the style of the rest of the room or a neutral colour such as white so see our project here on how to paint MDF if you have used the same material, however in our case the owner wanted them left bare.
Other finishing considerations you will have to make now is what is done with the inside. If you simply want to fix a rail in place to hang clothes on then you can use a 25mm round steel tube such as in the image below and fix across the width.
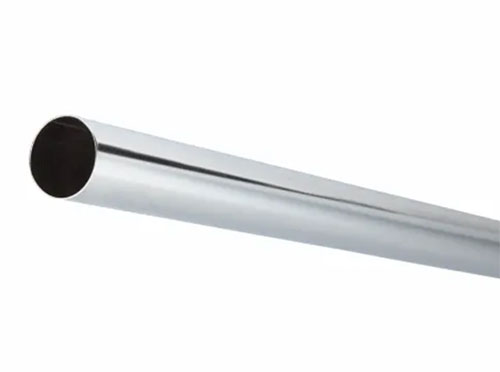
25mm round steel tube for a hanging rail in wardrobes
If you want something a little more involved such as a hanging rail, shelving, drawers etc. then as mentioned you can either purchase these as flat pack objects or indeed construct them yourself.
Building a wardrobe with sliding doors is a fairly involved task but once done you will enjoy a great storage space with plenty of scope for different storage options that can be adapted to meet your current and future wardrobe storage needs.
Completed bespoke built wardrobe with sliding doors