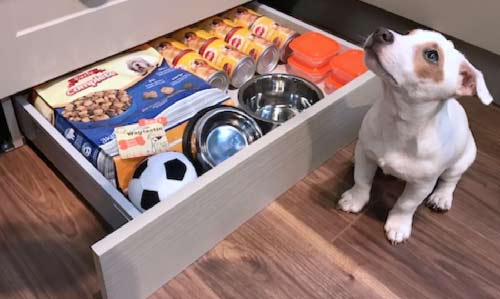
Storage in any room in the home is always stretched to the limits, especially in a busy family home and the kitchen is no exception to this, there’s never enough room to store all the pots, pans, cooking utensils and other implements necessary to keep a growing family fed and watered.
With this in mind, additional storage in the kitchen is always a blessing and one area that never gets considered is the wasted space that lies below your kitchen units e.g. behind your plinths, kickboards or kick plates.
In this guide you will find out about the different options for kitchen cupboard plinth storage, namely plinth drawers.
What are Plinth Drawers?
Plinth drawers are exactly what they sound like they are, they are a single or double drawer that occupies the area below a kitchen floor unit.
In most instances, this particular area simply goes to waste as the front is covered over by a plinth or kickboard and they never see the light of day again, except for the odd instance when they get vacuumed out or there is some sort of issue where access under the units is required.
A plinth drawer makes great use of this space. Instead of just going to waste, a decent sized drawer is constructed that can house all manner of items such as tins, cooking trays, pots, pans and other similar items.
When access is needed the drawer is simply pulled out as any standard drawer is and then retracted back under the unit when it’s no longer needed.
Bespoke kitchen unit plinth drawer
Different Types of Plinth Drawers
Although there are countless numbers of kitchen unit manufacturers, many UK floor standing kitchen base units do share some commonalities in that they all conform to a range of different sizes from 150mm all the way up to 1200mm, with the most common being around 600mm – 800mm in width.

Standard 600mm wide kitchen base unit
The other common feature is in the way they sit on the floor. In pretty much all cases this is either achieved through sitting on special kitchen base unit “feet” or by sitting on sides panels that make up the cabinet.
Kitchen unit sitting on feet
Kitchen unit sitting on side panels
The way in which your particular base units sits on the floor and its size will dictate the type of plinth drawer you can create, particularly the way in which it slides in and out.
Kitchen Base Units That Sit on Side Panels
With base units that sit on the side panels you do have a little flexibility in which method you use in that you can either use standard drawer runners e.g. the same type of runners that probably feature on any drawers that exist in your kitchen.
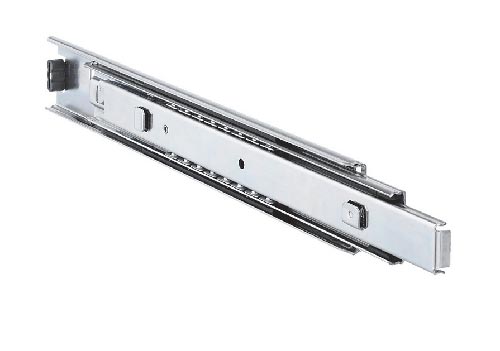
Standard drawer runners for a kitchen cabinet drawer
These are certainly a great option and will allow your plinth drawer to slide in and out smoothly and they can also carry quite a lot of weight, up to 10 or 15Kgs for higher quality versions.
However they can be quite tricky to fit in that your plinth drawer has to be constructed with absolute accuracy in terms of its width as the drawer runner housing is fixed to the inside of the side panels and the runners themselves are fixed to the outside of the plinth drawer.
If the runner does not sit in the housing totally square or is slightly too narrow or too wide then the drawer will bind and due to this won’t slide in and out easily at all spoiling the overall success of the job as it then becomes a hassle.
In cases such as these the preferred method is to sacrifice some of the available width and construct a housing or cradle for the drawer to sit in. This way the entire structure can then be built away from the unit and constructed precisely and then simply slipped and fixed in place when complete.
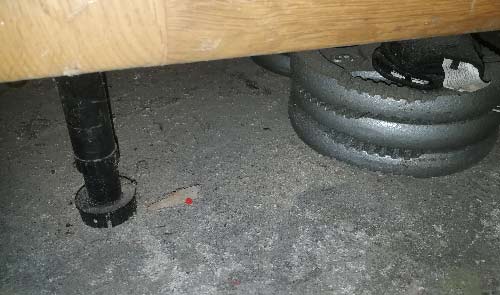
Base Units That Use Legs
With base units that sit on special adjustable kitchen unit feet or legs as they are known you are a little more limited as you can’t actually fix anything to the legs, or its certainly not an easy job.
Additionally as the legs are usually fixed in from the front and side edges this also limits the size of plinth drawer you can build.
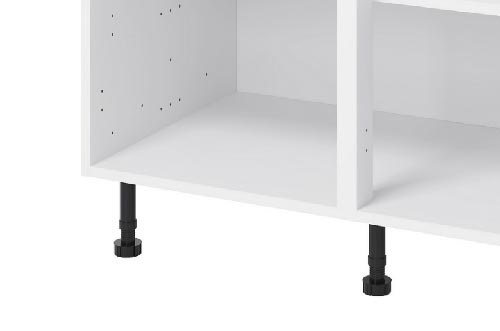
Limited width between kitchen unit legs
In terms of solutions the first is to utilise the cradle method mentioned above and build a housing cradle for your plinth drawer to sit in.
This is a decent route to take but the one drawback is that by the time you have allowed for the leg gap, the width of timbers used for the cradle, the width of the runners and the timber used to build the drawer you will loose quite a bit of storage space.
The second and often more preferred method is to construct a plinth drawer the full available width between the unit legs and fix special low profile or narrow castor wheels to the base or sides of the drawer which will allow it to easily roll in and out.
Plinth drawer with castor wheels
Made to Measure Plinth Drawers
Along side the above plinth drawer options there is also a third option and that’s the made to measure solution.
There are a few companies out there that will manufacture a full flat-pack plinth drawer unit for you (you need to supply exact measurements) that, once put together, simply slots into place.
In the majority of cases if you also supply images of your existing units they can also construct your drawer to match the rest of your kitchen.
This is obviously a great solution if you want a well constructed drawer that compliments the construction qualities of most modern kitchens but the obvious downside is the cost and in some cases this can be quite significant.
Made to measure kitchen plinth drawer – Image courtesy of drawerboxes.co.uk
Tools and Materials Needed for Plinth Drawer
To build your plinth drawer you will need the following tools and products.
Note: The measurements and material volumes used below are for a drawer that sits under a standard kitchen cupboard carcass, if your drawer is to be bigger or smaller you will need to account for this in eta materials you need.
- Drill/driver
- Tape measure
- Mitre saw and table saw or hand held saw
- 600mm x 600mm piece of 18mm thick MDF or ply wood
- 600mm x 600mm piece of 6mm ply wood
- Pen/pencil for marking
- 3mm drill
- Countersink for screw heads
- Multitool or jigsaw
- 4x low profile castors – Available online from various sources or from eBay, Amazon etc. Just search for “low profile castors”
- 4.0 x 40mm MDF screws
- Wood glue
- 3.5 x 16mm MDF screws
- 1.5m of 8mm door stop
- 3.5 x 30mm wood screws
How to Build a Basic Plinth Drawer
Now that we have looked at the various options for plinth drawers it’s time to look at how we can build one.
To keep things as simple as possible and to ensure our plinth drawer will work well and offer as much storage space as possible we are going to go with the castor wheel option.
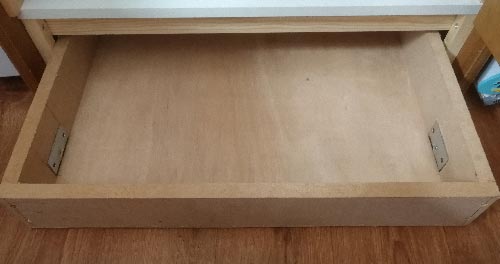
Remove Existing Plinth
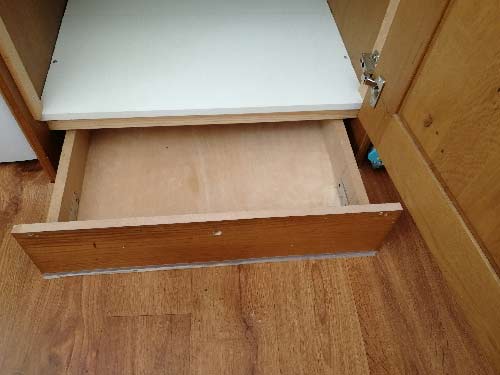
The first job to do is to remove the existing plinth from under the base unit to expose the area we are going to construct our drawer for.
In the majority of cases, unless screwed through from the front the plinth will be clipped in place so wiggle your fingers up and over the top of the plinth and pull it gently towards you. This will release the clips and the plinth will come free.
In the case of the cupboard we are working with here the plinth was actually fixed in place by screws screwed in from the rear so we had to remove the base of the cupboard to be able to unscrew them.
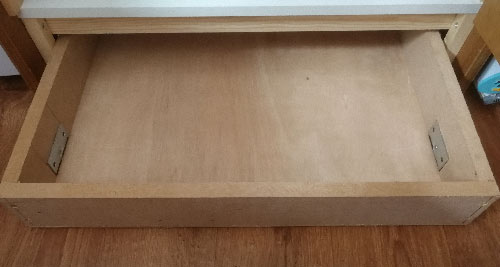
Existing plinth removed from beneath kitchen base unit
Measure Available Gap for Drawer
With the plinth removed we can now access the plinth area and measure up so that we can work out the maximum size our drawer can be constructed to.
Using a tape measure, measure the width gap at the very front of the base unit, at the very rear and 2 or 3 points through the centre width. Although something may look totally square it very often isn’t so you need to find the width at its least amount to ensure your drawer fits nicely.
Repeat this also for the depth of the unit. More often than not there will be a utility gap between the back of the unit and the wall to allow for water and waste pipes. It’s a good idea if there isn’t any pipes running here to make use of this space also.
In the case of our unit here it was 602mm wide and 560mm deep at its thinnest points so this would define the size of our drawer.
We also need to measure the height from the floor to the underside of our unit to know how high we can make our drawers. In this case it’s 140mm but to allow for some wiggle room we’re going to call it 135mm
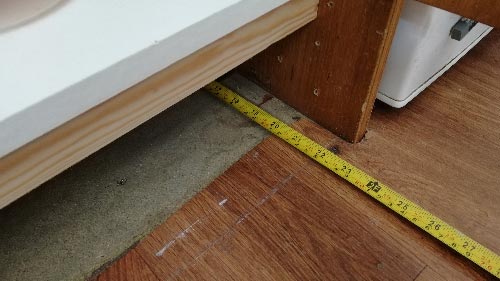
Measure the width and depth of the available gap to define the size of our drawer
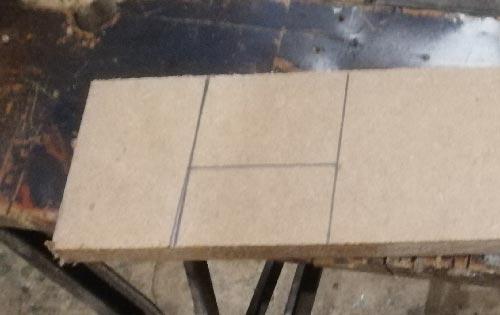
Mark out Parts for Drawer and Cut
Now that we know the dimensions we can now mark out the timber and cut the sections for our drawer. For this we are going to be using 18mm MDF but you can also use 18mm ply.
Before actually marking and cutting anything one final point we need to be aware of is how wide our caster wheels are as this will affect the total width of our drawer. In this case each wheel is 21mm in width.
To ensure we make as much use of the space as possible in this instance we are going to recess each castor wheel in by 8mm on each side, this will give us an extra 16mm in width as each wheel will stick out 13mm as opposed to the full 21mm.
This may not sound a lot but when it comes to storage every millimeter matters. If however you don’t fancy doing this, no problems just account for the full 42mm in width for both wheel and deduct this from the total width of the front sections.
The sections that we need to mark out and cut are as follows:
- 1x front section measuring 576mm by 109mm in height (to allow for 6mm base and castor wheels)
- 1x rear section measuring 576mm by 109mm in height (to allow for 6mm base and castor wheels)
- 2x side sections measuring 524mm (allow for width of MDF when fixing) by 109mm in height (to allow for 6mm base and castor wheels)
- 1x base measuring 576mm in width by 560mm depth
Once you know the exact dimensions of each component of your drawer you can now mark each section out on your chosen timber and cut it out using either a handsaw, jigsaw, table saw or circular saw.
When cutting ensure all of your cuts are totally accurate as if not this could negatively affect the fit of the drawer.
Note: MDF is carcinogenic e.g. it contains cancer-promoting particles so the upmost care needs to be taken when cutting it. Always cut in a well ventilated area and also ensure a vacuum is attached to your chosen power tool if you are suing one to suck the dust away. Also ensure that you are wearing a FFP3-grade mask at all times.
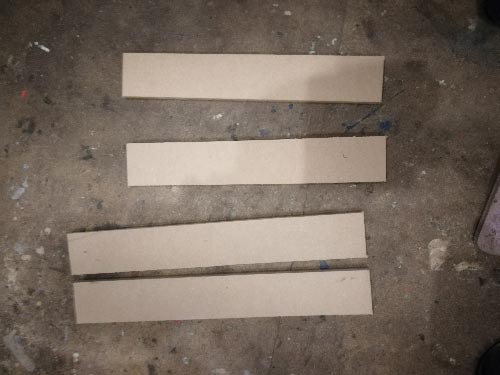
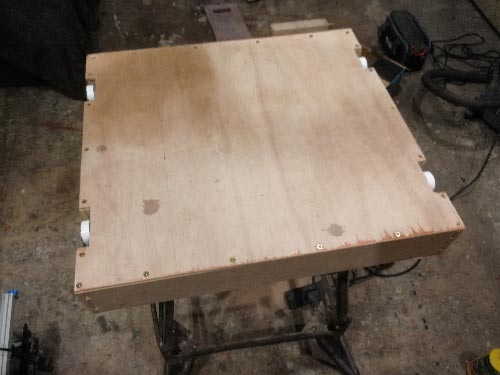
Plinth drawer sections all cut out and ready for fixing
Cut out Castor Wheel Recesses and Fix in Place
Before we can fix each castor wheel in place the next task is to cut an recess at the front and rear of each side section so that we can recess each castor wheel up into the drawer allowing us to gain the maximum height but still allow the drawer to slide in and out.
Using a tape measure, measure and mark 50mm in from each end and then take one of the castor wheels and place the edge on the mark and draw around it with a pencil. Repeat this for the other 3 placements. Ensure that the base of each wheel sits 11mm below the bottom of the drawer side. This is to allow 5mm of the wheel and also 6mm for the drawer base that will be fixed to the bottom.
Castor wheel recess marked on side of plinth drawer
To cut out each recess you can use a handsaw to cut the sides and then a jig saw to cut out the horizontals or if you have one a multi-tool can also be used.
Once all cut out test fit each castor wheel in its respective recess to make sure everything fits nicely.
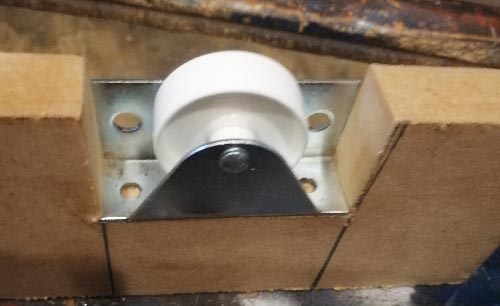
Test fitting castor wheel in recess
As you test fit, use a pencil to mark the very centre of each screw hole for each wheel and then drill a small 2mm pilot hole in each mark.
Once drilled place a castor wheel in its location and line it up to the very base of the drawer base and using 4.0 x 40mm MDF screws, screw each castor fully in place.
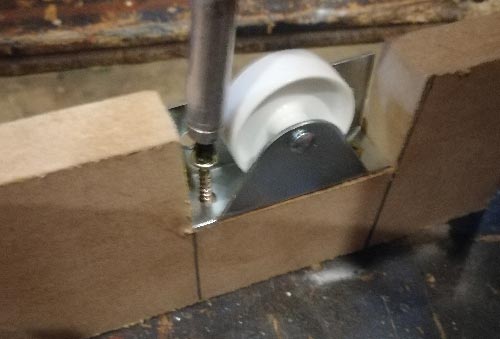
Screwing castor wheel in place in side of plinth drawer
Assemble Drawer Parts
With everything now cut out and ready it’s time to build our drawer. Using a 3mm drill bit, drill 2 evenly spaced pilot holes down each side edge of the front and rear sections 9mm in from each edge and then countersink each hole (tips on pilot holes and countersinking can be found in our project here).
Pilot holes drilled in front drawer section
Before screwing anything together, add a thin bead of decent wood adhesive down the front edge of the side section you are about to screw in place. Repeat this for any other mating faces before you screw them together.
Using 3.5 x 40mm MDF screws, screw on the left side section to the front ensuring at all times that the edges and base are totally flush with each other.
First side section screwed in place
Repeat this for the other side section and then also for the rear section of the plinth drawer until you have your drawer framework complete.
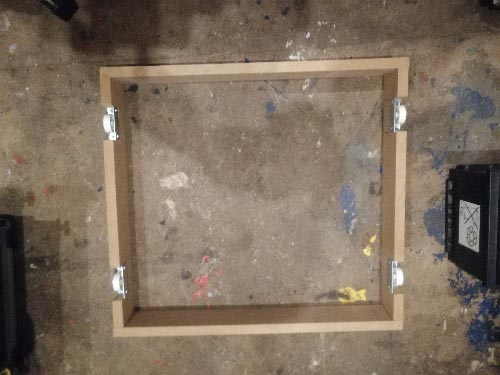
Plinth drawer framework complete
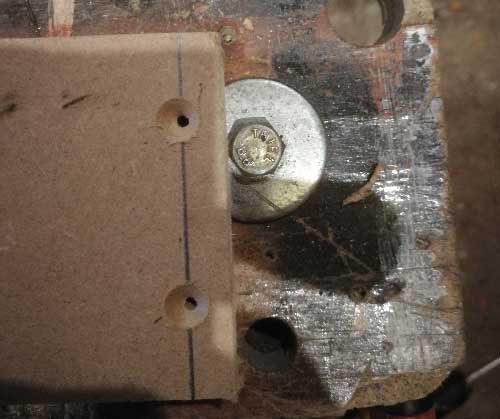
The final job now is to flip the framework over and fix the base of the drawer in place. Before fixing the base in place drill out around 5 or 6 evenly spaced pilot holes along each edge of the base and then countersink them.
Also at the point where each wheels protrudes down, mark each side of each wheel recess and then measure and mark in 18mm and then use a jog saw or handsaw to cut each recess out. This is to allow each wheel to pass through the base.
Add a thin bead of wood glue over each edge of the draw frame and then drop the base over the top and fully square it up. Using 3.5 x 16mm mdf screws, screw the base in place ensuring it’s kept fully square and flush.
Base screwed on to plinth drawer framework to form drawer
Test Fit Plinth Drawer
With the drawer fully built and the wheels fixed on we can now test fit the drawer. Take the drawer and position it in front of the plinth gap, making sure it’s the right way around.
Gently push the drawer back into the recess testing for any tight spots or binding. If all is well the drawer should just slip back into place, however if there are any issues then you may need to make some adjustments.
Test fitting plinth drawer
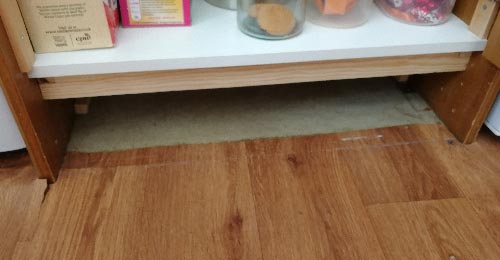
Mark Floor Runner Locations
In some instances adding floor runners may not be necessary and if you think this is the case and you are happy with the way your drawer slides in and out then you can skip the section.
This is particularly the case if you are unable to remove the base from the inside of the unit so that you can access the plinth recess from above.
With the drawer still in its test fit position make a mark on the inside edge of both front castor wheels to define where the sit and then pull the drawer out and put it to one side.
Next, measure in from the inside of the base unit side panel to the mark you just made and transfer this same measurement down to the rear edge. Repeat for the other side also.
Cut 2 lengths of 8mm door stop to 560mm in length and then drill 4 evenly spaced pilot holes along each length and then use 3.5 x 30mm screws to screw it down to the floor.
Pop the drawer back in place and push it back into the recess. The runners on the floor should help to guide the drawer as it’s pushed back in and also keep it aligned when it’s pulled out making it easier to push back in.
Fix Plinth Cover to Front of Drawer
The final job now is to fix the plinth that you removed in the first step to the front of the drawer so that when it’s pushed back into the recess it looks like any other plinth in the kitchen and conceals the drawer.
Remove the drawer from the recess and sit it on the back section so the front is facing upwards. Take the plinth and flip it over so the rear is facing upwards and then measure and mark the dead centre by drawing a line.
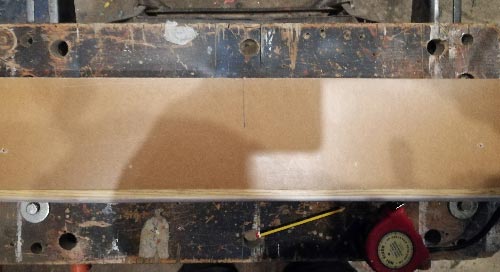
Centre of plinth marked
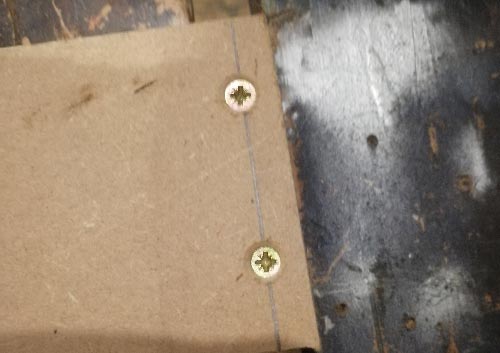
Now, do the same for the up-facing front section of the drawer and then mark 2 points either side of the line in the vertical and horizontal centre. Once marked using a 3mm drill bit to drill through each hole.

Plinth fixing holes drilled in plinth drawer
Position the plinth on top of the upturned drawer and centralise it so that both central lines are sitting on top of each other and the overhang each side is identical.
Once positioned use 3.5 x 30mm screws to screw the plinth on to the front of the drawer and then lay the drawer back down and test fit to make sure it still slides in nicely with the plinth fixed in place.
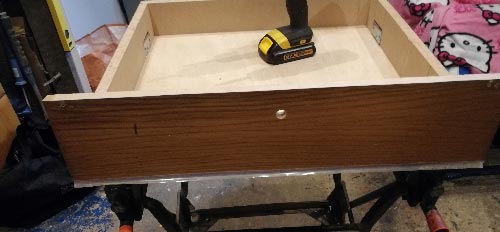
Plinth fixed to front of plinth drawer
The final job to do, if you do actually want to fit one, some don’t bother as in some cases the drawer can be opened from the side or by opening up the above cupboard is to fit a handle.
This is simply a case of choosing a handle you like or one that can be concealed below the bottom lip of the cupboard door and screwing it in place.
Or, as you can see in this case, a small 13mm hole was drilled just large enough to get your finger in to pull the drawer out.
Building a plinth drawer to increase the available storage in you kitchen is a fantastic idea if you are struggling for space. They are not that hard to make and once done will fully utlise space that is otherwise totally wasted.