Kitchen lighting is crucial for food preparation and, in some cases, the sale of a property. Subtle options like plinth and under-cabinet lighting enhance ambiance and functionality. Learn how to install low-voltage lights into kitchen unit plinths but this project is also suitable for covings, cornices, and even worktops with waterproof lighting.
Installing Plinth Lights: Regulations and Safety
When installing plinth lights or any electrical wiring at home, especially in areas like the kitchen or bathroom, only qualified electricians should be carrying out any installation work. They must be Part P registered to issue a minor works certificate, crucial for compliance.
Without a certificate, your home insurance could be voided, impacting property sales. Always ensure proper certification for electrical work so it can be confirmed that it’s been carried out in line with all relevant regulations.
For more safety guidelines on working with electricity, visit our electrical safety project.
Note: The above is relevant only to the full installation-type kits that need to be connected to an existing power source. For DIY kits, that only require plugging into an existing socket, these are fine to be installed by anyone.
Understanding Plinth Lights: What are They?
Plinth lights are small light fixtures placed in the plinth board of kitchen units that enhance the overall ambiance of a kitchen space.
The main job of a plinth is prevent dirt buildup and dust in the space under a kitchen unit. As for plinth lighting, they can be installed in various styles and colours, typically emitting soft, warm white light indoors.
Connection methods vary, from hardwiring with a junction box to DIY options that plug into standard sockets.
Usually operating at low voltage (12V), they often come with their own transformer for power.
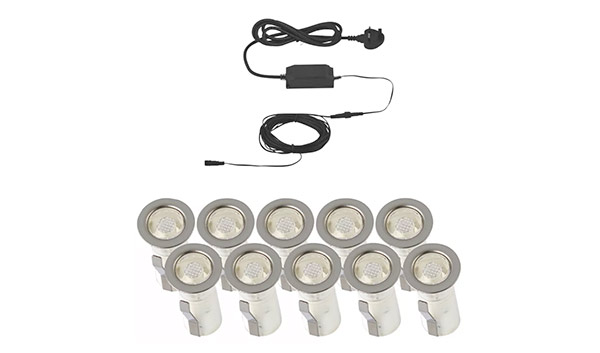
DIY install plinth lights with transformer and mains plug
Understanding the Types of Plinth Lights
Plinth lights come in two main types: continuous and spotlight.
- Continuous: Also known as LED strip lights, these are flexible strips that can be cut to size. They often come with a 12V transformer and mains plug for easy installation.
- Spotlight: These are individual units installed through the plinth and wired together. They can be DIY with a mains plug or hardwired by an electrician.
Both types offer coloured bulbs, including colour-changing LEDs. Installation methods vary between DIY, which uses existing sockets, and professional installation, requiring an electrician to connect to power, install a switch and issue a minor works certificate.
Today, many plinth light kits are also available as smart lighting, allowing you to connect them to smart devices such as the Amazon Echo, Google Home and the likes.
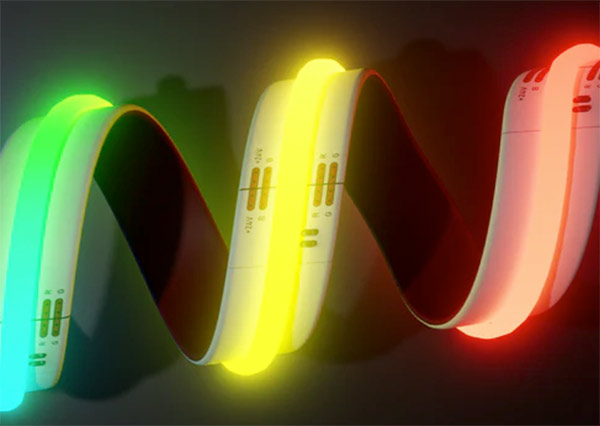
LED strip light – Image courtesy of ledspace.co.uk
Essential Tools and Materials for Installing Plinth Lights
To install your plinth lights effectively, gather the following tools and products:
- Plinth light kit of your choice (spotlights or continuous lights), preferably a complete kit and DIY if you are installing yourself
- Pen or pencil
- Tape measure
- Sticky pads (for continuous kits)
- Scissors
- Drill/driver
- Appropriate-sized hole drill, flat bit, or auger bit (for spotlight kits)
- Accessible socket (for DIY kits)
- Electrician (for wiring hardwired kits and installing switches)
Installing Plinth Lights: Step-by-Step Guide
Now that you understand plinth lights and their variations, let’s dive into the installation process.
For this demonstration, we’ll focus on installing a DIY spotlight kit, although the process for a continuous strip light kit is very similar.
Step 1: Get Your Plinth Light Kit
When it comes to gathering materials for your plinth light installation, you have two options: buy individual items or opt for a full, comprehensive kit.
We recommend purchasing a kit, which typically includes 9, 10, or 12 bulbs or LEDs on a strip (depending on your chosen length). Kits offer various colour options, including single colour, multicolour, or colour-changing options, the choice is entirely up to you.
Step 2: Locate Power Source or Socket
Prior to installation, identify the power source for wiring, such as an existing socket or a location where an electrician can take a feed from.
DIY kits typically provide ample cable length (usually at least 3m) to connect to a nearby socket. This straightforward setup allows for easy plug-in and on/off control.
For a fully concealed setup, engage an electrician to install a hidden socket or take a feed from an existing power source, such as inside or behind a unit, along with an accessible switch for control.
Regardless of the setup, ensure there’s a designated spot for the transformer/control box. For DIY kits, it’s often placed inside a unit, while for hardwiring, it’s fixed behind or under the unit.
Step 3: Drill Holes for Spotlights
Once you’ve determined the power source, it’s time to mark, drill, and install each spotlight.
Begin by removing the plinths. They typically unclip easily by sliding your hand over the top and pulling forwards. If they’re secured with screws, locate and remove them.
Measure the depth of the plinth at various points and mark the centre. Use a pencil to draw a line through these marks.
Determine the spacing between bulbs for a balanced arrangement and mark the locations along the line.
Drill holes using the appropriate flat or auger timber drill bit size specified in the lighting kit instructions, to create a hole for your specific sized light.
Once drilled, insert each spotlight until it clicks into place.
For continuous strip lights, use sticky pads to affix the strip to the underside lip of the unit.
Holes drilled for lights in kitchen unit
Step 4: Install Transformer and Connect Lights
Now, it’s time to connect each light. Simply plug the cable from one light into the next in the sequence.
The cable from the last light doesn’t need to return to the control box, so you can end your light setup at any point. However, the other end should be routed to the transformer location.
If the transformer is separate, plug it into the cable and secure it in place, normally using the sticky pad on the rear. If it’s one piece, install it in your chosen location.
Mount the transformer/control box on an accessible surface and secure all cables, either by clipping them or using self adhesive conduit/ducting that can be stuck down.
For DIY kits, run the cable from the transformer to the socket. If hardwiring, route it to the desired location for your electrician to connect to an existing supply.
If your kit includes a plug, connect it to the cable from the transformer and plug it in to your chosen power socket.
Control box or transformer for kitchen unit lights
Step 5: Organise Cables
To ensure safety and maintain a clean appearance, secure any loose cables neatly out of sight.
Depending on your kit and cable layout, hide cables under or behind units for a tidy look. Alternatively, use self-adhesive clips to secure cables, preferably hidden under the unit or along the front lip.
In the provided image below, loose cables were left hidden by the plinth at the bottom of the units. If placing lights in covings under units, use ducting or secure cables out of sight with self adhesive clips.
Wiring for plinth lights
Step 6: Test Your Installation
Once everything is neat and organised, plug in the power and switch everything on. If all is well, your lights should illuminate, creating a soothing ambiance in your kitchen.
If your system is hardwired, your electrician will handle the connection, testing, and any troubleshooting and once complete, issue you with a Minor Works Certificate for your records.
Plinth lights installed into kitchen unit
Installing plinth lighting in the plinths or kickboards of your kitchen units can transform the look and feel of your kitchen, turning it from a more work-orientated space into an area that’s much more relaxing and pleasant to be in.