Isolation valves, sometimes called shut off valves or service valves are used to cut off the water supply to anything in the home that is permanently connected to the water supply. Fitting an isolation valve is a fairly simple process as long as you know what’s involved.
Isolation valves are normally fitted to taps on basins, baths and sinks, toilets, showers, washing machines, dishwashers, outside taps, cisterns and water tanks and a variety of other fixed or movable appliances.
The most common type of isolation valve is called a Ballofix valve which is often abbreviated to Ballfix by plumbers.
The main role of the isolation valve is to enable you to “isolate” a given appliance. For example. if you want to remove a radiator to decorate behind it and you have isolation valves fitted to the pipes, it’s just a simple matter of turning the valve or valves to off, disconnecting them and then moving the radiator.
Without them, you have to drain your heating system down, remove the radiator, do what you need to do, reconnect it and then refill the heating system and bleed it out – a fair amount of work.
Additionally, when doing any work at home it is a great idea to fit isolating valves whenever the opportunity arrives.
Turning off the mains water just to change a tap is a real headache and can lead to airlocks when the water is turned back on.
Isolating valves, Ballofix or service valves are not difficult to fit and we give you a quick guide below. Full instructions on fitting isolations valves can be found in our project called repairing a burst pipe however you should exchange an isolation valve (service valve) instead of the slip-on coupling mentioned in that project, but we will also give a brief outline of the steps involved below.
What are the Different Types of Isolation Valve?
The range of names for these valves all describe a valve that does the same thing, which may be a little confusing and you will find that throughout this project as we will interchange the various names for these isolation valves where needed, but essentially, they all do the same or similar thing:
- Isolating Valves
- Isolation Valves
- Shut-off Valves
- Service Valves
- Ballfix Valves
Now that we have established the different types of isolation valve, it’s important to set out the different materials they can be made from and also the different type sof fitting they come in. These include:
- Copper compression isolation valves
- Speed Fit or pushfit isolation Valves
- Flexible Hoses with isolation Valves inbuilt
As discussed, rest assured that they all do the same job of allowing you to isolate the water supply to anything ‘downstream’ of the valve from where it sits in the water system.
Don’t worry too much about what it is called, we go on to explain the different isolation valve types further down this page. Below is an illustration of the two main types of isolation valves.
Isolation Valve With Handle
Isolation valves fitted to appliances, like washing machines and dishwashers, tend to be supplied with a small lever to shut them off. This enables the water supply to be quickly and easily shut off with a twist of the handle.
Washing machines can have a hot and cold water supply feeding the machine and, for ease of recognizing which is which, the levers are often coloured red for hot water and blue for cold water feeds.
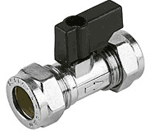
Isolation valve or service valve with handle
Isolation Valve With Screw
These valves come with either a screw to open and close them with (see image below), or a small lever (see image above). The screw on the one below is to make sure they cannot be turned on or off accidentally as it requires the use of a screwdriver.
The screw-types valves are equally as good as those with a handle, in terms of shutting off the water supply, but can be tricky to operate.
If you are in a hurry to shut the water off, then fumbling around trying to find a screwdriver is not ideal, so if you are installing a valve, then it’s worth considering this scenario.
Likewise, if the valve is going to be easily accessible to inquisitive children, then something that can be easily grabbed is also not great!
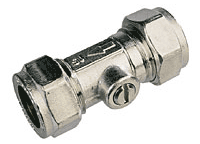
Isolation valve or service valve with screw
Isolating valves of all types also come in a right angled form which allows you to fit them to the top of a pipe running along, or up, the wall so that the opening for hose connection is facing out into the room (See below).
This can make it easier to reach the valve if you want to isolate an appliance where it may be difficult to pull it away from the wall.
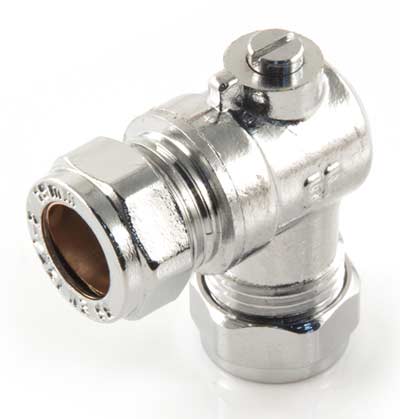
Isolation valve or service valve with screw
The Speed Fit Isolation Valve
The simplest type of isolation valve to fit is a speed fit valve, which simply pushes onto the pipe without the need for copper compression, or other plumbing fittings.
They are very quick and easy to use, provide a strong and water-tight joint, allow for expansion and contraction depending on temperature, can be used for both water supply and central heating and are fast becoming the go-to solution for plumbing work, mainly due to the speed that it can be fitted and the cost factor.
Many traditionalists see push fit as a poor choice and “a bit of a short cut”, but in reality, it’s every bit as good as copper, that’s not to say that copper pipework and fittings have had their day, far from it, copper has many of it’s own advantages and also push fit is yet more plastic!!
If you need to know more about copper compression plumbing fittings then our project on copper compression joints will give you more information.
Indeed, if you would like to know more about Speed Fit or pushfit fittings, then see our project here.
Although the fittings can be a little more expensive, professional plumbers do opt for using then as the additional expense can be made up in the time they save on fitting.
It is also worth noting that push fit/Speed Fit fittings can be used on both copper and plastic pipes.
There is also a fair amount of debate between plumbers as to whether you should use pipe inserts in plastic pipes with Speedfit. In reality this should not be necessary, but in most cases where a leak occurs on a joint, adding a pipe insert and then refitting the joint cures this, so we do tend to use pipe inserts regardless.
However, if you are using plastic Speedfit pipes along with copper compression fittings then always use pipe inserts as they prevent the fitting itself crushing the pipe when tightened as this would almost certainly result in a leak.
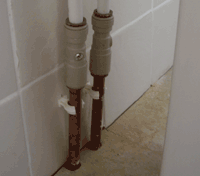
Water supply to taps with Speed Fit isolation valves
Above you can see two Speed Fit service valves in use. These valves are going to the hot and cold supply of a bathroom basin and are hidden behind the pedestal. Note how the shut off screw is positioned facing to the side of the pedestal to allow easy access when required. This makes it easier to turn the screw with a screwdriver, and to see what you are doing.
Flexible Hoses with Isolation Valves
It is also possible to buy flexible lengths of pipe, called flexible hoses, that are in most cases used to connect taps to the hot and cold water supply and these can also include a built-in isolation valve (see image below).
This is an incredibly useful piece of equipment for the DIY enthusiast especially as it makes tap connection so easy. These flexible hose are also available in Speed Fit connections.
If you are considering or even actively replacing your taps at present, then these handy objects are certainly worth fitting along with your new taps
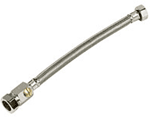
Flexible hose tap connector with isolation valve 15mm
How do you tell if an Isolation Valve is on or off?
Is my Isolation valve on or off? Anyone with an isolation valve in their home has probably asked themselves this question at some point.
The easiest way to think of it, is that it is as if the valve is pointing along the flow of the water.
If the screw or handle is lined up with the length of pipework then the isolation valve is open and allowing water to run through the pipe.
Where the screw head or handle is at 90° to the pipe then the isolation valve is closed and the water is unable to flow.
Of course it is usually fairly easy to test this by gently turning the valve to see if the water flows into the tap (make sure the tap is turned on) or for an isolation valve of toilet cistern you will hear water filling up the cistern if the valve is open.
However it can be less easy to tell if it is feeding an appliance, but in most cases, you will be able to hear if the appliance can draw water or not when it is turned on. Most modern appliances will have some sort of display to inform you of any issues, water supply included.
If there is no water supply to the given appliance, either because the water is off or any isolation valves are turned off, then please do not continue to run it as you may cause damage!
My Isolation Valves is Leaking or Stuck, how can I fix it?
Common isolation valve problems include leaking or sticking. If your isolation valve is leaking and it is a compression fitting you can try tightening the joint using a wrench to hold the valve and another wrench or adjustable spanner to tighten the nut.
It is best to turn the water off at the stopcock first and only tighten a little at a time, testing for leaks in between. Over tightening can be as bad and not tightening enough.
Often it is best to simply replace the valve whether it is a compression fitting or a push fit type.
If you are replacing either, make sure you clean the areas of the pipe that fit inside your given fitting thoroughly! If you’re working with copper pipe
If the valve is sticking on or off, in almost all cases it is best to replace it.
In a hard water area it could be a build up of limescale causing problems or the seal may have failed, either way it is a cheap and simple job to replace it and not worth trying to repair unfortunately.
Simply follow the steps for installing isolation valves below.
How to Fit an Isolation Valve
Fitting an isolation valve is a job that most DIY enthusiasts can do without too much prior knowledge or experience of plumbing, it’s mostly common sense.
Whenever you are fitting a new sink, basin, appliance or other, we would always recommend fitting an isolation valve to make replacement or removal even easier in future.
Whether you are fitting an isolation valve to plastic pipe or copper pipe, the process is basically the same, but if you haven’t already, please read the notes above concerning pipe inserts for plastic UPVC pipes.
Step 1 – Choose Your Type of Isolation Valve
Select which type of isolation valve you want to use, by reading the information above to work out which is the best for your particular job.
If you are fairly new to the world of plumbing then we would suggest you opt for push fit as soldering copper joints can be a fairly involved process if you are not familiar with the techniques required.
For the purposed of this project we will be using Speedfit or push fit fittings.
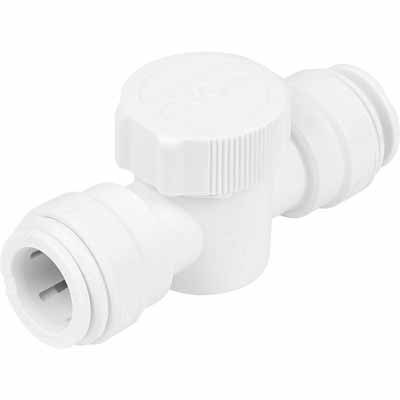
Standard push fit isolation valve
Step 2 – Where Should I fit my Isolation Valve?
Choose a spot where you can easily access the valve or valves for use in the future and also a spot where they can be fitted with the minimum of fuss.
You might also want to think about how they look aesthetically, they are not very pretty so you might want to have them hidden by a shelf, cupboard, boxing in or a sink pedestal if this can be done while still making them fairy accessible, that’s great.
If you are fitting a flexible hose with a valve built in, in place of a section of pipe (most probably copper) that runs directly to a tap or other appliance, then you are most likely going to have to cut a section of pipe away to give enough space for the flexi-hose to run from the pipe to the tap without any kinks or acute bends.
If this is the case, the best tool to use is a pipe cutter (or pipe slice as they are also known) as it will give you a clean cut and also bevel the cut edge, leaving no rough burrs or jagged edges.
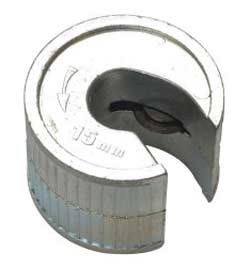
15mm pipe cutter or pipe slice – can be used to cut both plastic Speedfit pipes and also copper pipes
Step 3 – Turn off the Water
Turn of the water supply at the main stopcock, and put a towel down under the area where you are going to cut the pipes.
If you can, turn on a nearby tap to drain as much water from the pipes as possible. This not only removes as much water as possible to prevent it pouring out everywhere, but also releases any pressure remaining in the system.
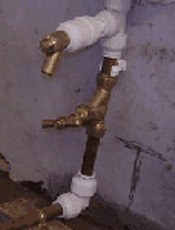
Turn the water off at the stopcock
Step 4 – Cut the Pipes
Using a pipe cutter or pipe slice (preferably) or hacksaw, cut the section of pipe where you want to fit the isolation valve or valves.
If you use a hack saw you will need to file the ends of the pipe free of burrs so that it is smooth with no jagged edges.
You may be thinking; how much pipe should I cut out for my isolation valve? A very valid question!
If you’re fitting a flexible hose and valve, cut away enough pipe to allow the hose to connect to the existing pipework and then run to the tap, but have around 20-30mm “play” so that you don’t have to stretch it or put it under tension to fit it.
If you’re fitting your isolation valve in an existing run of pipework then you will need to be a little more accurate with your cuts.
Essentially, you need to remove a section pipe the same length as the length of the “body” of your valve.
In the image below, each end of the pipe sits inside the valve up to around the point that the twist-lock meets the valve body. In this case, around 15-20mm. It is the length between these 2 points that you will need to cut out to ensure you’re not pushing or pulling the pipes to get a fit.
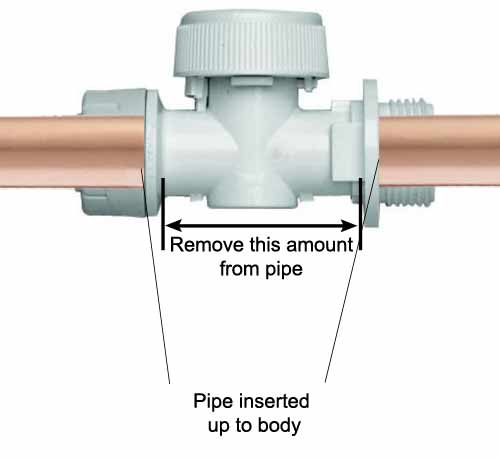
Remove the total length of pipework that is equal to the length of the main body of your isolation valve
Step 5 – Fitting Compression Joint Isolation Valves
Smooth and clean the ends of the pipe using wire wool or a fine grade sandpaper (240 grit or greater). If you are working with copper pipe, ensure that the end of the pipe is totally clean and free or any debris, grease, old paint etc.
First, slide on the compression nut, making sure it’s the right way around. Next, slide the olives onto the pipe then side the slip-on coupling onto the pipe.
The olives slide into the slip-on coupling and are compressed by tightening the nut. Tighten both nuts at either end of the coupling, this gives a watertight seal as in any other compression fitting.
Be careful not too tighten the nuts too much to begin with. Tighten to the point their tight and then give one final pinch.
If once you turn the water back on you have no leaks, great, all done! If you find that you do, you then have some margin to tighten further.
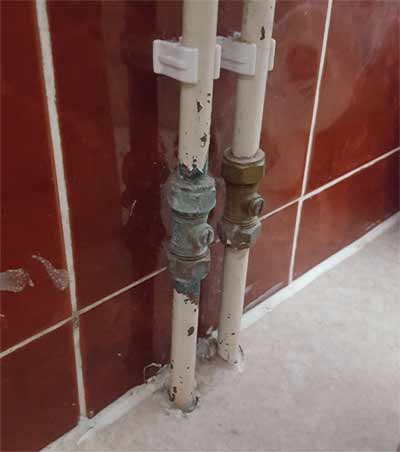
Compression isolation valves fitted with no leaks
Or Step 5 – Fitting Push Fit/Speedfit Isolation Valves
The easiest way to fit an isolation valve is with a push fit or Speed Fit system.
As with the copper variant above, make sure the pipe you are working with it totally clean and free of any dirt or debris before fitting your valve.
To fit, simply push on this purpose made valve at both ends of the cut pipe, making sure each pipe is fully engaged and touching the main body of the valve.
Once done, grab each pipe and pull them gently away from the main body of the valve. This fully engages the pipes in the valve and the collars at each end of the push fit connector or flexi hose then seal over the ends of the pipe giving you a water tight join and a very quick and easy fix.
It is also worth mentioning at this point that there are 2 types of push fit connector – the standard push fit fitting and also the Twistlock push fit fitting.
They both perform exactly the same job and both work the same way, only with the Twistlock fitting, once you have pushed the pipes in, you then have to twist and tighten the locking caps – clockwise to tighten, anti-clockwise to untighten.
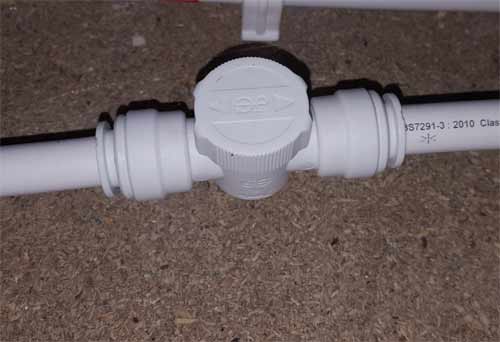
Push fit isolation valve fitted in place and water turned back on
One point to note here concerns fitting an isolation valve the wrong way around. If you look closely at your chosen valve, there should be an arrow indicating the direction of water flow, make sure this arrow is pointing from the water source to your chosen appliance so that it is running in the right direction.
Step 6 – Test the Isolation Valve
Once all connected and back together, turn the valve slowly to open the valve and release the water, turn it back and forward a few times to make sure it is fully operational.
Check for leaks around any and all joints and if all is well, you are done.
Fitting an isolation valve is a great idea and means that appliances such as sinks, washing machines, dishwashers etc can be disconnected and moved with the minimum of fuss.

