Erecting a fence on a slope means stepping the panels or rails down in stages. The depth of the step very much depends on the severity of the slope and its span.
The key point about fencing on a slope or stepped fencing is that you should not try to follow the contour of the land with your fence posts and panels, otherwise it will look very wobbly!
In the image below, the garden has been levelled using terracing, but the fence follows the line of the original slope, the effect looks very insecure even though it may well be quite sturdy.
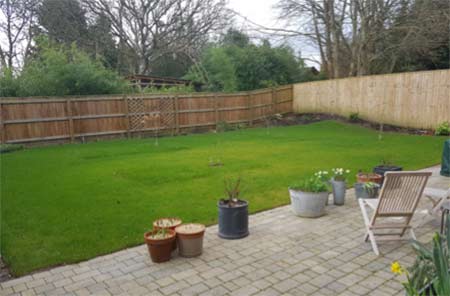
Putting in a fence on uneven ground and following the contours of the ground
On the DIY Doctor website, we have a great deal of informatrion covering all types of fencing. Before embarking on a stepped fencing project you might want to also read through these projects to familiarise yourself with these principles as they may also come in handy:
- How to build a panel fence
- How to correctly mix concrete for fence posts
- How to concrete in concreting fence posts
- How to cut down fence panel to fit a smaller gap
- How to erect a chain link fence
- How to erect close board or arris rail fencing
- Using metal post holders for fencing projects
- Fitting gravel boards to prolong the life of your fence
- How to install concrete fence posts and gravel boards
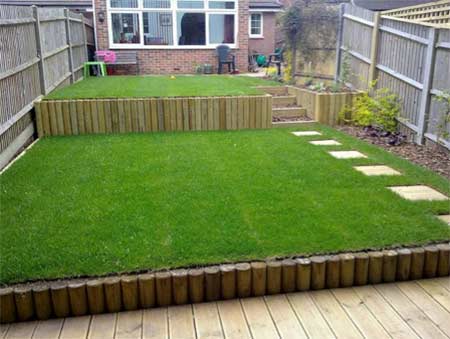
Contour fence following slope in the ground – Image courtesy of Pinterest
Ignore the Sloped Ground
For a professional-looking finish you should ignore the slope of the ground and work with true uprights and horizontals.
The posts are dug and concreted in exactly the same way as a fence on flat ground, but it is important that the top of the fence panel stays level.
If the top of the fence panel is sloping then the post will have to slope also and this looks horrible.

Stepping of fence boards and gravel boards
If the slope is a gradual one then the change in level at the foot of the fence can be smoothed out with the soil.
Where the slope is steeper, it is better to dig out some of the slope and drop the end of the panel into the “trench”, rather than have huge gaps under the panels, that way you can get a smooth curve in the lawn or flowerbed which will be adjacent to the fence.
However fences are not made to go underground and in these situations a gravel board is fitted between the posts at the bottom. Gravel boards are made of treated timber or concrete so they can withstand having earth levelled up against them.
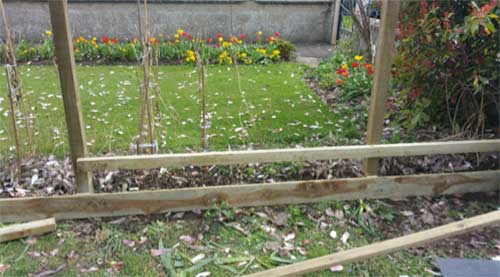
In the picture above the fence is being fitted with timber gravel boards, the picture below is an example of concrete gravel boards. Both of which protect the bottom of the fence from the moisture in the ground below.
For full information on timber gravel boards, see our project on fitting timber gravel boards here and also check out our project on concrete fence posts and gravel boards here.
Bear in mind that where you are fitting gravel boards you need to make sure your fence posts are long enough to accommodate the height of the fence panel and the gravel board.
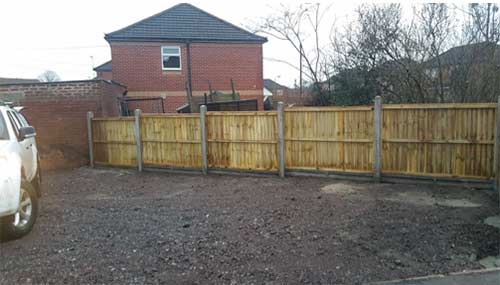
Fence panels with a step in using concrete posts and gravel boards
In the image above the ground is only slightly sloping but the fence panels have still been stepped between each fence post to give a much more pleasing finish, that looks “right” to the eye.
Where there is a steep slope it is even more important to ensure fence posts are upright, such as in the image below where you can see that you could not possibly follow the curve in the land – the fence posts would be in at almost 45 degrees! Keeping the posts upright and the rails level gives a much more pleasing aesthetic finish.
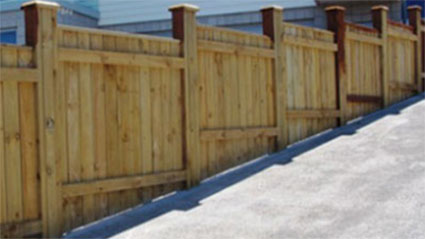
Stepped Closeboard Fencing – Image courtesy of jury.co.nz
As this fence is on a drive rather than in contact with the earth, the change in level at the bottom of the fence is accommodated by cutting each board at an angle at the bottom in line with the slope in the land – leaving a slight gap to allow moisture to run off the fence to avoid rot. The result is very neat, crisp and professional.
Work with the Slope
Providing the fence posts are upright and the rails are level you can then play around with the top level of your fence.
For instance if you are putting up a closeboard fence, or a palisade fence, like the one below, you can echo the line of the land by making each board the same length and the same distance from the ground.
While this will give a sloped or undulating finish to the top of the fence, it will still look “right” to the eye because the uprights are all straight.
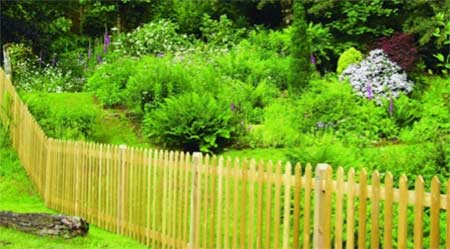
Palisade fencing – Image Courtesy of Jacksons Fencing
A garden wall is built in exactly the same way when the foundations are laid onto sloping ground and the information for these projects may help you to understand the principles of stepping fencing to slopes.
Tools and Materials Needed to put in a Stepped Fence
- Fence posts
- Fence panels, or boards and rails if you are making a closeboard fence
- Gravelboards
- Hammer or nail gun, and nails or screwdriver and rust-proof screws and (optional) angle-brackets
- Spade, post hole digger, or (if the ground if soft enough) a fence post auger
- Spirit level and/or a post level
- String or masons line
- Concrete, Postcrete or other brand of quick-setting fence post concrete
- Bucket, watering can or preferably a hose pipe for the concrete mix
- Aggregate to add to the bottom of each post hole
- Offcuts of battens or other timber (for creating a line and supporting the fence posts while the concrete sets)
- Wood preserver and brush
A Step-by-Step Guide to Fencing using Panels on Sloped Ground
Follow this simple step-by-step guide, for a trouble free professional-looking DIY stepped fencing job using fence panels – see above for the tools and materials required and for a guide to fencing on sloped ground using closeboard fencing.
Our method of digging each hole as you go allows you to move down the fence run quickly without any mistakes – particularly important when working on uneven or sloping ground.
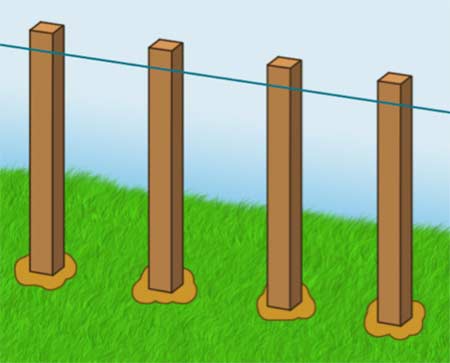
Using a string line to keep fence posts in line
- Mark out the line of your fence using a string line between stakes (see diagram above). If your fence is on the boundary it is worth checking the title deeds of the house so you can be sure you are putting the fence on your land and not encroaching on neighbouring properties
- Measure the length of your new fence and work out what materials you need. The standard size of fence panels is 6 foot wide (despite the UK using metric measurements we still use feet for our fence panels!). They come in 6 foot, 5 foot and 4 foot as standard heights. Close board fencing can be built to any height you like
- Dig the first hole – If your first panel butts up to a wall of the house or outbuilding then you can fix the first post and panel to that wall, as you are unlikely to be able to dig a hole for a fence post so close to the foundations. See our fixing to masonry project for more information on getting a secure fixing
- Add a layer of aggregate to the bottom of the hole
- Put the post in the hole and check it is level both ways using a spirt level or post level. When the post is in position support the post either side with some timber.
- Add concrete to the post hole by pouring in mixed concrete or adding water and Postcrete (or similar product) according to the manufacturer’s instructions. Find out more about how to use Postcrete for fencing in this project.
- Check that the post and panel are still level and adjust if necessary. The Postcrete should go off in about 15 Minutes or so, depending on environmental conditions
- While the concrete in the first hole goes off, you can dig another fence post hole. Measure for the next hole, six foot away and on your marked line. When you have dug the second hole the concrete in the first hole should have set
- Fix a fence panel to the first post you put in, check it is straight and level
- Drop a post into the second hole and fix the first fence panel to it, checking they are straight and level. When the post is in position secure the second post either side with some timber
- Add concrete to the second hole
- Repeat until you come to the end of your fence. Make sure you are keeping to your line all the time and when you have gone as far as you want to go in a day just check again that every post and panel are plumb
- If you need to cut down a fence panel to fit at the end then we have a project on how to cut down a fence panel, which will help you do this properly (unless you are lucky, you are very likely to have to do this)
Fitting fence panels correctly so they sit level and upright can sometimes be a tricky job. For a full rundown on putting up fence panels, see our project here for more detailed information.
A Step-by-Step Guide to Fencing using Closeboard Fencing on Sloped Ground
Follow this simple step-by-step guide, for a trouble free professional-looking DIY Stepped Fencing job using closeboard fencing. This will also work for palisade fencing, picket fences or post and rail fences.
We recommend this method of digging each post to allow you to move down the fence run quickly without any mistakes. This is particularly important when working on uneven or sloping ground.
- Mark out the line of your fence using a string line between stakes (see diagram above along with notes on garden boundaries)
- Measure the length of your new fence and work out what materials you need
- Dig the first hole (if your first panel butts up to a wall then you can fix the first post to that wall as your starting point)
- Add a layer of aggregate to the bottom of the hole to help with drainaingaway water and moisture and prevent sitting water from rotting the base of the post out
- Put the post in the hole, check for level both ways then support the post in place, regularly checking that it is upright and level
- Add concrete to the post hole and tamp it down so that it holds the post firmly in place
- Check that the post is level and adjust if necessary. If using Postcrete, this should go off in about 15 Minutes or so, depending on environmental conditions so be aware of this
- While the concrete in the first hole goes off, dig another fence post hole six foot away from the last, and on your line
- When you have dug the second hole the concrete in the first hole should have set
- Fix the bottom rail to the first post you put in, check it is straight and level
- Drop a post into the second hole and fix the first rail to it, checking they are straight and level. When the post is in position secure any further rails to the two posts
- Add concrete to the second hole, again tamping it around the post
- Repeat until you come to the end of your fence. Make sure you are keeping to your line all the time and when you have gone as far as you want to go in a day just check again that every post and rail are straight and level
- Once you have all your posts and rails in place you can fix the boards onto the rails
For more help and advice on building close board fenecing checkout our project here.
Finishing off your Fence with Capping
Capping rails are placed on top of any panels to finish the fence off. As with other types of fencing the top of the posts can be cut off level with the fence itself or a few inches can be left sticking up above the panels, it’s your call.
Post caps can be fitted to the top of the posts to stop water sitting on them and rotting the timber. Post caps act just like coping stones on a garden wall.
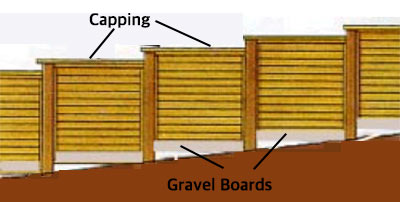
Stepped fencing panels
Tips for getting a great finish on your fencing
Protect Your Fence
It is not advisable to place any part of the actual fence panel into the ground because they would soon rot if you did that. As you can see from the image above, gravel boards have been fitted between the posts.
These boards must be treated with a rot preserver of some kind to stop the soil rotting them. They can be dug into the slope if necessary. Treat your whole fence with preservative to extend its life.
Get a Straight Line
Always remember to use a string line with your fence just as shown in the fencing to flat ground project.
Get Your Levels Right
Use a post level to ensure fence posts are plumb, use a spirit level to check the top of the fence is level – and keep checking as you work.
Use a Proprietary Quick Setting Fence Post Concrete
It is so much easier to dig hole for fence panels as you go, and to do this effectively we always recommend using Postcrete (or other similar products).
Buy Enough Materials
Make sure you have enough materials to finish the job in your allocated time – there is nothing more frustrating than running out part-way through a job.
Get the Right Size Fence Posts
Make sure the length of your posts gives you enough length in the hole, and for gravel boards if you are using them. It is better to get a post that is too long and cut it down than one that is too short – even we can’t teach you how to cut a bit of wood longer than it is!

