Why do we Need to Remove Radiators?
There are a number of occasions when removing the radiator would make life a lot easier. Decorating, replacing the floor or skirting boards, flushing the central heating out, cleaning behind a radiator, adding silver foil or radiator heat reflectors, changing or refixing radiator brackets if loose and even ceramic tiles in bathrooms Its not a hard job, and providing you take adequate precautions, not a messy one either.
If you want to take this opportunity to change radiators or insert a towel rail then go to our project on towel rails.
The major thing that prevents DIYer’s and Home Improvers from removing radiators is the possibility of the dirty water they contain getting onto the carpet.
This is now easily overcome with the second method of removing a radiator and involves the use of a simple toolkit called the Radkit Pro. This can be seen in the removing a radiator video at the foot of the page.
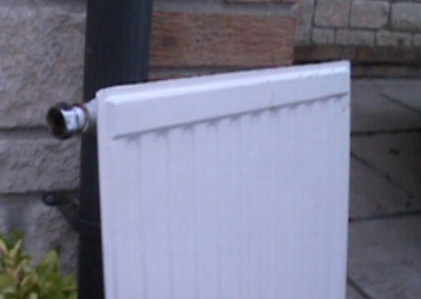
Types of Radiator Valve
Over the years, through the many trade associations connected to plumbing and central heating such as the The Chartered Institute of Plumbing and Heating Engineer’s (CIPHE) and the Association of Plumbing and Heating Contractors (APHC) many different types of valves to turn off hot water, cold water and central heating water have been tried. This huge pile has been reduced to three basic categories.
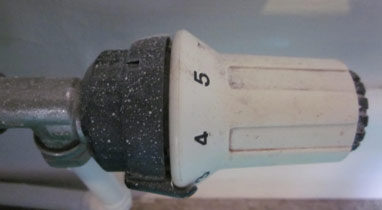
Every radiator has two valves, one to let the water in and one to let out again. Mostly the valves will be as shown below. One valve will be operational in that it actually turns the spindle to open or shut the valve. This one is called the wheelhead valve. The other is generally a white, cone shaped cover which simply pulls off to reveal the spindle underneath. This one is called the lockshield.
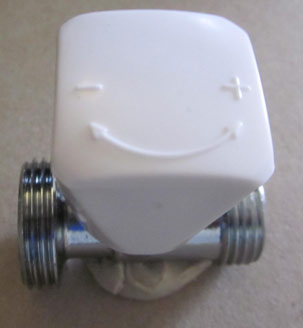
A third variety is getting more and more common now and that is the thermostatic valve. The principle is the same. If the valves are off, no water can come from the pipes, so the first thing to do is isolate the radiator.
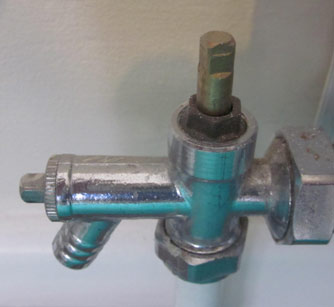
Lockshiled valves have removable cap to get to valve spindle head
A Wheelhead nut opens and closes a radiator valve without removing head
The Thermostatic Radiator Valve (or TRV) senses room temperature and opens and closes accordingly
How to Drain a Radiator Before Removal Using the DrainEasy Kit
The video at the foot of the page will explain how a radiator can be very easily drained, without draining down the entire central heating system, by using the simple to use DrainEasy kit. This kit allows you to drain down a radiator and avoid spilling the normally dirty brown water all over your carpet.
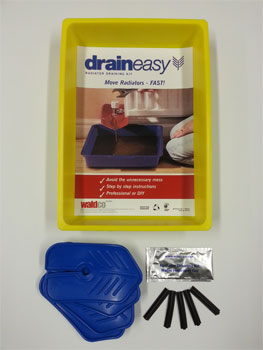
The DrainEasy radiator draining kit
The first task when using the kit is to position the drainage tray under the radiator and valve you are going to loosen.
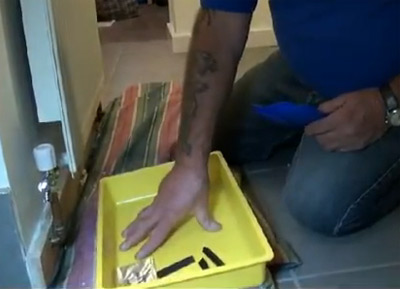
Position the drain tray under the radiator valve
Included in the kit is a small sachet of water repellent gel. Open the sachet and then take the blue diverting collar and apply the gel around the centre pipe slot.
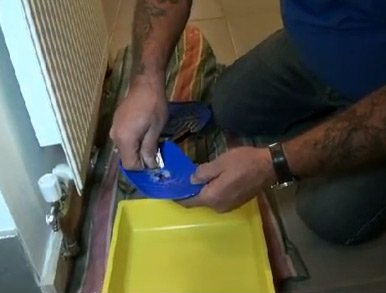
Apply water repellent gel to the diverting collar
Slide the diverting collar on to the pipe leading up to the valve and then push the collar joining clip onto the collar to bridge the gap. The clip ensures no leaks from the back of the diverting collar.
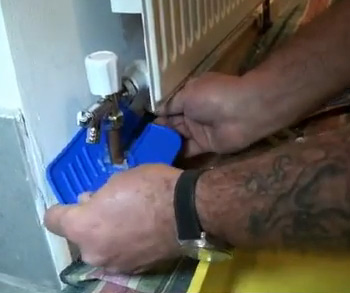
Add the diverting collar clip to the collar to create a complete seal
Once the clip is in place, turn the diverting collar so that the pointed end is facing towards the drain tray and then smear the gel around the point where the collar touches the pipe to give a good seal.

Diverting collar clip added, gel smeared around pipe and positioned over tray
With the kit now all ready to go the final job is to loosen the valve and watch the water drain out. Ensure you leave it long enough for all the water to drain.
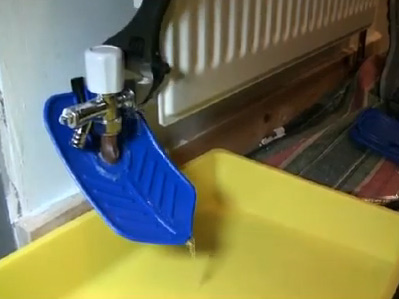
Using a wrench to loosen the valve allow the water to drain out of the radiator
How To Remove a Radiator the Traditional Way
Pull off the locksheild head (sometimes there is a little grub screw holding it on) and, using a small adjustable spanner, turn it as far, clockwise, as it will go. This will close the valve. Now do the same with the wheelhead valve, just by turning the handle clockwise. There is no need to remove anything from this one.
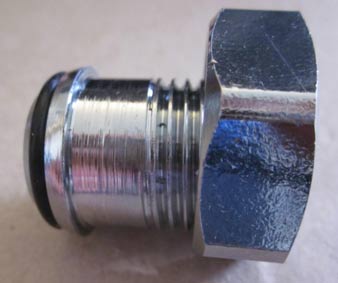
Nut between each valve and the radiator
Between each valve and the radiator there is nut. This nut is part of the radiator and not the valves. The left hand nut will undo by turning the nut toward you, the right hand one will undo by turning it away from you. The nuts will stay on the radiators as there is a small lip on the radiator entry point which will hold them on. The nut and the lip can be seen in the image. Both are on a threaded fitting which screws into the radiator.
The most important thing to remember when undoing the nuts, and later, when tightening them, is to hold the valve solid with another spanner. We use two adjustable spanners, one to hold the valve and one to undo the nut. It is very important the pipes are not allowed to bend as if they kink they may leak.
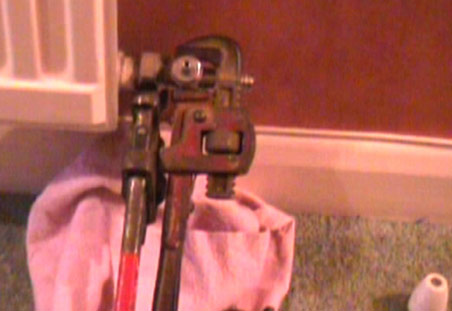
Undoing valve nuts with Stilson Grips. The valve must be held steady while the radiator nut is undone
The picture above shows the right hand valve and the nut will open away from you. The valve must be held steady. Introduce some rags around the base of the pipes and under the valves at this point. There will be some spillage from the radiator as it will be full off water.

Stopping a radiator valve from dripping onto the carpet
Undo both the nuts until they are just loose (you will need some help here). Now undo them all the way and pull the valve gently away from the rad.
Get your finger or thumb over the hole as soon as you can to reduce spillage. When you have both holes blocked you will be able to lift the radiator straight up from its bracket. You may have to pull it forward slightly as well as upward. The brackets are shaped as below, so you can see how the radiator will lift off.
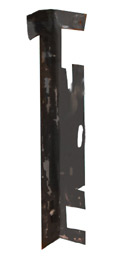
Radiator Bracket
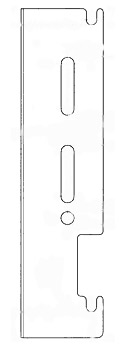
Radiator Bracket Side View
Having lifted the radiator off, take it outside and either turn it sideways to empty the dirty water out, or turn it completely upside down and set it on the ground. This way is easier if it is a large radiator and it will give you time to catch your breath before you get round to emptying it. This part is not necessary using method number1 and the Radkit Pro kit.
Prevent leakage when moving radiator by turning upside down