A fresh coat of paint or new wallpaper can transform a room. For the best finish, existing wallpaper should be removed first.
While you can paint or wallpaper over existing wallpaper and lining paper, the result won’t be as smooth as working with a bare wall.
This guide will teach you how to remove wallpaper and prepare a flat, smooth wall ready for painting or hanging new wallpaper.
A Note on Woodchip and Textured Wallpaper
Textured wallpaper, particularly woodchip, has seen various fashion trends over the years. Woodchip wallpaper, as the name suggests, features small wood chips between two sheets of paper, creating a textured effect.
Another popular textured wallpaper is Anaglypta, which has an embossed pattern for a raised texture.
Removing textured wallpapers, especially woodchip, can be challenging and often requires steaming. Even then, it can be difficult. For more tips, see our guide on removing woodchip wallpaper.
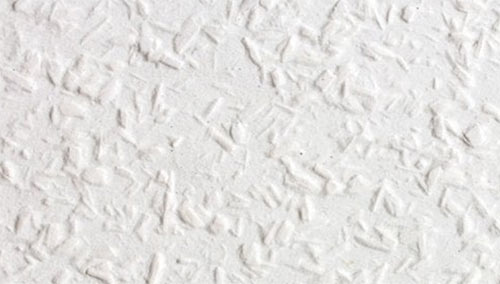
Commonly found woodchip wallpaper
Can I Hang New Wallpaper Over Old Wallpaper?
Yes, you can hang new wallpaper over old wallpaper, but it’s not recommended as you are not guaranteed the best finish. The final look won’t be as smooth as when applied directly to a bare wall.
Avoid hanging new wallpaper over old if any of the following are true:
- The existing wallpaper is vinyl or washable, which typically has a plastic film that prevents proper adhesive bonding.
- There is more than one existing layer of wallpaper on the wall.
- The existing wallpaper is peeling at the corners or edges, or has rips or tears.
- You are using vinyl or washable wallpaper, which can trap moisture and cause mould due to its non-breathable surface.
- There are bubbles or creases in the existing wallpaper, as these will show through the new wallpaper.
Identify Your Wallpaper and Wall Type
If your current wallpaper is washable or vinyl, steam or moisture won’t penetrate the plastic top layer. Also, too much moisture can damage plasterboard if wallpaper is directly applied to it.
For plastered walls, soaking or excessive steam can cause damage. If using a wallpaper steamer, avoid leaving it in one spot for too long to prevent harm.
Identify Your Existing Wallpaper Type
To determine your current wallpaper type, scratch a corner with your nail or the back of a knife. If the surface scuffs, revealing the backing, it’s likely standard wallpaper. If it starts to separate, it’s probably strippable, peelable, or washable wallpaper.
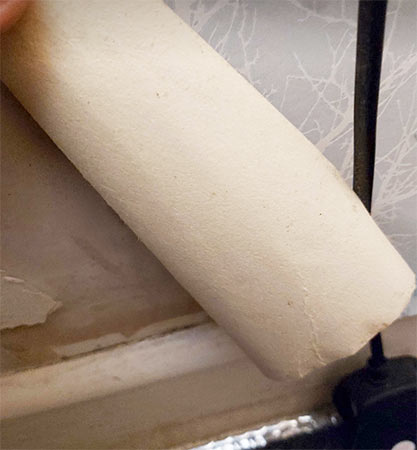
Peeling corner of wallpaper back
Identifying Your Wall Type
To determine the type of wall under your wallpaper, knock on it with a closed fist. If it feels solid, it’s likely a plastered brick or block wall.
If it sounds hollow, it’s probably a stud wall, usually with a plasterboard covering. To confirm, peel back a corner of the wallpaper.
If the surface is smooth and solid, it’s likely plaster. If it looks papery or scuffs easily, it’s probably plasterboard.
In the US, it’s common to paint or wallpaper directly onto plasterboard. In the UK, plasterboard is typically plastered before painting or wallpapering.
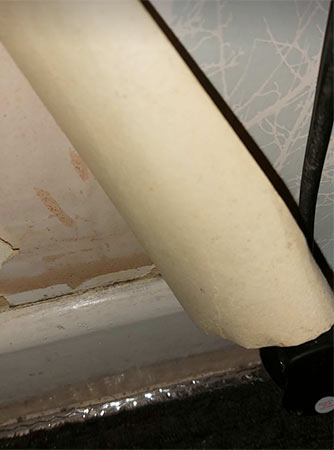
Wallpaper applied to plastered wall
Removing Strippable and Peelable Wallpaper
Modern wallpaper often comes in strippable and peelable varieties, making removal easy without the need for chemical or steam-based strippers.
Removing Strippable Wallpaper
Follow these steps to remove strippable wallpaper:
- Step 1 – Peel an Edge: Use a stripping knife or sharp knife to lift a corner or edge of the wallpaper.
- Step 2 – Peel Off the Paper: Once you have a corner loosened, do the same for the opposite corner. Pull both corners together, forming a straight line. Gently but firmly peel the paper upward until it comes away. If it tears, lift a new corner and start again.
- Step 3 – Remove Remaining Paper: Repeat the above technique around the room until all the wallpaper is removed.
- Step 4 – Clean the Walls: Wash the walls with warm soapy water to remove any remaining wallpaper paste, then allow them to dry.
Removing Peelable Wallpaper
Peelable wallpaper is easy to remove using these steps:
- Step 1 – Remove Topcoat: Start at a corner or edge seam with a stripping knife or sharp knife. Lift and peel off the topcoat around the room.
- Step 2 – Peel Off Backing: Score the backing paper with a paper tiger. Dilute wallpaper stripping solution in a sprayer, and apply it to a small section starting at the top. After a few minutes, use a stripping knife to peel off the soaked backing. Repeat for all walls.
- Step 3 – Wash Wall: Clean the wall with hot soapy water to remove any adhesive residue. Allow it to dry thoroughly.
Methods for Stripping and Removing Wallpaper
There are three effective methods for removing wallpaper: using a wallpaper stripping solution, hot soapy water, or a wallpaper steam stripper for tougher jobs.
Wallpaper Stripping Solution
Wallpaper stripping solution is a specialized liquid available at most DIY stores. It can come pre-mixed or require dilution with water.
Apply the solution to the wallpaper using a sponge or, preferably, a sprayer. Allow it to soak in, which breaks down the adhesive and makes the wallpaper easy to scrape off.
Various brands offer wallpaper strippers, with some performing better than others.
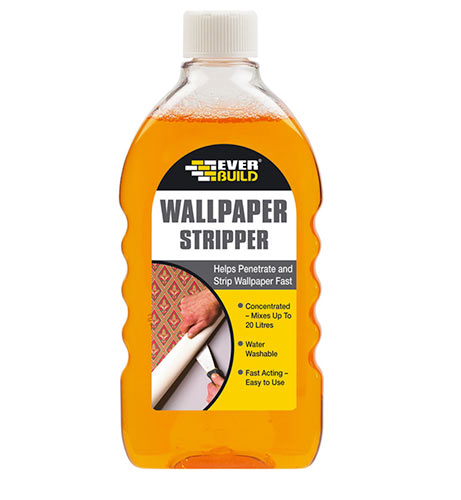
Wallpaper stripping solution
Hot Water
Hot water can effectively remove wallpaper by softening the adhesive. Apply the hot water to the wall with a sponge or brush. The heat and moisture break down the adhesive, making it easier to scrape off the paper.
While hot water can be effective, its success depends on the strength of the adhesive used. Some adhesives may be tougher to remove than others.
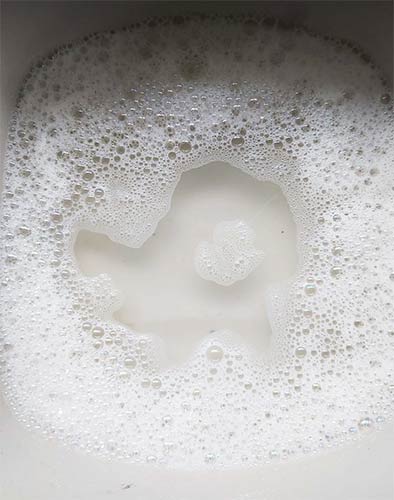
Hot water used top strip wallpaper
Wallpaper Steam Stripper
A wallpaper steam stripper heats water to produce steam, which softens the adhesive on wallpaper. The steam is directed through a plate that you press against the wallpaper, making it easier to scrape off.
Steam strippers are effective on most wallpaper types and adhesives, including multiple layers and woodchip wallpaper. However, be cautious: prolonged use in one spot can damage plaster and plasterboard.
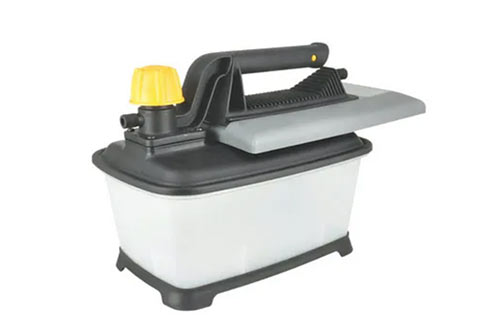
Wallpaper stream stripper
Choosing the Right Wallpaper Stripping Method
To determine the best wallpaper stripping method, test how easily the wallpaper comes off. Start by peeling up a corner or using a stripping knife. Based on how easily it removes, choose the appropriate method:
- Peels Easily: Use hot water or wallpaper stripping solution.
- Doesn’t Peel Easily: Use a wallpaper steam stripper.
Tools and Materials for Stripping Wallpaper
To successfully remove wallpaper from a wall you will need to use the following products and tools:
- Hot water, wallpaper stripping solution or wallpaper steam stripper
- Paint brush or spray bottle/rose sprayer
- Stripping knife (selection of different sizes may be useful)
- Wallpaper tiger or similar scoring tool
- Utility knife
- Steel ruler or steel straight edge
- Old clothes
- Suitable PPE gear – gloves, goggles etc.
- Plastic dust sheets
- Rags for wiping and cleaning up spillages
- Step ladder or hop up
- Sponge
- Bucket
- Washing up liquid
- Bin bags for old wallpaper
- Masking tape (for sticking plastic dust sheets in place)
Preparing to Strip Wallpaper
Follow these steps to prepare your room for wallpaper removal:
- Step 1: Remove all movable items from the room, such as sofas, tables, and chairs.
- Step 2: Take down all objects from the walls, including pictures, hooks, and air vents.
- Step 3: Turn off power to sockets and lights. Ensure each circuit is isolated at the consumer unit/fuse box. Inform everyone in the house or place a note on the fuse box to prevent accidental power restoration.
- Step 4: Loosen socket and light switch faceplates. Cover them with plastic bags and tape securely to protect electrical contacts from moisture.
- Step 5: Lay plastic dust sheets over the floor to protect it from water and debris. Secure edges to skirting boards with tape.
- Step 6: Score the joint where the wall meets the ceiling with a utility knife and straight edge to prevent damage to the ceiling paint.
- Step 7: Score the wallpaper surface with a wallpaper tiger or utility knife. This helps the stripping solution or steam penetrate the adhesive without damaging the wall.
Removing Wallpaper with Hot Water
Hot water is a classic and cost-effective method for removing wallpaper. Here’s a quick guide on how to do it:
Step 1 – Prepare and Apply Hot Soapy Water
First, fill a bucket with hot water and add a few drops of dish soap. This simple trick helps break down the wallpaper adhesive, making removal easier.
Apply the soapy water to the wallpaper using a decorator’s sponge. Let it soak for 30 minutes, then reapply as needed. Keep the water hot for best results, but be careful not to burn yourself.
Work in small sections, about 1/4 or 1/3 of the wall’s height, to prevent the area from drying out before you can scrape it off. While one section soaks, you can start scraping another.
Step 2 – Scrape Off the Wallpaper
Use a 3-4 inch scraper to gently remove the wallpaper. Keep the blade flat against the wall to avoid damage.
Scrape in a back-and-forth motion, applying steady pressure to lift the paper off. Collect the strips in a bin liner to keep your area tidy.
Continue this process around the room, adding more water as needed but avoiding excessive moisture on plaster or plasterboard.
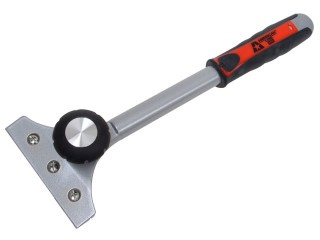
Adjustable wall scraper
Removing Wallpaper with Stripping Solution
This method uses a special solution to dissolve the adhesive, making it easier to scrape the wallpaper off the wall.
Step 1 – Prepare the Stripping Solution
If your stripping solution needs diluting, mix it with water according to the manufacturer’s instructions. Use a bucket for this.
If your solution is ready-to-use, proceed to the next step.
Step 2 – Apply the Solution
Transfer the solution into a sprayer or use a sponge to apply it to the wallpaper. Follow the manufacturer’s instructions for soaking time.
Some solutions are tinted to show coverage. Work in sections, about one-third of a strip at a time.
Step 3 – Scrape Wallpaper Off the Wall
Use a flat scraper to avoid damaging the wall. Gently scrape the wallpaper off using a short, controlled motion along the edges.
Continue this method around the room until all wallpaper is removed. Collect the stripped paper in bin bags to keep the area tidy.
Stripping Wallpaper with a Steam Stripper
For tough wallpaper, especially painted ones, a steam stripper is the most effective tool. It’s simple to use and highly efficient. We recommend using a steam stripper for any wallpaper removal job.
Safety Tips for Using a Wallpaper Steam Stripper
Using a steam stripper involves boiling water and can be dangerous. Follow these safety tips:
- Place the steamer on a flat, stable surface.
- Wear thick, heat-resistant gloves to protect your hands from hot steam.
- Move the steamer by the handle only. Avoid dragging it by the hose to prevent damage or tipping.
- Turn off and let the steamer cool before refilling the tank.
- Never leave the steamer unattended while it’s on.
- Do not let the steamer run dry; it could potentially explode.
- Ensure good ventilation to allow steam to escape.
- Turn off the room’s electricity and cover all sockets and switches with plastic, taped securely.
Step 1 – Prepare the Steam Stripper
First, fill the steam stripper tank with clean water and secure the cap tightly.
Place the tank on a stable, level surface. Attach the hose properly, plug the unit in, and switch it on.
Allow a few minutes for the steam stripper to heat up. You’ll know it’s ready when steam begins to emerge from the steam plate and you hear bubbling, similar to a kettle.
Step 2 – Stripping the Wallpaper
When using a steam stripper, start at the bottom of each wallpaper strip and work upwards.
Hold the steam plate by the handle and place it flat against the wallpaper. Move it over a small section for 10-15 seconds, then remove it. Use a 3-4 inch stripping knife to lift the corner of the paper and begin scraping it off.
Use a short, sharp motion with the knife, keeping it as flat as possible to avoid damaging the wall. Avoid leaving the steam plate in one spot too long to prevent plaster damage. Move the plate gently back and forth.
After stripping each section, repeat the process around the room. For stubborn areas, hold the steam plate on the spot a few seconds longer until the paper softens enough to scrape off, taking care not to damage the plaster or plasterboard.
Step 3 – Keep the Workspace Tidy
Maintain a clean workspace by disposing of stripped wallpaper in a bin bag regularly. This prevents sticky strips from spreading paste onto your shoes, clothes, tools, and other areas of your home.
For detailed guidance on using a steam wallpaper stripper, visit our project page.
Repair Any Damage
Stripping wallpaper can sometimes cause minor damage to the wall. Don’t worry—this is normal and fixable.
Use a high-quality filler to repair any dents or scratches. Let it cure completely, then sand the area smooth with 120-grit sandpaper and a flat block.
These repairs will ensure a perfectly flat, level surface for your next step.
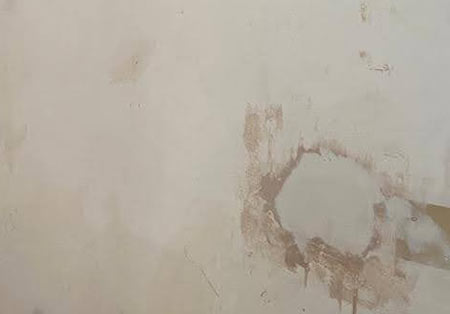
Damaged section of wall filled and repaired
Cleaning the Wall After Wallpaper Stripping
After removing the wallpaper, the final step is to clean the walls for painting or new wallpaper.
Use a stiff brush to remove any leftover paper fragments. For stubborn pieces, gently scrape them off with a stripping knife.
Wash the walls with hot, soapy water to eliminate any adhesive residue. Ensure the walls dry completely before reattaching electrical socket and light switch covers. Good ventilation will help walls dry within 24 hours.
Only restore power once you’re sure everything is dry and safe.
Wallpaper stripping can be tedious, but choosing the right method makes it manageable. If you’re preparing a new wall, check out our guide on preparing walls for wallpaper. Explore more decorating projects in our section.
Although stripping wallpaper is a tedious job, especially if it’s patterned or woodchip, to get the best results for paint or new wallpaper, it’s really essential that it’s done.