Supataps are a traditional type of tap innovation that eliminates the need to turn off the water before making repairs, a very handy feature indeed!
In this project guide we take a look at the Supatap, how it works and how easy they make the job of changing washers.
What is a Supatap?
A Supatap is a type of tap, commonly found in UK homes in the 50’s and 60’s and was designed for ease of installation and maintenance.
Unlike traditional taps, which require extensive plumbing work to fit or replace, a Supatap allows you to change the internal washer without having to turn the water off.
This innovative feature makes it an ideal choice for anyone looking to minimise hassle and disruption during routine plumbing jobs.
Supataps are especially useful in situations where you need to repair or maintain a tap without affecting the water supply to the rest of the property.
This is because they are equipped with an internal mechanism that automatically seals off the water supply when the tap head is removed. This design not only simplifies maintenance but also reduces the risk of water damage during repairs.
These taps are often found in older properties or in locations where ease of maintenance is a priority. The straightforward design of a Supatap makes it accessible even for those new to DIY, allowing for quick and efficient repairs with minimal tools.

Typical Supatap nozzle
What are the Main Benefits of a Supatap?
A Supatap offers several key benefit, one of the primary advantages being its unique design that allows for repairs or replacements without needing to shut off the water supply. This feature is particularly useful in situations where shutting off the main water supply would be inconvenient or disruptive, such as in busy households or commercial settings.
Another significant benefit is the ease of maintenance. Supataps are designed to be user-friendly, meaning you can quickly fix leaks, replace washers, or carry out other routine maintenance without extensive plumbing knowledge.
Durability is another strong benefit of the Supatap. These taps are built to last, often constructed from high-quality materials that resist corrosion and wear. This longevity ensures that once installed, a Supatap will provide reliable service for years.
However, like all things, there are some downsides too, the main one generally being appearance. Although Supatap’s were very stylish in the 50’s and 60’s, this isn’t necessarily the case now.
What Parts Make up a Supatap
So that you know exactly what part we are talking about when we get to the repairing stage of this guide, it’s important to go through the different parts of a Supatap:
- Gland Nut: Screws the Supatap head and body on to main spout of the tap
- O-Ring: Seals the body of the Supatap and prevents water leaking up through the body and out of the gland nut.
- Auto Shut-Off Valve: Allows you to unscrew and remove the main Supatap head without turning off the water by sealing the water flow to the tap head.
- Washer: Controls the flow of water from the spout.
- Anti-Splash Nozzle/Flow Straightener: Controls the flow of water and prevents splashing and keeps the flow nice and directed.

Main parts of a Supatap
Other Types of Tap
If you are new to the world of DIY, you may not be too sure about the different types of tap available, so to help you confirm what type of tap you have and whether it’s a Supatap, below is a list of the most commonly found types of tap in UK homes.
- Pillar Taps:
- Traditional taps commonly found in bathrooms.
- Separate hot and cold water flows controlled by individual taps.
- Simple design and easy to install.
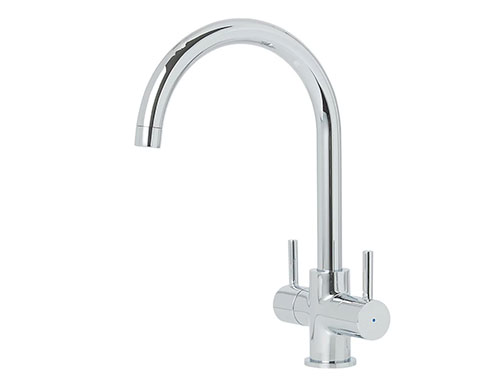
- Mixer Taps:
- Combines hot and cold water into a single spout.
- Allows precise control over water temperature and flow.
- Available in both lever and twist handle designs.
- Monobloc Taps:
- A type of mixer tap with a single spout and one or two handles.
- Popular in modern kitchens and bathrooms.
- Compact design ideal for smaller sinks.
- Both feeds are connected to the main body, making them much more slimline than a mixer tap.
- Ball Taps:
- Single-handle tap often found in kitchens.
- Uses a rotating ball to control water flow and temperature.
- Known for their durability but can be tricky to repair.
- Often used as service valves and taps for washing machine feeds and the similar.
- Cartridge Taps:
- Available in both single and double-handle varieties.
- Uses a cartridge to control water flow and temperature.
- Smooth operation with precise control, ideal for modern bathrooms.
- Disc Taps:
- Features a pair of ceramic discs that control water flow.
- Often found in premium and high-end fixtures.
- Offers long-lasting performance with minimal maintenance.
- Sensor Taps:
- Touchless taps activated by motion sensors.
- Hygienic and water-efficient, commonly used in public restrooms.
- Reduces the spread of germs by eliminating the need for contact.

Standard pillar tap
Standard kitchen mixer tap

Monobloc kitchen tap

Ball tap service valve

Cartridge for a cartridge tap

Pair of ceramic disc tap cartridges

Sensor tap that uses a sensor to turn on and off
Tools and Products Needed for Fixing a Supatap
In order to successfully repair a Supatap you will need the following tools and products:
- Selection of clean old rags
- Selection of washers and o-rings
- Selection of spanners
- Adjustable spanner
- Bucket
- Selection of screwdrivers
- Flow straightener/Anti splash nozzle and washer
How to Repair a Supatap
Now that we have looked at the different types of tap and also the particulars of a Supatap and how they work, it’s now time to have a look at how you repair one, particularly if it is leaking.
Step 1 – Loosen Lock Nut And Drop The Check Valve
Inside the tap, a check valve is present. When you hold the handle and loosen the lock nut above it, the valve drops down, automatically stopping the water flow as soon as the handle is removed. As said, this is the Supatap’s party piece!
Using the right sized spanner or an adjustable spanner, turn on the tap and hold the mechanism with one hand and loosen th gland nut with the spanner. As you unscrew the tap head tha auto shut-off valve will close and shut the water flow off.
Once unscrewed, out the Supatap head to one side.
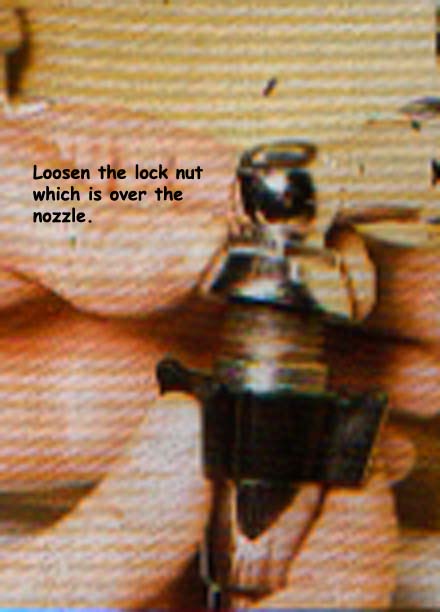
loosen the lock nut that covers the nozzle
Step 2 – Tap Out the Flow Straightener/Anti Splash Nozzle
At the end of the handle, you’ll see a "flow straightener". This can be gently tapped or sometimes simply pushed out. The washer and jumper are located at the end of the flow straightener.
If it won’t move easily you can use a small screwdriver to help gently press it out or gently tap it with a hammer.
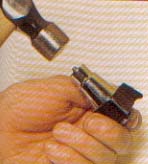
Gently tap out flow straightener from tap
The washer and jumper should then slide out of the tap body and can then be replaced.
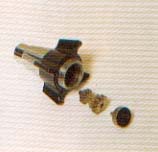
Components of a supatap
Step 3 – Find the Right Replacement Jumper and Washer
It’s always wise to keep a repair kit on hand for plumbing fixes at home. These kits, available at most plumbing merchants, include a varied selection of washers, O-rings, seals, and diaphragms for all manner of taps and appliances.
When replacing a jumper or washer, search your kit for an exact match in both diameter and thickness, they should be identical. Using mismatched parts can lead to leaks or other issues.
If you can’t find a match, take the old jumper and washer to a plumbing merchant. They can help you find an exact or compatible replacement. While DIY stores may have some options, plumbing merchants are usually more reliable for specialised parts like these.
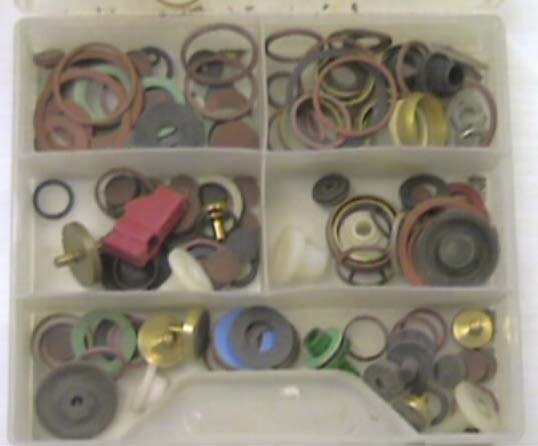
Selection of various washers
Step 4 – Reassemble the Supatap
With your replacement parts ready, reassemble the Supatap by reversing the disassembly steps. First, insert the flow straightener/jumper back into the tap with the washer assembly, ensure its fully in place correctly then screw the tap body back on using the gland nut.
Do this by hand first until finger tight and then use your spanner or adjustable to fully pinch it up tight.
Test the tap to ensure everything works correctly. If all is functioning smoothly, congratulations—you’ve successfully repaired your Supatap.
Note: We’ve made every effort to contact the owners of some images used above under copyright law. If you know the owner, please reach out to DIY Doctor.
Although slightly old-hat these days, unless you are going for a retro 50’s, 60’s look, Supatap’s are not that common place any longer in UK homes, however if you do have one you will know how reliable they are so it’s well worth keeping them going for as long as possible.