Changing a tap is a relatively simple DIY job if you have a sound knowledge of basic plumbing, but if you are new to this world, it may seem like a daunting task.
Fear not, in this project we will take you through the process of how to change a tap, beit a kitchen mixer tap or a bath tap, although they may look totally different, the principles of the job are the same.
So, if you are stood at a sink scratching your head, wondering where to start, go and get your tool bag or box and read on below.
Common Types of Tap
Before we actually get stuck in, it’s a good idea to take a look at the types of tap available and the common parts that each different type of tap shares with the next.
Pillar Taps
The majority of wash basins, baths and sinks are fitted with individual taps, one that supplies the hot and the other for the cold water. Individual supply taps of this nature are called pillar taps.
Most modern taps have shrouded heads of metal or plastic. With these particular designs, the “handle” or shroud allows you to both turn the taps on and also helps to protect the inner workings of the tap.
In other designs (such as the Capstan mentioned below), the handle and shroud are two individual items.
As I’m sure you can imagine, pillar taps are available in a huge range of styles and designs. Older style taps, with the cross bar at the top are normally referred to as Capstan Head taps.
Other common types include the lever head tap and bib tap.
The lever head turns the water on and off with the shortest push of the lever and is very useful for those with a disability or simply turning the tap when your hands are full, whereas bib taps tend to be wall mounted.
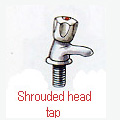
Shrouded head pillar tap

Lever head pillar tap
Mixer Taps
In essence, the traditional style mixer tap is just two pillar taps joined together so that they share one spout.
The idea behind this setup is so that you can independently control the flow of both hot and cold water out of the single spout to get a perfect and consistent temperature mix.
It is also possible to get single lever mixer taps (as opposed to the two pillar taps jointed together type). The single lever allows you to turn the hot and cold on and off and also mix them in the same way as the independent tap models.
The mixer tap is most commonly found attached to kitchen sinks and also baths and in the case of bath mixers, they can sometimes also feature a shower hose (known as a shower tap).
A push (or sometimes pull) button allows the user to easily switch between using either the taps or the shower as and when needed.
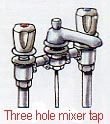
Three Hole Mixer Tap
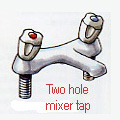
Two Hole Mixer Tap
Washbasin mixer taps frequently incorporate a pop up waste plug. A series of interlinked rods, operated by a button on the centre of the mixer, open and close the waste plug in the basin.
Normally the body of the tap which connects the valve and spout rests on the upper surface of the basin, the tails protrude through holes in the basin to meet the supply pipes.
A two hole mixer has tails spaced 100mm apart, a three hole mixer appears to have separate valves and spout but they are linked by a tube below the basin.
Monobloc Taps
Aside from the traditional looking mixer tap, todays more modern mixer taps can look more like a single pillar tap. Commonly known as Monobloc Taps, these modern sleek and attractively designed taps fit very well with todays popular and minimalist look.
The monobloc tap is in some ways the best of both worlds; small and compact with all the benefits of a traditional mixer tap.
Due to this, they are no longer simply just a go-to choice for the kitchen, they are ideally suited to all water supply needs in the home.
As you will probably notice from the images, the supply of water is controlled from a single lever (similar to the single lever mixer mentioned above), but as with all other taps, hot is to the far left and cold is to the far right, with a range of temperatures in between, depending on where the lever is positioned.
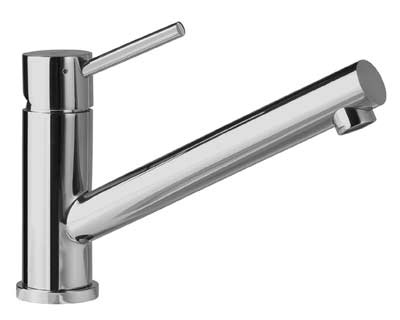
Contemporary and modern monobloc tap
How are Taps Connected to the Water Supply Pipe?
In terms of how your tap gets it’s supply of water, regardless of the type of actual fitting (more on this below) is through what is known as a tap connector.
One end is connected to the base of the tap (under the basin or bath) and the other is then connected to the water supply pipe (either hot or cold).
In the majority of cases, your tap connector will either be straight (rigid) or a flexi pipe.
Both rigid and flexi hose connections also come with several different methods of actually making the connection from the supply pipe to the tap.
The first type of fitting is the traditional compression fitting and the second type is the more modern push fit fitting.
Compression Fittings
If you have ever done any plumbing you will probably have encountered a compression fitting at some point.
These are the fittings that feature a compression cap, an olive that slides over pipe and a compression joint body and are normally made from copper.
Firstly, you slide the cap over the pipe and then slide and olive on. The pipe is then insert into the joint body and cap is screwed down, compressing the olive into the body and the pipe and creating the seal that also holds the pipe firmly in place.
If you are not used to working them, they can be a little tricky to use initially as they don’t always seal very well first time and if you over tighten then, you can damage the pipe or olive and never get a water tight seal.
To avoid these issues, most add some PTFE tape around the threads of the compression joint body, but this doesn’t always solve the problem.
In terms of the actual connection between supply pipe and tap, this will either be a flexi pipe or the copper supply pipe will run all the way up to the tap.
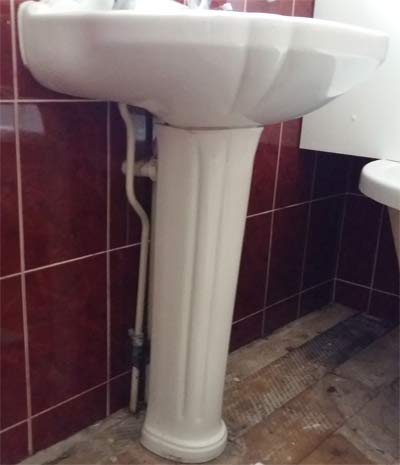
Copper pipe running all the way up to each tap
As pretty much all taps feature a screw fitting that connects your connector of choice to the actual tap, this in itself is a form of compression fitting, but instead of using an olive, normally a rubber seal is used to create the seal once the connector is screwed up.
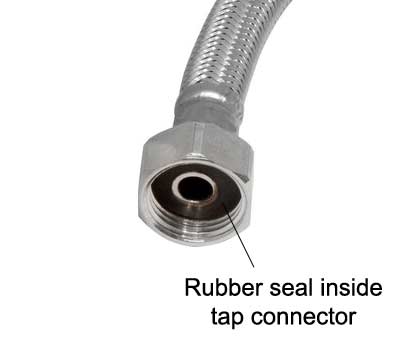
Rubber seal that sits in the end of a tap connector to create water tight seal
If you would like to know more about copper compression fittings, check out our project here.
Push Fit Fittings
Push fit fittings work slightly differently and on the whole are much easier to use. The fitting is simply pushed over the end of the pipe and it locks itself on and creates a water tight seal – Easy!!
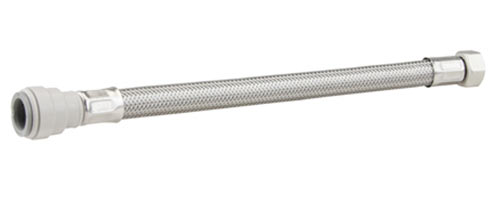
Push fit flexi pipe tap connector
If you are new to the world of plumbing then it’s a good idea to start off with these fittings. Not only are they easy to fit, they are also easy to remove again if you need to make any changes. Just push the joint down while pulling up the collar and then you can pull the fitting off.
It’s also worth noting that there are a couple of different variations of these fittings; the standard push fit and the twist lock or locking push fit type.
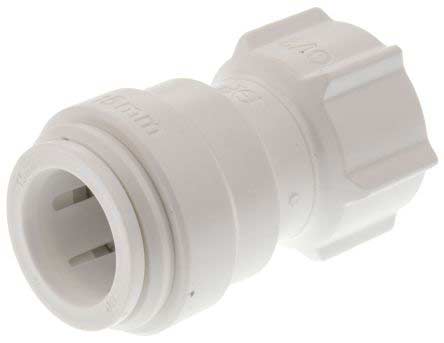
Standard push fit tap connector
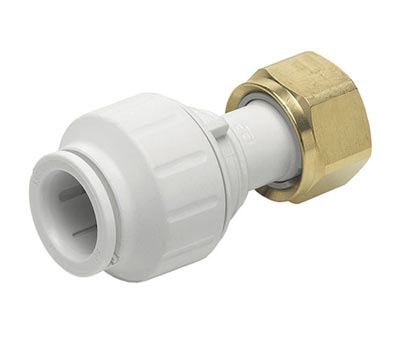
Twist lock push fit tap connector
As mentioned, the straight push fit type are pushed straight onto the pipe and lock themselves on, where as the locking type are pushed on in the same manner but then have a twist locking collar that needs to be turned in order to lock them on to the pipe fully.
Generally, more modern properties will utilize flexi pipes and push fit, whereas older properties tend to feature supply pipes that run all the way to the tap and compression fittings.
If you’re project involves working with the latter mentioned above then you are better off cutting off around 150 – 200mm off of the existing pipe and fitting a push fit flexi hose instead of trying to fit your tap to old and corroded existing fittings, much less of a headache!
More information on the types of push fit fitting and how to use them can be found in our project here.
What are the Different Types of Tap Mechanism?
If you are currently looking at this page as you want to know how to change a tap then the chances are that you have a set of brand new taps that you want to fit to replace either old and out of date taps or ones that no longer work.
If this is the case and you haven’t actually purchased your new taps as it, it’s also a good idea to take a look at the different types of tap mechanism as some are much easier than others to both use and maintain:
Rising Spindle or Compression Tap
These types of mechanisms are probably the most common and traditional in terms of design.
In essence, a threaded spindle with a washer on one end and handle on the other lowers of raises (screws up or down) the washer in to and out of a seat in the base of the tap body to increase or decrease and stop the flow of water.
These types of taps are simple in design as essentially, the sealing washer is screwed up or down to and from the seat, but do cause a lot of issues due to washers and seats wearing and corroding and causing leaks.
Aside form this, washers can be replacing and seats reground using a reseating tool, so any issues can normally be easily fixed. More information on this can be found in our dripping tap project here.
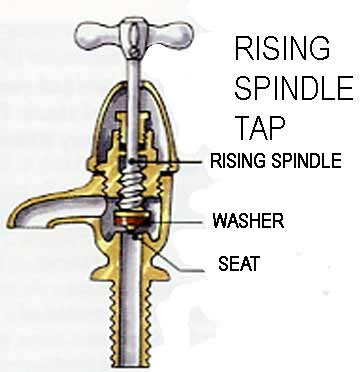
Rising spindle tap mechanism
Non-Rising Spindle Tap
This type of tap is pretty similar to the rising spindle type above in terms of the fact that the tap head screws a spindle with a seal at its base up and down, but instead of the seal turning with the spindle (as it does with the above mechanism), with this it is simply raised and lowered
As the seal is effectively not screwed down into its seat, this does in some ways reduce the wear and tear placed on both the seal and the seat so on the whole, they are a little more reliable than their rising spindle counterparts.
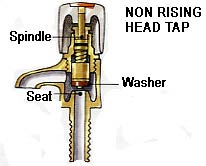
Non rising head or spindle tap mechanism
Ceramic Disc Taps
The principles of the above mechanisms rely on a washer or seal being raised and lowered into a seat but with the ceramic disc system, we are dealing with holes.
Two discs with matching holes in each sit together. When the tap is turned on, all of the holes are inline allowing water to flow but when the tap head or lever is turned into the off position, all the holes are offset and out of line, preventing any water from flowing.
In pretty much all instances, ceramic disc taps are operated by a single lever that normally has a maximum range of around a quarter turn from off to fully on.
This means that they are also easily operated and ideal for those that may struggle in operating other types of tap.
Due to their simple, non-pressure seals they do tend to last a good long time, but when they do go, generally the whole cylinder mechanism and sometimes the whole tap need to be replaced.
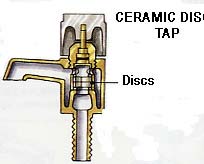
Ceramic disc tap mechanism
How to Replace Old Taps With New
Now that we have looked at the different types of tap and tap mechanism and also at the different fittings for connecting them to a water supply, it’s now time to actually find out how to fit a tap.
When replacing old taps it’s natural and sensible to use the existing plumbing wherever possible but connecting to old rusted fittings can be hard and sometimes its better to hack-saw back to clean copper tube and start from fresh.
As we have mentioned above, if your supply pipe or pipes run all the way up to your taps, the best thing to do is again, cut back 6 – 8 inches and use a flexi pipe for the remainder.
Turn off the Water
Firstly before we begin, turn the water off. If you’re fortunate enough to have an isolation valve on the supply pipe you can turn the water off there.
On that note, if you don’t have an isolation valve fitted, now is the ideal time to get one on there
If not, you’re going to have to turn it off at your main stopcock.
Once turned off either at the mains or through an isolation valve, turn the tap on to drain all the remaining water out of the pipe.
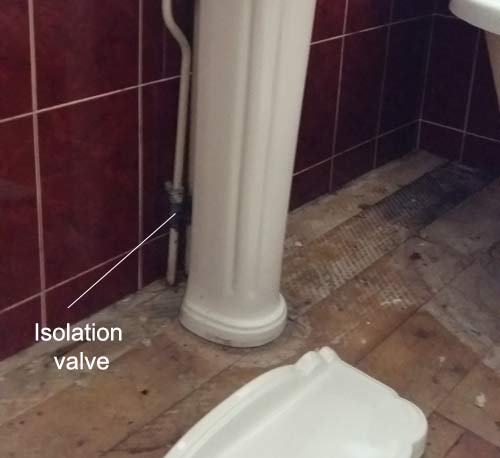
Isolating valve on supply pipe to tap
Disconnect Supply From Tap
The next job is to disconnect your supply pipe from the current tap so that it can be removed.
This can be a tricky job as with many sink designs, the compression nut on the base of your tap and the backing nut that holds the tap to the sink is located right up under the sink itself, so getting a traditional spanner in there is impossible.
Enter, your new best friend, the basin spanner! This handy tool will allow you easily access both the nut on the tap and the backing nut and both undo the old and tighten the new.
If you don’t already have one of these, it’s well worth buying one.
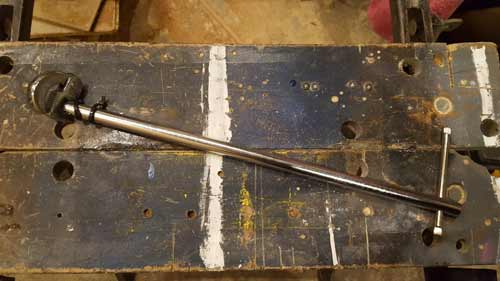
The very handy basin spanner
Poke the end of the spanner up to the compression nut on the base of the tap and wrap the jaws around it, making sure you have a firm and tight grip on the nut.
Note: If the nut looks rusty or corroded, apply some easing fluid such as 3-in-1 oil or WD40 after giving it a good clean and removing as much debris as possible.
Apply pressure and turn the nut to undo it. Ensure that the jaws retain a good grip and that the spanner does not slip off. If it slips off with force, it can easily damage the basin, bath or other object you’re working on.
Fully loosen the nut and remove it from the tap.
Loosen and Remove Backing Nut From Tap
Using you’re basin spanner again, position it back under the sink, this time wrap the jaws around the backing nut on the base of the tap that holds the tap to the sink.
As before, take your time and ensure you have a good grip on the nut.
Undo it fully and remove it. Once you have, the old tap should now be loose and you can now remove it.
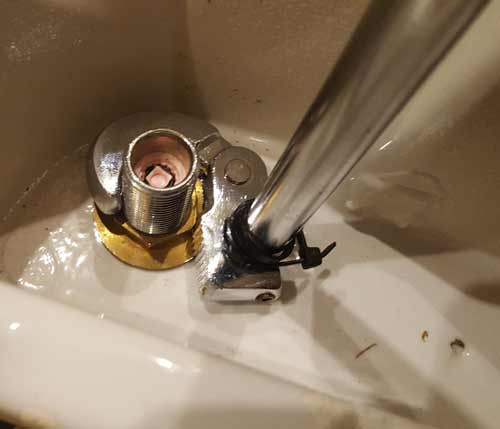
Loosening the backing nut from the tap with a basin spanner
Clean and Fit new Tap
Before fitting your new tap, give the area around the tap hole a good clean with some anti-bacterial cleaner, Cif or similar.
make sure that you remove any sealant, muck, grime etc. This isn’t just for aesthetic purposes, any dirt or deposits caught under the seal at the base of the tap could allow water to run down under the tap and to the underside of the basin.
Once cleaned, take your new tap and drop it through the tap hole. Pay attention to the seal on the underside of the tap that sits between it and the basin, bath or other.
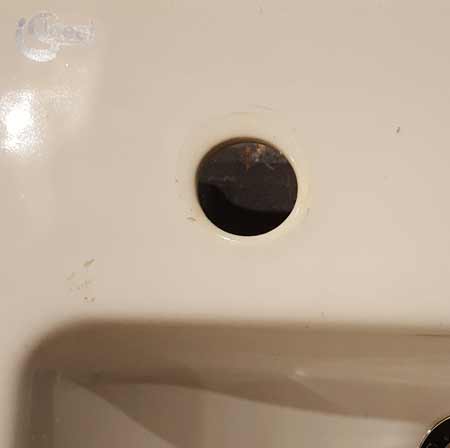
Tap hole in sink cleaned fully
Sometimes the seal is part of the tap, other times you have to add it yourself. It will need to be central to both the base of the tap and to the tap hole to provide an adequate seal.
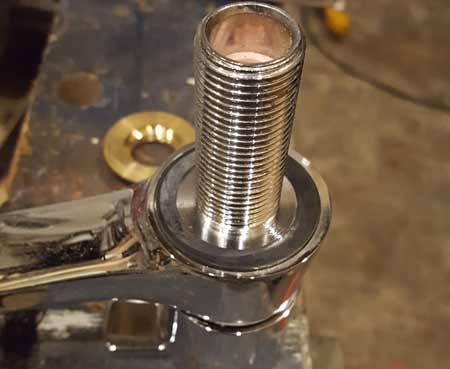
Rubber seal integrated in to base of tap
Make sure that the tap is also centrally positioned over the hole and then reach underneath and screw up the backing nut until it’s finger tight.
Now, crawl back under the sink and use your basin spanner to fully tighten the backing nut. If you have a metal backing nut, don’t go too mad as you can easily crack the basin due to the force that’s applied from over tightening. This is slightly less true for plastic ones, but all the same, don’t get too carried away.
Whilst tightening, regularly check how the tap is lining up, make sure it’s central and straight at all times.
Re-Connect the Tap Connector
While you’re crawling around under your sink, bath or other item and after you have tightened the backing nut, screw the tap end of your tap connector on to the base of your tap.
Again, do it up finger tight first and then do a couple of pinches up with basin wrench. As before, don’t go too mad tightening, just a few pinches should be ample.
With the tap end connected you can now connect the other end to the supply pipe. If you’re using the same connector or a new replacement of the same then push on the push fit or add a compression nut and olive and run it up finger tight before tightening with a wrench.
If however you are replacing, say, a full run of pipe to the tap with a flexi pipe and push fit end you will need to chop a little of the existing pipe away. Around 6-8 inches (or 150-200mm) should be fine.
The best tool to use for this job is a pipe slice. Using this, you can easily clip it round the existing pipe and turn it to chop off your desired section of pipe.
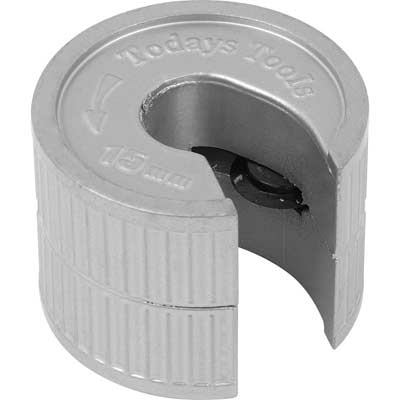
15mm pipe slice
Once chopped off, use some fine grade sandpaper or wire wool to clean the end of the pipe fully. Make sure there is no dirt, grime, corrosion, old paint or anything else left that will end up inserted inside your chosen fitting as this could affect the seal and cause leaks.
With the pipe prepped and ready, push on the push fit fitting, making sure it goes all the way down on to the pipe, right up to the collar. Once there, pull it back gently to ensure is engaged.
Turn on Water and Test
With everything now connected up it’s time to turn the water on and make sure everything is working and there aren’t any leaks.
Turn the water back on only slightly ate first just in case and then increase the pressure if you’ve confirmed all is well.
If indeed it is, top job, you’ve changed your first tap!
If not, check all of your joints and tighten any that are leaking. Only a little at first as over tightening will damage it and you’ll never get a good seal.
Changing a tap is a fairly straight forward job for both DIY novices and professional plumbers alike as long as you take your time and concentrate on the task in hand.
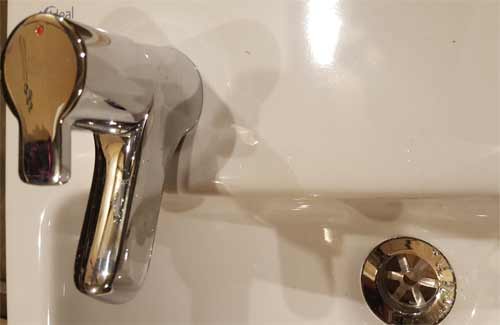
Tap successfully changed

