Fitting a thermostaic shower mixer valve is a fairly simply DIY plumbing job, as is replacing one, that can be done by anyone with just a few tools. First, isolate the water supply to the old shower, turn the shower on to run any remaining water out, unscrew existing shower nuts and remove it, screw the new one in place, install riser rail or riser pipe and then check everything works.
In essence, that’s pretty much it but as with many DIY jobs, it’s not always that simple due to the range of different types of mixer shower, the existing plumbing setup, how long the old mixer bar has been in place etc.
Fitting a bar mixer shower and indeed replacing one is pretty much the same process so for a full rundown, read on below.
What is a Thermostatic Shower Mixing Valve?
A thermostatic shower mixer valve is a temperature regulator and ensures that the water flowing from it (e.g. the shower head) is kept at a constant and consistent safe temperature (normally 38°C) set by the thermostatic cartridge within the shower unit.
An age-old problem with mains-fed showers is that they rely on the water supply flowing to them. If someone turns on a hot tap this then restricts the flow of hot water flowing to the shower causing it to go cold.
Likewise, if someone turns on a cold tap or flushes a toilet etc, this restricts the flow of cold water flowing to the shower causing it to go hot which can be very dangerous.
A thermostatic shower mixer valve solves this issue by regulating the temperature of the flow of water from it by internally balancing the hot and cold water flowing to it.
With pretty much all mixer showers, the thermostatic cartridge (the bit that controls the water temperature flow) is set to a safe 38°C; which is normally regarded as a comfortable temperature.
If you’re thinking; great, that sounds like it will fix my shower temperature and flow issues, then in most cases, yes it will, but you will first have to ensure that a mixer shower is compatible with your existing plumbing setup.
Most shower mixer valve manufacturers can advise you on this. Simply contact them with the make and model of the mixer shower you’re looking at and confirm your existing plumbing configuration e.g. gravity fed, combi boiler etc and they should be able to confirm for you, or offer alternative products if not.
In most cases thermostatic shower mixer valves can be used with mains pressure systems (standard pressure), combi boilers, gravity-fed systems and pumped systems.
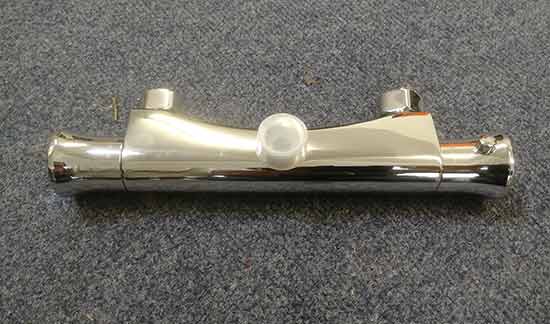
Standard thermostatic shower mixer valve
What Different Types of Thermostatic Mixer Shower are There?
Thermostatic mixer showers are available in two main types; Concealed (hidden behind wall/tiles) and exposed (visible pipework and valve).
Exposed Mixer Shower Valves
Hot and cold supply pipes run up to the mixer valve and fix into the base or through the wall behind and the shower mixer fixes to them as they protrude from the wall.
As you can imagine, the shower mixer valve itself is fully visible as is the supply pipework that runs up to the shower head itself.
Exposed mixer showers are available in a huge range of styles and designs, from contemporary modern to traditional.
Some regard the visible pipework and valve as unsightly and, in this case, go for a concealed unit
Exposed shower valves are generally much easier to install as they only need a hot and cold supply and in turn also much easier to repair as everything is on the outside of the wall.
For more general information on mixer valves and taps, check out our project on fitting mixer valves and mixer taps here.

Exposed thermostatic shower valve – Image courtesy of drench.co.uk
Concealed Mixer Shower Valves
As the name suggests, concealed shower mixer valves are “concealed” or hidden behind a wall and only the the controls and shower head (or sometimes riser bar) are visible.
Concealed shower valves tend feature in more modern homes or those that are going for a more minimalistic look.
Although they are generally more visually appealing this comes at a price as they are much trickier to install and if anything goes wrong e.g. starts leaking you need to rip down most of the wall to get at the valves and pipework.
If you would like to know more about concealed showers and how to install them, see our project here.
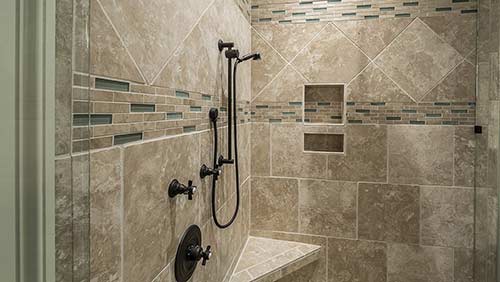
Concealed thermostatic mixer shower installed in bathroom
How to Fit or Replace a Shower Mixer Valve
For the purposes of this guide, we will be explaining how to fit or replace the most common type of mixer shower; the exposed thermostatic shower mixer valve. If you are looking to replace a concealed shower mixer valves, as mentioned above, this is not an easy job and involves removing sections of wall etc so refer to our concealed showers project here.
Step 1 – Initial Preparation Work
If you are fitting a new bar shower mixer valve the you won’t need to remove the old shower as we describe doing in the first few steps, so in this case you can skip to step 5. We are also going to assume that all the necessary pipework is already in place.
Before you actually start dismantling your existing there are a few things that need checking first:
- Check hot and cold feeds: Pretty much every shower mixer valve will have the hot supply on the left and cold supply on the right. Check your existing hot and cold supplies are configured this way also
- Check supply pipe spacing’s: Nearly all shower mixer valve connectors are spaced at 150mm centres, ensure your existing supplies are spaced the same
- Check supply pipe tail depth: There should be around 35-40mm between the walls surface and front of existing supply pipes/unions. This allows enough room to fit the concealing plates and screw the mixer shower valve up
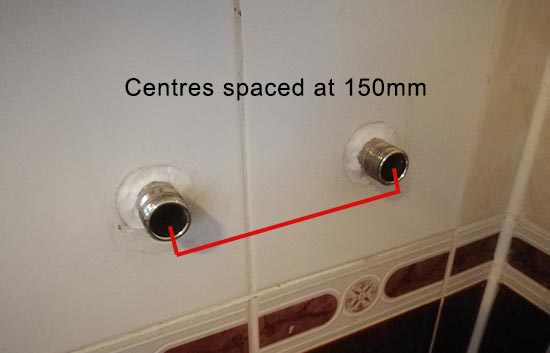
Shower mixer valve supply pipes should be spaced at 150mm centres
Once you have confirmed all of the above then you should be good to get started.
If not then you will need to resolve any issues before starting. In most cases this will mean getting pipework moved which isn’t an easy job unfortunately.
Step 2 – Isolate Water Supply
Before you disconnect anything you will first need to isolate the water supply to the shower. If the hot and cold feeds have isolation valves it can be done here, if not turn teh water off at the mains stopcock.
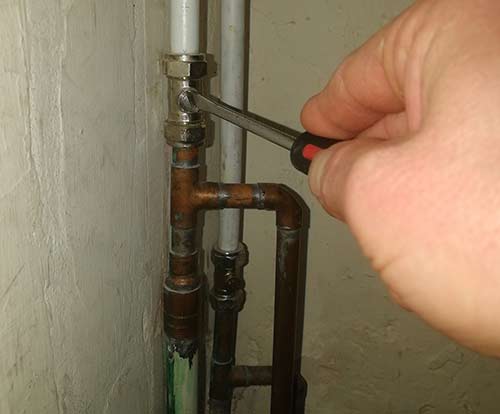
Turning off incoming water supply for mixer shower using isolation valves
Step 3 – Dismantle Existing Mixer Shower Pipework
Dismantling an old shower generally involves removing the shower head, shower hose, the riser rail or riser pipe and then finally the shower mixer valve.
With the water supply turned off, start with the existing pipework.
If your current mixer shower has a riser pipe e.g. a solid pipe that comes out of the mixer valve and runs up to supply the shower head then this will certainly need to be removed as if you’re replacing like-for-like then the new shower mixer valve will have its own riser pipe.
The riser pipe should be fixed to the wall through a bracket located near the top. The riser pipe and bracket can be fixed in a number of ways but in most cases there will be several small grub screws holding the pipe to the bracket.
Inspect the area around the top of the pipe and once located, unscrew them using a small allen key. Once grub screws have been removed the riser pipe should come away from the bracket.
However, if your existing shower setup has a riser rail then chances are you will want to keep this and just fit your new shower mixer valve, but if not then go ahead and remove it.
If you can’t see any screws, normally their covered over. Inspect the top and bottom of the rail where it’s mounted to the wall and you should be able to prize the cover off revealing the screws then simply unscrew each screw and remove.
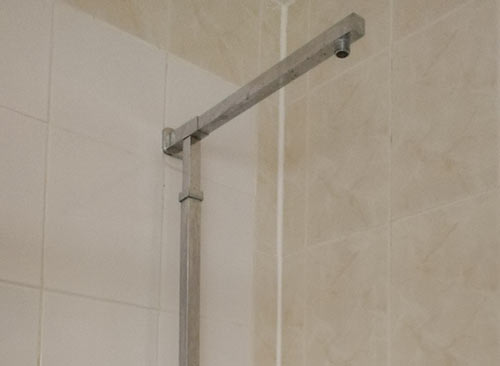
Locate grub screws holding riser to bracket and remove them
Step 4 – Remove Existing Shower Mixer Valve and Covers
With the riser bar/rail removed you can now remove the existing shower mixer valve. This is done by loosening and unscrewing the large nuts that secure the shower valve to the hot and cold water feeds.
Most mixer valve coupling nuts (the large nuts that attach the mixer to the supply pipes) are 32mm, so using a 32mm open end spanner or adjustable wrench loosen the nuts anti clockwise.
Once you have loosened both nuts, with your spare hand hold the mixer valve tightly and then continue to undo both nuts.
Once fully undone the mixer valve should come away easily.
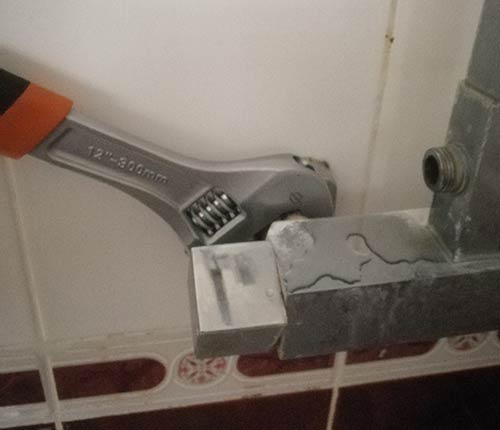
Unscrew nuts and remove old shower mixer valve
With the mixer valve removed, next unscrew the 2 supply pipe covers.
In the case of this shower, once the covers were removed there was a fair amount of black mould and the sealant had deteriorated quite a bit.
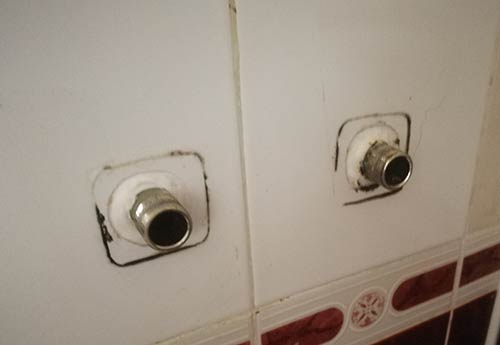
Black mould and badly deteriorated sealant
Due to this, all the black mould was cleaned up and the old sealant was removed and replaced with new to ensure it was sealed correctly and no leaks could occur.
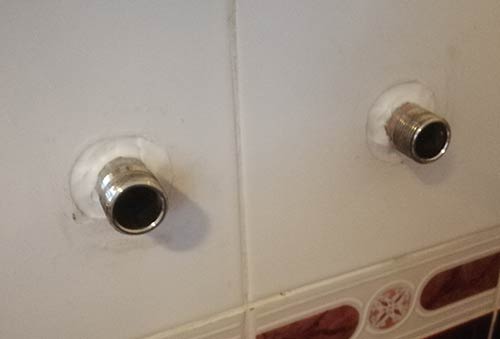
Black mould was cleaned and removed and old sealant was replaced with new
Step 5 – Flush Pipework Through
Before fitting your new shower valve flush the pipework through by holding a bucket over the ends of the hot and cold feeds and then turn them on at the mains and run for a few seconds.
Using a second pair of hands is essential here. Ask your assistant to hold a bucket over the ends of the supply pipes and one at a time, turn the water supply back on. Run it for a 5 seconds or so and any unwanted items lurking in the supply pipes should come out.
Note: If this is an existing setup and the supply pipework is not new there should be no debris present. However, if you do find any this may be a sign of issues so it might be a good idea to consult with a plumber.
Step 6 – Assemble and fit new Thermostatic Shower Mixer Valve and Pipe Trims
It’s now time to get your new mixer valve fixed in place by screwing on the pipe trims and then screwing the mixer back on to the hot and cold supply pipe unions. First, check that the old filters/seals are not still present on the supply pipes. If they are, use a small screwdriver to prize them out.
Before fixing the mixer valve in place, firstly screw on each pipe trim cover over each supply pipe. Screw them up until they touch the wall and are pinch tight and then level and square them with a spirit level.
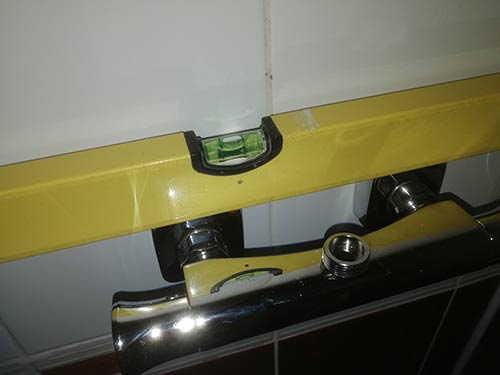
Level and square pipe trim covers with a spirit level
Next, locate the new filters/seal that were supplied with your new mixer. Depending on your make and model, the small mesh filters will either be part of the seals or built into the mixer unit itself.
Insert each seal/filter into each of the supply unions. Ensure each sits nice and flat against the body of the valve so that it seals properly
Position the mixer valve in place against each supply pipe. Make sure it’s the right way around e.g. hot on the left, cold on the right and screw up each nut finger tight. The valve should now support itself.
Finally, tighten each nut pinch tight using a flat open ended spanner. Do not use any spanners, pipe wrenches etc that have serrated jaws as this will damage the chrome plating.
It’s important not to over tighten each nut as if you crush the seals too much it will leak.
When it comes to the term pinch tight, this can mean different things to different people but in general it means to tighten something by hand to the point that it feels tight and offers resistance without over straining yourself and then you give it one final pinch up with a spanner, wrench etc.
The final pinch up will in most cases be no more than a full rotation of the object in question, sometimes just a half rotation if it feels as if a large amount of effort will be required to complete the full rotation.
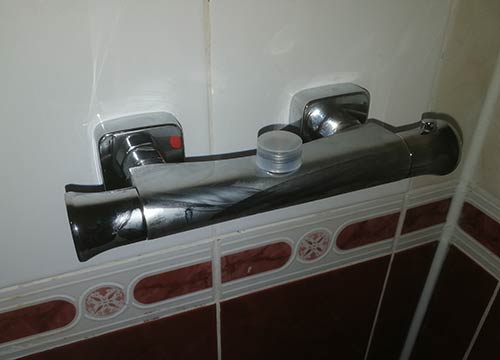
Mixer valve screwed on to supply pipe unions
Step 7 – Position and Mark Riser Rail Bracket or Install Solid Riser Pipe and Shower Head
Most riser rails and pipes are of a similar size (especially if adjustable) so you may be able to use the existing fixing points. To check, roughly assemble and position in place. Take note of where the fixing point on the wall is and the fixing slots in you riser rail or riser pipe bracket(s).
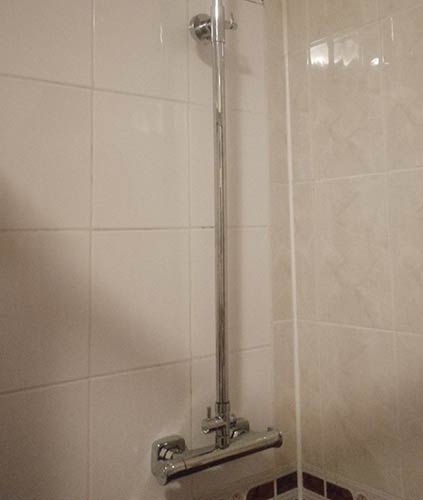
Riser pipe roughly assembled to check fixing point for bracket
If you can use the existing fixings, great news! If you can’t you will have to create new ones. See our project on fixing to ceramic tiles here for details on how to do this.
If you need to create a new fixing, when marking it’s position ensure that the riser pipe is vertically level. Check with a spirit level before marking.
Riser Rails
If you’re using a riser rail you can now go ahead and fix this in place. Before screwing up check that it’s vertically level using a spirit level.
Once the rail is in place you can then screw the shower head on to one end of the shower hose and then screw the other end on to the mixer valve. Tightening finger tight should be more than enough to create a good seal.
Riser Pipes
Most riser rails feature a drencher head and also a small body wash attachment. The supply to each of these is controlled by a diverter valve. Depending on the manufacturer of your mixer, the diverter valve will either be built into the first part of the riser rail or a separate unit.
In this case it’s a separate unit that screws down on to the mixer valve and then the first part of the riser then screws down on to this. Screw it up finger tight. As you tighten it make sure that the diverter valve lever is positioned square.

Screw diverter valve down on to mixer valve
Position the riser bracket over its fixing point and screw this up also, securing the riser rail in it’s upright position. Before tightening, use a spirit level to check that it’s vertically level.
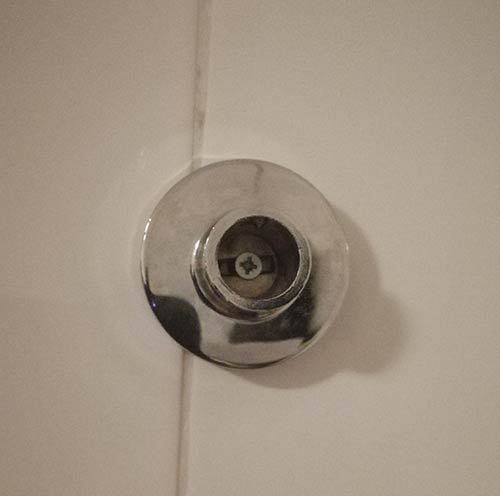
Riser pipe bracket fixed to wall
Next, insert the top section of the riser rail down into the bottom section. This is necessary as once the bottom section is fixed to the mixer there won’t be enough space to insert the top section due to the ceiling (unless you have very high ceilings).
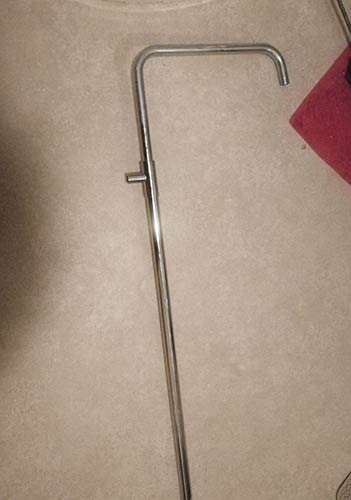
Top section of riser rail inserted down into bottom section
With the riser pipe assembled, position it down onto the diverter valve and screw it up finger tight.
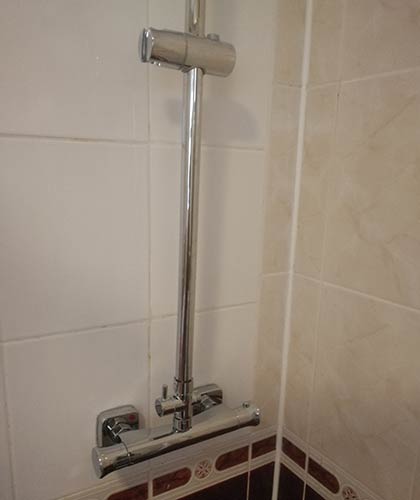
Riser rail fixed in to position on mixer valve
The final job now is to push the bracket fixing on the riser rail in to the bracket on the wall and secure it. This is done by screwing up the small grub screws with an allen key.
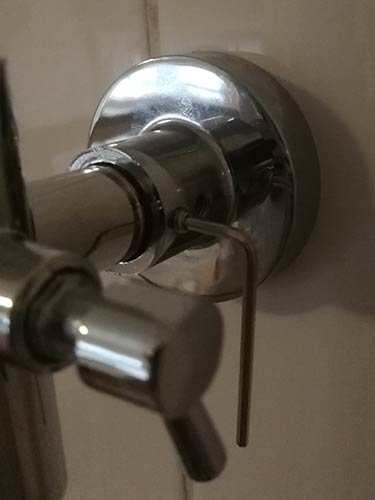
Screw up the riser rail bracket to secure the riser pipe firmly in place
The final job is to now simply screw the drencher shower head on and also the body washer and hose attachment.
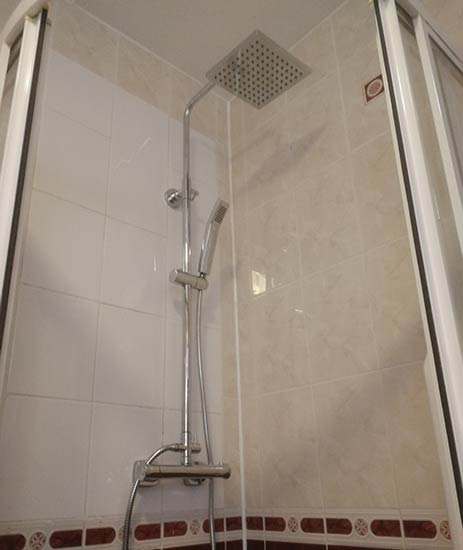
Brand new mixer shower successfully installed and ready for use
When screwing fixings on to ceramic tiles be very careful not to over tighten them! If you screw any screws up too tight then the force of the item your fixing bearing down on the tile can easily crack it!
Note: If you’re not using the existing fixing points you will need to seal them over. To seal up unused fixings in ceramic tiles, first remove or push any wall plugs at least 5mm below the surface of the tile and then seal over with some clear or white bathroom sealant, ensuring the hole is fully filled in.
Step 8 – Turn Water on and Test Shower
With everything now secured, tightened and fixed in place it’s time to give it a test.
First make sure the shower itself is turned off and then turn the water supply to the shower back on. Visually inspect all the joints and check for leaks. If you find any tighten the given joint until the leak stops.
If all is well, turn the shower on at the mixer and check the flow.
One final test to carry out is to ensure that the the thermostatic cartridge in the shower mixer valve is operating correctly and holding the temperature of the water at 38°C. To do this run the shower up to temperature and then hold a thermometer under the flow and see what temperature it peaks at.
If it stops at 38°C all is well but if its under or over this then you will need to adjust it.
To adjust the temperature setting of a thermostatic mixer shower, first, prize the cover off that hides the screw on the thermostat-side of mixer. Before unscrewing the screw, make sure the control knob is in the centre position, then unscrew the screw and pull the cover off.
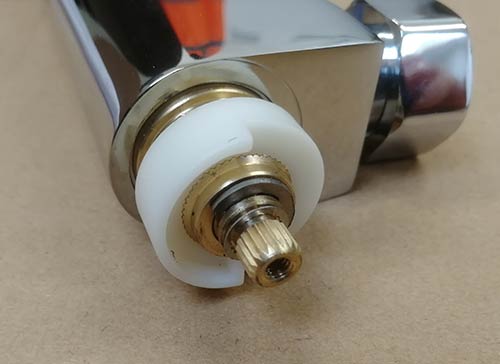
Thermostatic cartridge and adjustment inside shower mixer valve
With the shower running and a thermometer under the flow, turn the thermostatic cartridge either clockwise to make it warmer or anti clockwise to make it hotter. When the thermometer hits 38°C stop, replace the cover (ensuring the knob is central with the push button facing up) and then screw the screw back in and replace the cover.

