Installing a shower enclosure is a fairly straightforward job. Firstly, the frame brackets are fixed upright to the wall. Next, the fixed glass panels are screwed to the top and bottom sections of frame. The frame is then moved into place on the tray, the sliding doors are assembled and hung and then handles and seals are fitted. The frame is then fixed to the brackets and the exterior is sealed up.
When it comes to installing bathroom features such as a shower enclosure, the general rule is that the shower tray is fitted and leveled first, then any tiling is done and then the shower enclosure is fitted once the tiling has been completed (see our ceramic tiling projects here for information tiling).
This is generally the preferred method and is also the case for other bathroom fittings such as toilets, basins, baths etc as it avoids having to cut tiles to fit around these mostly awkward shaped objects.
For the purposes of this DIY guide we are going to be installing a 900×900 equal quadrant shower enclosure (both sides are equal in size) on to a shower tray that’s already been installed and.
The shower tray is the foundation of the enclosure and it is imperative that it is installed correctly. Using a spirit level, ensure that the tray is perfectly level. If it is not, then problems will occur throughout the rest of the installation (for more information see our shower tray project here).
A quadrant shower enclosure was used as they are best suited to fit in the corner of a bathroom, yet due to their curved shape provide the most usable space within the shower enclosure itself. For information on other types of shower enclosures, see our project here.
How to Install a Shower Enclosure
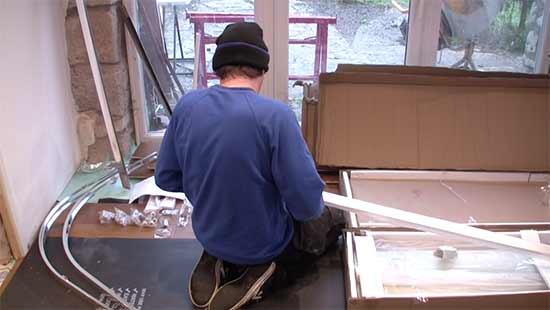
Step 1 – Unpack the Shower Enclosure Kit and Check all Parts are Present
Before assembling anything, the first job is to check that all the parts of your chosen shower enclosure are present in your kit.
As with any “flat-pack” fixture or item of furniture, there’s nothing worse than getting half way through putting it together to find that a vital part is missing.
In the enclosure kit somewhere there should be a list of all the fittings that should be included so go through them all and check they’re there.
If not, contact the company you purchased it from and inform them.
Unpacking a shower enclosure kit to make sure all components are included
Step 2 – Level, Mark and Fix Shower Enclosure Brackets
The vertical upright brackets are used to hold the shower enclosure firmly in place over the tray. They are fixed to the wall using screws and then the enclosure frame is in turn screwed to each bracket.
Shower enclosure fixing brackets are placed at the edge of the shower tray around 5mm in from the front edge. Position each bracket in place and use a spirit level to ensure it’s vertically level and then mark each fixing hole using a suitable pen.
Vertical shower enclosure fixing brackets positioned and marked
The method used to fix the brackets in place will depend on the type of surface you’re fixing to:
- Tiled Bricks/Blocks: Drill through tile using 8mm tile drill bit and then drill hole in bricks/blocks using 6mm masonry bit. Push wall plug through tile and into hole. Screw through bracket and into wall plug
- Ply Board: Drill through tile using 8mm tile drill bit, stop when you hit the ply board. Drill small pilot hole through ply and then screw through bracket and into ply using suitable wood screws
- Plaster/Cement Board: Drill a 10mm hole through the tile (start small and work up) using tile drill bits and then a 3mm pilot hole through board. Slowly screw a Redidrive (metal self-drill fixing) fixing through the tile hole into the board. Screw through the bracket and fix into the Redidrive fixing
- Shower Panels: Using the fixing advice above, drill suitable size pilot hole through panel and then enlarge hole if needed. For Redidrives, the hole needs to be around 10mm, for brick, block etc around 6mm. Insert wall plug or Redidrive and then screw through bracket to fix
In the case of this example, we were fixing to ply board that was covered with shower panels – nice and straightforward! If you’re thinking of renovating your bathroom, bear in mind how fixtures and fittings will be installed. Make it as easy as possible for you is our advice.
Before The brackets were fixed in place, a bead of silicone was run down the full length of the rear of the bracket.
Applying bead of silicone to rear of vertical fixing bracket before fixing in place
Step 3 – Assemble Shower Enclosure Frame
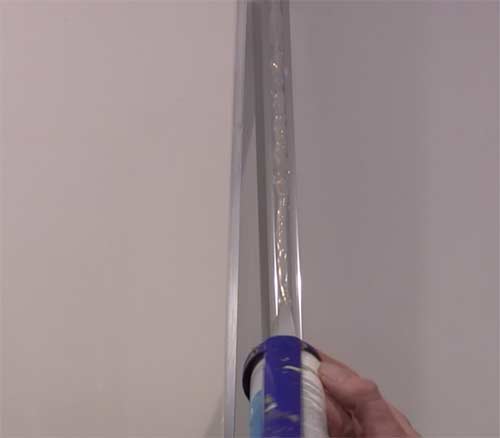
To assemble the shower enclosure frame, this needs to be done one side at a time and preferable with help. Ask your assistant to hold one of the fixed glass side panels vertically upright and slide on one of the sealing strips included with your shower enclosure kit.

Sliding bottom sealing strip on to base of fixed glass panel
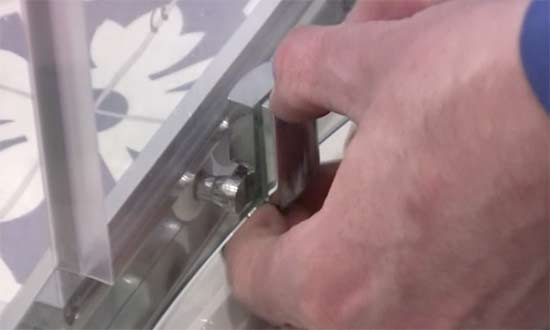
Next, slide the base of the quadrant frame onto the base of the glass panel and, using the fixing screws provided, screw through the frame section at the base of the screen into the section of quadrant frame. There should be 2 fixing points.
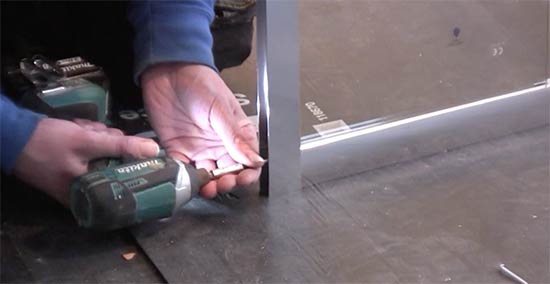
Fixing glass side panel to base quadrant frame
With your assistant holding the first panel, position the second glass panel close to the other end of the base quadrant frame. Ask you assistant to support it.
Slide the plastic sealing strip over the base and then slide the panel onto the frame and screw it in place as you did with the first.
Fixing second upright glass panel to quadrant frame
With the quadrant base fixed, add sealing strip to the tops of each of the fixed glass panels and then position the top section of quadrant frame over each panel and screw it up through the fixings on each side as you did with the base.
Note: The exact assembly method for your chosen shower enclosure may differ slightly so always refer to the manufacturers instructions for full advice.
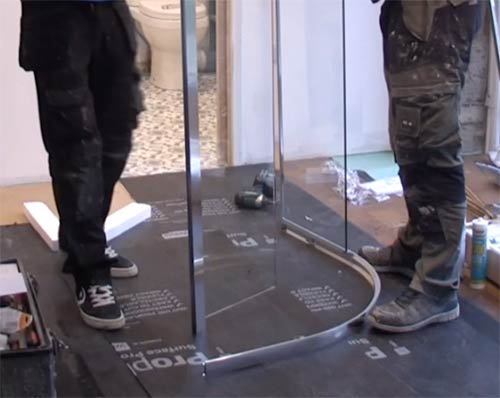
Step 4 – Move Shower Enclosure Frame into Position
To get the shower enclosure into position you will certainly need some help. Carefully maneuver the enclosure around any objects and through any opens, being carefully not to knock it and cause any damage.
Once in the required area, carefully move it onto the shower tray and slide the ends of the fixed upright panels into the vertical brackets.
To make sure the bottom quadrant frame is sitting flat and level on the shower tray, visually inspect it. There should be no gap.

Shower enclosure frame and fixed glass panes positioned in place on shower tray and in vertical wall bracket
Step 5 – Prepare Sliding Shower Doors and Shower Door Rollers
Unpack all the shower door rollers. The movable spring loaded rollers are fixed to the base of the sliding door while the fixed ones go at the top of the door.
Use a second pair of hands to hold the glass door in an upright position.
Fix the top rollers first. The roller section goes on the outside of the concave of the door. Position each roller over the fixing hole in the front of the glass door, place the cover over the rear of the hole and then screw the fixing screw through the back into the front. Don’t over tighten, pinch it up and then do one final turn.
Turn the door upside down and fix in bottom door rollers using the same technique.
Once all 4 rollers fixed to first door, repeat the same process for the second door.
Use a hand operated screwdriver and not a drill/driver.
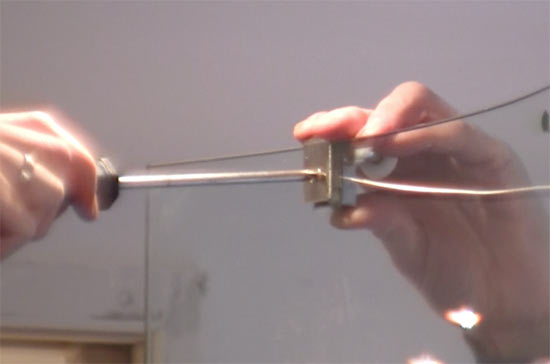
Fixing sliding roller brackets to shower enclosure sliding door
Step 6 – Hang Sliding Shower Doors on to Frame
Once rollers fixed, both doors need to be hung onto the frame. Move one of the sliding doors into the inside of the shower enclosure, firstly making sure it’s the right way up (spring loaded rollers on the base).
Hold the door with both hands and tilt the rollers in towards the recess in the frame. The rollers should drop straight in. Ensure both sets of rollers are fully inserted down into the recess in the frame.
Hanging first sliding door onto shower enclosure frame
Once the top section is securely hung in place, move down to the base of the door.
Apply a little pressure to the base of the door, pushing the rollers towards the recess in the bottom section of the frame. This is best achieved with a little help and you need both hands for the next task. If no one is around use your foot.
To engage the bottom sliding rollers in the base of the frame, push down on the top of each roller. As they are spring loaded they drop down allowing the rollers to drop into the frame recess and the spring action then pulls them back up holding the door firmly in place but at the same time allowing it to slide smoothly.

Push down on spring-loaded rollers to snap them into frame
Repeat this for the second door.
Check that the gap between the sliding doors is uniform all the way down. If not, the top sliding roller brackets should allow for some adjustment (refer to manufacturers instructions for more details). Adjust until required gap is set.
Step 7 – Fix handles to Sliding Doors
To fix the handles to the sliding shower doors, first unscrew the fixing bracket from the back of each handle (if the are supplied fixed together) and position handle on the outside of the door and then screw a screw through each fixing bracket and into the handle.
Fixing handles in place onto sliding shower doors
With one bracket secured repeat for the second bracket. Square up anything that needs it.
Depending on the make and model of your shower enclosure the inner bracket that holds the handle in place may have a cover, clip this into place now.
Step 8 – Fit Shower Enclosure Doors Seals
The shower enclosure door seals prevent any water from the shower escaping outside of the enclosure. There should be 6 strips in total, 2 that are fixed to the sliding doors on the edges where they meet, 1 at the back edge of each door and 1 on each fixed panel where it meets the end of each sliding door. To fit them, simply push them on.
In some cases, the sealing strips for the sliding doors will have a magnet running down the edge where they meet to help keep the door sealed when the shower is in use. If so, this will help identify them.
If not, to identify which sealing strip goes where on your shower enclosure, the strips for the door should be angled where they butt together (this further aids with sealing).
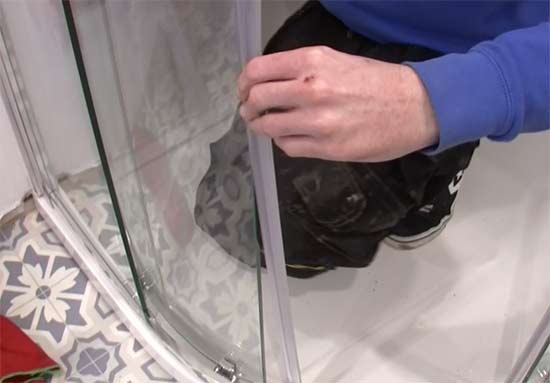
Sliding door sealing strips being fitted to sliding shower door
The strips for the fixed panels and back edge of the door should feature a clip section and then a strip that juts out at 90°. This section effectively fills the gap between the sliding door and the fixed panel.
When the door is fully closed, the clip at its end meets the clip on the fixed panel and seals the gap over.

Fitting sealing strips to fixed glass shower enclosure panels
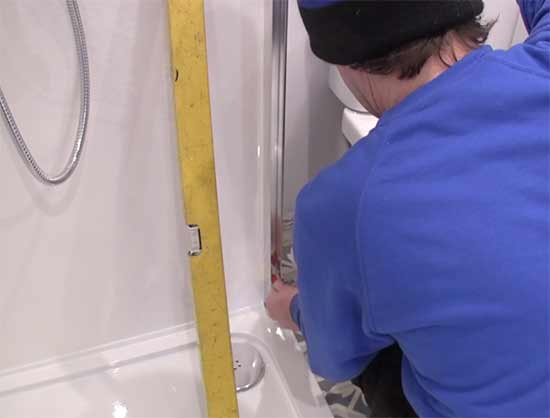
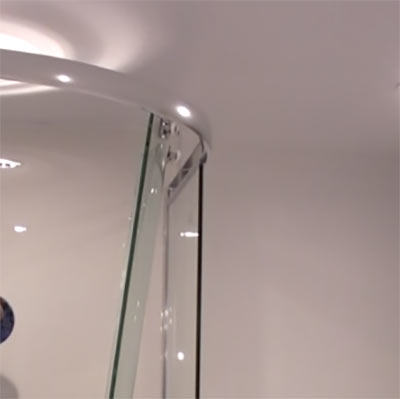
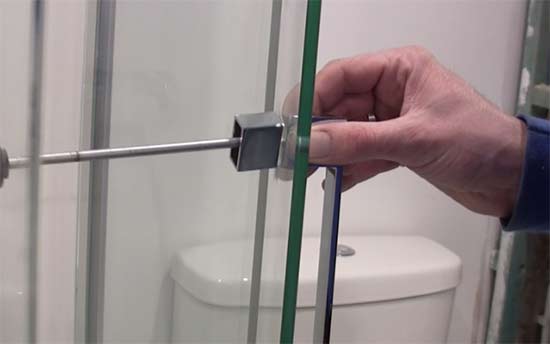
Step 9 – Fixed Shower Frame to Brackets
With the shower frame all fitted and the doors closing together as they should the frame now needs to be secured to the brackets.
On the inside of each of the upright brackets you should see somewhere between 3 and 6 holes running from top to bottom. Use a 2-3mm drill bit to drill out the top hole first. Find the correct screw in your kit, pop it through the provided screw cup and cover and then screw it up and pop a cap cover over it.
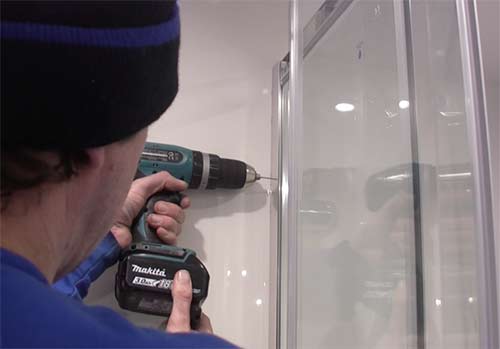
Drilling fixing holes for vertical wall brackets in shower enclosure frame
Once the first screw is screwed in place, one at a time drill out and screw up the remaining fixing points. Repeat these steps for the other side of the enclosure and bracket.
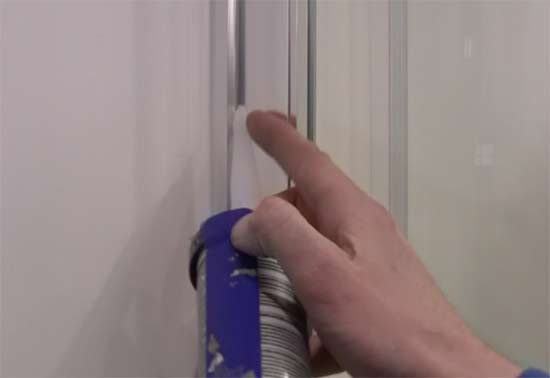
Step 10 – Fit Sliding Door Roller Covers and Frame Caps
The area of each of the sliding door roller brackets now needs a cover fixing over it. This is to prevent water from the shower sitting on the fixings and causing them to rust over time.
The covers simply push down over the top of each bracket.
Also included in your kit, there may be end caps that need to be fixed down over the top edges of the frame. These should just push on. These end caps prevent any water from finding its way down into the frame.
Push on roller bracket cover caps
Step 11 – Seal up Outside of Shower Enclosure With Sealant
Some very common questions we hear is: How do you seal a shower enclosure? and also; where to silicone shower enclosure? To seal up a shower enclosure and prevent any water from escaping outside of the frame it’s sealed up on the outside, around the full exterior of the frame and also along the base of the frame where it meets the shower tray.
A shower enclosure is never sealed on the inside. This is to ensure that if water finds its way into the frame then it can run out the base and safely back in to the shower tray.
Apply silicone sealant around the outside of a shower enclosure and along the base where it meets the shower tray
Once the silicone has been applied using a sealant gun, wet your finger and use it to force the sealant into any joints and remove any excess. Once all joints are filled, leave for at least 24 hours to fully dry before use.
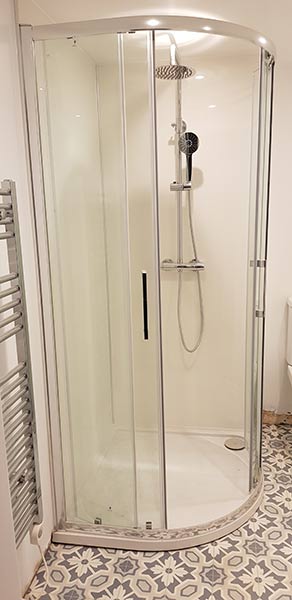
Quadrant shower enclosure successfully installed in bathroom
If you have a white shower tray and stainless steel frame used a clear silicone sealant but if the tray and frame are white you can use a white colour sealant.
As we have explained, this guide is geared around fitting a quadrant shower enclosure but there are several other different types of shower enclosure including offset quadrant shower enclosures, frameless shower enclosures, square and rectangle shower enclosures, the list goes on….
The process for fitting any of these is pretty much the same e.g. the frame is assembled and put in place, doors fitted, handles and seals fitted and then it’s all fixed solid and sealed up, so the above information should give you a good heads up on what needs to be done.
Each manufacturer will probably have a slightly different construction method/design even for the same type of shower enclosure so it’s always worth reading through the instructions that should be included with your kit.