Many assume safes are only for burglary protection and overlook installing one if they live in secure areas.
However, their not just for this purpose, they are ideal for keeping valuables altogether and in one place, for hiding things from kids and a multitude of other uses. Small fireproof safe – you can get this one at Amazon!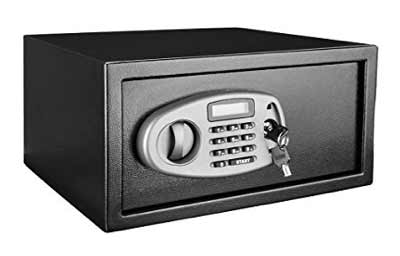
Why Install a Safe?
Fitting a security or fireproof safe in your home or office offers peace of mind and can even reduce insurance premiums.
In a fire, securing all your valuables in one fireproof location could be the only silver lining in such a crisis.
With the rise of home-based small businesses, safeguarding essential documents like cash, passports, and licenses is crucial, especially in an era of credit fraud.
Safes are primarily designed to protect against theft and fire, and understanding these main principles can help you choose the right safe for your needs. A free standing safe offers some protection from fire and security from petty theft – Image courtesy of National Home Security Month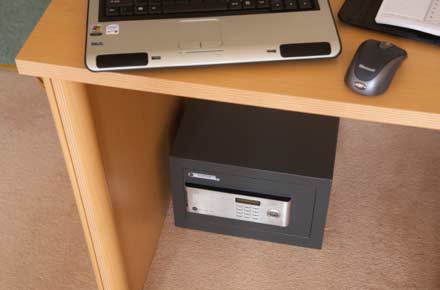
Types of Safes and Their Ratings
Safes are generally categorised into two main types:
- Theft Protection
- Fire Protection
Some safes offer both types of protection, but balancing these can be challenging. Security safes have thick walls that resist break-ins but conduct heat, while fireproof safes have thinner, insulated walls that protect against fire but are less resistant to physical attacks.
Within these categories, safes are further rated based on their level of protection. These ratings are crucial for insurance purposes, as they determine the coverage or premium discounts for valuables stored in higher-rated safes. An Under Floor Safe is one of the most secure safe installation options – Image courtesy of I love my floor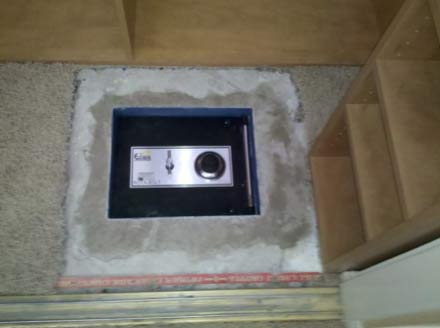
Safe Ratings: Understanding the Insurance Rating for Theft Protection
When choosing a safe, especially for insurance purposes, it’s crucial to understand its “insurance rating”, which measures its theft protection level. To ensure your safe meets industry standards, look for the AiS (Association of Insurance Surveyors) approval. This rating is recognised by top UK insurance companies, but always verify with your insurer that your selected safe aligns with their requirements. The AiS approved logo signifies that the safe meets insurance standards.
Insurance ratings assess the difficulty for a determined thief to break into the safe, focusing on:
- Lock security and durability
- Wall and door strength
- Resistance to tampering or removal
- Overall build quality
These factors contribute to a rating that determines how much cash and valuables can be insured when stored in the safe:
| Certificate | Eurograde Rating | Cash Rating | Valuables rating | Locks |
| Manufacturer | £1,000 | £10,000 | Only 1 required | |
| EN14450-S1 | £2,000 | £20,000 | Only 1 required | |
| Manufacturer | £3,000 | £30,000 | Only 1 required | |
| EN14450-S2 | £4,000 | £40,000 | Only 1 required | |
| EN1143-1 | Eurograde 0 | £6,000 | £60,000 | Only 1 required |
| EN1143-1 | Eurograde 1 | £10,000 | £100,000 | Only 1 required |
| EN1143-1 | Eurograde 2 | £17,500 | £175,000 | Only 1 required |
| EN1143-1 | Eurograde 3 | £35,000 | £350,000 | Only 1 required |
| EN1143-1 | Eurograde 4 | £60,000 | £600,000 | 2 Locks minimum* |
| EN1143-1 | Eurograde 5 | £100,000 | £1,000,000 | 2 Locks minimum* |
| EN1143-1 | Eurograde 6 | £150,000 | £1,500,000 | 2 Locks minimum* |
| EN1143-1 | Eurograde 7 | £250,000 | £2,500,000 | 2 Locks minimum* |
The security ratings above display the “Insurance Ratings” for approved safes.
* For Eurograde 4 and higher, two locks are required, each with a separate key. This ensures two individuals must be present to open the safe, adding extra security. This feature is typically used for commercial purposes.
Proper installation is crucial for your safe’s effectiveness. An incorrectly installed safe can be a vulnerability for thieves and may void your insurance coverage.
For safes under 1000kg, secure bolting is required unless the safe is specifically designed to be free-standing. Refer to the guide below for correct installation instructions.
Fire Protection Ratings for Safes
Fire protection for safes and document stores depends on the type of material stored and how long it can withstand high temperatures:
| Material | Degrading Temperature | |
| Paper | 177°C | 350°F |
| Digital | 120°C | 248°F |
| Film | 66°C | 150°F |
| Data | 52°C | 125°F |
A safe’s fire rating is based on how long it can keep the internal temperature below the degradation point of the stored materials. Ratings typically range from 30 minutes to 240 minutes.
For example, “120-minute fire protection for paper, CDs, DVDs, and USB drives.”
Additional factors to consider include:
- Humidity Control: Excess moisture can damage film or electronic data. Some safes offer humidity regulation.
- Drop Test: This test simulates a 30-foot (9.1m) drop, mimicking a building collapse.
- Explosion Test: Safes are tested to withstand conditions that could cause an explosion, ensuring contents remain protected.
Essential Factors for Choosing the Right Safe
While insurance ratings are a key factor in selecting a safe, other considerations are also important. Here’s a brief overview of factors you should consider:
- Safe Rating: Ensure your safe is durable enough to withstand physical attacks or fires, whether for insurance purposes or personal security.
- Size: Choose a safe that’s large enough to hold everything you need to protect, yet small enough to fit in your desired location.
- Stored Materials: Select a safe that matches the protection needs of the items you plan to store, aligning with relevant safety ratings.
- Locking Mechanism: Safes typically use key or combination locks, or electronic locks with passcodes, digital features, or biometrics. If opting for an electronic lock, ensure there’s a key override for battery failures.
- Additional Features: Consider extras like a USB-connected fireproof safe, waterproof hard drives, or customisable shelving to meet your specific needs.
Essential Tools for Installing a Safe
Here’s the equipment you’ll need to install your safe successfully: A mixed drill bit set is ideal for installing fixings in your safe.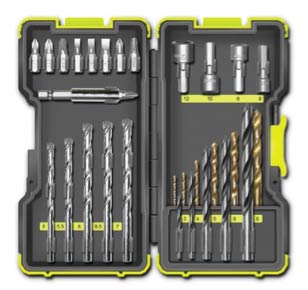
- Drill with a mixed bit set
- Socket set
- Screwdrivers
- Pencil
- Safe fixing kit (usually included with your safe)
Choose a discreet, accessible location for your safe, preferably in a corner of a quiet room to minimise access points for potential burglars.
How to Install a Safe or Fireproof Document Store
Before installing your safe, check with your insurance company to ensure the installation meets their requirements. Follow the manufacturer’s instructions carefully and use the recommended fixings to avoid invalidating your insurance claim. If you need professional help, find a locksmith here.
With the legal formalities out of the way, installing your safe is a straightforward DIY task.
Safe Installation Methods
There are various methods for installing a safe, depending on its location. We’ll cover each installation type and then provide a comparison table with the pros and cons of each method. Read on for detailed information.
Positioning Free-Standing and Cable-Fixed Safes
The easiest installation method is simply placing the safe where needed. For added security, consider cable-fixing it to prevent easy removal. This method is commonly used for fireproof safes and document stores, offering portability but potentially making it easier for thieves to remove if not properly secured. Cable fixing adds extra security to a fire proof safe or document store – Image courtesy of Corporate Travel Safety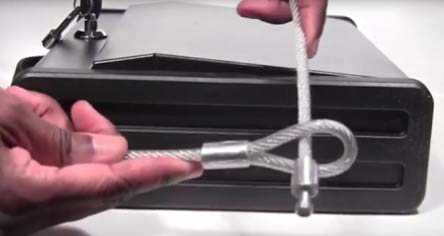
Installing Bolt-Down and Wall-Fixed Safes
Securing a safe with bolt-down or wall-fix methods prevents theft by making it harder to remove. However, drilling holes for bolts can reduce the safe’s fire resistance by allowing heat to enter. Drilling holes for safe installation – Image courtesy of Julian Cassell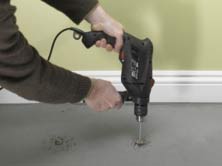
Installing a safe is straightforward. Most safes have pre-drilled holes for mounting. Follow our guide for drilling and fixing to ensure a secure setup. Pre-drilled fixing holes on a fireproof safe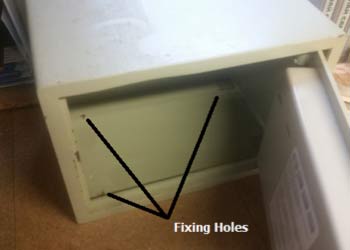
To install, position the safe, mark and drill the fixing holes, then secure it with bolts. Ensure the safe is accessible and follows any specific installation instructions. Heavy safes may require assistance to position.
For wooden floors, use coach or carriage bolts through joists and tighten nuts inside the safe. Consider using a strong adhesive like Stixall or No More Nails. Avoid using glue if you rent, as it can cause damage if removal is necessary later. Securing a safe to a wooden floor – Image courtesy of Dean Safe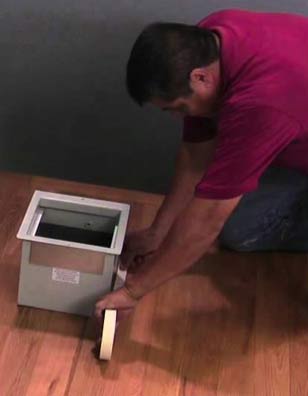
Avoid fixing to floors with underfloor heating and check for hidden pipes or cables before drilling.
Installing Safes with Bases: Lock-to-Base and PAD4 Base Safes
For some safes, you need to secure a base to the floor and wall before attaching the safe. This can be permanent with a PAD4 base or occasionally required with a lock-to-base safe.
Adding a base enhances security and may boost your insurance rating. Lock-to-base safes are ideal for transport, while PAD4 bases use chemical anchors (strong adhesives) to secure the safe without drilling, preserving its fireproofing and insurance rating.
To install, fix the base similarly to a bolt-down safe, as previously described. After securing the base, attach the safe according to the provided instructions, especially when using a chemical anchor. A PAD 4, Base Fixing Tray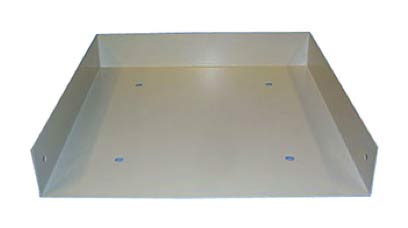
Wall Mounted Safe Installation Techniques:
Rather than fixing the safe to the wall it is possible to put the safe into the wall which makes it even more secure, protected and easier to conceal.
Installing Wall-Mounted Safes in Stud Walls
To install a safe in a stud wall, first use a stud finder to locate a section without studs, pipes, or cables.
Mark the area where the safe will go and cut the wall section using a drywall or jab saw. For detailed instructions, see our guide on cutting plasterboard. Marking holes for a wall-mounted safe – Image courtesy of Home Fixated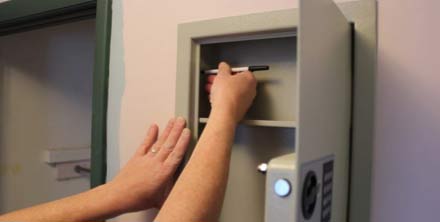
Reinforce the hole with studs and noggins to support the safe. Ensure proper fixing points once the safe is inserted. It’s helpful to have assistance, as the door may make the safe awkward to manoeuvre and balance during installation.
Installing Wall-Mounted Safes in Masonry Walls
To install a safe in a brick or masonry wall, remove enough bricks to fit the safe, ideally sized to match standard brick dimensions. Typically, removing 2-3 bricks should suffice.
Ensure it’s safe to remove bricks from the wall before starting. For detailed steps, see our guide on removing bricks. Use a disc cutter for efficiency, but handle it with care. Prepare the hole, and fill gaps with mortar as needed.
Slide the safe into the prepared hole (assistance may be required for heavy safes) and secure it with bolts as described in our wall and floor mounting guide. Finished installation of a wall-mounted safe – Image courtesy of Home Construction Improvement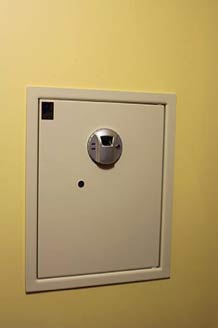
The safe’s rim will cover the edges of the hole, similar to an architrave around a door frame.
How to Install an Under-Floor Safe
Installing an under-floor safe is more challenging than other types of safe installations, but it can be a rewarding DIY project. There are two main types of under-floor safe installations:
- Under-Floor Safe in a Solid Floor (Concrete)
- Under-Floorboard Safe
Carefully choose the location for your safe; it should be discreet yet accessible. Typically, it will need to be covered with a rug or furniture to conceal it.
Installing an Under-Floor Safe in a Solid Floor
To install a safe in a solid floor, start by marking a hole that’s typically 100mm (4 inches) wider than the safe. Use a breaker or demolition hammer to dig about 75mm (3 inches) deeper than the safe’s height. Digging a hole for an under-floor safe – Image courtesy of Boswell Safe and Vault Co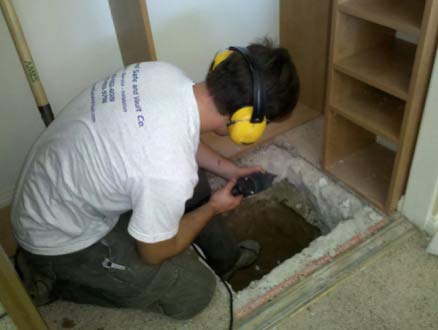
Line the hole with a damp-proof membrane to prevent moisture damage, then pour a concrete base to create a level surface for the safe. Ensure the safe sits flush with the floor, neither sunken nor protruding. After the concrete sets, lower the safe into place.
Fill around the safe with concrete, smoothing the surface to match the surrounding area. Let it cure, then finish the floor to blend with the existing decor, hiding it under a rug if needed. Installed under-floor safe in a concrete and tiled floor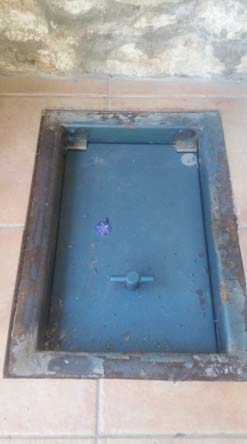
Installing a safe, especially a fireproof one, should be part of a comprehensive security setup, which may also include CCTV and upgraded locks. For more tips on maintaining low home insurance premiums, check out our advice on security enhancements. A floor safe finished off with a metal plate level with the floor tiles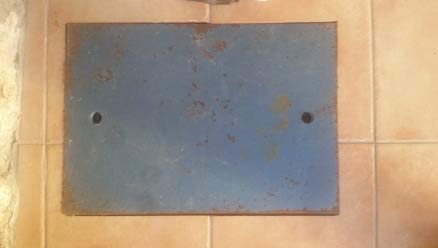
Installing an Under-Floor Safe in a Boarded Floor
Installing a safe in a boarded floor is similar to a solid concrete floor installation but without the concrete. Instead, you’ll need to create shuttering to hold the concrete around the safe. Concreting around a floor safe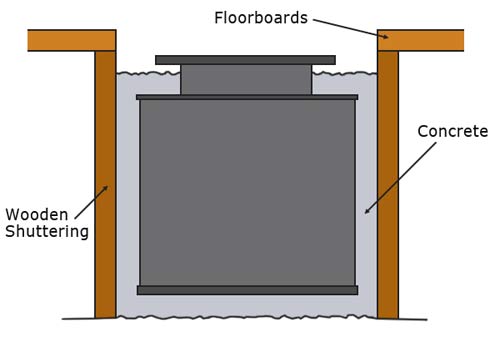
Start by marking the safe’s position. Be cautious of pipes and cables beneath the wooden floor. Cut a hole through the floorboards about 100mm (4 inches) wider than the safe to accommodate the concrete. Drill a starter hole to guide your saw, ensuring the cut doesn’t weaken the floor. Reinforce if necessary.
Dig approximately 75mm (3 inches) deeper than the safe’s height to create a flat base. Construct shuttering—a wooden frame—to contain the concrete, and line it with a damp-proof membrane. Pour concrete around the safe and smooth it out once set. Finish by sealing the area to match the surrounding floor.
Pros and Cons of Different Safe Installation Methods
Choosing the right safe installation method involves weighing up various pros and cons. Here’s a quick overview of these:
| Safe Type | Pros | Cons |
| Free Standing & Cable Fixed | – Easy to place and relocate – Ideal for fireproof safes – Extra security with cable fixing for safes and hard drives | – Easily removed by thieves – Typically smaller, limiting storage capacity |
| Bolt Down & Wall Fixed | – More secure, harder to remove – Suitable for both concrete and wooden floors | – Requires installation, though basic – Permanent placement – Can be challenging to hide, not ideal for rentals |
| Safes with Bases | – Enhanced security and insurance rating – Flexible and can be moved – Easier installation compared to wall or floor fixes – Better fire protection than bolted safes | – Higher cost – Slightly more installation work |
| Wall Mounted | – Accessible and easy to conceal – Increases security as only the door is visible | – Difficult installation with wall disruption – Limited by wall depth |
| Under Floor | – Highly secure and easy to conceal – Doesn’t occupy room space | – Complex installation requiring cutting and concreting |
Installing a safe is a manageable DIY project. However, check with your insurance company first, as it may impact your premium.
While bolt-down safes are straightforward, more involved installations like wall or floor mounts are certainly feasible with the right approach.