One of the most frustrating things in the home is when you go to flush your toilet and nothing happens. On the flip side another very frustrating occurrence is when you flush your toilet and the water doesn’t flush and it starts filling the bowl to the point it looks like it’s going to overflow!
In most cases toilet flushing issues are fairly simple to resolve and by working through a few simple problem solving steps you can get your toilet flushing again in no time.
Common Reasons Why Your Toilet Won’t Flush
There are several common reasons for flushing issues with toilets and these include a problem with the handle, there’s no water or very little water in the cistern, the diaphragm is damaged, the flush works but it constantly runs and won’t stop or there is a blockage in the S-bend/pan connector or drainage pipes.
Here follows a run down of the causes of each issue and how to resolve it to get your toilet flushing as it should do once again.
1. Toilet Flush Handle or Button Damaged or Broken
One of the most common reasons for the flush on a toilet to stop working is that the actual handle itself becomes detached from the flushing mechanism.
The type of flush mechanism that you have will very much depend on the type of toilet you have. Today, most domestic toilets utilise a European push button dual flush system e.g. there is a small button on the top or side of the cistern that’s split into 2, the smaller button for a short flush, the larger section for a long flush.
With a single flush system the button is only one piece and only gives one long flush.
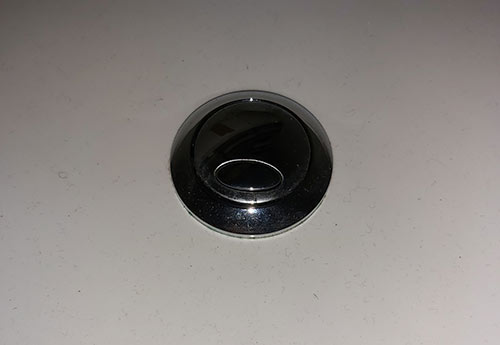
Push button toilet flush
There are 2 different types of push button flush – the first is where the push button is connected to the flush valve directly using a rigid plastic bar or connector. As the button is pushed down, the bar lifts the flush valve and the water in the cistern flows into the bowl flushing the toilet.
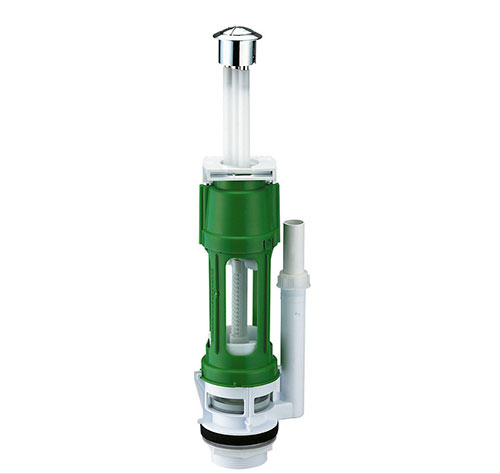
Connector bar connecting push button flush to flush valve
With the other type the push button is connected to the flush valve through a flexible cable. These are now the more common type of flush mechanism used on push button cisterns as they are much easier to install and connect up.
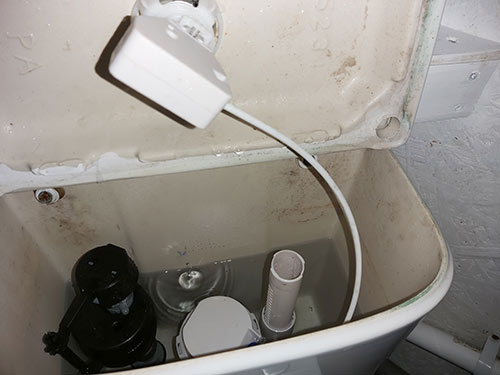
Push button flush mechanism using cable
In the majority of cases as the flush button itself is so simple any issues with the toilet flushing will be down to the fact the flush valve has actually failed and needs replacing.
However if you have an older type toilet that has an actual handle and when pulled down does nothing the chances are that it’s become detached from the syphon (the flush unit).
The flush handle itself will be attached to the syphon in one of 2 ways, either by a chain or piece of wire. When the lever is depressed, or the chain pulled (with an older high level cistern pull chain toilet), the flush diaphragm inside the syphon is pulled upwards on the diaphragm frame and this in turn releases water into the bowl.
If the chain or wire becomes detached from the syphon or flush handle the flush simply won’t operate.
A very quick way to check this is to simply lift the lid on the cistern tank and inspect the flush lever. If you find the chain or wire is detached, simply reattach it and the flush should now start working again.
2. Little or no Water in the Toilet Cistern Tank
As a toilet is flushed through the release of the water in the cistern tank down into the toilet bowl, if there is no or very little water in the cistern then the toilet simply won’t flush.
The cistern allows water in to it for storage through a valve located just inside the cistern, normally at the base or to one of the sides.
There are two main types of valve, the ball valve and the Torbeck valve. The ball valve is more commonly used with older toilets with larger cisterns whereas the Torbeck is more often used with smaller push button European cisterns.
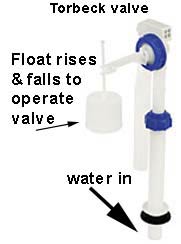
Torbeck valve for toilet cistern
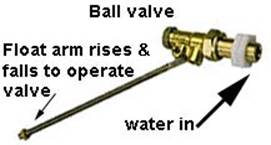
Ball valve for toilet cistern
Both types operate on the same principle. The water inlet is controlled by a valve which is opened and closed by a lever. The lever or “Float arm” is raised and lowered by the level of water in the cistern (this is exactly the same system as that used in cold water tanks in most lofts).
As the cistern fills with water it pushes the float arm up and when it reaches a set level e.g. the maximum level for water in the cistern it pushes the inlet valve closed stopping the floor of water.
Likewise when the flush is pressed or pulled the water in the cistern is released and the float arm drops opening the inlet valve and allowing water to once again fill the cistern.
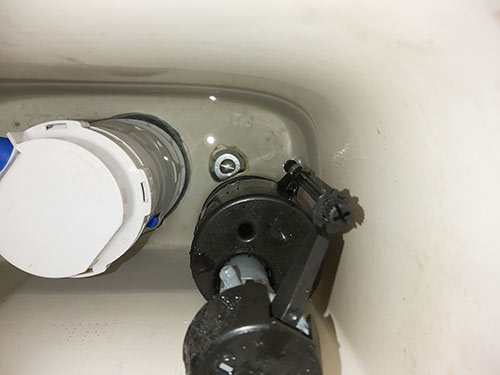
Inlet valve open and water flowing into cistern tank
If something happens to the inlet valve or float arm then it won’t open correctly and allow water to flow into the cistern.
The best way to check for any issues is to lift the lid on the cistern and inspect it. Try raising and lowering the Torbeck or Ball valve. If the inlet valve opens and water starts flowing there is some kind of restriction preventing it from opening correctly so look for any obstructions or objects that may be causing this and clear them away.
If after moving the valve up and down there is still no water flow then you will need to check the water supply to the toilet and ensure water is actually flowing. If it is then there is an issue with the Torbeck or Ball valve and it will need replacing.
If not then there is an issue with the water supply and this will really need to be inspected by a plumber!
One final check to perform is to check and see if there are any isolation valves on the water supply to the Torbeck or Ball valve. If there is check this has not accidentally been turned off.
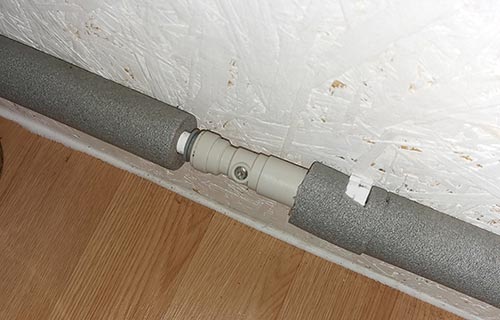
Isolating valve on water supply to toilet inlet valve
3. Damaged or Split Diaphragm
Many older toilets still in use feature a syphon as opposed to a more modern flush valve. With this type of toilet, when the lever is depressed, or the chain pulled, the flush diaphragm is pulled upwards on the diaphragm frame.
Because of the frame underneath the flush diaphragm the water cannot escape and is drawn up and over into the flush pipe where it then runs straight into the toilet bowl and flushes the toilet.
If the flush diaphragm is split however, the pressure of the water as the diaphragm is drawn up the chamber, simply pushes through the split and does not allow any resistance. The more you flush, the bigger the split gets and the worse the issue gets.
One of the good things about the syphon valve is that you can simply replace the diaphragm when it splits or becomes damaged and the good news is they’re peanuts to buy, some as cheap and 30p!
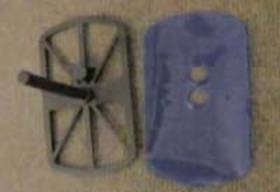
Diaphragm for syphon valve
To change the diaphragm simply turn off the water to the cistern, flush the toilet and soak up any remaining water in the cistern with a sponge. Once the cistern is empty, unclip the connection between the handle arm and the flush unit.
Release the back nut under the cistern and pull the flush unit clear. Unclip the bottom half of the connection clip and pull out the frame which holds the diaphragm. There may be a spring over the central dowel, don’t forget to return this when re-assembling Unclip and slide off the diaphragm, replace and re-assemble.
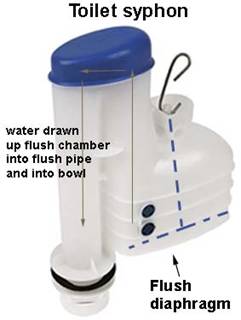
Toilet syphon valve showing diaphragm and water flow to toilet bowl
The one drawback is with this is that you have to remove the syphon from the cistern tank to replace the diaphragm, which essentially means taking it apart.
Ultimately if you are having to take the cistern apart to replace the diaphragm then you may as well replace the old syphon valve with a newer more modern flush valve as they are a fair bit more economical when it comes to water usage.
Despite most believing that this isn’t possible, in almost all toilets it’s simply just a straight swap!
4. Flush Working but Water Constantly Running into the Toilet Bowl
In some instances, when you flush your toilet, after the main flush event has occurred the toilet keeps on flushing and allowing water to flow into the toilet bowl.
This not only prevents the cistern from filling correctly so you can flush the toilet correctly again in the future but as the water is constantly running is wastes a huge amount. Event a slight trickle can waste gallons of water over a 24 hour period!
In the majority of cases the main cause of this issue is a split diaphragm in a syphon valve or with some older toilets that feature a flapper valve, the flap has failed and is no longer sealing correctly.
In the case of a syphon valve you will need to replace the diaphragm as described in the “Damaged or Split Diaphragm” step above.
If you have a flapper valve then this will need replacing using the following steps below:
- Turn off the water to the cistern inlet valve, flush the toilet and then soak up any remaining water in the cistern
- Remove the old flapper by disconnecting the the small prongs where it’s attached to the long tubular overflow valve and also disconnect the chain that’s attached to the flush handle
- Take the old flap to your local plumbing merchants and find a like-for-like replacement
- Refit the new flap valve on to the overflow tube and close it
- Refit the new chain that came with your new valve and adjust the length correctly so there is enough tension to easily pull the flap open but not to much as to subject it to unnecessary tension
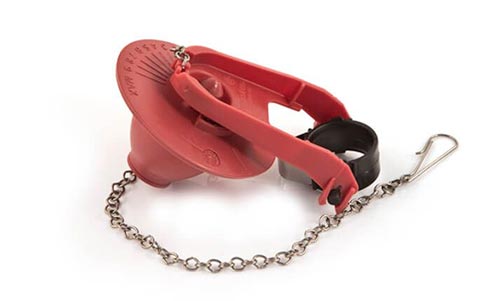
Older style flapper valve
However if you have a more modern flush valve and push button flush there could be several reasons why water is continuing to run into the bowl.
The first thing to check is that there is no debris from the bottom of the cistern that’s jammed in the valve keeping it open. If there is flick it out the way with your finger and allow the valve to close.
If not there the valve itself has failed and will need replacing. For information on how to change a push button flush valve see our project here.
5. Blockage in S-Bend, Toilet Pan Connector or Drainage Pipework
One of the most shocking toilet issue is when you flush your toilet and the water doesn’t run away it just starts filling the bowl to the point it looks like it’s going to overflow!
In the majority of cases this type of issue is caused by a blockage in the S-bend, pan connector or in the main drainage run.
Most domestic toilets are only designed to deal with certain objects being flushed down them, mostly waste and toilet paper. Any other objects can quickly and easily cause a blockage that in turn causes toilet paper to build up and then block the main route to the drain.
In most cases the blockage will be in the S-bend or toilet pan connector and if this is the case in 90% of instances it can be easily loosened using a toilet plunger or toilet brush.
Simply working the plunger or brush around the blockage and flushing the toilet will in most cases dislodge the blockage and get everything flowing again.
If the blockage is a bit more stubborn then a “Blockblaster” or similar tool can be used to blast the blockage away.
Similarly if the blockage appears to be along the drainage run a little more than a tool known as a “Drain Cleaning Coil or Drain Auger” can be used to work the blockage free.
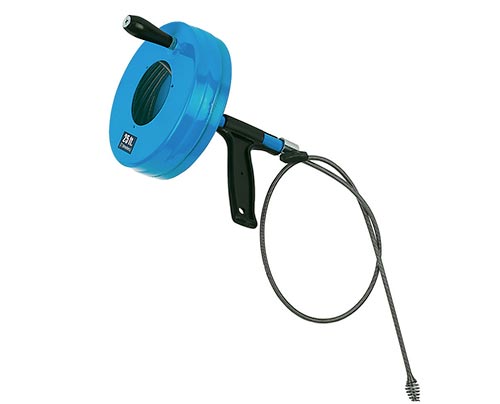
Drain auger or drain cleaning coil
However in the worse case scenario that none of the above solutions work then unfortunately you will have no choice but to call in a professional drainage company such as Dynorod or the similar.
There is nothing more frustrating than having a toilet that won’t flush properly, that leaks water into the toilet bowl constantly or one that’s blocked. Fortunately most toilet related issues can be overcome fairly simply and you can quickly and easily get your toilet working once more.

