Tyrolean is a form of cement-based render finish for exterior walls that hels to both protect and waterproof exterior walls from the elements.
You may not be familiar with the name but if someone ever mentions render the image that pops into most peoples heads will be that of a rough and uneven finish on the exterior of a house, this is generally a Tyrolean finish or some type of pebble dashed finish.
Tyrolean requires a special type of “Tyrolean gun” to apply it so read on below to find out how to both mix and apply this type fo finish to an exterior wall.
Different Types of Render Finish
Aside from Tyrolean there are numberous other render finishes that can be used on the exterior of a property, some of these include:
- lime
- sand and cement-based
- clay-based
- pebble dash
- Tyrolean
- Modern acrylic/silicone
- Modern polymer
- Spraystone
- Spraycork
- Mineral-based
- Monocouche
The type of finish that is suitable for your project will depend on a few factors that include the type of existing finish if there is one (in the case that you are patching or repairing existing render), the type of property it’s being applied to e.g period or new, whether the property is listed, the type of finishes surrounding properties have etc.
In some cases if the property is listed or it is in a conservation area you may not have much of a choice about the type of finish you can use as this may be stipulated to you by your local building control office.
For a full and detailed run down on the different types of render finish, including their advantages and disadvantages, see our rendering and exterior finishes project here.
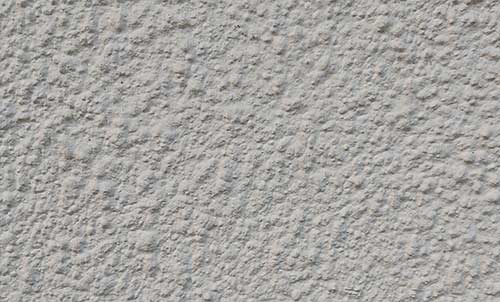
Smooth Tyrolean exterior finish on property
How Does a Tyrolean Gun Work?
As we have mentioned above, in order to get a Tyrolean finish on a walls surface a special “Tyrolean Gun” is used. This is essentially a hand opperated “flicker”, that when the handle is turned it flicks the Tyrolean finish onto the walls surface.
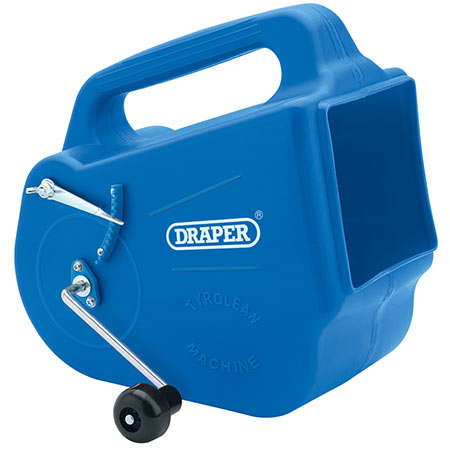
Tyrolean finish application gun or flicker
As there are different grades of Tyrolean finish e.g. small lumps all the way up to fairly large lumps, if you are patching or repairing a Tyrolean rendered area then the new finish is going to need to match the existing finish, otherwise the repair will stand out like a sore thumb!
Coming back to the gun itself, as you can see in the image above it features a handle on the side. When the handle is turned clockwise it in turn rotates a shaft with many little “fingers” or prongs attached. The fingers themselves sit in a reservoir of Tyrolean solution that is poured into the base of the gun and as they are turned they flick the solution out of the front opening onto the wall.
As we have mentioned, the texture if a Tyrolean finish can vary quite a lot from very rough finishes (below) to not so rough as in the first image in this project page.
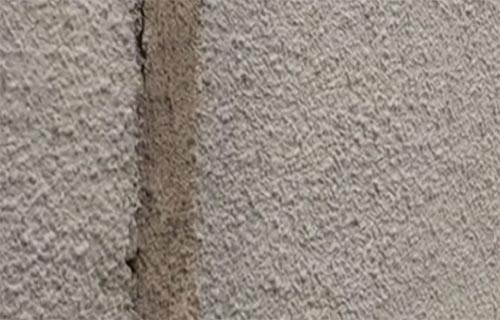
Rough Tyrolean finish
As you can see in the image below there is a small lever on the side and this is used to adjust the size of Tyrolean blobs that end up on the wall. To create larger blobs the handle is adjusted so that the fingers or prongs rotate slower causing larger blobs to be emitted, where as when adjusted to rotate faster smaller blobs are emitted for a smoother finish.
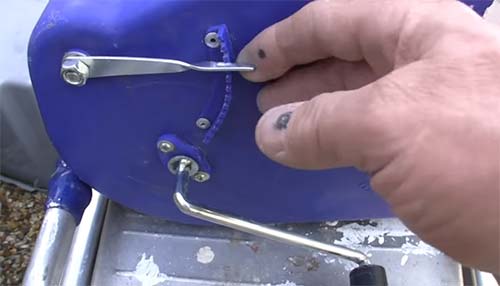
Tyrolean blob size adjusting lever
In order to fill the gun the Tyrolean you simply pour or scoop the solution in to the gun through the opening at the front, simple!
How to Apply A Tyrolean Finish to a Wall
A Tyrolean finish is usually applied as a finishing coat over an already rendered surface, see our project here on mixing and applying render and also see this project here on how to repair and patch rendered surfaces.
Once your rendered surface has been laid on or repaired and has fully cured a Tyrolean final coat can then be applied.
Exterior finishes such as these really should be applied in dry conditions as rain can easily wash the finish off after it’s been applied, so try and plan your application around any storms.
Cover and Protect Vulnerable Objects
The first job is to mask up and protect any areas that you don’t want covered in Tyrloean e.g. doors, windows etc. Use polythene dust sheets and masking tape to fully cover each object to ensure it’s protected. Also, don’t forget about any paths, garden areas, borders etc. that need protecting.
When in operation, the Tyrolean gun throws and scatters the solution out everywhere so even if there is a potentially vulnerable area away from where you’re spraying, air on the side of caution and get it covered up!
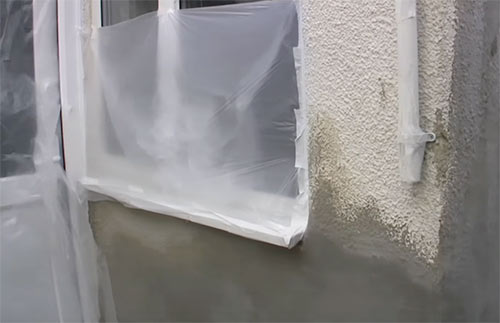
Cover all objects with dust sheets to protect them
Mix Tyrolean Coating
With all your potentially vulnerable areas covered and protected, the first task is to mix up a Tyrolean solution that can be applied to our given surface.
Tyrolean powder comes in 25KG bags and is essentially mixed in the same way as plaster in that you add the Tyrolean power to the water.
Using a standard 5 litre builders bucket, put around 2 inches of fresh clean water in the bottom and then pour some of the powder from the bag into the bucket, say an inch or so.
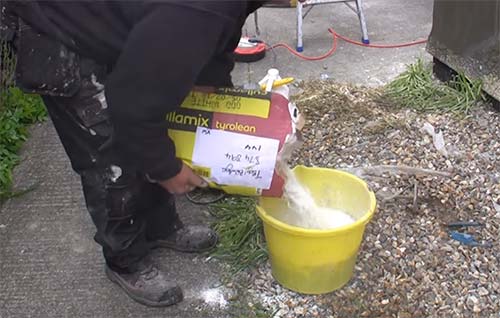
Adding Tyrolean powerder to bucket for mixing
With the powder added, use a mixing paddle or whisk as they are also known in an old electric drill to mix the power and water together.
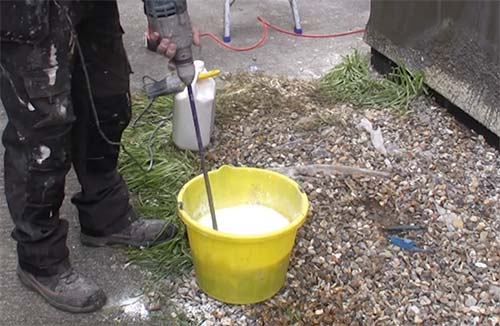
Mixing Tyrolean using mixing paddle
The consistency you are aiming for is that of heavy cream or yogurt, fairly thick yet fluid. With this in mind keep adding your powder to the water in fairly small quantities and mixing until you get to the correct mix. If you have a fair amount to do it’s a great idea to keep an exact tally of how much water and powder you use.
By doing so when you come to make your next mix you will know exactly how much water and powder you need to get exactly the same mix time after time. A good tool to use for this is a scoop as you can scoop exactly the same amount of powder each time.
Fill up Tyrolean Gun
Once you have the correct consistency of mix the next job is to get it into your Tyrolean gun. To do this you can simply hold the gun between your feet to stop it moving, angling it slightly upwards, and then pour the solution from the bucket into the opening at the front of the gun.
It can be a little tricky to pour it in and not spill any so make sure you put some newspaper or an old sheet over the area you are pouring on.
Alternatively if you don’t fancy pouring from the bucket you can scoop the solution into the gun using a suitably sized scoop.
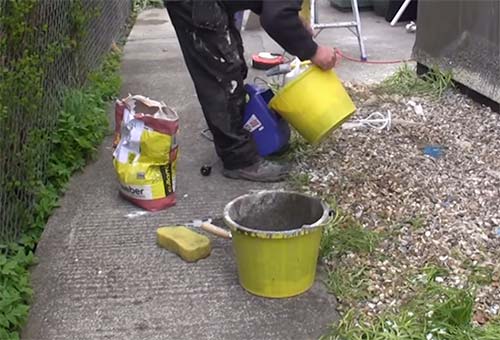
Pouring Tyrolean solution into Tyrolean gun
Apply First Coat of Tyrolean Finish to Wall
Once the solution is in your gun you can then start spraying. Staring at the beginning of your area to be covered, position the Tyrolean gun so the opening is facing the wall or surface you are working on.
Starting at the lowest area start turning the handle of the tyrolean gun until the solution starts flicking out the front and gradually move it up the wall ensuring you get an even coat. Repeat this process working your way along the area that needs covering.
Keep a very close eye on the existing surface and the new surface you are applying and compare the size of Tyrolean blobs. If needed increase or decrease the speed of the gun to adjust the size of the blobs you are applying until they match the existing.
Also keep an eye on the Tyrolean reservoir in the base of the gun and refill if needed. If you need to mix some more solution do so but as mentioned, make sure it is the same consistency as the last mix!
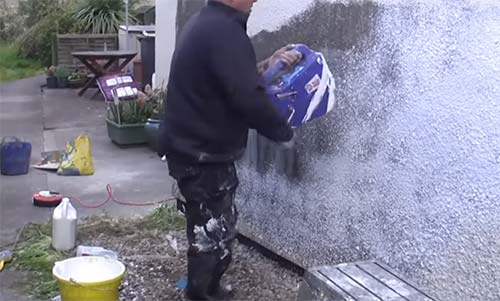
Applying Tyrolean solution to walls surface
Apply Second Tyrolean Coat
If you have worked your way steadily and consistently from one end of the work area to the other you should now have a fairly even finish across your work area, however in most cases a second coat is a good idea just to fill in any missed or thin areas.
Repeat the same process as you did for the first coat for your second coat, working steadily and methodically from one end of the work area to the other ensuring that all areas have an even coating that’s consistent with the existing finish.
Once done you should have an even Tyrolean coating over the entire area that blends almost seamlessly with the existing finish.
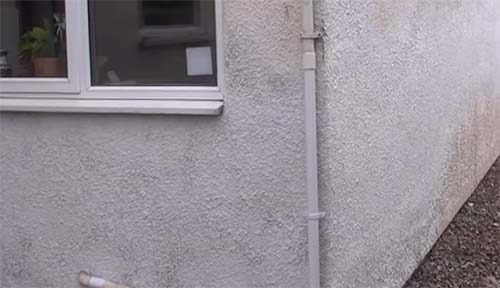
Second coat of Tyrolean applied to wall
Once the second coat has been applied you will then need to leave it for 24 hours to fully cure. In some instances if the weather is colder it may take a little longer to fully cure.
Apply Paint or Final Finish
Once the second coat has fully cured the final step is to then paint the whole area so that it blends fully with the old existing Tyrolean render finish.
To ensure the repair or patching work is as invisible as possible it’s a good idea to paint the entire wall or area that’s been patched and not just the patch itself.
Over time, UV rays and the elements can dull and discolour a painted surface and if you only paint the area you have worked on this in many cases will stand out almost as badly as if you haven’t painted it at all, so it’s well worth the time to give the whole area a fresh lick of paint.
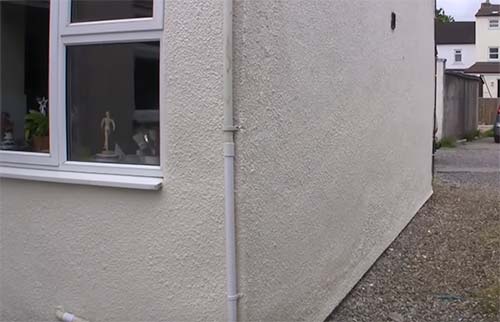
Finished Tyrolean repair area fully painted
Applying a Tyrolean finish over a repaired or patched area of rendering is a pretty straight forward job and one that can be done by anyone as long as they use the correct Tyrolean gun and ensure they apply an even and uniform coating.

