The space under the stairs is great for all kinds of storage solutions. We have a project dedicated to making the most of this space – and there are lots: See for yourself here.
This is a practical project aimed at showing you how you can make one of those ideas come to reality. It does require a little carpentry skill, but with a little care and patience there is no reason that anyone with the right tools and time cannot complete it.
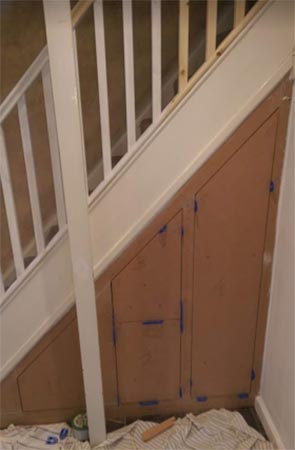
How to Build Under-Stair Draws for Shoes
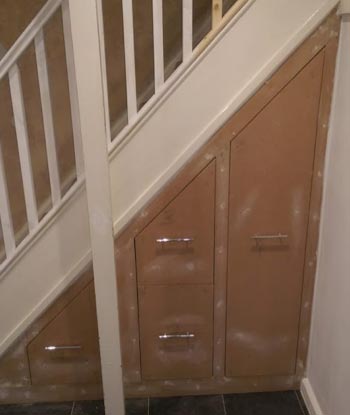
Before you start here is an image of what we are trying to achieve.
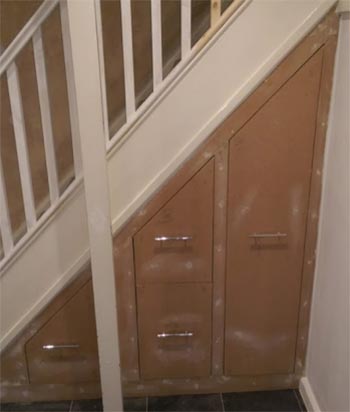
Under-stairs cupboard with sliding shoe racks and drawers
The instructions for a simpler version with just shelves and a cupboard are here should you feel this is too ambitious.
The sliding drawer version, as you can see above is made from MDF and requires a slightly different method of painting than normal timber. You can find out how to do this at this link which explains how to paint MDF.
The first thing you need to ascertain when doing any work of this kind, is whether your floor is level.
If not, your doors may not open properly and, in the case of version 2, the drawers may open in a lop sided way making the whole lot look very ugly.
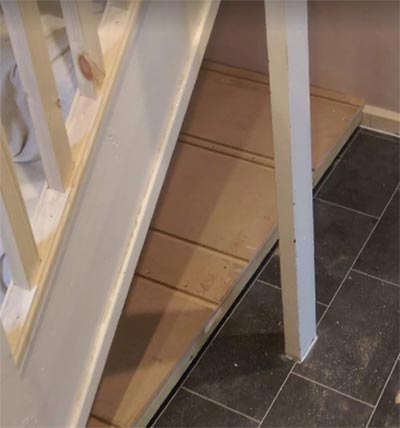
This particular job was hampered slightly because of a steel supporting column right in front of the stairs but we managed to build the unit in such a way that it slid in, at an angle, behind the column to fit neatly in the space.
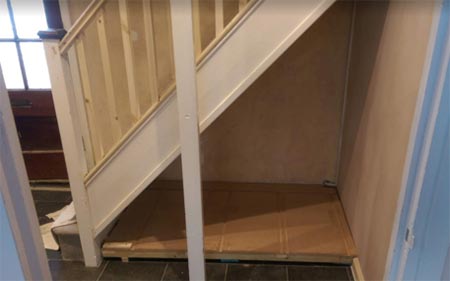
Level base fixed in place under stairs
To overcome a severely sloping floor we decided to put in a new base for the cupboard. This gave us the advantage of starting with a 100% level base and also giving us a base surface that was easy to fix to.
As you can see from this photo, we have used packers and shims to get the base level. These are covered, at the end of the job by a piece of skirting.
The shims and packers can be cut from off-cuts by hand, but a simpler approach is to use shims which have been pre-made for the job. See the other photo or look at shims and packers here.
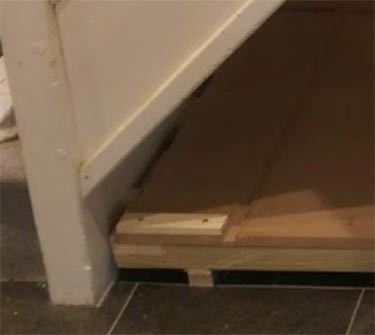
Packers added under base to bring it up to level
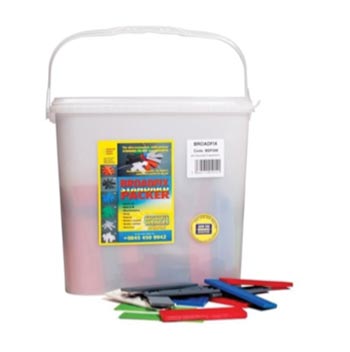
Trade size tub of packers and shims
You will also see, from the photo below, that having measured and designed our cupboard carefully – something you will be able to do when you have understood how this all goes together by the end of the project – we have routed out a housing for the upright sides of each cupboard.
With the base in place, you will now need to calculate the angles for the slides and doors
Having built, levelled and fixed the base, it’s time to work out the angles for the cuts needed to build the sides and doors.
For this you will need a tool called a sliding bevel. You can find out how to use a Sliding Bevel, and what it does, at this link.
Please remember a Sliding Bevel is a pretty exact tool so don’t be tempted to buy the very cheapest, do what we always suggest and buy the best you can afford. Good tools, looked after, will never let you down.
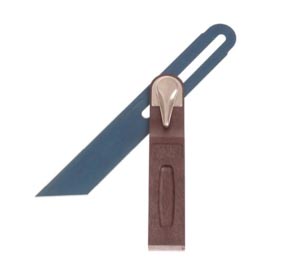
Sliding bevel used to caclulate angles
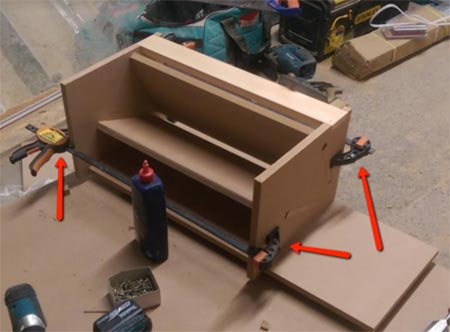
Having knowledge of all the angles you need for the sides of your cupboard you can start the measuring process to get the sides in. Do not fix the sides yet. At this stage we are simply making sure they fit, we need them out in order to fix our sliding shelf brackets to them.
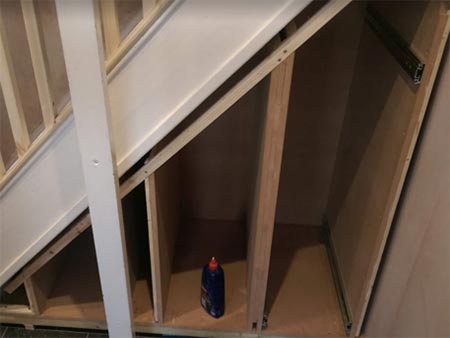
Test fit all sides in place to make sure they all fit correctly

Weatherproof Evo-Stik wood adhesive
You can see, a tub of woodworking glue in the photo. This is a must for all good quality carpentry and if you click on the link, or the photo, you will be taken to our preferred adhesive.
How to Make the Under-Stairs Draws
Once you are sure the sides will fit, take them out again and put them to one side. It’s now time to make the drawers. This will put your carpentry to the test but it is an incredibly rewarding feeling when complete.
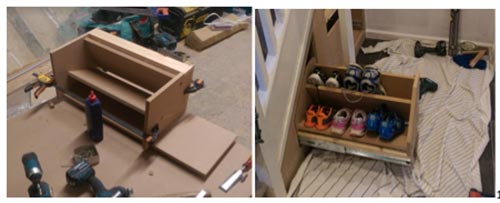
Sliding shoe drawer being constructed and then fitted to the under stairs cupboard to ensure all fits well
This particular unit is specifically for shoes so you need to check, when you are designing your cupboard that each drawer is large enough to put the shoes in and still have room to open. You can see from the photo that this shelf has been built for the children’s shoes.
As well as the MDF to build the unit, you will need to buy some heavy duty sliding brackets. These are exactly the same as the sliding drawer brackets you get in your kitchen but are able to carry much more weight.
Clearly, as with your kitchen drawers, one side of the bracket is fixed to the drawer itself and one side to the frame.
Make sure, when you cut your drawer front and sides, that you have allowed the exact amount of space for your brackets to fit either side.
When looking for your brackets please remember that normal, kitchen cupboard sliding brackets will carry a maximum weight of about 35Kg.
When you build your MDF sliding shelf unit, the drawers themselves are heavier than the shoes you will put in them so you will need brackets that can take a minimum of 70Kg
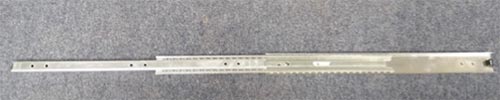
Drawer runner used to fix drawers to side of cupboard
The front of the drawer can be cut slightly wider than the sides so that the edges of the brackets are not visible from the front.
This way you can cut each face neatly so the gap is even all the way round as it should be when hanging any kind of door. The photo shows that the drawer runner is sitting behind the front face of the drawer.
Drawer runner fixed to drawer
As you can see from the photo below, we have put spacers in to ensure our gaps are identical before the final fix.
To get these cupboards correct you will need to temporarily have fixed the facing strips to the edges of the cupboard sides. It is these edges that will ultimately hide the runner brackets fixed to the sides.
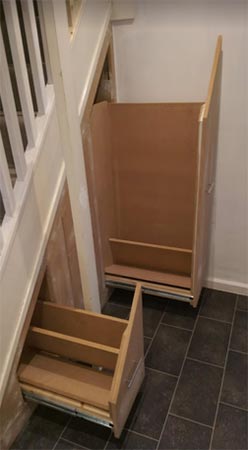
Drawers installed into cupboard to make sure all fits as it should do
The drawers themselves are glued and clamped together for 24 hours.
It will not hurt to add some screws, countersinking the heads down under the surface of the timber. The countersink holes can then be filled with some two-part filler which is sanded down prior to painting.
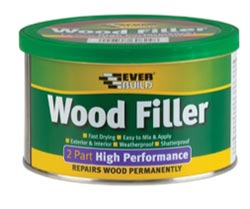
Everbuild high performance wood filler
You can find out more about countersinking here.
Measure out carefully for the shelf components. Glue and clamp them into place as you can see from the photo. These clamps are an essential item in any woodworking.

Irwin Quik-Grip clamp for clamping items during the glue drying process
With the cupboard sides in place, temporarily fixed with a batten across the front to hold everything in place, mark the position of your shelf brackets carefully.
Measure even more carfully when transferring these measurements on to the shelves you have made. We have always found it easier to fix the runners to the shelves first.
Drawers are clamped together during the glue drying process
With the shelf runners in place you can now add the facing boards to the cupboard, fixing the sides permanently. Remember to drill pilot holes which you have countersunk for filling later.
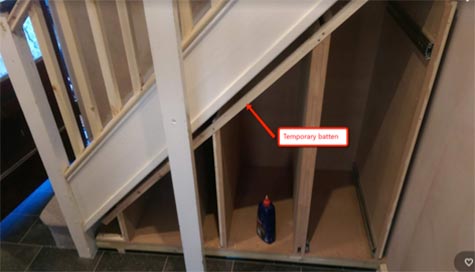
Temporary batten added in place to hold sides up when marking positions of brackets
Last, but not least, comes the handles of your choice. Don’t forget to measure carefully to ensure all the handles line up or you will spoil the front of your new unit.
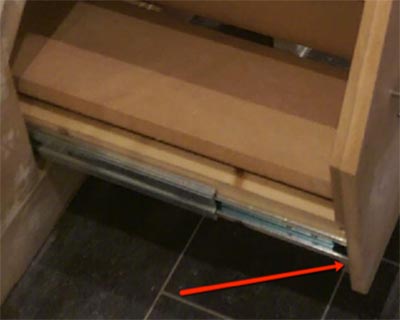
With each drawer fitted in place they are tested to ensure all runs smoothly
With the drawers pulled out to test smoothness, they are then closed up again to make sure they retract correctly
We hope you have found this idea challenging. We feel it is one of our jobs to stretch your DIY skills. The work is intense but the satisfaction immense. Enjoy your project and we will see you next time.
As we mentioned above, we have been involved with a project like this in the past where we took an under-stairs space and turned it into a cupboard which was used for a multitude of things.
This particular job is an up-market version of the simple cupboard below but if you would prefer to carry out the easier of the two go and have a look at this link to see our under stairs cupboard project and follow the instructions.
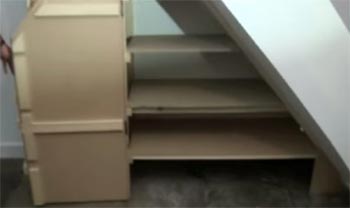
Understairs cupboard with shelves and double hinged opening doors
This project would take a professional tradesman the better part of a week to complete, so you should expect to take a little longer perhaps.
Making the most of the storage space under your stairs and a fantastic challenge and one for any DIY enthusiast with time and patience.
Fitting drawers under the stairs is a great way to make the most of the space, especially when using special show drawers.