Painting MDF or Medium Density Fibreboard is not an easy job. The paint dries so quickly that it can dry in a very uneven and blotchy way.
To prevent this from happening and get a great finish there is a certain process that you need to follow, read on to find out exactly what.
What is MDF and How is it Made?
MDF is a man-made sheet timber material constructed from a range of organic wood products which have been broken down into fibres through being pulped and crushed.
MDF is used for a huge range of things in the building trade, from kitchen cabinets to wardrobes, shelves and everything in between. It’s often used in place of other sheet materials such as ply wood and OSB as it’s both cheaper and features a nice flat smooth surface, perfect for a range of finishes.
To make MDF, firstly trees (both hardwood and softwoods) are cut down and de-barked. They are then fed into an industrial chipping machine, which is the start of the reduction process. None of the timber is wasted as the bark is used for landscaping products and all undersized chips are bonded and sold as wood logs.
The chips are then fed into a screw feeder machine which heats them for 30 seconds to 2 minutes and then they are fed into a machine called a defibrator which grinds the timber down into a pulp while introducing very hot steam to further soften the timber. This entire process is done at a very high pressure.
The pulp is then mixed with wax to allow the very light, very fine fibres to obtain a degree of resistance to moisture. A resin agent is also added to allow the fibres to bond and set together after the timber pulp is fed into giant trays of varying thicknesses and pressed under a very high heat, which initiates the resin-bonding process. The resulting sheet is then cut into the required thicknesses and sizes.
MDF then becomes a very uniform wood. Uniform in size and quality with no knots or rings or any other form of imperfection.
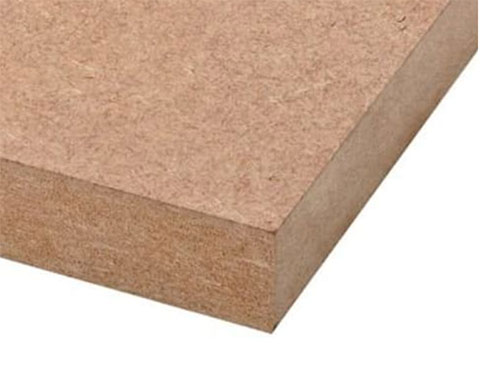
MDF sheet made from pulped timber products
What’s the Problem With Painting MDF?
There are several problems you will encounter when painting MDF. The first is the fact that it is very porous. This not only means that the water contained in many paints is sucked out of it before it can cure, meaning it doesn’t bond correctly but also when it does absorb water, this can cause the resins that bond it together to break down and it then falls apart or blows as it’s known.
Also, as the flat smooth surface can vary in density slightly, this causes the paint to be absorbed at different rates, producing a very patchy, blotchy and inconsistent finish.
Finally any bare or cut edges can be even more porous than the flat surfaces, creating even more inconsistent results and requiring additional attention and steps to prepare them.
Despite all these issues, once sealed and primed correctly you can get an extremely good, uniform smooth finish on any type of MDF.
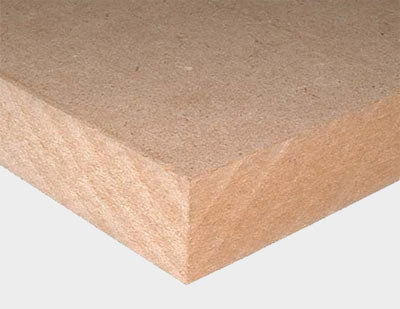
Closeup of MDF fibres that make up the medium density fibreboard
Do you Need to Prime MDF Before Painting?
To get a flat and even finish when painting MDF it is absolutely essential that any bare surfaces are first sealed and then primed before any top coats are added.
As we have mentioned above, the surface of MDF, despite it’s density, is very porous. The moisture from ordinary paints is soaked into the MDF very quickly. This leaves a ″skin″ of paint on the surface which, because all moisture has been removed, does not adhere well to the surface. This means that every subsequent layer of paint applied to the MDF is only stuck to the layer (or coat) of paint below it, not to the MDF itself.
This is the reason that, if MDF is not prepared properly, the paint sometimes blisters up resulting in large bubbles on the surface as air (or water) is allowed under the first coat of paint.
When it comes to primer, there are many available on the market today and as with all things, some are better than others. Once applied to the timber, it can then be painted with any ordinary paint. The MDF primer seals the timber effectively allowing other paints to dry in a uniform way.
To increase its effectiveness, we also recommend painting any surfaces with an undercoat, after the primer and prior to any top coats.
Advantages and Disadvantages of MDF
As with many different materials used in the building trade, MDF has its advantages and disadvantages, here follows the most common.
Advantages of MDF
- Because MDF is so completely flat with the ability to absorb adhesives, the MDF surface is good for attaching timber, or plastic veneers to
- MDF is usually less expensive than the timber it is made from on a comparable area price
- There is no grain. This makes MDF an isotropic timber which gives it consistency in every direction
- MDF can be curved easily without splitting or cracking in it’s thinner sheet sizes. This makes it ideal for hobby or intricate work
- Unless it is subjected to a lot of water, MDF will not expand and contract, as timber does, due to the natural moisture content of a normal room at home
- Having been primed correctly, MDF is very easy to paint as there is no grain or varying surface texture
Disadvantages of MDF
- MDF is extremely porous and easily absorbs water and moisture
- When it absorbs water it can blow and loose its shape
- It’s very hard to get a strong fix into the edges of MDF
- Without any grain character, any finishes can look flat and boring
- MDF is a suspected carcinogen and has been potentially linked to several different cancers
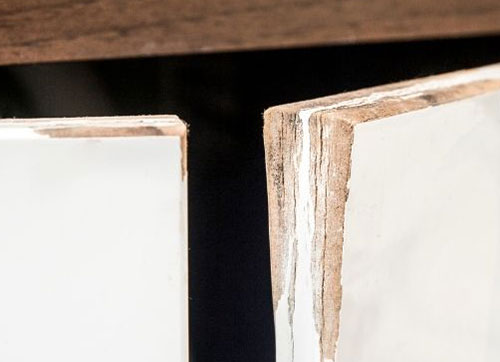
Blown MDF door – Image courtesy of makingthishome.com
What are the Best Paints to use on MDF?
There are many different types of paint available today for use with MDF but some are certainly better than others.
As there are several different types of paint required to successfully cover MDF that are used at different stages, some of the best we have used are as follows
- First Coat – Sealer: There are many on the market today, but one of the best we have found is the quick drying MDF sealer from Rustins as it produces a very even and flat coat, dries very quickly and a variety of other paints and coatings can be applied on top
- Second Coat – Primer: Again there are many options available but some of the best we have used are the Rustins quick drying MDF primer and undercoat, the Leyland Trade MDF primer and also the 3-in-1 Zinsser B.I.N primer, sealer and stain killer. This one is particularly good as, unlike some all-in-one solutions it goes on bare MDF and actually works, although it’s quite thick so needs sanding
- Third Coat – Undercoat: Although not really necessary if you have applied a good quality sealer and several coats of primer, but for the best possible results, applying undercoat is always a good idea. However today there are quite a few very good all-in-one primers and undercoats such as the Dulux Trade MDF primer and the Rustins quick drying primer and undercoat we have mentioned above. One of the best specific MDF undercoats we have used is that MDF undercoat by Blackfriar
- Fourth Coat – Top Coat: Once sealed, primed and undercoated, you can apply most types of finishing top coat e.g. gloss, emulsion, eggshell etc. However, depending on the item you’re painting will depend on which is best. For example gloss and eggshell will give a tougher finish than most water-based emulsions
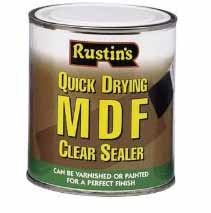
Rustin’s MDF Clear Seal
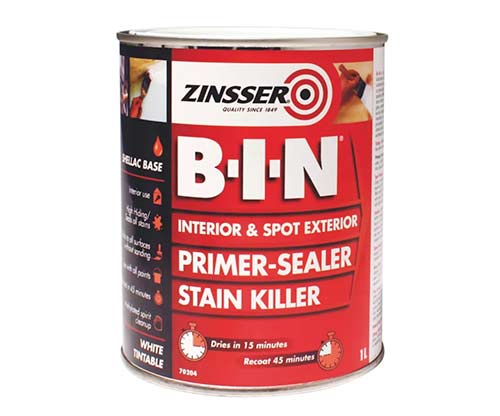
Zinsser BIN MDF primer, sealer and stain killer
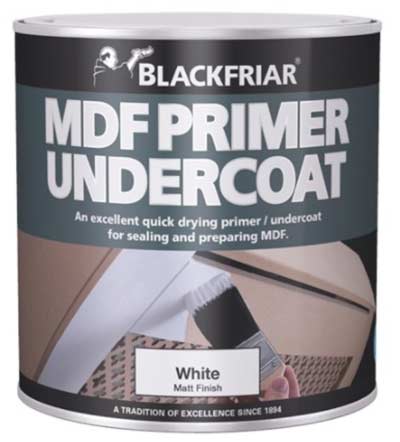
Blackfriar MDF undercoat
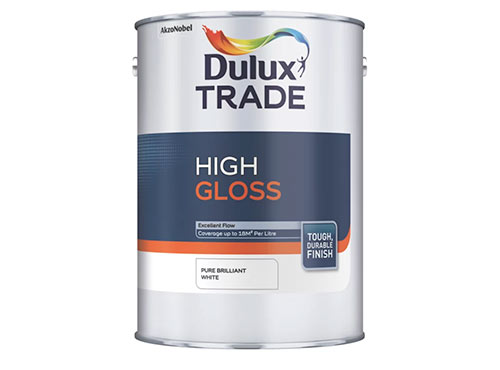
Good quality Dulux High Gloss top coat paint
Safety Issue With MDF
As good, cheap and universal a product as MDF is it does come with some safety issues you should definitely be aware of when working with it so that you can take the necessary safety precautions.
Firstly, pretty much all forms of timber dust, no matter whether it’s from softwood or hardwood sources can cause numerous respiratory problems and some has also been linked to some forms of cancer.
Secondly, the resins used to bind MDF often contain Formaldehyde and other dangerous compounds which are quite hazardous to health. These compounds can escape into the air when the MDF is being sawn, sanded or disturbed and can even escape from the edges of the timber in it’s free standing, sheet state.
Although priming and sealing the MDF properly is very important for painting, it also prevents these compounds from being released in to the air.
Also, whenever you are cutting or sanding MDF you should always wear a good quality FFP3 mask (and other PPE kit) to prevent breathing anything in. You should also work in a well ventilated area and where possible, try and catch any saw/sanding dust straight away with a vacuum.
In most cases you can either attach the vacuum to the tool you are using or have a friend or family member hold the suction end close to the working area and capture as much of the dust as possible.
Tools and Products Needed for Painting MDF
To successfully prepare and paint MDF you will need to the following tools and product:
- Good quality MDF sealer
- Good quality MDF primer
- Quality MDF undercoat
- Chosen type of top coat paint
- Good quality paint brush or roller
- Appropriate PPE gear – FFP3 mask, goggles, old clothes etc.
- 120 – 240 grit sandpaper
- Flat sanding block
- Dust sheets
- Solid, flat work surface
How to Paint MDF
Now that we have looked at the best types of sealer and paint to use and also what safety issues you need to be aware of when working with MDF, we can now look at the process of painting it and getting a good finish.
Step 1: Sand MDF Over to Create Key
As we have stated above, the flat faces of a sheet of MDF are very smooth as the fibres are tightly compressed together and regardless of what sealer or primer you use, it won’t bond as well to such a surface without a decent key so the first job is to create one.
Wearing your FFP3 mask and other safety gear, lightly sand all areas of the MDF you are looking to paint, including all edges. As stated, ensure you’re working in a well ventilated area and are vacuuming up any dust as quickly as possible.
When it comes to sanding, many people do not put sandpaper onto a sanding block, tradesmen are the worst offenders and we hold our hands up to this.
The fact of the matter is that sanding (usually) is to try and get surfaces as flat as you can be so sanding with a a flat surface, such as a sanding block is absolutely essential.
A human hand, however you contort it, is not flat and the surface you are sanding will never be 100% flat if you use your hand. This applies especially to MDF as the pulp itself is so soft, so when sanding, always use your paper on a flat sanding block.
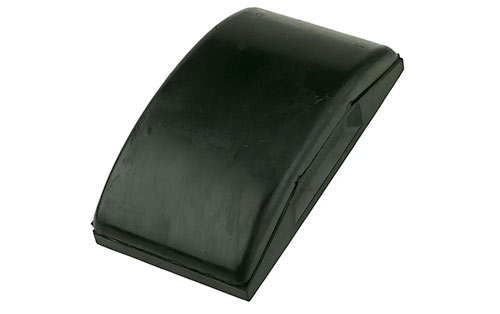
Flat rubber sanding block
Step 2: Seal Surfaces and Edges
Once rubbed down and a decent key created, the next job is to seal all surfaces. Using a good quality MDF sealer and paint brush or roller, brush or roll on the sealer, ensuring that you cover everything leaving no gaps.
When covering all surfaces you will need to leave one that will sit face down on a flat surface while the others dry. Once dry you can then flip it over and coat this face also.
Although a decent sealer will work very well on the flat surfaces, edges can always be a problem as they are extremely porous.
Over the years there have been many different techniques tried to get a good, even finish on the edges which matches the surface finish.
The best method found by DIY Doctor is to apply an ultra-thin layer of wood filler to the edges, pressed well in with a putty knife or scraper, then sanded down using a sanding block. This prohibits the over-absorption of primer and paint and lays the foundation for an even finish.
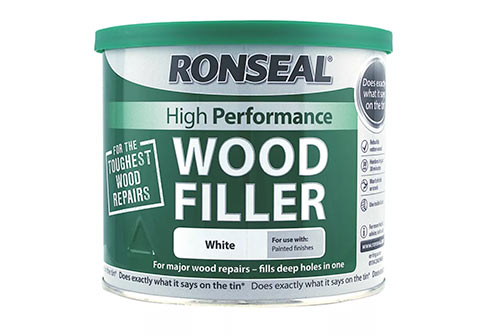
Good quality wood filler
Step 3: Sand and Wipe Surfaces Over
Once all flat edges have been sealed over and edges sealed or filler applied and it has all fully cured, use a medium grit sandpaper such as 240 grit and a flat sanding block and then very lightly sand all surfaces and edges over to again provide a decent key for the next stage.
Once sanded over, vacuum up and resulting dust and then using a damp cloth, wipe all surfaces and edges over to remove any remaining dust.
Step 4: Apply Primer and Sand
Using a good quality primer such as one of those mentioned above or even a good quality all-in-one primer and sealer, brush or roller it over all edges and surfaces, except the base which will need to be done later once the others have dried.
In some instances there may be faces that aren’t going to see the light of day therefore you may decide to save a bit of time and not paint these, but don’t do this!
Damp and moisture can get in everywhere and once it has access to an unprotected MDF face it can destroy it very quickly so you should always coat all faces and edges.
Step 5: Apply Second and Third Coats
After one coat has been applied, it’s then a good idea to put on your mask and give all surfaces a very light sanding down using a 240 grit sandpaper, then brush or hoover off the dust and wipe down with a rag dipped gently (not soaked) in white spirit.
This degreases the whole surface allowing the second coat of primer to be applied uniformly and form a great, sealed base for your undercoats and top coats. Remember, any painting is only as good as the preparation that has gone into it.
After a second coat has been applied this then may be enough to provide a uniform platform for any further coats, however if it is still looking a little blotchy then a third coat might be necessary.
Step 6: Apply Undercoat
Once the primer has been applied and rubbed down it’s then a good idea to also add at least one coat of undercoat, unless that is that the primer you’re using is a combined primer and undercoat.
As with the primer, any undercoat is applied using a good quality brush or roller to minimise any brush or roller strokes.
Once applied and dried, again, rub everything down using a medium 240 grit sandpaper, vacuum up any dust and debris and then wipe over lightly using a rag dipped in white spirit.
Step 7: Apply Top Coat Paint
After applying primer coats and undercoat, if you have also opted for this, and everything has been sanded and wiped over to remove any remaining dust and debris, it’s then time for your finishing top coat.
As with all others, this is best applied using a top quality brush or roller to reduce any roller or brush strokes and create as flat and smooth a finish as possible.
Top coat is best applied in 2 coats, allowing the first coat to dry fully before adding the second. Once both coats have been applied you should then be left with a perfectly smooth and uniform finish to your MDF surfaces.
To get a great finish when painting MDF, there are quite a few steps that need to be followed in order which may seem a little tedious, however once you do you will be left with a fantastically finished MDF surface equal to anything that the pros can produce.

