Cavity wall ties are an essential part of any building. Their job is to tie together the visible protective outer cavity of brickwork or block work of a building to it’s structural and load bearing inner masonry skin.
As you may be able to tell from the above, if your property is suffering from wall tie failure then this can mean that both skins become independent of each other.
The building can then become structurally unsafe and a danger to those that may be in it or around it.
In this project guide we will deal with wall tie failure, how to replace wall ties and also how to ensure that all wall ties are spaced the correct distance apart so that your outer cavity wall is stable without the possibility of it falling or blowing over.
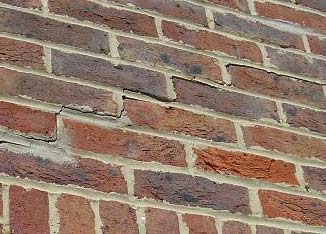
Wall badly damaged by corroded wall ties
Professional Assistance
Before we get into it, if you are unsure about the condition of your wall ties, always seek professional help. A qualified structural engineer or wall tie specialist can safely assess the situation and provide expert guidance.
These experts use specialist tools such as a Borescope (a small camera inserted into the wall cavity) to carry out a full visual inspection. This ensures an accurate diagnosis that you cannot achieve by guesswork alone.
While a professional survey may seem costly, it is a smart investment. A clear report tells you the exact state of your wall ties and what repairs are needed. This prevents mistakes, avoids unnecessary work, and saves money in the long run.
A Brief History of Wall Ties
Wall ties have been used in housing since the early 1800s and became standard in the 1930s. Today, they are an essential feature in all cavity wall constructions.
Cavity walls split the traditional 9-inch solid wall into two 4½-inch layers. The outer wall acts as a weather shield, while the inner wall supports the structure. This design prevents water penetration and reduces heat transfer from outside to inside.
Wall ties connect the inner and outer walls, improving stability and slightly enhancing load-sharing between the walls.
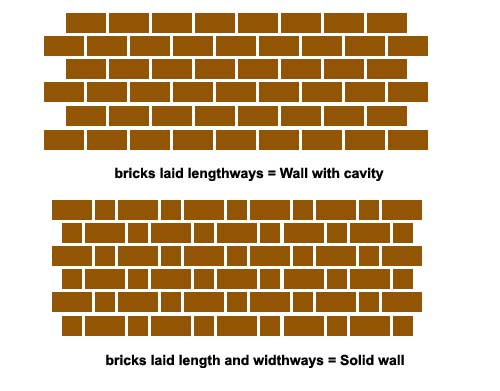
Using the brick pattern of the wall you can identify whether your wall has a cavity or is solid
Signs of Damaged or Corroded Wall Ties
Wall tie damage can cause serious structural issues. Look out for these visual warning signs:
- Cracks in brickwork, vertical or horizontal
- Bulging or uneven brickwork
- Gaps or separation around window reveals
- Sagging or lifted lintels and window sills
These issues are usually caused by wall tie corrosion:
- Cracks in brickwork – Rusting ties expand, pushing bricks apart and causing cracking mortar due to the rust. This often appears every six brick courses (≈450mm where wall ties should be placed) if ties are correctly spaced.
- Bulging walls – Corroded ties expand, forcing the outer wall up or down which causes an outward bulge where space is limited.
- Window reveal gaps – Expansion on the inside of the property can create gaps between frames and reveals or cause inconsistent reveal depths.
- Lintel or sill movement – Rust expansion and resulting movement can lift or sag lintels and window sills, affecting alignment.
Wall Tie Failure and How This can Happen
Here follows a breakdown of the two most common causes of wall tie failure:
Wall Tie Corrosion
Most wall tie corrosion happens due to age. Over time, the mortar around each tie undergoes chemical changes through carbonation, which can attack the metal and cause rust (iron oxide) to form.
As rust layers build up, they expand and push the mortar apart, creating visible cracks. This is especially noticeable with twisted or sheet steel ties in rigid mortar beds.
In more flexible mortar, rust may not produce obvious cracks, but bulges can appear and the wall may subtly move or “flap” without visible warning.
Wall Ties Incorrectly Installed
Another common cause of wall tie failure is poor installation during construction. Ties may be incorrectly positioned in the mortar, too short to reach each wall layer, spaced too far apart, or sometimes omitted entirely.
Even a few mistakes can reduce wall stability and increase the risk of corrosion or structural issues over time.
Types of Wall Tie
Wall ties have been made from many materials over the years. The age and location of a property usually determine the type used. Common wall tie materials include:
- Metal – Modern ties are usually stainless steel, highly resistant to corrosion. Older ties may be mild steel, wrought iron, cast iron or copper. Wrought and cast iron ties are strong but often need replacement if corroded. Copper is rare, long-lasting and durable.
- Brick or Terracotta – Rare and region-specific, these ties can create cold bridges, allowing moisture and cold to pass through walls.
- Stone or Slate – Uncommon, resistant to corrosion but prone to cracking under movement. Can also transfer moisture and cold to inner walls.
From the 1930s onwards, mild steel was widely used, either uncoated or bitumen-coated. Later, zinc or galvanised coatings improved rust resistance. Today, stainless steel is preferred for its durability and long life.
Wall tie designs also vary, with two common types:
- Strip Ties – Also called vertical twist or fishtail; the most common type.
- Wire Ties – Also called double triangle or butterfly ties.
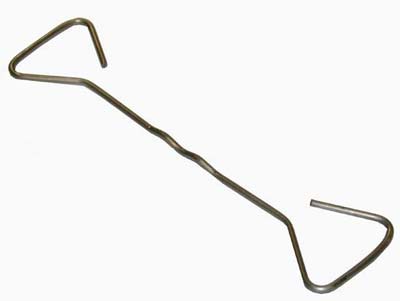
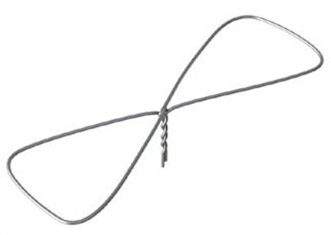
The images above represent the more modern wall tie design but depending on the age of your property it may have more traditional type wall ties such as the below:
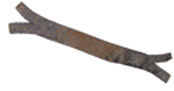
Traditional butterfly wall tie
Types of Retrofit and Remedial Wall Ties
Modern retrofit and remedial wall ties fall into three main categories, each suited to different wall conditions:
- Resin or Grouted – Inserted into a pre-drilled hole filled with resin or grout. Once set, the tie bonds to the wall, making it ideal for bricks or blocks in poor condition.
- Mechanical – Installed into a pre-drilled hole, these ties expand via a sleeve when tightened. Best for walls in good to excellent condition, they usually require a drill and supplied setting tool.
- Helical Screw – Shaped like a long corkscrew with wide threads, these ties are drilled into a pilot hole and screwed into place using a hammer drill. Suitable for walls of any brick or block condition.


Helical screw type wall ties
Life Expectancy of Wall Ties
Mild steel wall ties will eventually corrode over time. For properties built before 1940, estimating lifespan is difficult due to variable materials and construction methods.
For homes built between 1940 and the mid-1960s, typical life expectancies are:
- Wire Ties: 15–30 years
- Strip Ties: 30–60 years
For properties built from the mid-1960s to the early 1980s, expected lifespans are slightly shorter:
- Wire Ties: 13–26 years
- Strip Ties: 23–46 years
What Type of Wall Ties Do I Have?
Identifying wall ties can be tricky. The most reliable method is to locate the tie with a metal detector, then inspect it using a Borescope or similar camera. Professionals often provide this as part of a full wall tie inspection.
If you don’t have specialist equipment, locate the tie with a metal detector, remove a brick (see our guide on removing and replacing bricks), and check the cavity visually or with a camera.
For most retrofit wall ties, knowing the exact type isn’t essential, as they can usually be installed regardless of existing ties. The type of bricks and whether you have cavity insulation may influence the retrofit method, which we cover next.
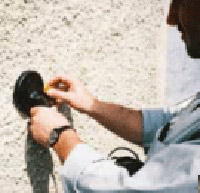
Special detector for detecting wall ties in a wall
What if I Have Cavity Insulation?
If your walls have cavity insulation, avoid retrofit ties that rely on chemical-setting resins, as these can damage or compromise the insulation.
Most remedial ties require drilling a small hole to install. Choose ties that need the smallest possible hole to maintain your insulation’s thermal efficiency.
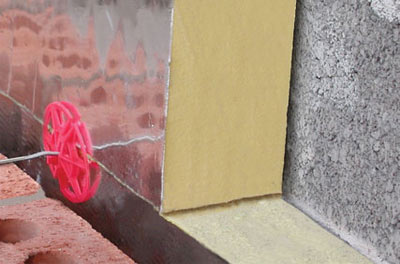
Board type cavity insulation – uses insulation retaining clips fitted to wall tie to hold in place

Example of pumped cavity fill polystyrene beads
What Type of Bricks Do I Have?
Knowing whether your bricks are solid or perforated is key, as it determines which retrofit wall ties you can use.
You can often check from your loft by looking at the tops of the walls. If this isn’t possible, you’ll need to drill a small test hole in each wall—usually one or two holes per wall.
If the drill cuts consistently, your bricks are solid. If the drill bit goes slack and then cuts again, the bricks are perforated.
Always refill any drilled holes with a waterproof filler or mortar to prevent water from entering the cavity.
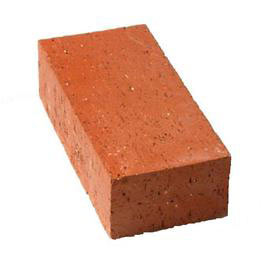
Solid red clay brick
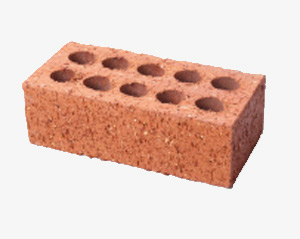
Perforated red clay brick
Choosing the Right Wall Tie
After identifying your brick type, select the appropriate wall tie from the options below:
- Solid Bricks or Blocks – Use Resin Grouted ties, Mechanical ties or Helical screw ties.
- Perforated Bricks or Blocks – Use Resin Grouted ties in a sleeve or Helical screw ties.
- Fire-Regulated Properties – For properties like guest houses or hotels, choose Helical screw ties, which offer at least 30 minutes of fire resistance (check manufacturer specs).
- Cavity Wall Insulation – Avoid chemically reactive resin ties. Use Helical screw or Mechanical ties only.
Correct Wall Tie Spacing
Proper wall tie spacing is essential to securely connect the outer cavity wall to the structural inner wall. Incorrect spacing can lead to wall instability or collapse.
For standard 90mm thick bricks or blocks:
- Horizontal spacing: max 900mm apart
- Vertical spacing: max 450mm apart
- Near openings (windows, doors, gables): max 225mm horizontally, 300mm vertically
For other constructions:
- Bricks/blocks less than 90mm thick: 5 ties per square meter
- Timber-framed with brick cladding: 4.4 ties per square meter
Think of ties in a diamond pattern for easy visualisation. When installing retrofit ties, stagger them around existing ties following the above spacing rules.
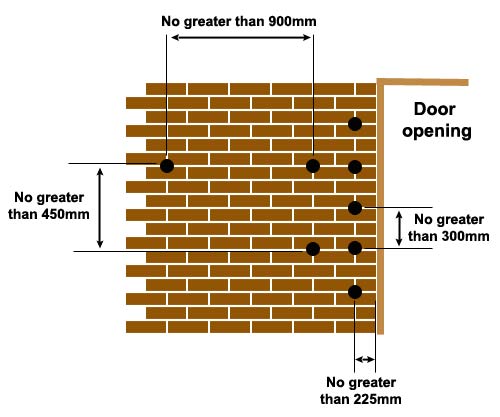
Diagram showing the correct spacing of wall ties when placed in a wall and also around window reveals and door frames
How Many Wall Ties Do I Need?
The number of wall ties depends on your property’s size and the number of openings like windows and doors. A simple way to estimate is:
- Measure each wall in square meters (length × height)
- Add up all walls to get the total wall area
- Multiply total area by the number of ties per square meter for your construction type
Example for a solid brick or block property:
- Total wall area = 110m²
- Ties required = 110 × 2.5 ties/m² = 275 ties
Include openings and gable ends by adding ~7.5% plus a small allowance for wastage. Final total ≈ 296 ties.
What is the Correct Length of Wall Tie?
The correct wall tie length depends on the width of your cavity. You can measure this using several methods:
- From the Loft: If accessible, measure the cavity width from the loft edges looking down.
- Remove a Brick: Take out an outer brick to measure the cavity directly. See our project on removing and replacing bricks above for guidance.
- Drilling: Use a long masonry bit (≥250mm) to drill through the outer wall until it touches the inner wall. Mark the drill bit at the outer wall surface, withdraw, and measure from tip to mark. Subtract the brick or block thickness to get the cavity width.
Once measured, select ties that embed securely into each leaf wall. Aim for 65–75mm of the tie in each wall leaf to allow for centering and tolerances, ensuring a strong and safe fix.
| Width of Cavity | Recommended Length of Wall Tie |
| 50 – 75mm | 200mm |
| 76 – 100m | 225mm |
| 101 – 125mm | 250mm |
| 126 – 150mm | 275mm |
| 151 – 175mm | 300mm |
| 176 – 200mm | 325mm |
| 201 – 225mm | 350mm |
| 226 – 250mm | 375mm |
| 251 – 275mm | 400mm |
| 276 – 300mm | 425mm |
How to Replace and Install Cavity Wall Ties
Before starting, it’s important to note: if your property shows cracks from corroded wall ties, this may be beyond a DIY repair. You should consult a qualified structural engineer to assess the damage and recommend next steps.
In many cases, severely corroded wall ties will need professional removal. This is a skilled task, and attempting it without experience can cause further structural damage.
Step 1 – Assess the Situation First
Check for visible signs of corrosion or wall damage, such as cracks, bulging bricks or gaps around windows and doors.
If damage is severe, consult a qualified structural engineer before attempting DIY repairs.
Step 2 – Identify Your Wall Type
Determine whether your walls are solid or perforated bricks/blocks.
Use a metal detector to locate existing wall ties.
Optional: Drill a small inspection hole to confirm the type of tie inside the cavity.
Step 3 – Check for Cavity Insulation
If insulation is present, avoid resin-based ties that require chemical curing, which could damage insulation.
Opt for mechanical or helical screw ties instead.
Step 4 – Measure the Cavity Width
From the loft or by removing a brick, measure the distance between the inner and outer walls.
Ensure the new tie will embed at least 65–75mm into each wall leaf for a secure hold.
Step 5 – Choose the Correct Wall Tie Type
Solid bricks/blocks: Resin-grouted, mechanical, or helical screw ties.
Perforated bricks/blocks: Resin-grouted in a sleeve or helical screw ties.
Fire-sensitive properties: Helical screw ties with fire resistance.
Cavity insulation: Only mechanical or helical screw ties.
Step 6 – Determine Wall Tie Spacing
Standard: 2.5 ties per m² (approx. 900mm horizontally, 450mm vertically).
Near windows/doors: Max 225mm horizontally, 300mm vertically.
Adjust for brick thickness (<90mm) or timber-framed walls as needed.
Step 7 – Calculate How Many Ties You Need
Measure total wall area in m².
Multiply by the required number of ties per m².
Add 7.5% extra for openings and wastage.
Step 8 – Drill Holes for New Ties
Drill through the outer wall into the inner wall to the required depth.
Hole size: 6mm for mechanical/helical ties, 12mm for resin ties.
Slightly angle the tie downwards toward the outer wall to prevent water dripping inside.
Step 9 – Install the Wall Ties
Insert the tie as per manufacturer’s instructions.
For resin ties, inject resin into the cavity around the tie end.
For mechanical or helical ties, expand or screw the tie into place securely.
Step 10 – Seal the Holes
Fill all drill holes in the outer wall with waterproof mortar or filler to prevent water ingress.
Step 11 – Check Alignment and Stability
Ensure ties are evenly spaced and aligned in a diamond pattern.
Verify that walls are stabilised after tie installation.
Step 12 – Repair Any Cosmetic Damage
Repoint any cracked mortar around windows, doors or affected areas.
This helps maintain wall integrity and prevents future water damage.
Step 13 – Final Safety Note
Replacing wall ties involves structural work.
If unsure at any step, hire a qualified professional to prevent damage or safety risks.
Other Considerations
Adding remedial wall ties fixes immediate structural issues, but it won’t repair damage caused by corroded ties, such as cracked or expanded mortar. If old ties remain, the cracks can worsen over time.
Consult a qualified expert for advice on removing damaged ties.
Also consider repointing any cracks during repairs. This improves structural stability and prevents water from entering the cavity.
Wall ties are essential to ensure the stability of the walls of your home and without them your home could become unstable and unsafe, so if you have identified that you have failed walls ties, ensure you get them replaced as soon as possible.