
Damp patches aren’t just unsightly, they can lead to mould growth which can trigger some serious health issues like asthma or allergies. That means damp walls don’t just damage your home, they can affect your wellbeing too.
Worse still, damp walls lose heat up to three times faster than dry ones, making your rooms feel colder and driving up heating costs.
In this guide, we’ll explain the most common causes of damp and condensation on internal walls and how to fix them for good.
How to Check if Your Wall is Damp
Before you treat a damp wall, you need to confirm just how damp it actually is. There are two simple ways to do this:
- Touch Test: Use the back of your hand to feel the damp area, then compare it to a dry section nearby. This gives you a quick idea of how wet the wall is, though it’s not very precise.
- Damp Meter: A more accurate method. Push the two metal prongs into the wall and check the display for a moisture percentage reading. These meters are affordable and widely available.
For condensation issues, try a Relative Humidity Hygrometer. Leave it in the room to measure the moisture in the air. Use it to track changes as you apply fixes like ventilation or a dehumidifier.
Important: It’s essential you don’t start repairs until you’ve found the root cause. Treating damp without knowing the source often leads to wasted time, money, and effort.
Quick Guide to Identifying and Fixing Damp Patches on Walls
Damp patches on walls are a common problem in UK homes, especially in older or poorly ventilated properties. Left untreated, damp can lead to mould growth, musty smells, and structural damage. The good news is, with a little know-how, most damp problems can be identified and fixed without major disruption.
Identifying and Fixing Damp Issues
Step 1: Spot the Signs of Damp
Common symptoms include dark or discoloured patches on walls, peeling paint or wallpaper, a musty odour, and mould spots. Pay close attention to areas near windows, external walls, corners, and chimney breasts, as these are typical trouble zones. Damp can appear suddenly or build up over time — early detection is key.
Step 2: Work Out the Type of Damp
There are three main types of damp, and each needs a different fix:
- Condensation: Often found in kitchens, bathrooms, and bedrooms. It’s caused by poor ventilation and high humidity. Look for water droplets on windows or black mould on walls.
- Rising Damp: Usually affects ground floor walls. It occurs when moisture travels up from the ground due to a failed or missing damp-proof course (DPC). Signs include tide marks and white, powdery salt stains.
- Penetrating Damp: Caused by water entering through walls, roofs, or windows. Often shows as isolated wet patches, especially after heavy rain. Common culprits include cracked render, faulty pointing, or leaking gutters.
Step 3: Fix the Cause Before Repairing
Once you’ve identified the type of damp, fix the source first or the problem will return. For condensation, improve airflow by using extractor fans, opening windows, or installing air bricks or trickle vents.
For rising damp, check your DPC, if it’s damaged or absent, professional treatment or a new DPC injection may be needed.
For penetrating damp, inspect and repair any cracks in the walls, replace damaged pointing, unblock gutters, or fix roof tiles.
Step 4: Repair the Damage
After resolving the root issue, let the wall dry out completely. This may take a few weeks. Once dry:
- Strip away damaged plaster, wallpaper, or paint
- Treat the area with a mould remover or salt neutraliser, depending on the type of damp
- Apply a breathable plaster or membrane system to allow the wall to ‘breathe’
- Repaint with anti-mould or breathable paint suitable for damp-prone areas
Helpful Tip: Use a moisture meter to monitor damp levels in your walls before and after repairs. This helps ensure the issue is fully resolved before decorating.
By following these steps, you can diagnose, fix and prevent damp patches on walls with confidence. For persistent problems or large affected areas, it’s always best to consult a qualified damp specialist.
Now that we have look at the quick process of what’s involved in identifying and fixing various damp issues that can affect interior surfaces in a given home, it’s time to go through this in a little more detail.
In the sections below we have outlined each of the most common internal damp issues and they’re likely cause, plus how to then fix the issue permanently.
How To Find the Cause of Your Internal Damp and How To Fix it
As we have mentioned above, it’s essential that you don’t implement any fies until you have actually cured the root cause of your damp problems.
Below you will find a selection of the main root causes of penetrating damp and internal damp issues and how they can be fixed:
How to Fix Cracks in Walls, Mortar, and Render
Cracks in external walls, mortar joints, or render can let in moisture and rainwater, leading to internal damp, rot, and costly structural damage. Major health issues can also arise from damp and moisture-related problems.
Even if they’re not the main cause of damp, they absolutely must be fixed quickly.
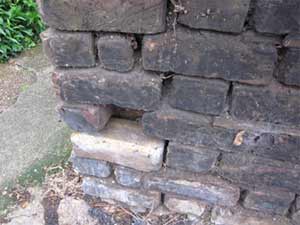
Missing mortar joints let moisture enter and cause damp inside your walls
Water seeping into cracked masonry can rot roof timbers, floor joists, and internal plaster. Regularly inspect your exterior walls. To do so you can use binoculars or even a drone to safely check high areas like chimney stacks and pots.
How to Repair Cracked Mortar
- Use a plugging chisel or bolster to rake out damaged mortar to 10–15mm depth.
- Mix fresh mortar (see our mortar guide) and repoint the joints.
- Replace any crumbling or cracked chimney mortar using the same method.
How to Fix Cracked Render
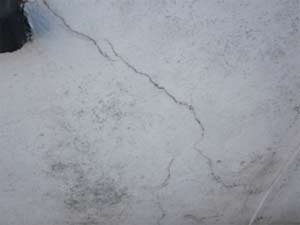
Cracked render allows rain in, which causes internal damp and damage
Render cracks let water sit behind the surface, weakening the wall. Large or deep cracks should be sealed immediately using a silicone-based exterior sealant as a temporary fix. When you’re ready for a permanent repair:
- Remove the temporary sealant and fill the crack with render that matches the original grade and texture.
- Use pre-mixed render or patching compounds like K-Rend or Euromix (though we haven’t tested these ourselves).
- Once dry, apply a waterproof sealant or render-safe exterior paint to protect the repair.
If your render is coloured, matching the repair can be tough. Consider repainting the full wall using exterior masonry or cement-based paint for a uniform finish. Our mortar colour matching guide can help.
How to Check and Fix Roof Flashing and Broken Tiles
Damaged flashing or broken roof tiles are a common cause of internal damp. Flashing (usually lead) seals the joins between your roof, walls, and chimney. If it cracks or lifts, water can easily get inside and cause havoc.
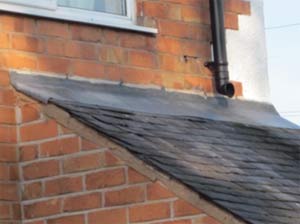
Inspect lead flashing for splits or gaps that let in water
How to Inspect Flashing
Use binoculars or better still, a drone if you have access to one to scan your roof or chimney flashing from the ground. If possible. Look for cracks, lifted edges, broken, cracked or missing mortar or sealer where the flashing runs into the wall or separation from the surface.
How to Repair Flashing
- Best fix: Replace cracked or damaged flashing with new lead flashing. It’s the most effective long-term solution.
- Temporary fix: Use flashing tape like Sylglas to seal over cracks. It’s waterproof and self-adhesive but only a short-term solution.
More on this in our lead flashing repair guide.
How to Replace Broken Roof Tiles
Cracked tiles allow water into your roof and walls. Prompt replacement prevents a whole host of rot, leaks and internal damp damage.
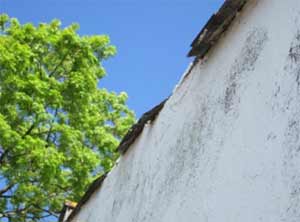
Replace broken tiles quickly to stop leaks and damp patches
- Remove nails with a slate ripper or cut them with a hacksaw.
- Gently slide out the broken tile and replace with a matching new one.
- If nailed access isn’t possible (as with old slate roofs), secure the tile with a lead or galvanised metal strip.
- Nail the strip to the batten, push the tile into place, then fold the strip over the tile to lock it down.
Ensure the tile sits flat and aligned with surrounding tiles. Learn more in our roof tiling guide.
How to Check and Fix Guttering to Prevent Damp
Your guttering directs rainwater away from your home. If it’s damaged or blocked, water can overflow and soak your walls. Over time, this leads to damp patches inside caused by the moisture and water seeping through the brickwork.
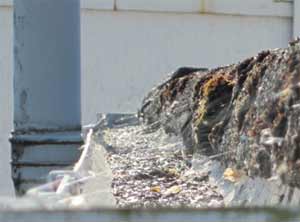
Blocked gutters overflow and cause water damage to your walls and roof
How to Inspect Your Gutters
Use binoculars or if you have access to one, a drone to check your gutters from the ground. Look for:
- Cracks or splits in the guttering
- Leaking joints or sagging sections
- Blocked downpipes or broken brackets
How to Fix Common Gutter Problems
Most issues are simple to repair using basic tools and sealant. Replace any clearly damaged sections and clear out any blockages. Always work safely by using a proper ladders or call a professional if you’re unsure.
For a step-by-step guide, visit our guttering installation project.
How Wall Fixings Can Cause Damp and How to Stop It
Fixings like screws, wall plugs, sleeves and bolts often go deep into your walls and in some cases, right into the cavity between your inner and outer walls if they’re long enough.
If moisture gets into this cavity (through cracked mortar, roof leaks or another route), it can travel along the fixings and cause damp patches on your internal walls.
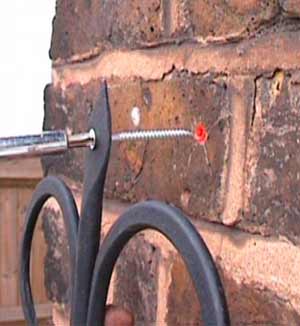
Drill the right depth to avoid fixings reaching damp cavity areas
How to Prevent Damp from Wall Fixings
- Remove fixings that go into cavity spaces.
- Seal holes using a flexible waterproof filler like silicone or mortar mixed with waterproofer.
- Can’t remove it? Then seal tightly around the fixing using a flexible filler like silicone, which won’t crack with movement.
For more help, see our guide to fixing to masonry and learn how to apply silicone sealant.
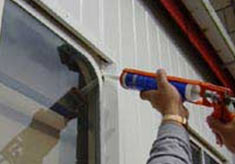
You can use a silicone gun to waterproof around window and door frames
Rising Damp Issues – Causes and Cures?
Rising damp is moisture that travels up from the ground into your walls through tiny pores in bricks or stone, a process known as capillary action.
This can lead to damp patches on internal walls, usually lower level below 1.2m up the wall, especially if your home’s damp proof course (DPC) is missing, damaged, or bypassed.
A DPC is a waterproof barrier, often a plastic strip, slate, or engineering bricks, installed about 6 inches above ground level to block moisture rising through the walls.
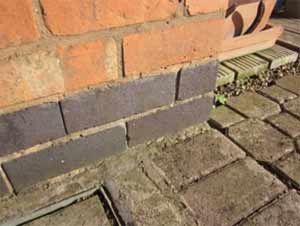
Engineering bricks help form a durable, moisture-resistant DPC
Does Rising Damp Really Exist?
Some experts claim rising damp is rare or even a myth, arguing that dense bricks should block moisture naturally. Older buildings without DPCs often used breathable materials like lime mortar and the like, which allowed moisture to evaporate naturally before causing any damage, thus making it appear if the issue doesn’t exist.
However, in modern homes built with much less breathable materials, like cement, gypsum, and concrete and plastic, trapped moisture has nowhere to go, making rising damp a real concern when a DPC fails.
How to Fix Rising Damp with Chemical Injection
If your DPC is broken or has been bridged (e.g. by an extension or soil level externally), you can fix the problem by injecting a chemical damp proof course.
This DIY-friendly method involves drilling small holes into your wall, injecting a waterproof cream, and sealing the holes after it cures.
Step-by-Step: DIY Chemical DPC Injection
- Drill 12mm diameter holes at 125mm intervals, approx. 150–200mm from ground level (check your product’s guidelines).
- Inject the chemical cream using a skeleton gun or applicator.
- Repeat on internal walls.
- Let the walls dry for at least 2 weeks (both internal and external) before sealing the holes.
- Use waterproof mortar to fill the holes fully on you have confirmed all is dry.
The chemical seeps into the bricks and cures to form a waterproof barrier, similar to silicone. This blocks rising moisture from continuing up the wall and solves any rising damp issues.
Full guide to chemical damp proof injection here.
Recommended DPC Products
Trusted chemical DPC brands include Permagard, Twistfix, and other professional-grade options.
Tubes are typically used with caulking guns, though high-volume pump systems are also available for larger jobs.
Damp Walls Caused by Condensation and Chimney Salts
Condensation is one of the most common causes of damp patches on interior walls. It happens when warm, moist air inside a room touches a cold wall, cools down quickly, and turns into water. This water then collects on the surface, leading to visible damp.
What Causes Cold Walls?
To stop condensation, you need to fix the cold spots on the walls it forms on. These are often caused by:
- Cracks in external walls: Gaps in mortar let cold air into the cavity, chilling internal walls. Seal any cracks to restore insulation.
- Poorly ventilated chimneys: Blocked or capped chimney stacks trap cold air. Without ventilation, the wall stays cooler than the rest of the room, encouraging condensation.
Adding ventilation helps fix this. Install air bricks about 300mm above floor level and near the top of the external chimney wall to get air moving and stop cold air building up.
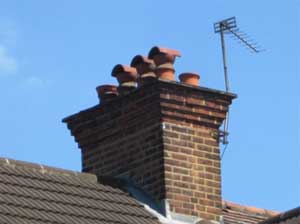
Use chimney cowls and air bricks to keep air flowing and prevent condensation
What Are Chimney Salts?
When you burn wood or coal, salts and tars can build up inside your chimney. Over time, they can move through the wall and show up on the inside surface.
- White, powdery stains: These are salts. They draw moisture from the air and create damp patches.
- Yellow or brown marks: These come from tars and soot deposits.
How to Treat Salt-Related Damp
Salt itself doesn’t make the wall damp, but it attracts moisture from the air, making the problem worse. Here’s how to fix it:
- Strip all damaged plaster down to the bare wall.
- Apply a salt neutraliser to stop salts from coming through again.
- Let the wall dry completely.
- For extra protection, apply a damp-proof membrane before replastering.
- Replaster and redecorate.
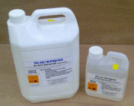
Salt neutraliser blocks salts and helps stop damp from returning
Salt neutralisers are chemical solutions that remove existing salts and stop new ones forming. You can find them online or at most DIY stores.
In severe cases, consider adding a membrane before replastering. These rolls have a dimpled surface that lets air flow behind the wall, keeping it dry. Read our full guide on damp-proof membranes here.
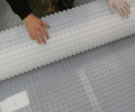
Fit a mesh membrane before replastering to prevent salts returning and causing damp on your internal walls
Finding the cause of damp patches can be tricky, as many issues can lead to them. But once you’ve identified and fixed the problem, you can be almost 100% certain the damp won’t return.

 DIY Doctor Ltd,
  0845 6342 179


