Damp is a very common issue in UK homes, especially when it affects interior walls. If left untreated, it can lead to condensation and harmful black mould, which can pose a serious health risk.
In some cases, preventing moisture from reaching an internal wall just isn’t possible, especially if the wall is underground or poorly ventilated. That’s where tanking comes in. It’s a tried, tested and reliable way to stop damp from spreading through your walls. Read on to learn exactly how tanking works and how to apply it effectively.
What is Tanking?
Tanking is a waterproofing method that creates a barrier on the inside surface of a wall to block moisture coming from outside. It stops water from reaching your internal walls and prevents issues like condensation, mould, and damp.
When it’s too expensive or difficult to stop water getting into a wall from the outside, tanking offers a reliable, cost-effective solution by sealing the wall from the inside.
This technique is commonly used in basements, cellars, wet rooms, and shower areas, anywhere moisture needs to be blocked or contained.
In the past, tanking meant fixing plasterboard over wooden battens to hide the damp, but wood eventually rots. Modern tanking uses two main systems: a waterproof slurry (liquid coating) or a plastic sheet membrane. Both form a strong, lasting moisture barrier, that protects internal surfaces.

Mixing and applying cement-based tanking slurry
Why Do Walls Need Tanking?
Damp walls aren’t just unsightly, they’re colder, more prone to condensation and can quickly lead to black mould, which poses a very serious health risks.
As moisture moves through a wall, it brings salts and minerals with it. These salts can break through paint and plaster, draw in more moisture from the air and eventually cause surfaces to bubble, stain or crumble completely.
Tanking adds a waterproof barrier inside the wall to block this moisture and stop further damage. It protects your interior finishes and helps prevent condensation, mould and salt stains.
Damp can be caused by many issues including cracked bricks or render, broken roof tiles, faulty gutters or poor flashing. It typically appears in two forms: penetrating damp (from water entering the wall) and rising damp (from moisture drawn up from the ground).
Walls that sit below ground level fall below the damp proof course (DPC) or act as a retaining wall will naturally absorb moisture from the soil that touches it. In these cases, tanking is essential to keep the inside dry and protected.
Salts on wall due to damp
What Are the Different Methods of Tanking?
There are three main ways to tank a wall and stop damp coming through:
- Bitumen or Sheet Tanking – The traditional method, using a waterproof coating or sheet fixed to the wall. Effective but can be messy and harder to apply.
- Slurry Tanking – A modern cement-based mix applied like paint. It bonds directly to the wall and creates a waterproof layer. Great for basements and wet rooms.
- Membrane Tanking – A plastic sheet fixed to the wall. It comes in two types: one with an air gap to let the wall breathe, and one without for a tighter seal.
Each method suits different situations. The right choice depends on how severe the damp is, what the wall is made of, and how easy it is to access the area.
Liquid Bitumen Coating
Liquid bitumen was once a popular way to stop damp on walls, wood and other surfaces. It’s applied like paint or laid in sheet form over the surface you want to protect.
While it can work on clean, dry surfaces like brick, block or render, it often struggles on older, damp, or dusty walls. It doesn’t stick well, and it can peel away if the wall is salty or doesn’t dry properly.
Because of this, bitumen coating is best for small, low-risk jobs—like sealing external areas below the damp proof course. For most internal damp issues, modern tanking slurries or membranes offer better results and long-term protection.
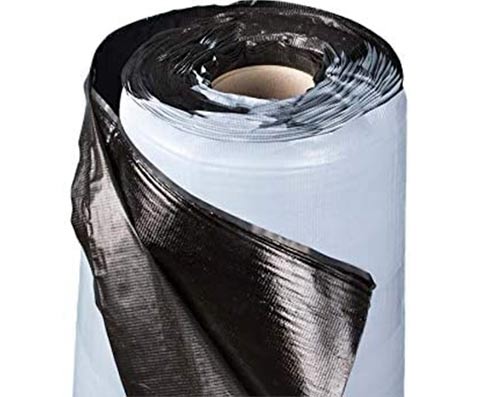
Bitumen tanking sheet
Cement-Based Slurry
Cement slurry is one of the most effective ways to stop water and moisture from reaching internal surfaces. Once applied and cured, it forms a strong, lasting waterproof layer that locks damp out.
For best results, the wall surface must be clean and free from dust, debris or loose material.
It is generally applied with a stiff masonry brush and in most cases it goes on easily and bonds well with brick, block, stone, concrete or even solid floors, thanks to its cement base.
While it’s highly water-resistant, it isn’t a full vapour barrier. It works best when finished with breathable materials and is ideal for basements, below-ground walls or external foundation coatings.
Mixing up tanking slurry to apply to walls surface
Air Gap Membranes
Air gap membranes are laid over damp walls to keep moisture away from internal surfaces. They’re then covered with plasterboard or other finishes.
These membranes usually have a dimpled plastic backing. The dimples create an air gap that channels and allow moisture to drain down behind it safely, often into a sump pump or other drainage system.
They’re fixed to brick, stone, block, or render walls using plastic plugs, creating a ventilated cavity between the membrane and the wall.
Some membranes have a mesh face and these can be plastering directly onto, while others are smooth for fixing battens. They’re ideal for cold, solid walls, including single-skin or 9-inch thick masonry walls.
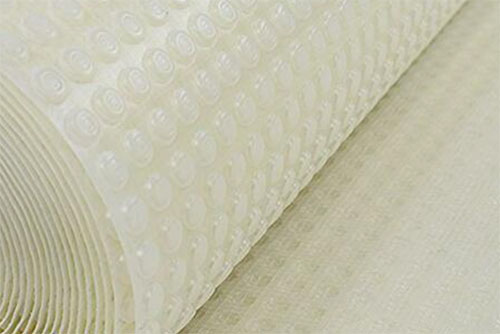
Damp proof membrane for fixing to walls
When to Use Membrane or Slurry Tanking
Choosing between slurry and membrane tanking depends on the cause and flow of moisture you’re dealing with.
Slurry tanking creates a solid waterproof barrier and is ideal for both above and below ground walls, especially when moisture is minimal or occasional. It’s best when you need to fully block water from reaching internal surfaces.
Membrane tanking is better where moisture is constant or flowing. Instead of stopping water completely, membranes allow it to move behind the wall and drain safely away. This makes them ideal for basements, cellars, wet rooms, and other high-moisture areas.
In short: use slurry to block water entirely, and membranes to manage ongoing damp by guiding it to a drainage system.
How Long Does Tanking Last?
Both slurry and membrane tanking systems are built to last at least 10 years when installed properly, following the manufacturer’s guidelines.
The key to long-lasting tanking success is by-the-book installation. For slurry, every inch of the surface must be fully covered as any gap, no matter how slight can allow water to seep through, causing failure.
Likewise, membrane tanking must have no gaps at all, otherwise again, moisture will escape and compromise the system.
How to Tank Walls
Now that you have a full understanding of tanking types and their uses, let’s explore the step-by-step process to properly install tanking systems on your walls.
How to Tank Walls with Cement-Based Slurry
Tanking walls with a cementitious slurry is a simple, cost-effective way to stop damp. It creates a waterproof barrier that’s easy to apply and ideal for DIY or professional use.
In this guide, we’re fixing a wall that was damp proofed badly. The original job missed a key step, using a salt inhibitor. Without it, salts in the wall drew in moisture from the air, making the surface damp again over time.
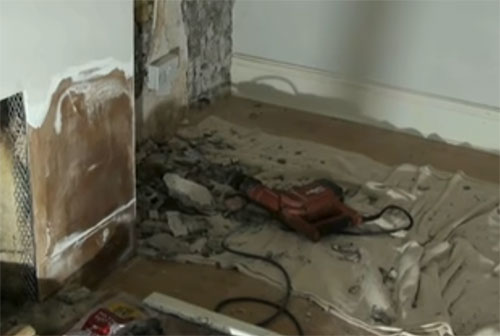
Step 1 – Remove Damp Plaster
Start by removing all damp or damaged plaster from the wall. A small electric breaker works best, if you don’t own one, you can easily rent one locally.
Clear away any loose debris, dust, flaking paint, old render, and anything else stuck to the surface, like nails or screws. The wall must be clean and solid before you begin damp proofing.
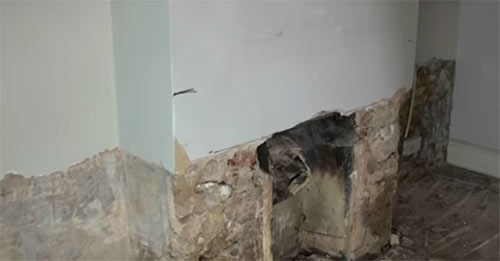
Remove all the old damp plaster using a small breaker
Step 2 – Check for Active Water
After removing the plaster, inspect the wall for signs of active water, this means moisture or water regularly seeping through.
If you spot any, you’ll need to drill relief holes and install proper drainage. This can be complex, so getting expert advice is often the safest option.
Poor drainage can trap water behind the tanking layer, putting pressure on it and causing long-term damage or leaks elsewhere in your home.
Step 3 – Fill All Holes and Cracks
After removing old plaster, you’ll likely find holes or damaged areas in the brick, stone, or mortar. These must be filled to create a flat, even surface for tanking.
Use a mortar mix of 4 parts sharp sand, 0.5 parts soft sand, and 1 part cement. Add a waterproofing agent or plasticiser to help prevent future moisture issues. Trowel the mix into all gaps and smooth it out to level the surface.
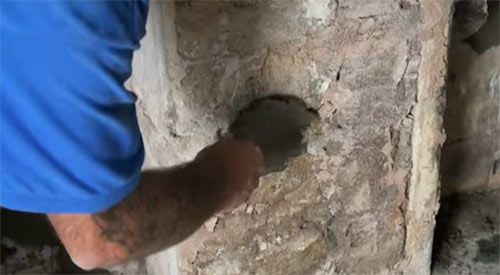
Fill all holes and depressions in walls surface
Step 4 – Apply Salt Neutraliser
Next, apply a salt neutraliser to the entire wall. This stops salt from damaging your new tanking layer.
Salt neutraliser is a clear liquid that soaks into masonry, plaster or render. It kills existing salts and forms a barrier to prevent future salt buildup.
Start by wetting the wall with clean water. Then, use a brush or roller to apply the first coat evenly. Once dry, dampen the surface again and apply a second coat. Let it fully cure before moving on.
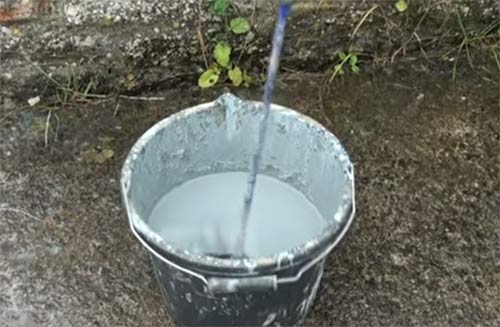
Step 5 – Mix the Tanking Slurry
To make tanking slurry, combine cement with SBR (a strong bonding agent similar to builder’s PVA). Fill about a quarter of a 14 litre bucket with SBR, then gradually add cement while mixing.
Keep adding cement until you get a smooth, creamy consistency. Mix only small amounts at a time, as the cement can settle and will need re-mixing often.
Once mixed, use it immediately and wash your tools right away, SBR dries quickly and can be hard to remove once set.

Mix up tanking slurry using SBR and cement
Step 6 – Apply the Tanking Slurry
Before applying the slurry, dampen the wall with clean water to help it bond properly.
Use a masonry brush to coat the wall with slurry in even, horizontal strokes. Apply generously for full coverage and a uniform finish.
Keep stirring the mix as you work, cement can settle at the bottom.
Let the first coat dry for around 2 hours, then apply a second coat for best results.
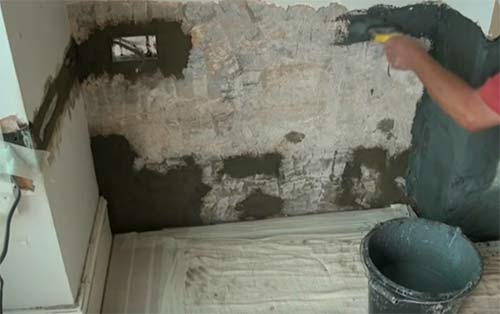
Apply first coat of tanking slurry
Step 7 – Apply the Second Coat of Slurry
After 2 hours, or once the first coat is touch dry, apply the second coat of slurry.
This time, brush it on vertically at a 90° angle to the first coat. This helps seal any tiny gaps the first layer may have missed.
Use a masonry brush and apply a thick, even layer across the entire surface.
Step 8 – Replaster or Render the Wall
Once the second slurry coat is completely dry, you can finish the wall. Use renovating plaster, breathable microporous paint, or a sand and cement render, our preferred option for long-term durability.
For rendering, mix 5 parts sharp sand, 1 part soft sand, and 1 part cement. Apply with a trowel, keeping the surface about 3mm below the existing wall level to allow for a skim coat later.
This base render acts like a first coat of plaster. For a step-by-step guide, see our base coat plastering tutorial.
Once cured, apply a skim coat for a smooth finish. Learn more in our skim plastering guide.

Wall surface rendered ready for skim plaster
How to Tank Walls Using a Membrane
After looking at the cement slurry method above, here follows a brief explanation on how to install a damp proof membrane but for a full run down on the process see our lining damp walls project here.
Step 1 – Clean the Wall Surface
Carefully remove any remaining gypsum plaster using a hammer and bolster. Leave cement or sand render in place if it’s sound.
Take out any wall plugs, timber pieces, screws or anything else that shouldn’t be on the surface.
Step 2 – Check for Water Penetration
Inspect the wall for signs of water seepage or past flood damage. Even small, continuous moisture can cause serious long-term issues.
If water is present, you’ll need to install proper drainage, like a sump and pump system or a basic wall drain, to divert it safely away.
Step 3 – Fix the Damp-Proof Membrane
Next, attach your chosen damp-proof membrane to the wall. The method depends on the membrane type, so follow the manufacturer’s instructions closely.
There are two main types of membrane:
- Plain membrane: Used behind battens or studwork for fixing plasterboard.
- Mesh membrane: Designed for direct plastering or dot-and-dab plasterboard.
Use the fixings provided in your kit, these are made specifically for the membrane you’re using.

Fixing damp-proof membrane to wall surface
If the floor is also damp, it may need a membrane too. Once installed, you can finish with chipboard flooring or a concrete screed.
If water is rising from the floor, the wall and floor membranes must be sealed together. This creates a watertight system.
Important: If standing water is present, a sump and pump or drainage channel is essential. If the is the case you will need to consult a damp-proofing professional for a custom solution.
Step 4 – Finish the Surface
Once the membrane is fully installed and secure, it’s time to finish the wall surface.
You can either use timber battens or apply dot-and-dab plasterboard over the membrane, then decorate. Alternatively, if using a mesh membrane, you can plaster directly onto it.
The type of finish is your choice, but never drill or damage the membrane, doing so will compromise its waterproofing.
If you’re dealing with damp walls or floors, tanking is an effective way to prevent further moisture damage. Best of all, many tanking systems are DIY-friendly and simple to install with the right guidance.