Wiring a light switch and indeed a ceiling rose is a fairly straightforward job for a professional electrician as in order for the light to come on when the switch is flipped you have to know exactly which wire goes where.
When changing light switch face plates and ceiling roses for new it’s easy to forget which wire goes where if you don’t note it down so to help get your lights working correctly again you will find out below how to correctly wire a one and two way light swtch and ceiling rose.
Please remember when attempting any electrical installations at home that you are obliged to get the completed job tested by a fully qualified electrician and obtain a minor works certificate. Failure to do this may render your house insurance invalid and you may have difficulty selling your home.
Warning: Additionally, to complete electrical works you must comply with Electrical Regulations – Click here for more information.
Types of Light Switch
As I’m sure you already know from living in a house, if you haven’t then you may not, there are several different types of light switch that can be used depending on the situation at hand:
- 1 way switches (single or 1 gang)
- 2 way switches (single or 1 gang)
- Intermediate or crossover switch (single or 1 gang)
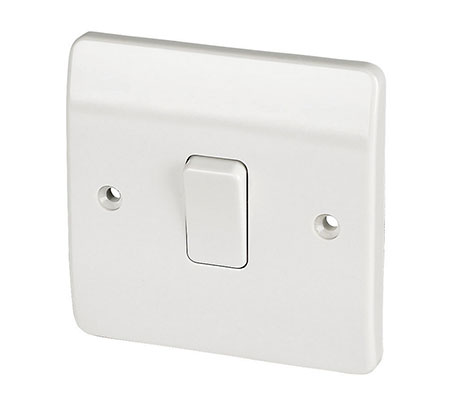
Single gang 1 way light switch
The 1 way switch is the most simple type of light switch. It enables a single light to be turned on and off.
The 2 way switch is a little more involved. It allows a single light to be independently switched on and off using 2 different switches. A good example of this is a stairs light that can be switched on and off at either the bottom or top of the stairs.
An intermediate switch, as you may have guessed, can essentially be used between a set of 2 way switches to achieve a 3 way switching setup.
If you have ever though; How can I tell what type of light switch I have, the way to tell is to flip it over and look at the back. If all it has are “com a L1” terminals then it is a 1 way switch, if it has “com, L1 and L2” terminals then it’s a 2 way switch, however you can use a 2 way switch as a 1 way switch if needed.
If, however your light switch has “2x L2 terminals and 2x L1 terminals” then this is an intermediate switch.
You may have also noticed in the above list that we have mentioned the term “1 gang”. This essentially refers to the number of switches on the face plate; 1 switch = 1 gang, 2 switches = 2 gang, 3 switches = 3 gang and so on.
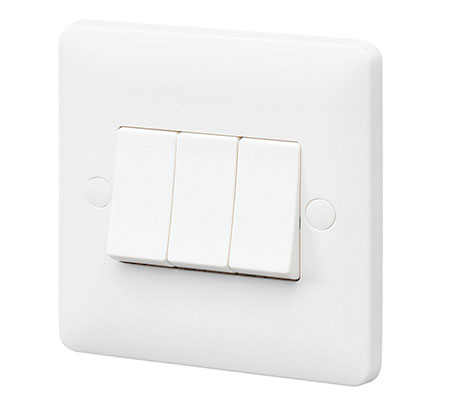
3 gang 1 way light switches
We have a full and detailed project that covers different types of switches here if you’d like some more information on the types of switches.
Different Types of Lighting Circuit Wiring
There are essentially 2 different types of lighting circuit wiring used in the UK; the traditional junction box method and the newer loop-in system.
Lighting circuits are the same as a radial socket circuit – A single cable runs from the consumer unit to the first light and then on to the second light and so on until it reaches the final light and stops.
This particular set up is the same for both the junction box and loop-in systems, however the difference comes from the way that the light switch and light are actually connected up.
With the junction box light circuit the cable from the consumer unit runs to a junction box and then 2 separate cables are run to the light fitting and switch. The main supply cable runs to the next light and the same setup occurs.
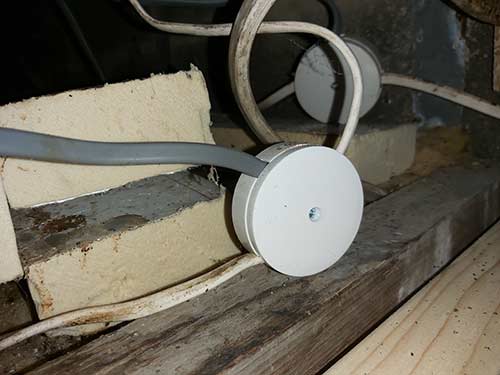
Junction box used in lighting circuit
With the more modern loop-in system the ceiling rose acts as the junction box and the light fitting is wired directly to it. A single cable is then run to the switch that controls the light.
As accessing junction boxes to wire in a new light or fix a fault can often involve pulling up floors or making holes in ceilings to locate the actual junction box, this can be a real hassle and often involve lots of expense.
The newer loop-in circuit avoids most of this hassle as a live feed can be taken directly form the ceiling rose and a cable run to the new light location.
In some situations the light switch itself may be used as the “junction box” and not the ceiling rose.

Loop-in lighting circuit using old colour wires
If you live in an older property it’s likely that there will be a mixture of both types of circuit, especially if electrical work has been carried out, however in most newer properties they will tend to just feature the loop in system.
What Type of Cable and Fuse for a Lighting Circuit?
The type of electrical cable that should be used for a lighting circuit is 1mm or 1.5mm2 twin and earth (or 2-core and earth as it’s also known) depending on how far the cable has to run.
When it comes to what MCB should be used in a consumer unit to power a lighting circuit a 6amp MCB should be used or if you have a traditional fuse board, 5amp fuse wire should be used.
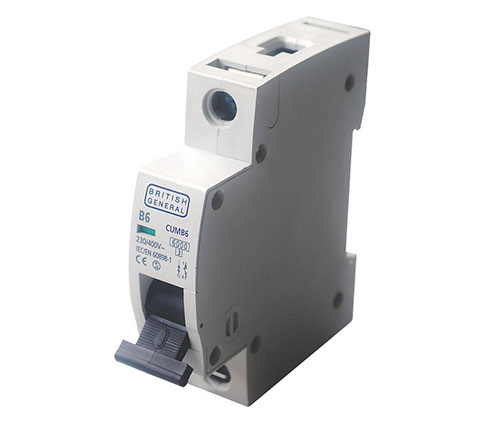
6amp MCB suitable for lighting circuits
As you may be aware, some years back electrical wiring colours changed to harmonise with the rest of Europe so the older black, red and green and yellow earth wires changed. See our project here on new wiring and cable colours for more information.
How to Wire a Light Switch – 1 Way Switch
As we have mentioned, in most cases the need to wire a light switch or ceiling rose normally comes from disconnecting either the switch faceplate or ceiling rose to renew them and then forgetting which wire goes where.
The most common mistake made when changing a ceiling light, is connecting black or blue to black or blue and red or brown to red or brown. This is not always the case: The cable that comes from the switch to the light has a black/blue and or a red/brown wire, both of these are live wires.
The black/blue wire should have a piece of red or brown sleeve or tape around it to indicate this. Before disconnecting an existing light make careful note of how the existing connections are made to avoid any issues.
However on some occasions you may wish to wire in a new light. New ceiling lights can be added by introducing a new supply cable into one of your existing ceiling lights, sharing a live, neutral and earth connection with those wires already in the ceiling rose.
The other end of the new supply cable is then connected into a new ceiling rose, live, neutral and earth.
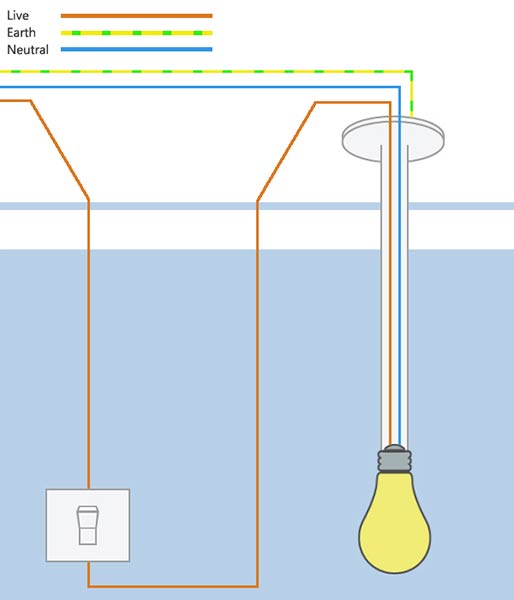
How a switch is wired in a one-way lighting circuit
As you can see in the above diagram, the switch simply interrupts the live feed to the light and enables you to turn the light on and off by disconnecting the live flow
In order to wire up a one-way light switch and ceiling rose work through the following steps:
- Important: Turn off the power to the circuit you are working on. If working on an existing light circuit, turn the MCB for that circuit off at your consumer unit or remove the fuse if you have an old fuse board. In most properties there will be an downstairs and upstairs circuit so make sure you have the right one
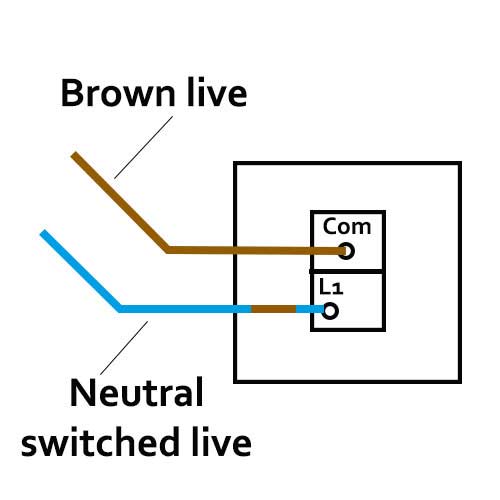
- In the switch, wire the live from the supply cable from the ceiling rose to the Com terminal
- For the switched live back to the ceiling rose we are going to use the neutral wire so connect this to the L1 terminal. So that anyone working on the circuit knows this is now a live, wrap some brown electrical tape around it to signify that the neutral is now an intermittent live
- At the ceiling rose, the live supply to the switch should be connected to the live terminal block containing the live from the consumer unit or previous light and the live for the next light
- The neutral wire that is now our switched live should be connected to the terminal block with the live supply to the light fixing
- All 3 earth wires for the previous and next lights and the switch should be connected to the earth terminal in the ceiling rose
- As mentioned, the 2 live wires from the cables that supply the previous and next lights should be wired to the live terminal containing the wire from the switch wire
- Finally the 2 neutral wires from the previous and next light supply cables should be wired to the neutral terminal containing the neutral wire for the light fitting
- If there is no terminal to connect the earth to within the switch, simply curl it up out of the way and wrap some insulation tape around it and leave it in the back of the patress box. By law an accessible earth should be left even if it isn’t used so don’t cut it off
- Refit the ceiling rose cover and screw the switch face plate back on to the patress box, turn the power on and test everything works
Wiring a one way switch in a lighting circuit

Ceiling rose wiring for a one way light switch
As you can see form the above, wiring or reconnecting a one-way light switch and ceiling rose is fairly straight forward once you know which wire does what and which are the live and switched live wires
How to Wire a Light Switch – 2 Way Switch
The 1 way light switch above is fairly simple to understand, but 2 way light switches and ceiling roses are a little bit more complicated due to the fact that with this setup you have 2 switches that can independently turn a single light on and off.
The actual cabling that is used will vary depending on how and who has done the original wiring. In some cases individual wires will be used but in the majority of cases some 3 core and earth wire will be used.
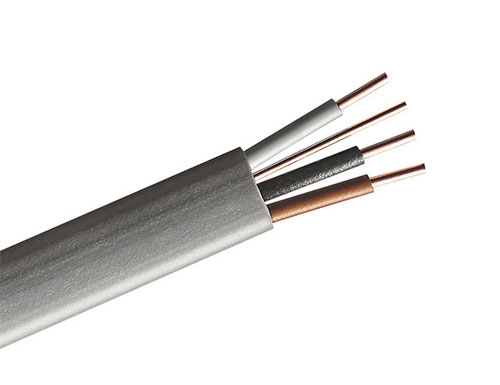
3 core and earth cable
Wiring a 2 way light switch can be done in numerous different ways, all fully valid and down to the electrician performing the task and how they prefer to do it. In the example below we are going to use the most common form of wiring a 2 way switch:
- Important: Before starting any work ensure that you isolate the circuit that you’re working on by turning it off at your consumer unit or fuse box!
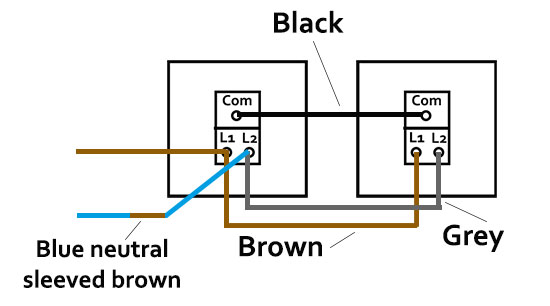
- Once isolated run a supply cable down from the ceiling rose and connect the brown live up to the L1 terminal of the first switch
- Next connect the blue neutral from the supply cable form the ceiling rose to L2 and wrap some brown electrical tape or sleeving around the neutral to indicate it’s an intermittent live
- Run a length of 3 core and earth from the first switch to the second switch
- Strip the cable back and in the first switch connect the brown live to L1 terminal and then connect grey to L2 terminal and finally connect black to the Com terminal
- In the second switch, strip back the cable and connect brown live to L1terminal and then connect grey to L2 terminal and then finally connect black to Com
- In the ceiling rose the same wiring as used in the 1 way switch scenario above should be used and again the blue neutral that is now being used as a switched or intermittent live should have brown electrical tape or a brown sleeve put on it to signify this is the case
- You will also be left with several earth wires in the first switch from the ceiling rose supply and the 3 core cable to the second switch. Connect both of these together using a 6amp terminal block. At the other end curl the spare earth up and wrap some insulating electrical tape around it and tuck it into the back of the patress box. It is a legal requirement to have an accessible earth even if it isn’t used so don’t cut it off. As signified in the image, the earth end in the ceiling rose should be connected to the earth terminal
- Screw both switch face plates back on to their respective patress boxes and refit the ceiling rose cover, turn the power back on and test everything works in that each switch independently turns on and off the light
Common wiring for a 2 way light switch

Common wiring for a 2 way switch lighting circuit ceiling rose
In the above we have used the new colour 3 core cable, however if your property is older then there’s a good chance that the older cable colours of red, blue, yellow and bare earth will have been used. If this is the case the principles of the above still stand, simply just match colours at both ends like-for-like.
Connecting up a 1 way or 2 way light switch and ceiling rose can seem fairly daunting at first but once you fully understand which wire goes in which terminal on the switch and ceiling rose then it can seem much more straightforward.