A floating shelf is a shelf that has no visible mounting or supports showing and looks as if it is “floating” on the wall.
Types of Floating Shelf
If you would like to fit a shelf of this type you have several options:
- Make your own: It is possible to make your own floating shelf from a few basic materials. Although we do not yet have a project on this (we have one in the pipeline) there are several good guides online, one of which can be found here.
- Buy a pre-made kit: As I’m sure you will be aware, pretty much every homestore, supermarket and DIY shed will stock a floating shelf kit. The kit normally includes a wooden shelf section and a bracket. The bracket fixes to the wall and the shelf slides on

Floating Shelves
To these ends, in this project we are going to cover fixing a floating shelf kit to a wall.
Types of Wall Fixings for Floating Shelves
The first job is to check the construction of the wall and from here you will then know what type of fixings you are going to need:
- Solid brick or masonry wall: For this you will need red wall plugs (for 6 – 10mm screws). If you would more information see our fixing to masonry walls project here
- Plasterboard and studwork wall: Ideally the best solution is to locate the vertical studs in the wall and screw directly into these although sometimes this is not possible. In these instances you will need to use either a Redidrive, spring toggle or nylon toggle fixing (as these tend to be the best at supporting weight). For information on how to use these fixings see our fixing to plasterboard project
How to Fit a Floating Shelf to a Wall
Once you have determined your wall type and have acquired the correct fixings to be used you can progress to installing. For the purposes of this project we will be fixing to a solid masonry wall so we will run through this process and cover relevant information for other fixings where required.
Step 1 – Check the Area with a Stud Detector
Before drilling any holes it is a good idea to run over the area you are going to be drilling into with a stud, pipe and cable detector. This is a handy device that detects any pipes or wires that may be buried in the wall so that you don’t inadvertently drill through them. Not only is this potentially lethal but it is also very expensive!
Locating Plasterboard Vertical Studwork
After running over your installation area with the stud detector to check for wires and pipes the next task is to drill your fixing holes. If you are fixing to a plasterboard wall, as said at the top of this project, the most stable fixing is to screw straight into the vertical upright stud timbers.
You can use the affore mentioned detector to locate the edges of the studs and once you have, mark the edges on the wall with a pencil so that you know exactly where the studs are.
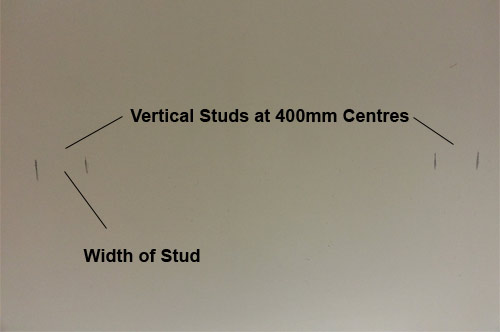
Position of timber studs marked on wall
Depending on the width of your shelf, it may not be wide enough to reach the full width of the timber studs in which case you can fix one end to a stud and the other will require fixing into the plasterboard.
Step 2 – Marking and Drilling Holes
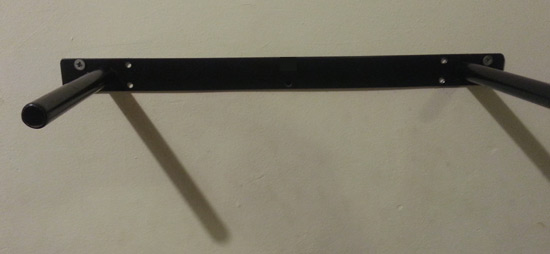
Regardless of what surface you are fixing to you will need to drill some holes. Firstly, take your bracket and position it on the wall in the location that you want your shelf.
Using a pencil, mark the top left fixing hole so that you know where to drill. Put the bracket to on side for now. Again, depending on what you need to drill, select the correct drill bit from the list below:
- Masonry wall: For this you will need a 6mm masonry drill bit
- Plasterboard and studwork: If you are screwing into the stud then you will need to drill a small pilot hole. For this use a 2.5 – 3mm universal or multi-purpose drill bit. If you are drilling into the plasterboard, the drill bit required will depend on the type of fixing you are using. This should be stated on the packaging
Insert the require drill bit into a drill (can be either corded or cordless) and position the tip of the bit directly on the mark you made on the wall. Start the drill off slowly and increase in speed as the bit bites into the surface. Drill to the required depth and then pull the drill bit out
Step 3 – Inserting the First Fixing
Before inserting the wall plug its a good idea to vacuum out the dust and then take one of your red wall plugs and push it into the hole. If it doesn’t go all the way in, tap it in with a hammer.
Once the wall plug is in place, take your bracket and position the top left fixing hole over the wall plug, insert a screw and screw it up, but not all the way. Make sure that the bracket can swing freely as you will need to move it around.
In terms of what screws to use, for this job we have used 4 x 30mm screws, maybe a little oversized but if they are slightly bigger you can be sure that they will force the wall plug to expand and bite into the wall giving it a good anchor.

6mm hole drilled and red wall plug fixing inserted
Step 4 – Drill Second Hole and Level up
The next task is to drill and fix the bracket through its top right hand fixing hole. Swing the bracket up until it is roughly level by eye. Once roughly positioned, place a spirit level across the parallel shelf support poles and wiggle the bracket until it is dead level. Make a pencil mark on the wall in the top right hole.
Remove the level and swing the bracket down out of the way. Take your drill and drill your hole exactly in the position of the mark on the wall.
Once drilled, vacuum it out and insert a wall plug, tapping it in with a hammer if needed.
Now, swing the bracket back up and insert a screw into the fixing hole and screw it up, again, not all the way up, just enough to allow you to mark the rest of the fixing holes
Bracket how fixed in a second position and levelled up ready for the rest of the fixings
Step 5 – Mark and Drill the Remaining Fixings
Now that the bracket it levelled on the wall you can mark the remaining fixing points. As you may see, there are quite a few fixing points provided. On the shelf we are installing here there are 10 fixing points in total.
Depending on what you will be putting on the shelf will depend on how many fixings you want to use. In this case the shelf was for a small stereo system and car keys so we opted to use 4 of he points provided (3 at the top and one at the bottom to pull the bracket into the wall) as the shelf won’t be carrying much weight.
If you are planning on putting your collection of Britannica Encyclopaedias on it then it’s probably best to use them all.
With remaining points marked, unscrew one of the screws and let the bracket swing down out of the way.
Using the previous method or drilling and vacuuming, form your holes and then insert your wall plugs.
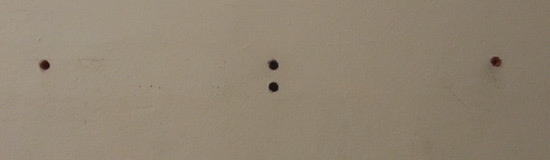
Final fixings holes drilled and wall plugs inserted
Step 6 – Fix the Bracket to the Wall
With all holes drilled you can now fix your bracket securely to the wall. Swing it back up into position and insert screws where they are required and screw them up tight. This will then pull the support bracket tightly into the wall and securing it in place.
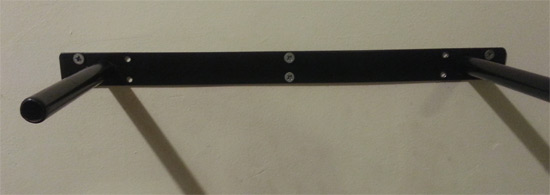
Your floating shelf bracket should now be securely fixed to the wall
Step 7 – Slip the Shelf onto the Bracket
Once your bracket is fixed firmly in place you can then slip the shelf on to the support bracket.
As the bracket is screwed up to the wall sometimes it pulls the support poles slightly off square so you may find that you need to pull the poles in slightly to get the ends to slot into the holes on the back of the shelf.

Push the shelf onto the supporting bracket poles
Step 8 – Secure the Shelf to the Bracket
On the underside of the shelf there are fixing screws located that screw up into holes in the fixing bracket. These stop the shelf sliding off the support poles.
Insert each screw and screw it up. You may find that you need to wiggle the shelf very slightly for each screw to locate its hole.
Once this has been done you have now completed the installation of your floating shelf. Stick the kettle on and stand back and admire your handy work!
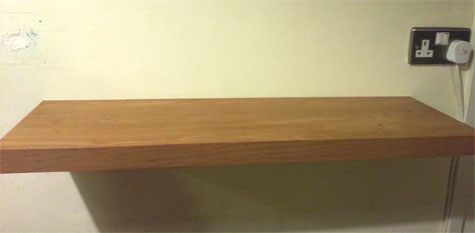
Floating shelf installation complete!
Always remember not to over load your shelf. They are pretty sturdy and if you have followed this guide on how to install a floating shelf correctly then they will be fairly secure but they do have limits!
If a floating shelf is not what you want, you can visit our project on built in shelves for a tutorial on how construct a sturdier set of shelves.
As always with DIY projects that create dust, debris and have sharp components DIY Doctor recommends the use of gloves, dust masks and eye protection.