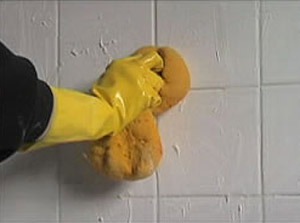
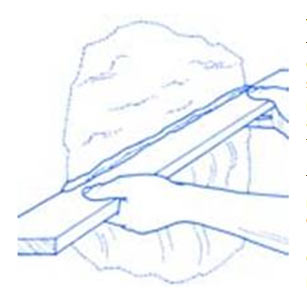
Grouting a ceramic tiled wall
Tiles and waterproof boards for bathrooms are in themselves water resistant, but if you are going to create a wet room you need to be absolutely confident that the joints between the tiles do not leak and cause expensive damage to the fabric of your building, especially if you are creating a wetroom above the ground floor.
Waterproofing Behind Tiles
If you are going to be fitting a shower, or tiling a bathroom, for the first time you might also want to be sure that what you are creating is 100% watertight. Grouting tiles is a skill that takes some practice, and it is the joints between the tiles that forms the weak link in the chain, in any bathroom, kitchen or cloakroom.
Using a liquid membrane underneath tiles gives you peace of mind that what you are fitting will remain water resistant and that the only route for the water is down the drain.
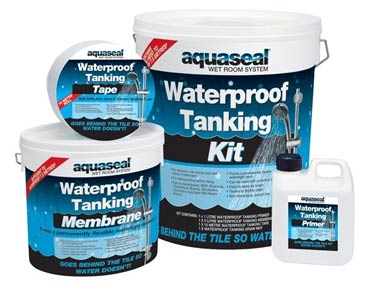
Everbuild Aquaseal tanking kit to cover 4.5 square meters
The Aquaseal tanking system is suitable for wetrooms and wet zones in bathrooms, kitchen and cloakrooms
Waterproofing for Wet Rooms
In a wetroom the whole room is basically a shower cubicle. You will need a central drain in the floor somewhere, for the water to drain out. This is obviously the most vulnerable area in terms of potential leaks. For this reason you will need to be particularly careful that this area is sealed and watertight.
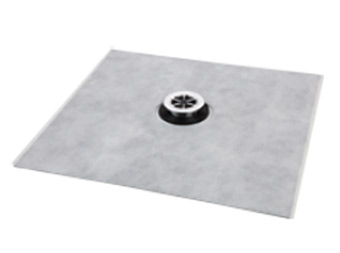
Using a flexible, waterproof backing mat will allow flexibility around pipes and drains
For this project we are going to be looking at the Aquaseal tanking system for wet rooms and wet zones by Everbuild. The tanking system comes in a kit form, with everything you need to complete the project, primer, sealing mat, sealing tape, tape roller and liquid rubber primer.
All you will need to add to the kit is a possibly another brush of your preferred size and make. There is one brush with the kit but two would be an advantage.
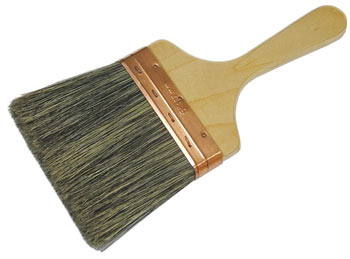
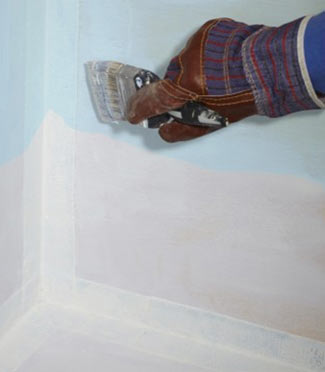
Use a soft brush to apply primer to seal wall
The Everbuild tanking kits come in differing sizes, and the basic kit is big enough to waterproof an average shower cubicle of approximately 4.5 square meters. The larger kit covers 7.5 square metres.
Alternative to Tanking and Tiling
Another way to ensure your wetroom or shower room is completely watertight is by using Shower Panels.
Shower panels are usually uPVC panels which slot together into pre-formed channels which, after being filled with sealant, are waterproof. They can be fixed to existing plastered walls, timber or steel studwork or stuck on top of existing tiled bathroom or shower room walls. A drawback to panels is that they cannot be used on the floor. For further information regarding these panels see our project on decorative shower boards.

Shower boards can create waterproof walls in the bathroom
Preparing for Tanking
Tanking is just making a room water tight, like a water tank. This is usually created by applying material to the surface of the wall. You may also have heard of the term being used in building with a cellar or without a damp proof course (DPC) where injection DPC or tanking is carried out by injecting walls with chemicals to prevent water ingress from the ground.
In this instance we are going to coat the walls with a liquid rubber compound by simply painting it onto the walls.
Tanking Wetroom Walls
The walls will need to be sound and flat so remove any old tile, tile adhesive, flaking paint, crumbling plaster and any protruding nails or screws.
You should fill any holes and make sure that the filler has had sufficient time to dry before you proceed, because the same water resistant properties that prevent water getting into the walls will also prevent any filler or fresh plaster from drying out.
Fill all holes to get wall as flat as possible
The tanking system works on plasterboard walls, plastered walls, concrete and brick.
As all these surfaces are porous to some degree, they will first need to be sealed using a primer.
The primer comes in the kit and should be applied by brush and allowed to dry before the membrane can be applied.
One coat of primer should be sufficient to seal most surfaces. However if there is any doubt then you should apply a second coat to be certain that you do not have an area that is very porous which could cause the liquid membrane to dry out too rapidly and might then cause it fail later.
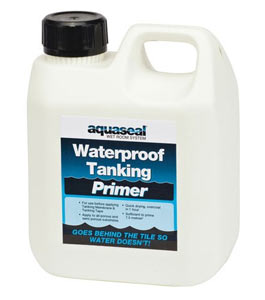
Everbuild tanking primer will seal the walls and floor
The primer should be allowed to dry for at least an hour between coats, and before moving onto the second stage, which is to apply waterproof tape to the joints in the room. This includes the vertical joints between the walls and the horizontal joints between the walls and the floor.
You will also have to prepare the joints between the walls to ensure water cannot seep in between these areas. This is done using the self-adhesive tape mentioned above after the primer has dried.
When you are taping the walls you should always work from the bottom up. This means that where you have joints in the tape, each join overlaps the join below it. That way when water is running down the wall it will not get behind the tape where there are joins.
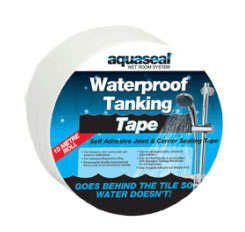
Tape all joints to allow movement when tanking
The waterproof tape is also included in the tanking kit, and it is self-adhesive and slightly flexible so that any slight movement in the wall will not cause the tanking system to crack and leak.
Tanking Wetroom Floors
The floor of the wetroom is going to bear the brunt of the water carrying duties, and so it needs to be sound and secure, because excessive movement and flexing could cause the tanking to split.
Solid floors are ideal, but boarded floors are acceptable providing they are properly prepared.
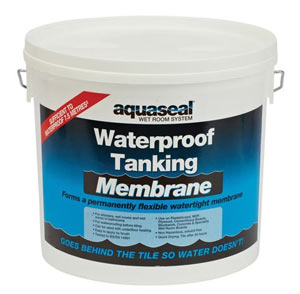
Rubber tanking membrane will allow walls and floors to stay flexible
If you have a timber floor you will need to tape the joints between the floorboards. This obviously helps to ensure the joints remain waterproof, but also allows for a degree of flexing and movement, without causing the membrane to crack.
If your floor is not stable you may need to lay hardboard down over your floorboards screwing it down firmly into the joists, to provide a solid foundation for your wetroom floor.
Waterproof Sheet
The third part of the system is a sheet or mat, which can be cut around the drain to make sure there are no leaks in this vulnerable area. Any other pipes coming in to the room should also have the sheeting cut around it.
This mat is also flexible, like the tape, and so allows a small amount of movement in the seal, keeping it watertight.
Once the area is primed, all the joints are sealed and the drain and pipes are surrounded by the fabric membrane the liquid tanking membrane can be applied.
Apply the rubber membrane to the wetroom walls
The liquid membrane is applied in two coats, the first is applied horizontally and the second is applied vertically. The liquid membrane needs to be allowed to dry for at least six hours between coats.
The liquid membrane should be 1 mm thick all around the wet room, and we are aiming for an even coat all the way around.
After twelve hours the room will be ready to tile, and once the tiles are on the wall we can be absolutely confident that the spray of water from the shower will not be able to go anywhere other than down the drain.
If you need any advice or help with the specifications of a bathroom or shower room you have bought you can refer your enquiry to the Bathroom Association
How to Tank a Wetroom – a Step by Step Guide
- Make sure your walls are structurally sound, fairly flat and reasonably smooth. You should remove any old tile adhesive or flaking material such as loose paint or flaking plaster, as this will not provide a good base for the sealant or the new tiles. You will also need to remove any nails or screws, and fill any holes
- If you have used filler make sure you allow enough time for it to dry according to the manufacturers instructions and then lightly sand it flat before you start to prime your surfaces
- Apply the first coat of primer to the wall using a brush and working in vertical strokes. Work along the room from the floor to the ceiling and make sure you are working methodically around the room so that you get an even coverage
- Allow the primer to dry for at least six hours
- Apply a second coat of primer working horizontally across the walls, again making sure you cover the whole area and work from the bottom of the wall to the top
- Use the self-adhesive tape to seal any joints between materials including floorboards, walls and floor, where necessary
- Use the self-adhesive membrane to seal around the drain, by cutting a hole the correct diameter for the drainage pipe and sticking it down firmly all the way around
- Use the roller, supplied with the kit, to make sure the tape is stuck securely, and there are no air bubbles in the seal between the membrane and the floor
- You should do the same for any other pipes coming though the floor or the walls
- Seal the joint between the walls and the floor making sure the tape is pressed right into the joins and corners. This will not only ensure a waterproof joint but will also allow for a small degree of movement between the materials, without the tanking splitting and leaking
- Again use the roller to ensure the tape is firmly stuck
- You should preferably apply the liquid rubber membrane to the floor first. Use a broad brush and even stokes, to ensure an even coat and make sure you don’t paint yourself into a corner!
- Allow to dry
- Then paint the walls with the rubber membrane
- You should apply two coats of the liquid membrane, and they should be applied at right angles to each other, to make sure you do not miss any areas which would allow the water to get through. You will need to allow the membrane to dry for six hours between coats. This applies to the coats you apply to the walls and on the floor
- After the second coat has been applied you need to allow it to dry completely, before you tile the bathroom