Complete Bathroom
Our mission:- To pull out an existing bathroom completely, replace all ceramic tiles with new, check and replace rotten flooring, fit a new suite.
We had (2 of us) three days to complete while the customer went away…..Very sensible!
Please read this project all the way through before starting. You will get an idea of what you need. Not all bathrooms are the same and we have been as general as we can. The customer purchased this suite and wanted it installed to the highest quality.
Below you can see what we started with. As you can see we have removed some tiles from around the bath. We were replacing all of our tiles anyway, but if you plan to keep yours, you will almost certainly have to remove the bottom course to get the bath out.

Old bathroom suite
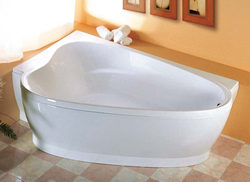
New bath ready for installation
This bath was boxed in at the tap end so the boxing had to be removed. It is rarely of use to save this boxing whole as it will probably not fit back when your new bath is in position. Save the timber if it is in reasonable condition, you may be able to adapt it to fit.
When you remove the bath panel take a good note of how it was fixed in place. It will help you when you fix the new one.
All surrounds were removed and the bath panel, take everything out of the bathroom when you have removed it, including tile pieces. You will have a lot of tools strewn about during this job, and bathrooms are small. Keep the job tidy. Fill the kettle up. During the next two or three hours you are going to need a cup of tea!
Now turn the water off, hot & cold. Open the taps in the kitchen to make sure the water has drained down, when it stops running downstairs open the bath & basin taps upstairs, in case air is keeping water in the pipes.
Its time to remove the bath, use a basin spanner (below). The picture below on the left is of a special pipe cutter we use, called a pipe slice. As you can see it is round and clips on the pipe, the blade is inside. You turn the slice and it cuts through as the blade is on a spring. The main advantage of the slice is that you need very little room to work. Do not cut any pipes yet unless you have to. If it is the only way you can get the bath out, eg rusted nuts etc, then cut them as close to
the tap as possible.

Bathroom with tiles removed

Cutting feed to taps behind basin

Earth strap
Don’t forget to undo the earth tags and wires if you have to. All pipes in bathrooms have to be earthed. For more information on this see our earth bonding project.
Now disconnect the waste from the bottom of the bath. remove all fittings until you are left with just the inch and a half plastic pipe going to the main 4 inch soil pipe. The trap will be full of water so tip it down the loo or into the basin…
You may have brackets holding the bath to the wall. You will probably have found these when removing the tiles. Unscrew them. The feet of the bath will (or should) be screwed to the floor so undo them as well. The bath is now ready to be lifted out and taken away. If you are saving any fittings from the bath e.g. taps etc, take them off now. They damage easily and taking the bath downstairs is easier with them off anyway. They have a wonderful knack of catching the wallpaper, curtains, handrail etc!
Now we will turn our attention to the basin, leaving the loo in place as long as possible unless you have another downstairs!
The system is the same. Undo the tap connectors or cut the pipes as close to the taps as possible. Remove the waste fittings just leaving the inch and a quarter pipe, and unscrew any fixings from the basin to the wall. If you have a pedestal then this should be screwed to the floor also. Remove the basin etc, saving the taps if you
need to.
Now the loo. Flush it first! There will still be water in the cistern. Remove any water left in the cistern using a sponge or some rags and wring them out into a bucket. Incidentally, a bucket, in our firm is referred to as a FAK….(Plumbers) First Aid Kit !
Undo the water inlet connection at the side or bottom of the cistern. Undo the overflow connection. Unscrew the fixings at the back of the cistern and the W.C. stand.
If they are rusty, as they often are, use a drill to take the head off and lift the loo out. the screws can then be pulled with a claw-hammer.
If your unit has a pipe between the cistern and the wc, you have a low level unit and the two halves can be removed seperately. If your cistern sits on top of the wc. Then the unit is close-coupled and can be removed as one.
Making up the suite: If you have some help, that help can apply a bit of masking tape to the ends of the pipes and remove the rest of the ceramic tiles.
We use an old wood chisel and a claw-hammer. Be careful on plasterboard walls.

Removing old tiles
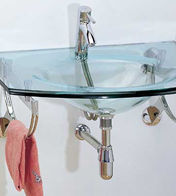
New glass sink
Before we install isolation valves to all the pipes (more about them in a moment) we need to know where to cut the pipes down to.
We are going to use some special push-fit tap connectors to make life easier on this job, so we now "make up" our suite, which means putting all the bits we can on, ready for installation.
When unpacking your new suite from its boxes please make absolutely sure it is in pristine condition. It will be too late afterwards. Most new suites come with instructions for make up, ie. where to place the washers etc.
As a rule of thumb, with taps there is nearly always a washer between the tap and unit (basin/bath) and with wastes the washer is nearly always underneath the unit and sometimes sits into a recess in the waste connection itself.
Bed all bath and basin waste grills with a little plumbers mait between the grill and the bath/basin. (More about plumbers mait later). When your units are made up they should look like this……..

Bath Taps Made Up

Basin waste made up
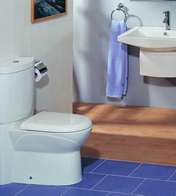
Grace Bathroom Range
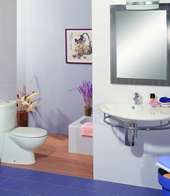
Jazz Bathroom Range
If your bath has fixing brackets that screw to the timber along the side that goes against the wall, now is the time to fix them. For the bath, you will need an inch and a half, shallow bath waste trap and for the basin, if behind a pedestal like ours, an inch and a quarter basin waste.
If your existing wastes are in good condition they can be re-used, but get new washers.
If your existing basin waste pipe comes up directly in line with the waste outlet in your basin, you will need a bottle or pedestal waste, who’s outlet is directly below the inlet.
You will see that we have connected the waste to the basin already. That is because it will be behind a pedestal and very difficult to manoeuvre later.
The tap connectors you can see are simply a marvellous invention. You will not often see a plumber using them as they are expensive compared to copper tap connectors. But for the purposes of this project they are wonderful.
They have a nut on one end which, with a washer inside, screws on to your tap, and the other end simply pushes over the copper inlet pipe.
You will need 15mm push fit tap connectors for cold connections and 22mm for the hot.
Incidentally, these tap connectors can be bought with in-line isolation valves to make life even easier, we have done it this way in case you wish to install isolation valves on other pipe runs in the future.
Make sure you use some jointing compound on all threads. Boss white is the most common, used either on its own or in conjunction with some PTFE tape, which is simply wound around the thread making a completely watertight joint. The joint compound is applied with your fingers and pushed into the threads.

Toilet cistern including all parts
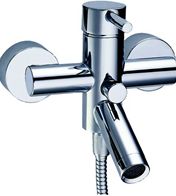
Contemporary bath taps
Making up the cistern is a process of following the manufactures leaflet which will be with the bits inside. You can always refer to your old cistern if you are confused.
Make up the close coupled unit as well and stand it up against a wall out of the way for now. If your new cistern has a side entry inlet for the water, a flexible tap connector will not be suitable. You will need to use copper. See our section on joining copper pipes.
Now we will install isolation valves to each water supply. These enable you to turn of the supplies individually and are invaluable if you have any kind of leak or want to replace taps etc. They look like this.
Firstly look for the arrow on them which tells you the flow direction. Cut a piece of copper pipe 2 and a half inches long and fit it into the out going side of the valve, apply your joint compound and ptfe and tighten.

copper pipe and angle joint
Copper tap connectors. These fittings come fully fitted with the nut on the pipe. Just insert a fibre washer and tighten to the tap.

Isolation valve
Isolation Valves. Absolutely vital (and now a requirement from building regulations, in new bathrooms) to isolate each appliance and make life very easy indeed.
Do not over-tighten these (compression) fittings and always remember to use two spanners when working on them in all situations. If you try and do/undo them with only one spanner you will twist them on the copper pipe and it will kink and probably leak.
Do not forget to insert the olive (small brass wedding ring) over the pipe so it fits between the nut and the body of the valve.
It is this which compresses between the nut and the pipe giving you a water tight joint. Isolation valves are supplied with olives inside so check when you buy them. They come in brass for unseen locations, and silver for that extra touch of class!
Having tightened the valve/pipe, push the other end of the copper pipe into the tap connectors.
Measure the distance from the top of the unit (bath, basin) to the bottom of the isolation valve. Write this down. Now mark the wall where the top of your new units will sit.
You will have to make up the legs on the bath for this and work out how high up the wall it will go when installed. You will probably be able to get it quite close to where the old bath sat.
Also mark where your fixing brackets will go and chop a piece of wall out to recess them in under your new tiles.
With the basin, simply place it in position on the pedestal. Take 2 and a half inches away from the measurement you have written down. This new measurement is the distance down from the mark you have made to the point where you will need to cut the water pipes and make your push fit connection later on.
The toilet inlet is exactly the same principle (except in the case of side entry cisterns). Cut the pipes and clean the paint etc of very thoroughly with a Stanley knife and wire wool for about 1 and a quarter inches.

Contemporary style bath tap

Copper pipes with tops cleaned
Now disconnect the isolation valve from the tap connector by squeezing the bottom flange of the connector toward the body and pulling off.
Now, slide the nut and olive of the inlet end of the valve over the pipes you have cut, apply compound and tighten.
The on/off screw of the valve needs to be accessible when units are installed.Make sure the valve is in the off position (screw head at right angles to the body) and you have all valves installed (2 to bath, 2 to basin and 1 to toilet).
You can now turn the water on because it’s time for another cup of tea!

Turn water on at incoming mains
Turn the rising main gate valve slowly, and remember you still have the kitchen taps open, let the air splutter out and open it fully. Turn your kitchen taps off. Check for leaks and pinch the offending nut a bit tighter if you have any.
The next thing to do is the tiling. It is so much easier to do at this stage, there are no awkward cuts round cisterns etc.

Tiling above bath

Wall tiled above bath
Tiling needs to be thought about. Set out the tiles by measuring or even placing them next to each other and marking with a pencil. Ideally you would like as few cuts as possible, but if you are going to have them, and you will, make sure they are even.
It is dreadful to start off with a full tile only to find that you need a half inch sliver at the other end. Much better to start with three-quarters of a tile at one end and half a tile at the other.
Before you begin tiling, paint the area the tiles are going to cover with neat PVA adhesive.
This will give better adhesion to the wall and completely waterproof the area. Two coats are better than one and it only takes about 10 minutes to dry 500ml will be enough for your bathroom.
You will already have the new top of the bath marked on the wall from our measuring for the tap connectors. Deduct 1 inch from the depth of the tiles you are using and make a mark on the wall this far up from the top of bath mark. Then fix some thin batten to the wall absolutely level.
Your first course of tiles are to be laid on this batten (as 2nd photo up). This is because a) You will need a bit of room to get the new bath inand b) It is not so easy to get the bath 100% level which does not matter within quarter of an inch or so, because when we insert the tiles down to the bath, we can cut them to suit.
c) Your measurements may be a little out at the start because you were using the bath which may not have had the feet adjusted to a true level so this method gives you some room for manoeuvre.
If we laid the tiles after the bath was in, not only would we have adhesive all over the bath, we stand a chance of dropping tiles and chipping it, and if the bath is slightly out of level, starting your tiling from there leads to all sorts of complications.

Laying tiles on wall
Carry on tiling now, at the batten level up, then, in areas other than the bath, remove the batten and tile down. Cut down onto skirtings, and into architraves, which are very rarely level or plumb also.
It is much better to have one cut slightly leaning because of the obstacle, than to have all of the tiles leaning to suit it.
Spread your adhesive evenly with a notched trowel and use spacers for regular joints. Use non slip adhesive if you can, it does not take long to go dry enough to be self supporting for when you need to move the battens. Tile the first course, including cuts, all the way around the battened wall first, giving it longer to dry. We have tiled a little area in the photo to give you an idea of the adhesive and spacing.
Now its time to turn our attention to the floor. Because the ceiling underneath the bath was soaked, we thought we were going to be faced with a rotten floor. We were lucky.

Wood stain treatment
The floor had undoubtedly been soaked on more than one occasion, but it was laid in sections and the water had just run through the joints. We checked if it was solid and not rotten by pushing (or rather not pushing) a screwdriver in and then absolutely soaked the floor in Cuprinol 5 Star wood preserver.
This protects against Rot and Wood boring insects and is very effective. Wear a mask for the application, and open the window. Go and have a cup of tea while the smell and fumes wear off.
When we had soaked the floor we installed some bearers, as the floor joists were running the same way as the bath and we were able to straddle them with our bearers giving maximum support to the bath. Unless the tiling is absolutely dreadful and full of holes, baths will generally only leak around the edges because they have moved. We do everything we can to stop that happening.
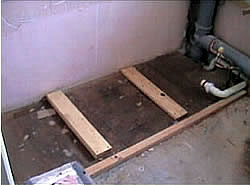
Battens ready for bath installation
These bearers were screwed to the floor and treated with Cuprinol as well. OK, so we have 90% of the tiles on the wall, a solid area to work with, so lets install the bath.
A great many baths these days come with a timber strip along the edges and two brackets to fix to the timber and then the wall. Ours didn’t! The owner of the house bought it in a sale!
The brackets came attached to the back of the bath and we didn’t think much of them so we took a step that can only be described as inventive.
We must stress that you must check your bath for flaws while unpacking, because if you follow what we are about to do now you will have negated the guarantee for good.
We had a steel bath to work with and no sensible brackets to fix it in place. The steel turned down over the edge of the bath by about an inch so we very carefully drilled two holes in it, one right at the front and one right at the back.
The holes were obviously in the lip where it met the wall. We drilled the holes 7mm diameter, so we could get a 6mm masonry bit through them when the bath was in place. Look at the top of the bath lip and you will see one of the holes.
Please don’t try this if you have any alternative, and if you do, don’t try and drill a 7mm hole straight away. We started with 2mm and worked up to stop the drill slipping and marking the bath.
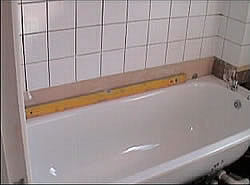
Wall tiled and bath installed
We are now ready to put the bath in position.
This is always a bit of a struggle, so sort out a plan before you lift. When you have it where you want it, get it as level as you can using the adjustable feet. The bath itself has a built in "fall" for the water to flow out so you do not have to allow for that.
We then had to reach under, front and back and make our fixings, you may only have to screw your brackets to the wall. then screw down the feet, this is particularly awkward at the back but worth persevering as you want the bath to be as steady as possible.
Now is the time to replace any boxing taken out with the bath. If you have followed the earlier instructions well you should be able to push your tap connectors into place. The bath waste will be a matter of finding a mixture of the right fittings and getting to the existing in the most straight-forward manner.
We suggest you buy, before you start, 2 x 1& a half inch 90 degree bends, 2x 45 degree bends, 2 straight connectors and a short length of 1 & a half inch solvent weld pipe. All the fittings should be solvent weld too. 1 tin of solvent weld adhesive. To join, apply glue liberally to inside of fittings and end of pipe and twist together.
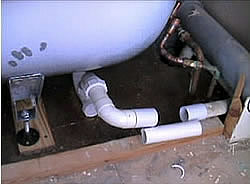
Constructing bath waste
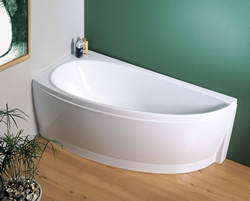
Avocado bath Suite
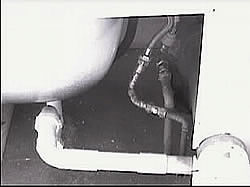
Completed bath waste
The pipes will probably not have been touched for a number of years so clean them thoroughly with wire wool before gluing.
Now open the isolation valves and fill the bath, for two reasons:
A) It will tell if you have any leaks at the tap end (Don’t worry if you get a quick spurt of water from the tap connectors as you turn on. they sometimes do this until the O ring bites. You won’t drown!)
B) The bath will be as heavy as it is going to be when you fill it up to the overflow and let it settle nicely while you do the other jobs. Then you can get a tube of clear sanitary mastic and seal all round it between the wall and the bath, before letting the water out. That way you can be sure that if it ever does move a little that the sealant will still be effective against water running down behind the bath.
You will then have a working bath!
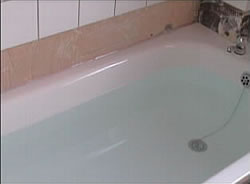
Bath filled with water ready for sealing and tiling
Remember now to set out your tiles for the boxing if you have any. Tiles laid flat should be laid first so the water runs off the walls onto a tile and not a joint. You can now make the frame for the bath panel. Sometimes instructions for this come with the bath. If not, you will need to put the bath panel in place and remember (or draw a sketch) where the best place to put fixings will be.
It is an excellent idea to have a solid upright in the two corners which the panel can push up against, and this will also give extra support to the bath.
Most bath panels are the plastic, quite flimsy variety as ours was. The top of the panel clips under the lip of the bath. You then mark on the floor where to fix your batten to stop the bottom of the panel pushing in.
Remember how the old one was fixed and use a similar method. There are no rules for fixing bath panels, but make sure you can remove it easily if you should ever need to. Get your framework ready now if your wc, like ours, is close to the bath. You will not have as much room afterwards.
Its a good idea to leave the panel off though, because now you can install the last course of tiles and you will find the panel a nuisance and in the way of your toes.
Please re-instate the earth tags and wires. To fit the last course of tiles, you will need to measure each one and cut them to fit. If your bath is level they should all be the same cuts. Cut them as close to the bath as you can and use a carborundum stone to neaten the cut edge if you are just going to grout the bottom joint.
If you intend to apply bath sealant between the last tile and the bath, the cut does not have to be that neat. Because we have applied unibond to the walls and thoroughly sealed between the bath and the wall, we only grout the bottom joint.
This is because if any water does get behind the tiles for any reason whatever, it is able to seep out again into the bath. (We have been into bathrooms where sections of grout have been dug out by children’s toys!) Cutting tiles to this level of neatness requires practice so you may be better off sealing the bottom. But do not do that yet.
Before you fix the toilet and basin, grout the joints you will not be able to reach easily later.( More about grouting in a moment). Our exchange was virtually like for like, ie we exchanged one close coupled suite for another. If you are doing this then you will find that the connections to the 4 inch waste outlet and the overflow are pretty much the same. you will have adapted the water inlet to suit your flexible tap connector, so its basically a question of reversing the removal procedure. You will need some grease (or fairy liquid) to ease the toilet waste outlet into the plastic pan connector.
Now screw down the pan to the floor and the cistern to the wall. Use a hand screwdriver for these two operations or turn the setting right down on your battery operated screwdriver.
We always squeeze some clear silicone into the holes in the base and cistern first, then screw in 99% of the way. Leave it for couple of hours then tighten up and trim off the excess silicone, this gives some protection against the movement of the toilet and cistern against the body of the unit.
Most of the time we sit the pan on a liberally applied bed of a filler/adhesive such as "gripfill". This comes in a tube and is applied by sealant gun to the base of the pan. Any surplus can be cut off afterwards.
Many people bed the pans on sand and cement, which you may have to do if the floor is really badly out of level, but if you do it this way and you have a wooden floor, paint the area first. Sand and cement does not stick well to wood.
Make sure the top of the cistern is level, it will stick out like a sore thumb against the level joints of your tile.
Make up your overflow and connect it to the existing, push the tap connector into place. you can then turn on the isolation valve to the cistern and watch it fill up.
Set the ball valve to the required position and flush it again. A really important tip to remember is…. when fixing anything through ceramic tiles, make sure the head of the wall plug is right through the tiles, otherwise it expands as the screw goes in and the tile cracks.
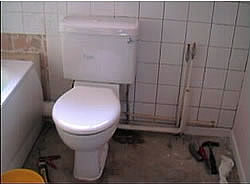
Toilet fitted and wall tiled
The basin is next: before you do anything else, measure from the back of the basin (where it will touch the wall) to the centre of the waste outlet, then adapt the existing waste so that you have the pipe pointing upward, in the centre of where you want the pedestal to be, the same distance from the wall. Next apply a strip of "plumbers mait" to the top of the pedestal, a non-setting putty used for sealing sanitary joints.
A small tub will do when you go to the merchants. Place your pedestal in position and sit the basin on top. Mark the screw holes for fixing the basin, and ditto for the pedestal to the floor. Measure the amount of waste pipe you need, allowing for the joint, and move the basin and pedestal and basin out of the way. (remember they are not joined together and you will have to separate them from the putty.
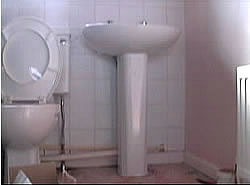
Sink fitted
The putty can be re-applied and surplus cleaned quite easily, but if you don’t use it for this marking operation, then your screw holes will be a couple of millimeters out, which is a lot when you need your screws positioned exactly.
Glue and fix your waste pipe to the existing, and slide the sealing nut of your new waste down over the pipe ready for re-connection. However your waste is set up, make sure you only have the one connection to make when you put everything back into its final position.
In the photograph above, you will see that our only threaded connection was at the back of the basin. We cut the pipe to fill the gap you can see, unscrewed this connection and stuck all of the pipe together. This connection was then re-made when the basin was fixed.
Now set everything back in place, screw in the waste connection, push the tap connectors home and screw the basin and pedestal tight, using the same method as with the pan and cistern. Turn on the isolation valves and try the taps.
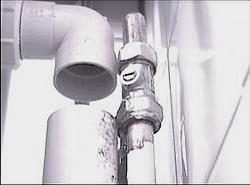
Connecting waste and water feed for sink
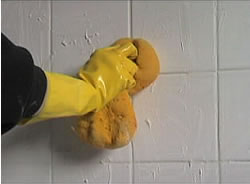
Put your toilet seat on and have a good clear up. Its time to grout. We use an ordinary decorators sponge, after following the directions for mixing up the grout. Do not mix too much in one go. While it is quite a quick operation, grout dries quite quickly and you do not want a tub full of grout you cannot use. Work one area at a time dipping the sponge in the grout and scooping up a dollop.
Work it well into the joints and wipe off surplus to use on the next joint etc. Keep a bucket of water close to rinse the sponge. Wring out well and wipe down the tiles afterwards. You will need to wipe down two or three times to get the tiles clean.
When you have finished, leave the grout to dry. You will find a white residue all over the tiles. This can be polished off with a duster.
Finally, use a little white spirit on a cloth and wipe it around the top of the bath/tile joint, and the same between the basin and the tiles.

Grouting tiles
When this has evaporated and cleaned any grease that may be on either surface, apply your bath/basin sealant.
You have now completed your bathroom………….Well done!
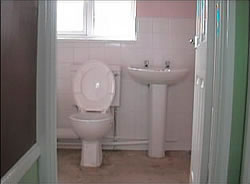
Completed bathroom install – sink and toilet installed and wall grouting completed
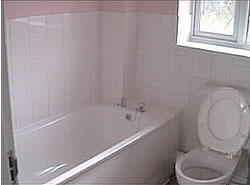
Completed bathroom install – bath fitted and all tiling completed
We hope you have enjoyed this project and your first taste of a major plumbing job!
Our video section on bathroom design has a sort film on bathroom design for seniors which will give helpful hints when designing a bathroom for the elderly. There is also a film in our bathrooms section showing how to fit a bathtub and surround to the walls.

