A brick barbecue is a great addition to a patio area or out door garden space. Easy to build and use, a brick barbeque means you don’t have to find a large space to store your barbeque. It won’t go rusty and fall apart, and it looks a lot more attractive.
There are two different types of basic brick barbeque that can be easily built – a bbq on it’s own and also one with a small preparation/storage table. How creative you want to get with these basic designs is totally up to you!
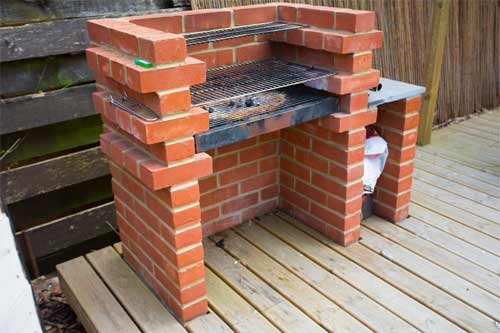
Brick bbq with preparation table and warming rack
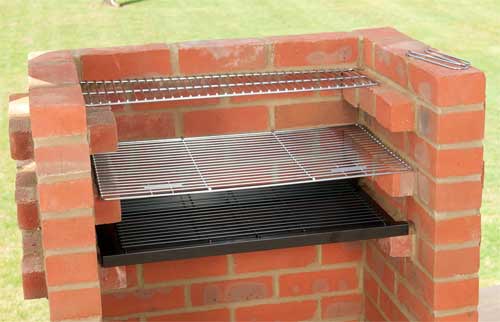
Brick bbq with no table – Image courtesy of blackknightdirect.co.uk
Where to Site Your BBQ
Firstly you need to decide where to build your barbecue. The one drawback of a brick BBQ is that you can’t move it around, so think about the location carefully.
You want to place it near enough to the house so that it’s easy to fetch everything you need, but not so close that the smoke will blow into the house!
It’s nice to have your BBQ near to a seating area, so that the cook and the diners can converse, but make sure the heat from the coals isn’t going to make your guests uncomfortable or indeed affect any surrounding items such as wooden fences, sheds etc….
Think also about the route to the BBQ. If you are going to be walking across the same patch of lawn all summer it may get a little thread bare. This would be a good time to add some stepping stones for a narrow path to the BBQ or just excavate a small path section and fill it with shingle.
Building a BBQ Base
Make sure you have a sturdy base for your BBQ – if you don’t already have a suitable area of patio to build on, you’ll need to lay a concrete base or some slabs. The base should be level and sturdy enough to take the weight of the bbq without subsiding or sinking. See our Building a Shed Base project and also our project page on Laying a Patio for help with this.
Remember when you are building your base that you will need to stand in front of the BBQ to cook. It’s best to extend the base to cover a large enough area to enable you to work behind it comfortably.
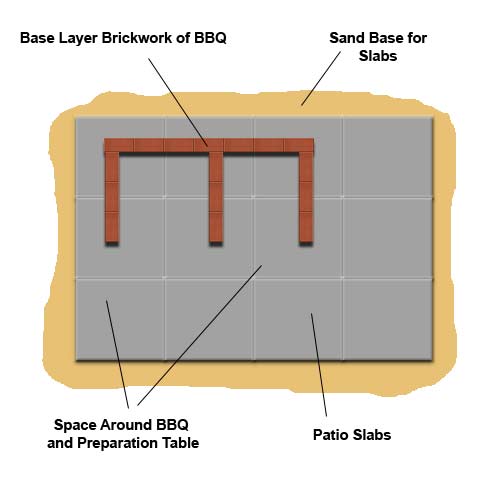
Base layer of BBQ with space around cooking area and preparation area
Materials for Building a Brick and Mortar BBQ
First, you need to buy a barbecue grill set. Sets are available which are designed to be set into a brick barbecue, with a tray for coals, a cooking grill tray and also sometimes a warming tray. Then you need bricks of course.
Work out how many bricks you will need using the BBQ cooking tray as a guide. Count how many bricks you will need to go around three sides of the tray and work out how high you will need your bbq to be.
You want to be standing comfortably while cooking, not stooping down or reaching up. As a rough guide, most people set their charcoal tray around 7 to 9 brick courses up, but this is obviously up to you.
You might want to add on a couple of courses above what will be your cooking tray so that you can add on a warming rack higher up.
If you have space, then it’s a good idea to add on a preparation area or table next to the barbecue (as can be seen in the image above). A paving slab makes a good table top, so you need to add on enough bricks to build up a base for this too.
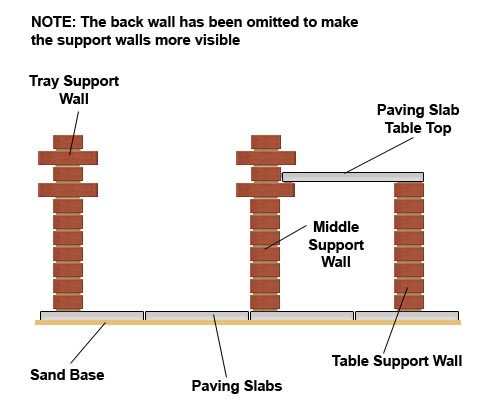
Front view of a basic plan for a brick bar-b-que in the garden
Building sand and cement are needed to make your mortar – see our Mortar Mixes project for help with this and how to mix your mortar to a suitable grade.
Tying the Parts of Brick Walls Together
Metal brick ties will help to strengthen the join between the middle and back walls. Wall ties come in various shapes but the best for building a bar-b-que is the horizontal twist tie or fishtail tie as it is more widely known.
Simply push the ends of the fishtail tie down into the mortar and your walls will be firmly tied together
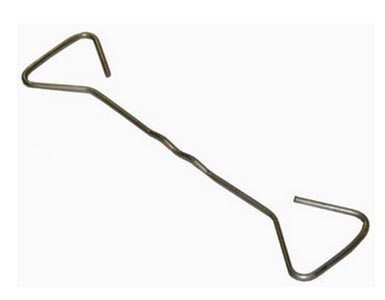
Fishtail wall tie
Tools Needed for Building a Brick BBQ
The first thing you might want to think about buying for this, and other brickwork projects, is a sturdy, portable base for holding your cement that will protect your paths and lawns from cement stains.
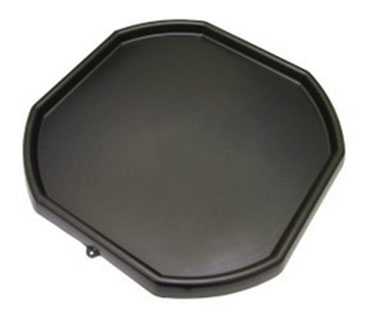
Portable cement and mortar base tray – Used for protecting paths, lawns and other areas from cement stains
Other tools you will need are:
- Shovel for mixing the mortar
- Bricklayers trowel or gauging trowel if you are not used to laying bricks
- Spirit level
- Club hammer or lump hammer
- Bolster chisel
- Bucket Trowel
- BBQ paint
- Wire brush
These tools can be seen at the bottom of the page. A short length of hosepipe is also handy for getting a nice neat joint between your bricks. Simply cut about 6 to 9 inches (225mm) off your garden hose and you have the ideal brickwork jointing tool.
Use a short length of hosepipe to create a bucket handle mortar joint when pointing
Laying Brickwork for a Brick BBQ
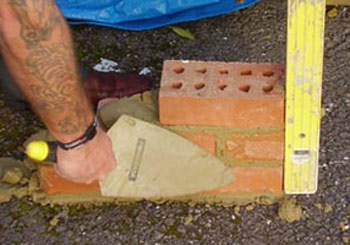
Lay out the first layer or "course" of bricks around the barbecue tray to ensure that you make it the correct size.
If you are building a table on the side of your barbecue then you will need to arrange the bricks in a sideways "E" shape, so that the central wall supports both the barbecue and the table.
At this point is it also important to mention that you will need to ensure that the width of the left cooking area is correct to take your cooking grill and coal tray. You don’t want it too wide or too narrow! Most that are available will have been manufactured to correspond to the width of a set number of bricks.
See our Laying Bricks project for some pointers before you start.
Once you have your first course laid out ready and in the positions you would like them, move the bricks out of the way and check the level of the ground. Put down a layer of mortar following the shape of the bricks, compensating for any changes in level.
Lay the first course of bricks on the mortar, using the spirit level to ensure that the lines are straight and the bricks are all level with one another. Lay a metal brick tie over the join between the middle and back walls.
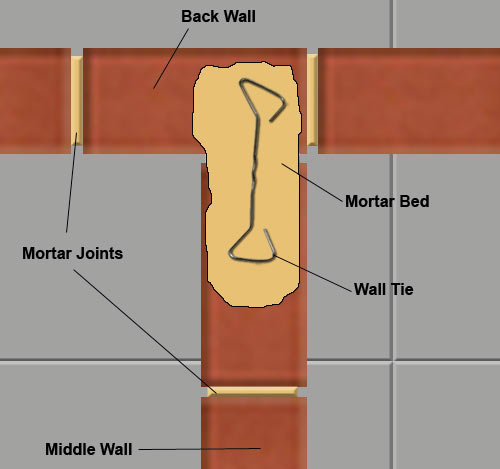
Fishtail wall tie set in mortar bed joining middle wall to back wall for support
You will also want to try and avoid having to cut any bricks as this can be a tricky job and will ultimately lead to damage and wastage so bear this in mind when planning your layout.
Build up your walls starting at the corners and filling in the gaps gradually. Stagger the joints in each course by half a brick so that the wall is strong and has the traditional brickwork pattern. Keep using the spirit level to ensure that your walls are level, straight and vertical.
Ideally, it’s best to use a level that is long enough to reach from corner to corner of your brickwork but if this is not possible you can use a length of wood to rest the spirit level on. Please make sure that the piece of wood you use is straight and level itself!
Use a spirit level to make sure brickwork is upright and level
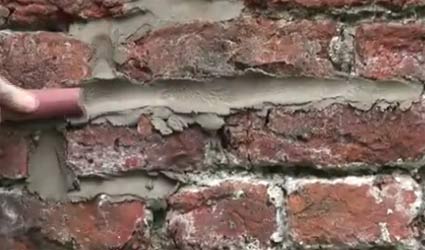
Every few courses, stop to neaten up the mortar joints – remove any excess mortar, fill in any gaps with mortar, and run the hosepipe along each joint to give a neat, professional finish. This type of semi-circular pointing is normally called ″Bucket Handle pointing″.
When you get to the seventh course (taking into account your height, you may want to change this to eighth or ninth course), create a ledge for the charcoal tray by turning bricks sideways in the left and middle walls.
In terms of the middle wall please remember if you are going to add in a preparation table area then you will need to ensure that any bricks you lay sideways protrude both left and right so that not only do have a base for your charcoal or cooking grill but also a stable base for your table area.
Add another standard course, then on the next course up turn bricks sideways again to form a ledge for the cooking grill.
Repeat the standard course followed by another ledge, so that you have a choice of cooking heights. Add another ledge higher up if you wish to add a warming rack.
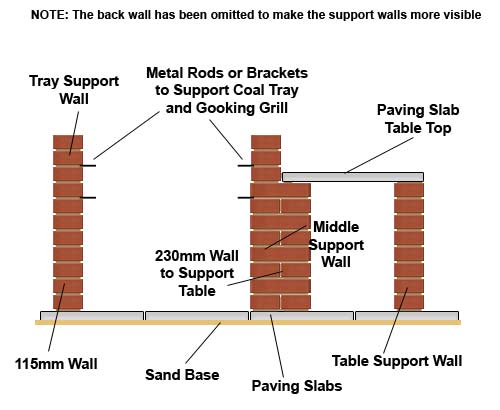
Instead of using bricks turned on their side, metal rods can be inserted into the mortar bed to provide support for cooking trays
In the image above you may notice that we have doubled up on the thickness of the middle wall. Instead of turning bricks on their sides to provide support for the table/preparation area top it is possible to add metal supports to do this job, well for the coal and cooking trays at least.
If you do decide to go down this route ensure that you use metal brackets or strips that are thick enough to support the weight and heat from the coal tray or the grill without bending. Also, ensure that you have at least 3 strips per wall.
You may also need to hunt around for suitable metal supports. A possible solution may be zinc plated mending plates such as the one in the below image.
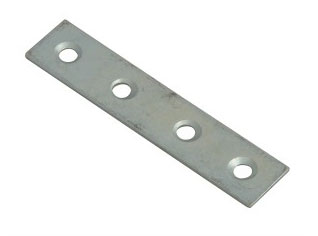
Zinc coated mending plate used for coal and cooking tray supports
Grill racks and warming racks can also be created by buying, cutting to length and building in some short metal rods into the joints of the brickwork. This adds to the expense slightly but makes the brickwork a lot easier.
Decide what height you want your table area to be at, and stop laying the far right hand wall at your chosen height – make sure this coincides with one of the ledges you built to hold your charcoal tray or cooking grill in so that the tabletop slab is supported on three sides. Lay the slab on with a layer of mortar to fix it into place.
Allow to dry for at least 48 hours before using the barbecue. Cover if rain is expected to stop the mortar from being washed out of the joints.
Maintaining a Brick BBQ
The more use your Barbeque gets, the more it is likely to lose it’s shine. You can renovate the grill and all metal work using the BBQ paint below from the DIY Doctor Toolstore.
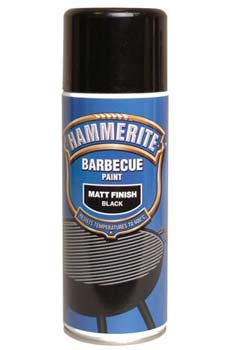
Heat resistant barbeque paint
To clean down the existing metalwork you can use a wire brush and the easiest way to do this is with a two-handed brush such as the one shown below.
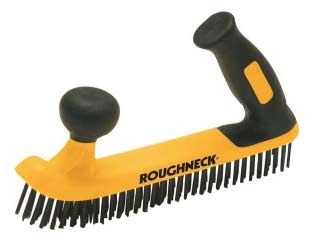
Two handed wire brush ideal for cleaning bbq’s
Sometimes heat will shrink brickwork mortar rather faster than it is comfortable with. This shrinkage may lead to a few little cracks here and there. This is not really a massive problem. Simply go to our page on repointing brickwork an you will see it is an easy job to make good a few shrinkage cracks.
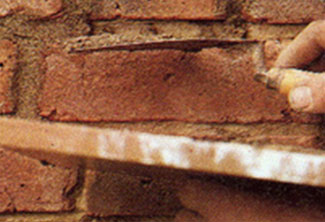
Repointing mortar joints