The core drill is the drill bit to use when you need to cut a large diameter hole through a solid brick or block wall. This is often required when needing to run cables, waste pipes and soil pipes and also install extraction fans.
There are a few different types of core bit and the best one to use will very much depend on the size and depth of hole you’re drilling and the type of material you are drilling through.
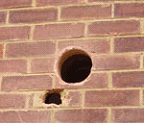
Large hole in wall drilled with core drill bit
What is a Core Drill?
As we have briefly touched on, a core drill is a drill bit which cuts large holes through masonry and concrete removing the centre part of the hole (core) as it drills and cuts its way through.
There are many core drill sizes and generally each size is manufactured to represent the size of a commonly used pipe, cable or duct so that once the hole is drilled, the object in question passes through with ease.
Again, as we have also touched on above, there are several different types of core bit available and depending on the object you are drilling through and the size of hole you need to create will ultimately depend on what type of core drill your should use.
Carbide Core Drill Bits
Carbide core drills are generally the cheapest option when it comes to core drilling.
The drill bit itself features carbide “teeth” that surround the circumference of the drill bit. Once rotating, these teeth bite into the surface you’re working on and cut their way through creating the required hole.
Although it is not recommended, many use hammer action with these drill bits to increase their cutting speed and ability. This will ultimately wear the core bit out much faster, but as they are generally cheap this is not often seen as a major concern.
As well as wearing the drill bit out much faster, the hammer action also creates a lot of vibration whilst drilling often leading to the hole ending up larger than intended.
As they are not of a particular high quality, carbide core drills are generally only really any good for drilling through softer concrete blocks.
Trying to drill more dense objects such as solid concrete will in most cases cause the bit to heat up, wearing it out even faster.
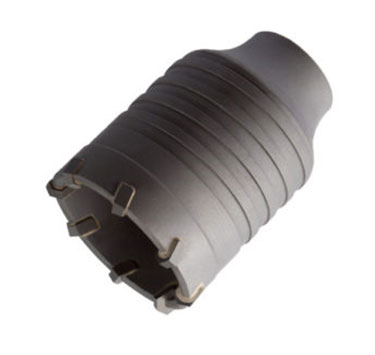
Carbide core drill bit
Diamond Core Drill Bits
The diamond core drill bit is a definite step up from the carbide core bit mentioned above.
Unlike carbide drill bits, the teeth on a diamond core bit features diamonds that are embedded in the teeth themselves. As diamonds are extremely hard they grind their way through the surface you’re working on creating a sharp and clean cut.
There are in fact two different types of diamond core bit – wet cut and dry cut. Essentially, wet cut diamond core bits use water to cool them while drilling and dry diamond core bits are just used dry.
Due to the amount of heat created during the drilling process it is necessary to keep diamond core bits as cool as possible to prevent unnecessary damage to the cutting teeth to a minimum. If the surface of the cutting teeth are subjected to too much heat the metal encasing them melts covering the diamonds and reducing cutting efficiency. If this happens the drill bit then needs to be “redressed” to expose the diamonds once more.
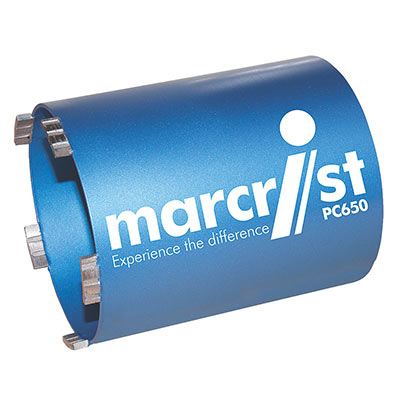
Diamond core bit
With the above in mind, dry cutting diamond core bits are generally used when working indoors, whereas wet cutting bits are used externally.
When using dry cutting bits it is essential that they are kept as cool as possible. To do this they should be used in short bursts and the whole bit should be regularly withdrawn from the hole and exposed to the air to disperse any heat. Despite this, dry cutting diamond core bits don’t have to be used dry you can also use them wet.
In the majority of domestic cases the largest hole you will need to drill will probably be around 6 inches in diameter through a standard cavity wall which will be around 300mm in depth. For anything up to this size a dry cutting diamond core bit will be more than up to the job.
Most domestic use diamond core cutters will always have a removable guiding drill bit which acts as a pilot hole to guide the core drill.
The guide drill bit normally slots into the arbour (see below).

Guide drill bit for core drill
Generally, the guide or pilot bit is just used to get you started and keep the actual core bit in position whilst cutting into the surface of the wall.
Once you have cut 25-30mm into the surface you are working on, you can withdraw the core bit and remove the guide drill and carry on without it.
However, leaving it in will allow you to see when it is about to break through the opposing side of the wall you’re drilling through. More about this and why this is a good thing can be found below.
Pretty much all core bits don’t feature a shaft like a normal drill bit, the connection to the drill is made via an arbor. The arbor screws into the core bit at one end and the other end then slots into the chuck of the drill.
When hiring or buying a core bit always make sure you have the correct size and type of arbor for not only the core bit your are using but also for the type of drill you have e.g. SDS, spline, straight shank etc.
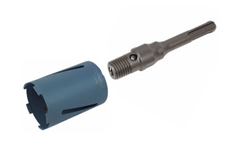
Diamond core drill and correct sized arbour
What Type of Power Drill do you Need for Core Drilling?
A core drill should always be used with a power drill, at minimum around 800 watts and at maximum somewhere around 1300 watts. Your chosen drill should also have a variable speed function (somewhere between 100 and 300 rpm) and it must also have a safety clutch!
During operation, core bits can easily bite into the surface your cutting through and stick. This in turn then causes the actual drill to rotate instead and if you have a tight grip on it, the torque can easily break your wrist!
If you don’t already have a suitable drill, any decent hire company will gladly supply not only the correct drill but also the correct diamond core bit, if purchasing either the drill or core bit is deemed too expensive. Remember you will also be charged for the amount of wear on diamond tipped bits.
In general, a corded drill is the best to go for as it will produce power at a more constant rate, but if funds are available, the more expensive and higher quality cordless drills (minimum 24v) from brands such as DeWalt, Makita, Milwaukee etc should provide more than enough grunt.
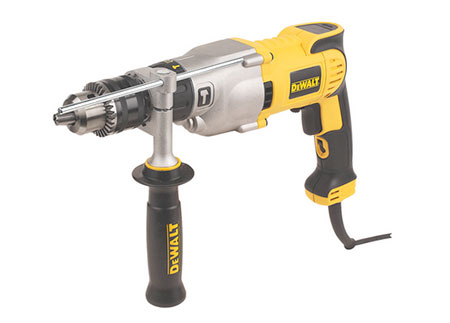
Corded power drill with safety clutch and variable speed ideal for use with a core drill
How Fast Should you Drill When Using Core Bits?
Essentially the speed that you drill at will be dictated to you by the size of hole you are drilling. As a very general rule of thumb, the larger the hole you are drilling and the denser the material you are drilling through, the slower the speed you should drill at.
For example, smaller holes up to 30mm in diameter can be drilled at up to around 3000 rpm whereas large holes around 400mm should be drilled at speeds as low as 300rpm.
If in any doubt always refer to the manufacturers instructions for your particular power drill and also for the core bit you are using. In both cases, each set of instructions should state the correct drilling speed you should be using.
Preparing for Drilling Holes Using a Core Drill
Before you start your drilling you should always make sure there are no cables or pipes hidden in the wall at the spot you intend to drill your hole.
You can never take it for granted that work hasn’t been done by someone else in this area before and it has not been recorded.
The best tool to use for this is a cable and pipe detector. You simply pass it over the surface of the wall and if any items such as these are found, lights and/or a buzzer indicate their presence.
How to Drill a Hole using a Core Drill
For this example we are going to be drilling a hole through a kitchen wall in order to reposition a cooker hood extractor. For this we will be using a 100mm (or 4 inch) diamond core bit.
As we have already stated but will do so again, never use hammer action when core drilling. The drilling action needs to be as smooth as possible and the jerky action of the hammer can snap expensive diamond teeth very easily.
Mark the Exact Drilling Spot
Before you start any drilling, the first job is to measure and mark the exact spot that you want to drill your hole so there isn’t any mistakes.
Drilling a 6mm hole in the wrong place can easily be rectified, but trying to fill in a 4 inch hole is not an easy job at all.
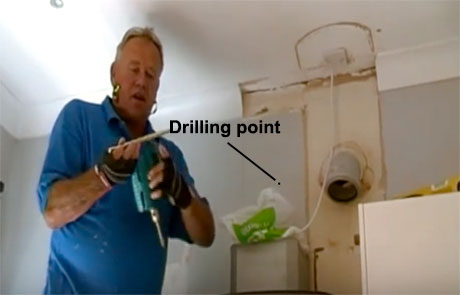
Drilling point for core bit marked on wall
It is also a good idea to measure or at least try and gauge the thickness of the wall you are drilling through as this will indicate weather you can drill through in one go if your core bit is deep enough or if not the point at which you will need to stop, clear the core bit out and then continue.
Screw Core Bit on to Arbour
With the drilling point clearly marked on the wall, next setup your core bit and drill. Screw the arbour into the end of the core bit until it’s pinch tight.
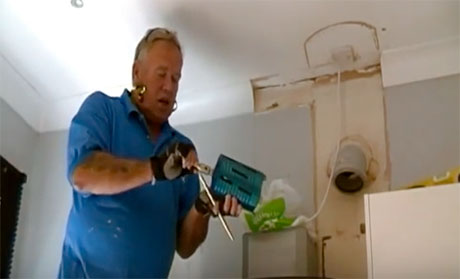
Screw the arbour into the core drill until pinch tight
Once the core bit is attached to the arbour insert the pilot or guide drill into the arbour, pushing it in until it goes tight.
Once the core drill is assembled, pop the shank into your power drill. As we are using an SDS drill, the chuck collar is pulled back and the shank is simply pushed into the chuck and the collar released to hold it firmly in place.
Finally, set the correct speed of your drill for the size of bit your are using and material you are drilling into and also check that the drills hammer action is turned off.
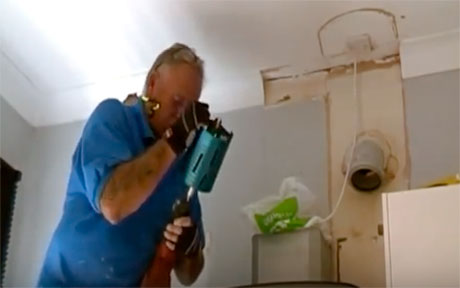
Insert the core drill into your drills chuck and tighten
Drill out Hole
With everything assembled it’s time to start drilling your hole. Position the tip of the guide drill on your drilling mark and start the drill slowly, increasing speed slightly until the pilot drill starts biting into the wall.
Keep drilling until the core drill teeth hit the surface of the wall. You will feel them bite once they do.
When drilling your hole, always hold the drill and core bit dead level. You do not want to drill in at an angle and cause the hole to slope up or down!
Also, drilling at an angle can easily break the teeth off of the core bit rendering it useless.
A quick and easy way to tell is to withdraw the core bit from your hole and inspect it. If the cuts made by the teeth are deeper at any point then this is a sign you are not drilling level. All the teeth should touch the surface at the same time!

Core drill teeth only cutting at one side due to not holding drill straight
With the drill held straight and true, keep drilling, stopping regularly and withdrawing the bit from the hole to allow it to cool down. When withdrawing a core bit from a hole ensure that it is still rotating.
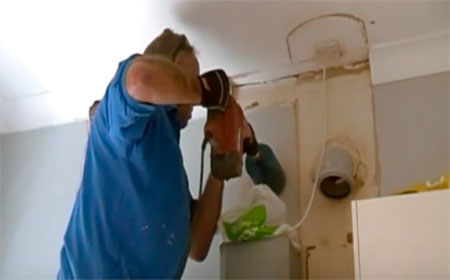
Drilling hole through a wall using a core drill
If you are able to drill right the way through the wall in one go, the core drill will remove the core at exit.
If however the depth of the hole is longer than the drill bit you will need to withdraw the core bit when you hit a depth of about 125-130mm and chop out the core with a hammer and bolster, or in some cases you can lever it out.
Keep a close eye on your drilling depth and once you are roughly within and inch of breaking through the wall on the other side, decrease any pressure and also speed slightly.
If you keep forcing the core cutter through, when you actually break through you will force a large amount masonry away from the outside of the hole, making a total mess of it all.
As this point it’s a good idea to ask someone to stand on the other side of the wall and let you know as soon as the guide drill breaks through and when it does, stop drilling.
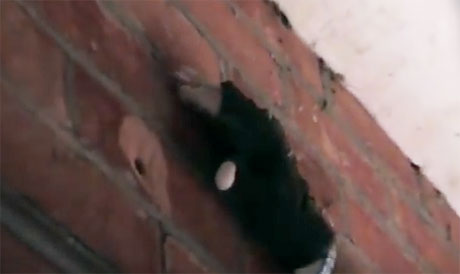
Keep a close eye on the other side of the wall for the guide drill to break through
Move to Opposite Side of Wall to Finish
For the neatest cut and finish to your hole it is advisable to then finish the hole from the other side. This guarantees both a neat entry and exit hole.
Move all your kit to the opposite side of the wall and position the guide drill back into the hole it previously made.
Start your drill up again and run it down until the core drill teeth hit the walls surface. Check all is level and commence drilling again.
At this point you will only have around half an inch or so to drill through so take your time and once done you will be left with a nice neat and clean hole.
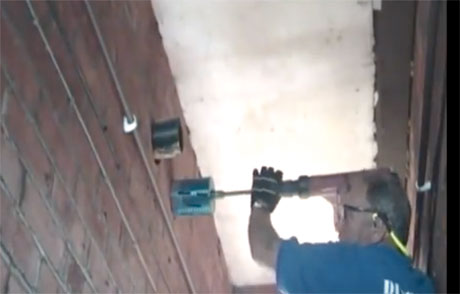
Finish off your core drill hole by drilling through from the opposite side
As always at DIY Doctor we advise the use of purpose built tools for DIY use. Safety must always come first. Wear the appropriate safety equipment, gloves, dust masks and eye protection at all times.
Using a core drill bit to drill out a hole for a soil pipe, extractor fan or waste pipe is a fairly easy task as long as you take your time and ensure the core bit and drill are both dead level.

