The Importance of Kitchen Furniture
Fitting or fixing kitchen cupboard door handles and knobs, know as door or cupboard furniture, is a really important part of finishing off any job and can really give that finishing touch.
The positioning of the handles and knobs can make a lot of difference to the final look of the kitchen.
It’s important to remember there are no rules for fitting handles and knob, in fact there are not even official guidelines. It really is one of those jobs where if it looks right – It is right and is completely a matter of personal choice.
Buying Cupboard Knobs, Handles and Hooks
Take plenty of time in choosing your cupboard and drawer furniture. You can show off your kitchen well with the right handles and knobs and the right ones can really give your kitchen units and cupboards or furniture item the final finishing touch it deserves.
You can also read a lot more about keeping the doors and drawers shout in our project page on magnetic and other kinds of door and drawer catches.
Knobs or Handles for Your Kitchen Cupboards and Doors?
Lets first look at the practicalities involved with opening doors and cupboards before we discuss the aesthetics of either.
A cupboard or drawer knob requires a firmer grip. Some knobs are large and allow you to get your fingers behind them, giving you plenty of leverage to pull the door or cupboard open. Some however are tiny and a good finger grip is required in order to pull the drawer or cupboard open.
Ask yourself, especially in a kitchen, whether it will be necessary to open a door or drawer when your hands are wet and potentially covered in washing up liquid.
If this is the case, maybe a small knob is not the best idea and someting that will provide more grip and leverage will be much better.
The aesthetics of this however, in a small, country cottage kitchen, may be the deciding factor but there is usually a balance that can be found by searching around.
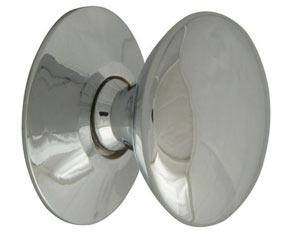
Smaller cupboard knobs are trickier to pull with wet hands
How to Position and Fix Cupboard and Drawer Handles
When positioning a cupboard handle or knob we always suggest that base unit handles should go towards the top of the door while wall unit handles are fixed towards the bottom of the door. Knobs are usually fitted using the 2 thirds/1 third rule.
This image below shows the knob in the middle of the width of the drawer, between the top and middle thirds. If it were a cupboard door, the knob or handles would be about 50mm in from the leading edge of the door.
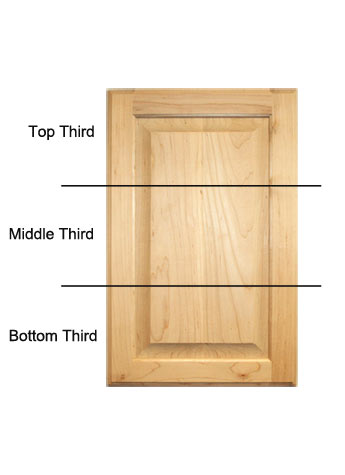
Cupboard door divided into thirds to mark position for handle fitting
How to Fit Cupboard Handles and Knobs
Fitting a cupboard knob or handle is in itself a pretty easy job, but if care isn’t taken, things can go wrong pretty quickly.
Measuring and Marking Handle and Knob Positions
If you are fitting several in a row you need them all to be level or in the same position on each door or drawer. If one is slightly off it will stand out like a sore thumb and ruin the overall job, so, before you drill any holes, it’s best to mark the position of each handle on each door to ensure all will be in the same place.
Firstly, decide where it’s going to go. Suggested positions are as follows:
- Drawers: Handles/knobs should be positioned in the horizontal and vertical middle of each drawer face
- Floor Standing Cupboards: Should be positioned around 50mm in from the edge of the top side opposite the hinges (as mentioned above)
- Wall Mounted Cupboards/Units: Again as with the above, they should be around 50mm in from the edge opposite the hinges, but this time positioned near the bottom
The above positions are only suggested placements and as we commented at the top of this project, there are no hard and fast rules, where you put them is entirely up to you.
Once you have settled on your desired position, you now need to use a pencil to mark your drill hole(s). Depending on your choice (either handles or knobs) will depend on how the holes are marked. In the below example we are using a base unit cupboard door and positioning at 50mm in from the leading edge in the top third:
Fitting Handles
- From the leading edge (edge opposite hinges), use a tape measure and measure in 50mm top and bottom and make a mark each time with your pencil
- Draw a line using a spirit level or straight edge across your marks. Don’t press too hard with the pencil and mark the timber/laminate
- Measure total height of your door and divide by 3. This will give you the sizes of your top, middle and bottom thirds
- From the top of the door, measure down the amount of 1 third and put a mark with your pencil. Your handle is going to go somewhere in this top third
- Measure the distance between the 2 fixing holes on your handle, from the centre of one hole to the centre of the next
- Now subtract this measurement from the height of the top third of your door and then divide this figure by 2. This will now give you the distance from the top of the door of your first screw hole. Measure down and then make a mark with your pencil
- Finally, measure down from the first screw hole mark on the door the distance between the screw holes on the handle (centre to centre) and make a mark. This is for your final screw hole
- You can now rub off any pencil marks with a rubber
Fitting Knobs
- Similarly to the above, measure in 50mm top and bottom on the leading edge (opposite hinges) and mark these positions with a pencil. Draw a line full length of the door using a straight edge with a pencil being careful not to press too hard and mark the laminate or timber
- Measure the height of the door from top to bottom and then divide this number by 3. Once done, this will give you the height of each third of the door. Measure down your first line the amount of one third and make a mark
- Now, divide the total height of 1 third of the door by 2 and measure this distance down from the top of the door and make a mark. This mark should now be in the centre of the top third of your door
Drilling Fixing Holes
Before you start drilling, hold the handle or knob against the door to check the final position. Each mark should corrispond to a screw hole. When you are happy that all is inline, it’s time to get the drill out.
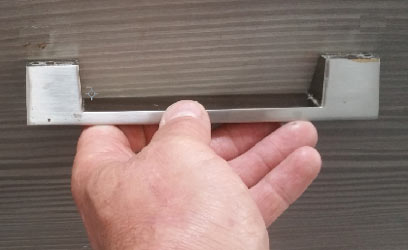
Checking handle marks are in right position before drilling
Drill through the door or drawer using a 2mm drill bit first. This size drill bit will not split any timber.
Next drill the hole again with the correct size drill bit for the screw. Drill half way in from both back and front to keep the hole neat and avoid any splits or paint chips which the handles may not cover up.
If you need any further help or advice on this, see our project on drilling pilot holes
Screwing Your Handle or Knob on
The final task is to now actually screw the handle or knob in place. Push your screw or screws in to each hole from the inside so that they poke outwards. Take your handle or knob and place the screw hole in front of the first screw.
Using your fingers to begin with, screw the screw into the fixing. Make sure that is goes in smoothly and does not bind as you could risk cross threading it. This would ruin both the screw and the handle.
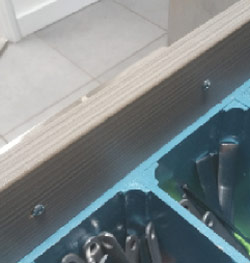
Handles can be fixed with screws from inside of drawer face
Once done up finger tight but not fully tight, move on to the second screw if there is one and repeat the above. Finally, take a suitable screwdriver (normally phillips or pozi-drive) and tightenup fully. Job done!
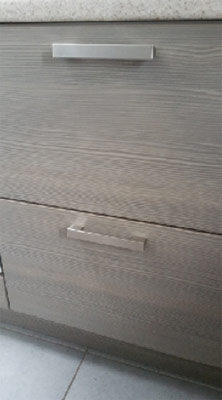
Keeping handles level when fitting to cupboard doors
The principles outlined above can be applied to pretty much any situation when it comes to fitting door handles and knobs. Essentially as long as you accurately position the first one and measure the rest in accordance, all should be in exactly the same place.
The same principles can also be applied when fitting drawer handles and knobs.
Vintage Knobs and Handles for the Kitchen
It is easy to change the entire appearance of your kitchen by painting the kitchen unit doors and cupboard fronts and adding a new set of knobs and handles.
Adding a touch of antiquity is a very popular thing to do and this can be done by looking for retro knobs and handles. Please do click on any of the images below if you would like to know more about them.
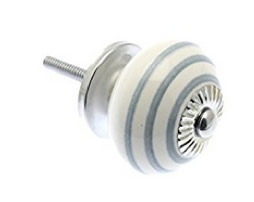
Getting an antique look in the kitchen can be done with knobs
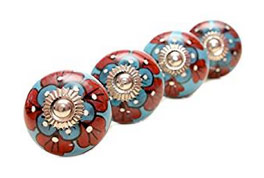
Colourful knobs can enliven a kitchen
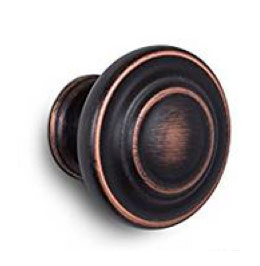
Classic style kitchen knobs add a touch of class
Half way between a cupboard knob and a handle is the classic shell pull handle. These handles really do give the antique look but, as a cupboard door opens out to at least 90 degrees, and there is a chance of getting your fingers stuck, it is not usual to use this type of handle on a door. They are usually placed on the drawer fronts while a matching D handles, or knobs, are positioned on the cupboard door
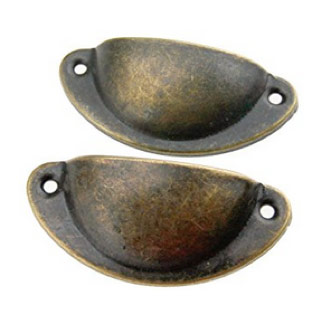
Shell handles are popular for the antique look
Sourcing Handles and Knobs
Because of the popularity in retro cycling these days, the cost of antique handles and knobs can be excessive. Think laterally and look round junk shops for old furniture items. It may be cheaper to buy the furniture and strip off the knobs and handles for use in the kitchen.
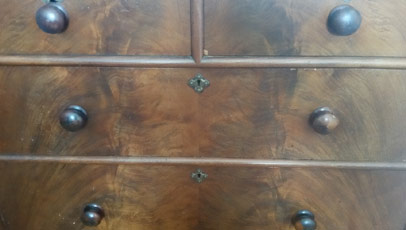
Antique chest of drawers with polished knobs
Different Type of Fixing for Handles and Knobs
Most cupboard handles and knobs come with a hole in the connecting face. This hole is threaded and accepts a screw or bolt which is turned from the inside face of the cupboard door or drawer face. The handle or knob is then fitted as shown above.
However, some knobs come with a threaded screw attached to them. Fitting them involves drilling a small pilot hole in the correct position, then simply screwing the knob into place. These can be much easier to fit than the bolted knobs or handles, but not nearly as secure as they do tend to come loose over time.
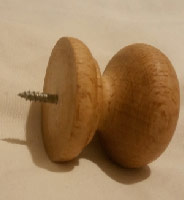
Classic wooden door knob with screw in type fixing
Using Cupboard Knobs and Handles with Magnetic or Other Catches
Knobs and handles from older kitchen cupboards which do not have self closing hinges, can be used together with magnetic catches to secure the door. When this is done it is normally sensible to place the magnet opposite the knob or handle to give the maximum amount of “pull” to keep the door closed.
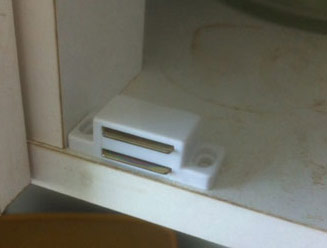
Using catches with knobs and handles helps with closing the cupboard door
Cupboard Handles and Knob Sets
Remember there are no rules and if you want to put handles on at an angle, its up to you. Just make sure you can reach them when the cupboards or drawers are open!
Similarly, it seems to be that people buy sets of knobs or handles and due to this they all usually to match.
This need not be the case and some companies make sets that deliberately do not match identically. Together though, as a set, they form a kind of story which can make your kitchen cupboards more interesting and even a talking point.
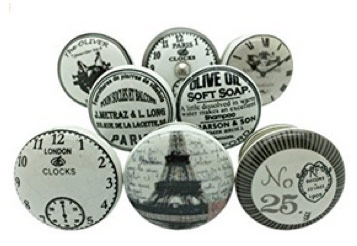
Knobs that do not match can be a talking point

