Using natural stone in construction can produce a real authentic feel to a project and help it to blend seamlessly into it surroundings, but it’s hard to work with and takes many years of experience to spot which stones will naturally fit and work together.
When a whole stone won’t fit in a certain position but there is a feature of it you would like to use or you only need half of a given stone you will need to cut it to the correct size or shape.
Cutting natural stone is a tricky job but one that can certainly be mastered given time and practice so read on for tips on how it can be done.
Different Stone-Types
One point that you need to consider when cutting natural stone is how it should be cut and what tools and cutting implements should be used.
For example you can use a hammer and bolster to cut limestone and the similar but if you used that to cut a piece of marble that has to be square and true with straight edges it wouldn’t be possible without many many years of experience.
With this in mind here follows a selection of some of the most common types of natural stone and how they should be cut:
- Granite: Very heavy and hard natural stone with great durability making it popular for worktops and floors. Granite is best cut using a wet diamond blade and although this can be done on a DIY level, it’s best left to those that specialise in granite preparation
- Marble: As with the above, marble is a weighty and very tough hardwearing stone that is often used in kitchens and bathrooms and for flooring. Again the same as the above, marble should be cut with a wet diamond blade and generally left to specialists that know how to do it correctly
- Basalt: Volcanic in nature, basalt is also a very dense and hard material making it ideal for different floor coverings. As you may expect it should only be cut using a diamond blade that is constantly cooled with water
- Limestone: A popular type of natural stone used widely across the construction industry from building to producing cement. Existing in both hard and softer forms, limestone can be cut and shaped using a variety of methods including cut-off saws and angle grinders with eth correct discs and also using a hammer and bolster
- Slate: More commonly known as a roofing material but can also be used in many other construction areas. Similarly to limestone it can be cut using a special “slate cutter”, most power saws with the correct blade and also using a hammer and bolster with a little practice
- Sandstone: Again a very popular material used widely in construction for many tasks due to the fact that it is very easy to split and cut down using basic tools such as a hammer and bolster, but again for cleaner cuts power tools using the correct cutting disc can also be used
As you can see there is quite a wide variety of different types of natural stone out there, each with it’s own particular characteristics that in some cases require specialist tools to cut and in other cases can be cut and sized using just a simple hammer and bolster.
How to Cut Natural Stone
As we have mentioned above there are several different ways that you can cut or split down natural rocks of varying sizes so that they can be used in a variety of different construction scenarios.
If you need to cut or split down natural stone for a DIY project, chances are they are going to be fairly small manageable stones that are either limestone, sandstone or similar that you should be able to work on using either an angle grinder and suitable disc, a petrol cut-off saw or just a hammer and bolster.
However for anything more specialist such as marble or granite, especially if they are large pieces, to guarantee a decent finish you should consider getting them cut professionally.
Using a Stone saw or Disc Cutter
One of the quickest and easiest methods of cutting a piece of natural stone is to use a power tool with a suitable blade.
In terms of the different power tools of this type that you can use to cut natural stone, they are as follows:
Angle Grinder/Disc Cutter
If you do a fair bit of DIY there’s a good chance that you already have an angle grinder in your tool arsenal, if you you can buy a budget one for as little as £15 or £20 but this will only be for a small 5 – 6 inch grinder which is adequate for cutting stones up to around 4 or 5 inches thick.

Basic 6-inch angle grinder
However if you have larger stones to cut you may want to think about buying a larger 9 inch grinder, but if it’s going to get little use after your stone-cutting project then you could also hire one.
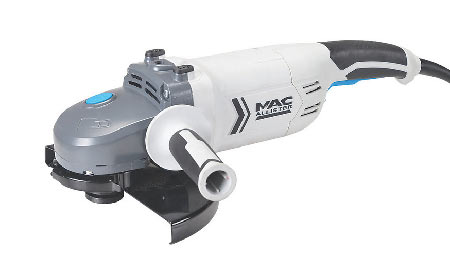
Basic 9-inch grinder
When it comes to the correct type of disc to use with your angle grinder you can indeed get specific stone cutting discs of the correct size for a grinder but these tend to be suited towards cutting paving slabs and concrete and may not be up to the task of cutting tougher materials.
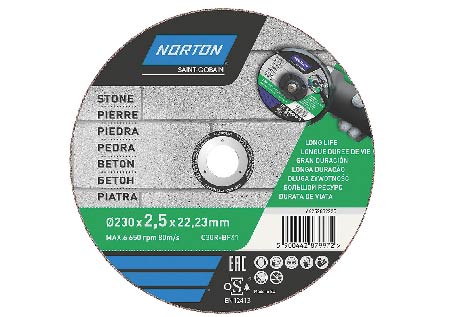
6-inch stone cutting disc for a 6 inch grinder
For guaranteed cutting ability the best type of disc to use for cutting natural stone is a diamond cutting disc. Available in both 6 and 9 inch versions to fit either size of grinder they will certainly cut through the item you are working on, however to reduce damage they do need to be water cooled during cutting which obviously coupled with an electric grinder certainly isn’t safe!
One other reason for the use of water when cutting is to suppress the large volumes of dust that’s created whilst cutting which is essential, not only for comfort reasons but also for health and safety reasons.
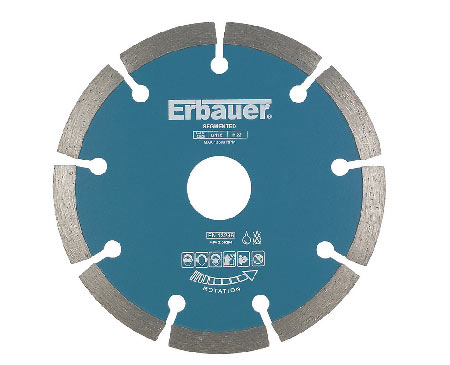
6-inch diamond-tipped cutting disc
If you would like some tip and help on how to use an angle grinder correctly see our project here.
Petrol Cut-off Saw
The other type of power tool you can use to cut natural stone is a petrol cut-off saw. In essence they are pretty similar to the above angle grinder only as opposed to being electrically powered they have their own in-built petrol engine and they are a fair bit bigger.
Another great advantage of these types of power saws is that they also have their own built-in water distribution system and they coat the disc in water as it cuts, both reducing the large amounts of dust created and also protecting the blade and producing a smoother cut.
If you have never used a petrol cut-off saw before they can look fairly daunting to use but with a little practice you’ll be using one like the pro’s in no time. To find out how to use one see our project on petrol cut-off saws here.
Again when it comes to discs there are specific stone cutting discs and also again diamond-tipped cutting discs, with the diamond cutting disc being the best option to go for however they do cost substantially more.

Petrol cut-off saw diamond cutting disc
For the purposes of this guide we will be cutting a small natural stone using an 6 inch angle grinder and a standard stone cutting disc.
Note: Cutting stone a fairly hazardous job so at all times you should wear goggles, sturdy gloves, old clothes, sturdy shoes or boots and also a suitable dust mask.
- Place the item you are cutting on a flat, level and sturdy surface. Ideally you should clamp the object up using clamps or a Workmate to prevent movement but this isn’t always possible. If not, place the item on an old pallet or similar and position it so the slat gaps support it. You can also use a Workmate without clamping if you open up the slats and sit the stone on an old towel as this will help to prevent any movement
- Insert the correct cutting disc into your chosen power saw. In this case we are using a specific stone cutting disc. When plugging in your grinder you need to use an RCD plug (standard plug with RCD built in)
- Using a pencil, chalk or a marker pen and straight edge mark a line on the stone where you want to make your cut so you have a clear line to follow
- Start Your grinder up and position the disc above the start of your cutting line and lower it down and start cutting, holding the grinder firmly as it will bite and snatch. Follow along your line with a first pass cut to create a nice groove to follow
- Go back to the start and re-cut the stone with a second pass, this time cutting a little deeper and then repeat until you have cut all the way through or reached the limit that your grinder can cut to
- If the cutting abilities of your grinder aren’t enough to get through the stone then you will have to make the final split using a bolster and hammer
- Lay your stone down on a soft surface such as an old towel. This will help to absorb the shock from the hammer blows. Position the bolster down in the groove and give it a blow with the hammer. You don’t need to hit too hard just a gentle tap. Continue this up and down the groove until the stone finally breaks

Stone to be cut placed on old towel on Workmate

Stone marked for cutting
Cutting first pass groove in natural stone
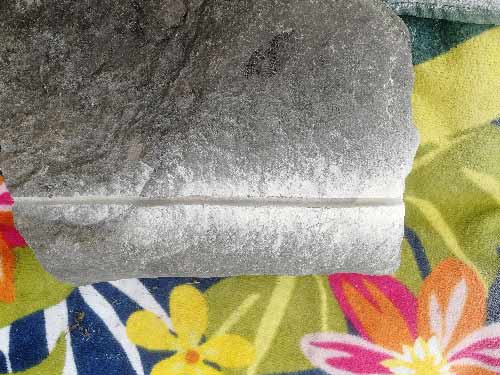
Final cut made to natural stone using angle grinder

Piece of natural stone cut using angle grinder and finished with hammer and bolster
Cutting natural stone using a power tool such as an angle grinder or cut-off saw will yield great results and fast but a clean and sharp cut isn’t always the desired finish and if you are going for a natural look then this can be a little too clean.
In cases like this where a more natural finish is required then you may get better results using just the hammer and bolster method below.
Using a Hammer and Bolster
Splitting and cutting natural stone using a hammer and bolster or chisel is the traditional way of doing things and one that has been used for hundreds of years.
In this example we are going to be cutting a piece of natural stone in half using a 50mm bolster chisel and a 2.2lb (1Kg) lump hammer.
- Find a flat, level and solid surface. An existing concrete surface is best as if you try to hit down on a soft surface such as grass, the hammer blows will be absorbed by that surface and won’t be transferred down into the stone. Place an old folded towel down to prevent any damage to your stone and place it on top
- Using a pencil, chalk or a decent marker and straight edge, mark a straight line along the stone at the point that you want to cut or split it
- Take your bolster chisel and position it at the start of your line and hold it upright ensuring it’s fully vertically upright. Strike the top with your hammer, not too hard, just enough to mark the surface of the stone.
- With the first mark made, move the bolster down a little and repeat the process until you reach the end of the stone. You should now have made a very slight groove along your stone in place of the cutting mark
- Before repeating the above have a good look over the stone to see if the initial first pass has made an impact. If so you should start to see some very slight cracks down from your cutting groove.
- Repeat the above steps for a second pass, again ensure your hammer blows aren’t too hard, just take your time. Keep repeating passes until you can visibly see a crack start to form. At this point one final pass should be enough to split the stone fully
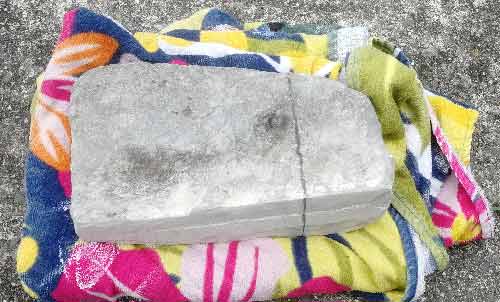
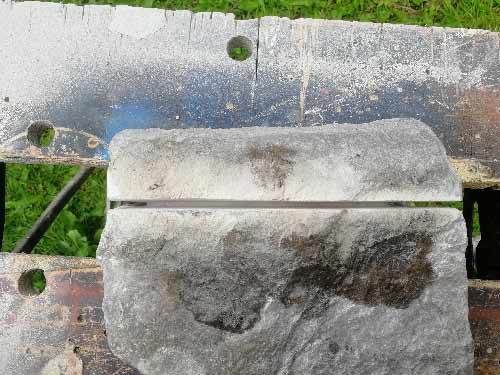
Stone to cut placed on solid surface on old towel

Cutting point marked on stone
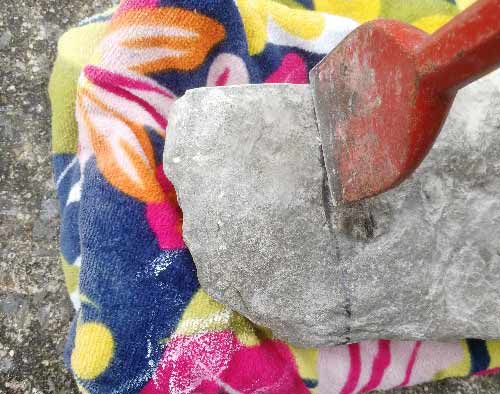
Bolster chisel positioned and first strike from hammer made

First pass groove made with bolster and hammer in piece of natural stone
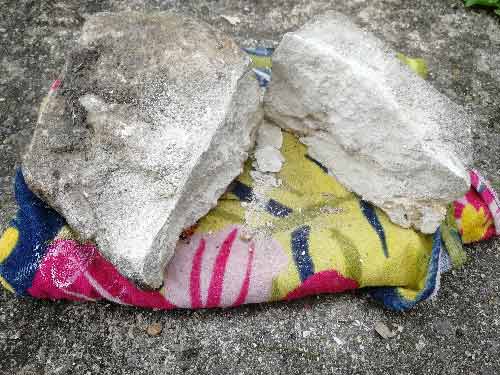
Piece of natural stone fully split using a hammer and bolster
When it comes to how a piece of stone will split when cut this way, ultimately it will split how it wants to. Unfortunately we have very little control over how this happens as it depends on how the veins within the stone run, what other features are at its core and many other factors.
If you are lucky, the split face you end up with will be a clean break right through the stones centre, however you may end up with lumps and depressions here and there.
These slight imperfections can be cleaned up in a process known as “dressing”.
Dressing Natural Stone
Once a piece of natural stone has been cut it often still features irregular-shaped edges, lumps, bumps, chips, depressions etc and although this may be fine for some situations it’s not in others.
As mentioned above this is a process known as dressing and involves the removal of all of these imperfections so that you are left with a cut piece of stone to fit your particular requirements.
This can obviously be done fairly easily using power tools such as those mentioned above where you can easily cut and square up your stone to the point that you are left with something that almost resembles a brick it’s so perfect.
However this may not be the result you require and someting with a few more natural features may be more suited.
In this situation the dressing is best done using traditional tools e.g. a brick hammer, hammer and a range of stone carving chisels.
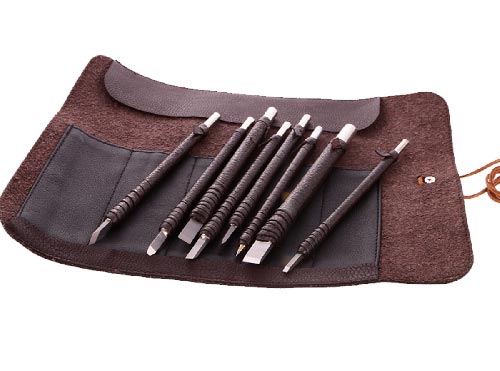
Set of stone carving chisels
The basic process of dressing involves using the above tools to slowly and carefully chip away any unwanted sections of the stone until you are left with exactly what you need.
Dressing stonework is quite a skill and one that is acquired over quite a number of years. Knowing exactly where and how hard to hit the stone and exactly what tool to use does take lots of practice but inevitably practice also involves making lots of mistakes so don’t be surprised if this is the case.
Cutting natural stone is quite a straight forward job and one that can be done by anyone, however ensuring that a stone splits in a particular way and dressing it to a set shape is something that requires lots of experience.