I Want to Increase my Loft Insulation, but how do I Fit the Minimum Required Loft Insulation Material and Still Maintain my Storage Space?
Sound familiar? Well you can fit a loft boarding system that allows you to have the recommended 270 mm loft insulation, plus an air gap to allow air flow, which prevents condensation building up in your roof space (helping to prevent rot in your roof timbers). Fitting Storefloor by LoftZone raises the loft boards over the increased loft insulation, provides an air gap, and a secure storage floor for your suitcases, Christmas decorations and old photo albums. This system allows you to board out your loft yourself, and you can fit it in sections so you don’t have to clear out your whole loft before you begin.
The system is compatible with any insulating material including Batt or blanket insulation, blown-fibre and loose-fill loft insulation. It is worth noting that if you squash down, or compress, loft insulation it reduces the effectiveness of the insulation material.
We talk you through how to fit loft boards in your roof space using this system and it is designed to be easy to DIY, but you can also have it installed by LoftZone if you prefer.
How Much Loft Insulation Do I Need?
Loft insulation boards are used where a loft conversion is to take place but boarding a loft for storage simply requires insulation under the loft floor. This project shows you how to lay loft bording over insulation while keeping the required amount of loft insulation both at the old depth of 100mm and the new increased regulation depth of 270mm.
This means current building regulations require loft insulation of 270mm as of August 2013. Previous guidelines required 100mm of insulation. So any new buildings must have the increased depth of insulation, owners of existing buildings are not required to increase their loft insulation, but it makes sense to insulate your loft for the increased savings in energy loss to your home. Loft insulation is a very cost effective measure and will soon pay for the cost of outlay in savings on your heating bills, find out how much money you could save by insulating your loft on the Energy Saving Trust Website.
The down side to this is that boarding out a loft or attic floor is made more difficult with an increased depth of loft, or attic insulation. If you fix the floor boards to the existing joists there will not be room for the insulation, and if you squash the insulation you make it much less effective.
Regulations for Loft Conversion and Boarding Lofts
How Much Weight Can My Loft Floor Take – Can I Board Out My Loft To Use As An Attic Room?
Please be aware that a loft floor is not meant to be regularly walked on. A loft or attic floor is only designed to carry a load of 25kg per square metre. The loft flooring is not designed to carry loads heavier than this. In fact the horizontal rafter sections in your loft are there solely to hold up the ceiling for the rooms below.
Where there is a heavy installation in the loft, like a water tank, that section of floor is always reinforced to allow for the extra weight. Often the rafters in that section are also given additional support using hanging timbers attached to the pitched section of the roof trusses.
You can board out your loft without Building Regulation approval but laying or fitting loft flooring in the loft or attic must only be done to store light items, such as empty suitcases. If you mean to convert your loft into living accommodation of some kind then you need to find out from your Local Council whether you need planning permission. You will certainly need Building Regulation approval to convert your loft into anything other than a storage space. Please note, even if you planning to use your roof space as an office or study it still counts as living accommodation.
Also see our project on using the loft or attic for storage and how to do this safely.
What Loft Boards Will I Need?
We recommend using purpose-made loft flooring panels for boarding out the loft. These panels are 18mm thick, 1.2m long and only 320mm wide. This means they are easy to get through loft hatches. They usually come in packs of three and each pack of three is enough to cover a little over 1 square metre.
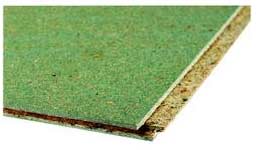
320mm wide moisture resistant loft flooring panels
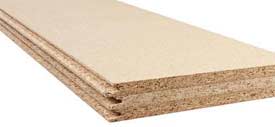
320mm wide non moisture proof loft flooring panels allow easy insertion through a loft hatch
Loft flooring panels like these have tongue and groove fittings, a notch or groove along one length and one width, then a tongue to fit into the groove along the other edges, this gives a more secure joint than a straight edge would do.
Even though most loft boarding is moisture resistant (moisture resistant loft boarding usually features a green covering) it still requires a constant air flow to ensure no moisture buildup.
Fitting Loft Boards over 270mm of Loft Insulation
The most important thing we can teach you when we are explaining how to fit loft boards is that loft insulation must not be squashed down. If it is, it is virtually useless for stopping the warm air from rooms below entering your loft. This being the case, it is necessary to raise the loft floor above the insulation. This is now easily done with a new system of loft flooring called StoreFloor, designed by LoftZone.
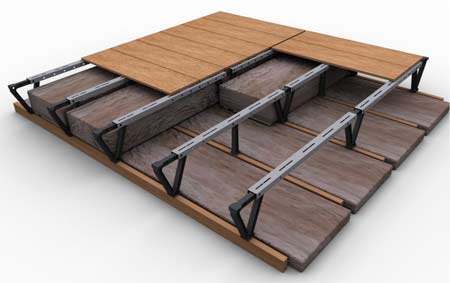
LoftZones StoreFloor loft flooring system allows airflow over loft insulation
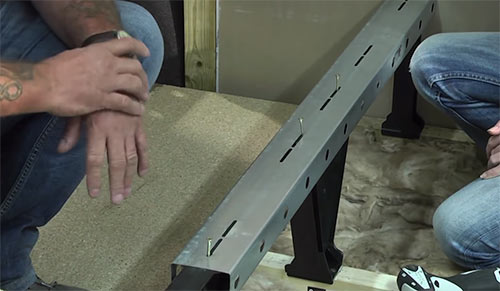
Raising the loft floor with StoreFloor is easy. Two types of supports are screwed to the ceiling rafters, lightweight galvanised steel joist sections are screwed to the supports and the boards are screwed down on top of the new, steel joists. This type of loft flooring is very strong indeed – although as we mentioned before it is not designed to convert your loft into a living space, you need to comply with Building Regulations if you want to do that.
Easy to fit supports and steel joist sections allow a solid loft floor to be added easily
The StoreFloor system allows the loft boards to be butted up to the roof rafters so the air can rise through the eaves, follow the line of the underside of the roof and ventilate the main loft, while flowing under the new loft floor through the gap left between the insulation and the underside of the boards.
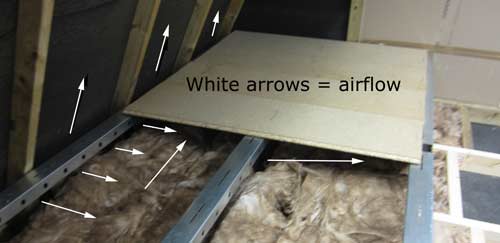
Loft flooring boards must be ventilated between the top of the insulation and underside of the boards
Most ceiling rafters are set at 600mm centres, or 400mm centres. (This simply means that measurements are taken from the centre of one rafter to the centre of the next one). The StoreFloor loft flooring system is designed to fit into these standard measurement perameters.
The bracket supports are set at regular spacing, which allows the new steel joists to be placed at the correct centres for the new loft flooring boards.
How to Board a Loft Yourself Using StoreFloor from LoftZone
Using the LoftZone system for boarding your loft is quick and easy to do. You can also watch a video which explains fitting the system, at the bottom of this page.
- Place a loft board onto the ceiling rafters to make moving about easier and avoid going through the ceiling! This is easily done if you haven’t got anyting solid to rest on
- Work out the area of the new loft floor you wish to cover. See our project on measuring floor areas to help calculate the amount of loft flooring you will need.
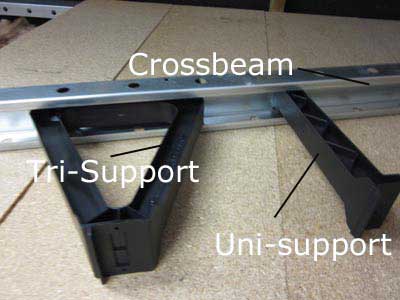
- Place Tri supports at 610mm centres along the rafter. The lip on the bottom of the Tri support will sit flush alongside the rafter to make sure it is in the centre of the rafter.
- Screw the Tri supports down onto the rafter. For this we have used No.8 1 1/2 inch (38mm) wood screws ensuring that the support remains central to the beam while it’s screwed in place
- Slide the cross beams over the Tri supports and position it correctly
- Push the Uni supports up into the cross beam, mid-way between the Tri supports and twist through 90 degrees.
- Slide the Uni support onto the rafter and screw down onto the rafter.
- Once the beam is positioned correctly and the supports are in place screw it down to the supports through the slot in the centre of the beam and through the pre-drilled holes in the support. If you can’t see them, slide the beam to the left or right until they’re visible
- Place the loft boards on top of the cross beams. The edge of each board should be positioned and fixed at the centre of the beam when you are fitting a larger boarding setup e.g. 2 or more board widths and for the ends of each run of boards, they can be fixed at the edge of a beam or even overhang slightly if needed (as long as this doesn’t cover any ventillation areas)
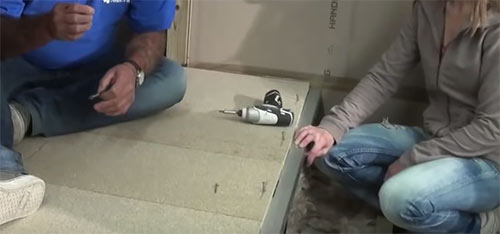
- Mark the boards with the position of the cross beams in order to drill and countersink them to fix down
- Drill and countersink the loft boards
- Screw the loft boards down to the cross beams. The boards themselves are screwed down to the beam and if you are using a decent drill/driver this will force the screw down through the beam fairly easily as the material is quite thin. However if it doesn’t you will need to drill a small pilot hole (roughly 2mm) down through the board and beam to gove the screw a head start
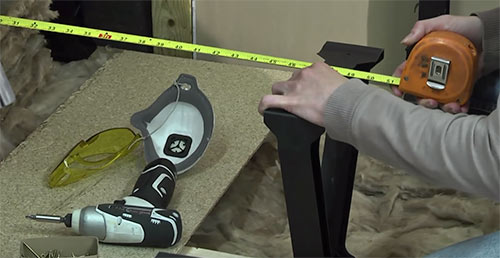
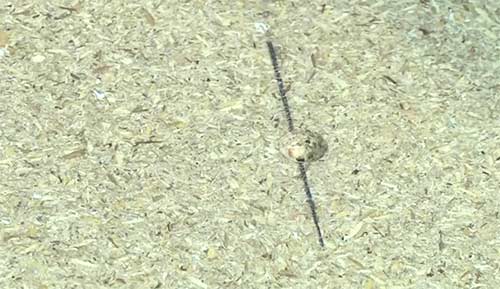
Measure the correct location for the tri-support
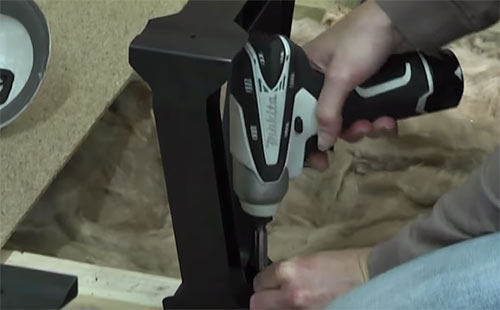
Screwing Loftzone Tri-Support down to rafter in the centre of the rafter
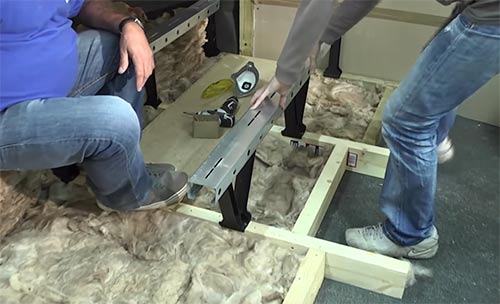
Slide the aluminium beam over the tri and uni supports
Screw beam to tri and uni supports
Loft boards should be fixed at the centre beams accept at the edges that can be edge fixed or overhang slightly
Countersink screw holes in boards to prevent screw heads catching on any objects
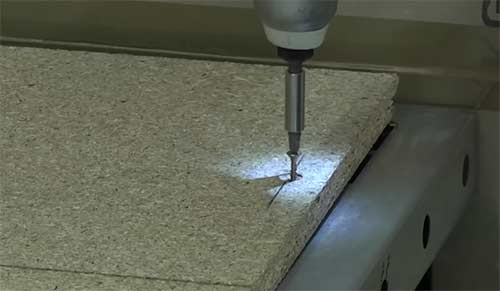
Screw the loft board down to the support beam
One point to note is that we have suggested edge fixing boards where they is only a single run, however if you extend your boarding at a later date then you will obviously need to move supports to continue boarding so with this in mind if you do plan on extending at some point, centre fix all your boards and then extending can be done with the minimum of fuss.
DIY Doctor recommends this flooring system as one of the very best ideas we have seen for strong, safe loft flooring in the loft. The StoreFloor system also won the Ideal Home Show – Ideal Inventor Winner in 2013.
Don’t forget that you can fit your LoftZone StoreFloor in sections, so you can move stored items around in your loft rather than clearing out your whole loft to lay flooring.
Cable Rating in Lofts and Under Insulation
Our regular reader, Andrew, makes a great point:
You make no mention of the down-rating of cables if they are totally enclosed in insulation. Whilst this is not a problem with many cables it will be an issue with cables serving large loads like a shower.
Andrew is absolutely right that if you are adding insulation into your loft space you do need to think about the cable routing as this will affect their rating or size. This is actually a complex issue, which we cover in a separate project in much more detail: Find out all about cable ratings and sizes here.
As a rule of thumb, if you don’t know what the cables are for or are not sure about the ratings you should get an electrician to check it before piling insulation on top. Ideally you should be able to re-route the cables on top of the insulation so that they are not covered. If the cables are going to a shower and they cannot be routed safety away from the insulation, then this is definitely something for an electrician to check, as Andrew suggests.
Remember that working on a shower is notifiable work (you have to notify building control) and it has to be performed by a qualified electrician. We have a project to show you what is involved in an electric show insulation if you need more information.
Alternatives to LoftZone
While DIY Doctor was very impressed with StoreFloor from LoftZone there are other similar systems available but it has to be said that we have not actually installed any of them so cannot provide an accurate comparisson between all the products. However on watching several videos on their installation and having installed the LoftZone system we can see that they do look a little trickier to fit and don’t look as sturdy.
Loftleg shows that the siting of the legs needs to be very precise as up to four boards need to meet on any one of the legs. If your measurement of the position of one of the legs is a little out, this could affect the rest of the legs. This method also restricts the shapes you can build a floor to in your loft.
The same criticism can be levied against Loft Storage Stilts who use a very similar leg system. While both systems will undoubtedly do the job they both look a little flimsy to us and the fact that each leg has to be so precisely placed (especially when working in a hot, confined, obstruction filled area as a loft space) adds an unnecessary degree of difficulty to a job which we think LoftZone have made so easy by using a crossbeam on top of the legs which allows a great deal of positioning movement with the boards. The crossbeam also makes StoreFloor very much stronger than either Loftleg or Loft Storage Stilts.
Additionally if you would like to find out about boarding a loft with 100mm of insulation see project on this for more information.